One of the most exciting changes Google made to its Chrome OS platform in recent years was the addition of Android app support in 2016. While Chrome OS could already run browser extensions and web apps, the addition of Android apps has dramatically increased the platform’s value.
Nearly all Chromebooks launched in or after 2019 support Android apps and already have the Google Play Store enabled — there’s nothing you need to do. However, there are models new and old that simply can’t run Android apps due to hardware limitations. If you’re not sure if your Chromebook qualifies, Google provides an extensive list. The company says it will continue to “evaluate more devices.”
Keep in mind that not every Android app will run on your qualified Chromebook. Again, this is due to hardware limitations because the developer hasn’t released an app that, for example, runs natively on Intel processors. Also, keep in mind that
Read on to find out how to get Android apps on a Chromebook. If your device doesn’t qualify (yet), then we’ll suggest an alternative.

Update Chrome OS
First, let’s make sure that your Chromebook is running Chrome OS version 53 or newer. Since Chrome OS is currently on around its 96th version, this probably isn't an issue, but it's important to make sure.
Step 1: Click the Quick Settings Panel (beside the system clock) followed by the Settings cog on the pop-up menu.
Step 2: When the Settings window opens, select About Chrome OS listed on the left.
Step 3: On the right, you’ll see the platform automatically update if a newer version is available. If it doesn’t automatically update, click the Check for Updates button and restart as requested.
Enable the Google Play Store
You probably already have the Google Play Store enabled, but if it’s not clearly visible on the Shelf or Launcher, here’s how to make sure it’s switched on.
Step 1: Click the Quick Settings panel (system clock) followed by the Settings cog on the pop-up menu.
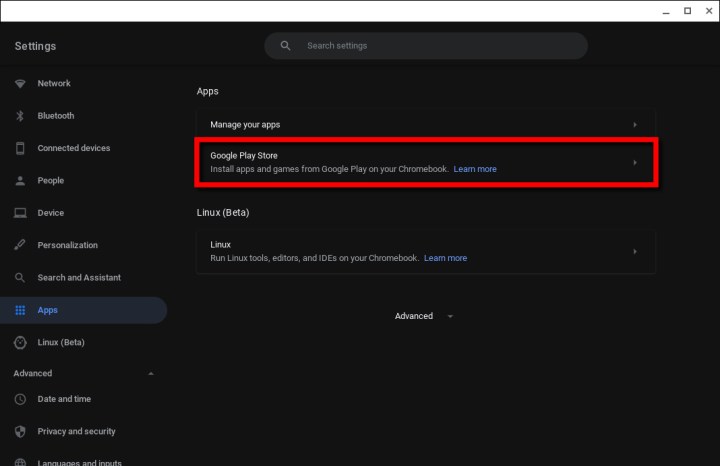
Step 2: Select Apps listed on the left.
Step 3: Select Google Play Store listed on the right.
If the Google Play Store is enabled, you’ll see a Remove button. If not, move on to the next step.
Step 4: Click the Turn On button displayed next to Install Apps and Games from Google Play on Your Chromebook.
Step 5: Select More in the pop-up window.
Step 6: Select I Agree after reading Google’s Terms of Service.
Step 7: The Google Play Store appears on the screen. Accept the additional terms and conditions.
Now you can proceed to the next section.
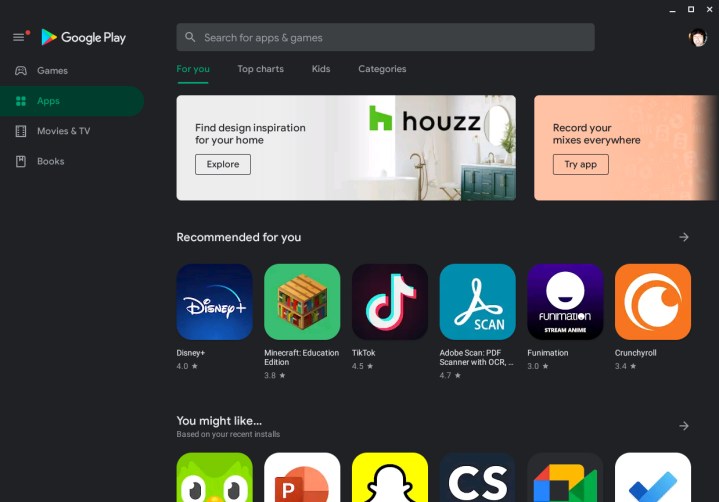
Download and install your Android apps
The process of installing Android apps from the Play Store on a Chromebook is similar to doing so on an
Step 1: To install an app, locate it in the Play Store, click on its entry, and click the green Install button.
Note: Android apps that are not compatible with your Chromebook will not appear on the Play Store.
Step 2: The app will download and install. When finished, click the green Open button or open the app from the Launcher.
Step 3: Authorize permissions as needed. For instance, Microsoft Word requests access to media, photos, and files. Click Allow or Deny.
You can manage Android apps like other Chrome OS apps. The same window controls are located in the upper-right corner, while the Back arrow key resides in the top-left corner, allowing you to easily navigate through the app.
Note: Some apps may be “instant apps,” which means you can open and try them out before downloading them. This is a great way to test out how an Android app functions before you choose to fully install it.

Change app permissions or uninstall
Step 1: Click the Quick Settings panel (system clock) followed by the Settings cog on the pop-up menu.
Step 2: Select Apps listed on the left.
Step 3: Select Manage Your Apps listed on the right.
Step 4: Click on the app you want to modify or delete.
Step 5: To modify the permissions, click the Toggle next to each to switch them on or off. For example, Microsoft Word can access storage but not the camera, microphone, or contacts.
If you just want to uninstall the app, click the Uninstall button instead.
Android app extra tips
Chromebook type: The quality of your Android app experience will vary based on your Chromebook. For example, Chromebooks with touchscreens, and particularly 2-in-1s, will provide the best
Syncing: Your Android apps, like other apps, will try to automatically sync to the data in any other Chromebooks you are logged on to. However, they may not sync if you are using the app on a non-Chrome device.
Administrators: Administrator settings may block the ability to add the Chrome Store or Android Apps to your computer. If you’re at work or school, you may need to secure permissions or move to a different network.

For Chromebooks that don’t support Android
Chromebooks either support the Google Play Store, or they don’t. The underlying hardware must support Android, and jumping into the developer channel won’t magically make
One possible workaround is to sideload Android apps using Linux. This can be useful for those who prefer Linux commands and could make some
However, there’s a catch — the process isn’t easy. You need to be comfortable with Linux and Android APKs to make the whole thing work. Here are a few other things to consider:
Installing Android apps outside the Google Play Store is dangerous, as they could contain malware.
Android apps simply may not run normally on your Chromebook’s hardware.
Your Chromebook may not have adequate space to host the Android tools and apps.
If you want to take the risk, use the following steps.
Step 1: Click the Quick Settings panel (system clock) followed by the Settings cog on the pop-up menu.
Step 2: Select Advanced, then Developers.
Step 3: Look for Linux Development Environment, and select Turn On. Linux will take several minutes to set up. Confirm the on-screen instructions to proceed.
Step 4: Linux should install with its terminal open and ready for commands. Now, you’ll need the tools and APK to sideload your Android apps. Type/Paste the folllowing command to download the ADB tools:
sudo apt-get install android-tools-adb -y
Step 5: With the Linux Terminal still open, type the following command:
adb connect 100.115.92.2:5555
Step 6: In the pop-up window to Allow USB Debugging, check the box next to Always Allow and then select OK.
Step 7: Install the Android APK. To sideload a downloaded
adb install appname.apk
The whole process is certainly not for everyone, but those who are happy to use Linux will find it a great way to run Android apps without the Play Store.
A note about Android on Chromebooks
In previous versions of Android, the framework couldn't run natively on Chrome OS, and instead has to use a virtual environment. This is now quickly changing as
Editors' Recommendations
- How to take a screenshot on a Mac
- How to run a free background check
- How to open RAR files on Windows and Mac
- How to clean a laptop keyboard without damaging the keys
- How to change your Gmail password