There are currently two ways to get it. The easiest is via an over-the-air update, which obviates the need for a computer and USB cables. Google says that the Pixel and Nexus 5X/6P builds have entered carrier testing and will roll out soon, alongside the Pixel C and Nexus Player. Alternatively, if you’re the impatient sort, you can download factory images from Google’s Android Developer page and install it manually.
If you want to take a crack at it, here is how to install Android Oreo. We should caution, however, that the first release of any OS is often the buggiest. There could be bugs that brick your device, so make sure you back up your data before you do anything.
Don’t own a Nexus or Pixel devices? Not to worry. Google says it’s working with partners including Essential, General Mobile, HMD Global Home of Nokia Phones, Huawei, HTC, Kyocera, LG, Motorola, Samsung, Sharp and Sony to launch or upgrade devices to Android 8.0 Oreo by the end of this year.
How to flash the factory image
Flashing the factory image differs from installing the over-the-air (OTA) update in that the factory image contains the full system files for your device, whereas the OTA update contains only the upgrade information. In other words, flashing a factory image is more like completely deleting all the software on your device and replacing it. The OTA will only replace what is being changed since your last update.
Some people prefer to install the OTA update since you don’t have to do a factory reset, while others like the factory image method because it’s like starting from scratch with a fresh install of the entire system. It’s more of a pain to factory reset your device, but you are less prone to some of those annoying bugs that seem to crop up after an OTA update.
Remember to make sure all your data is backed up, because you will lose all your data on the device when you unlock the bootloader, which is required for flashing. There is no way to unlock a bootloader without a factory reset. However, if you happen to already have an unlocked bootloader, then you can forgo the factory reset if you wish. We will show you how later on, but we still recommend that you back up your data in case something goes wrong.
Installing ADB and Fastboot
In order to flash the factory image to your Nexus or Pixel device, you must have ADB and Fastboot installed on your desktop computer. ADB stands for Android Debug Bridge, and it allows you to send commands to your
There are two methods to getting ADB and Fastboot on your computer. The first is to download and install the Android SDK tools from the Android developer site. This will work on Windows, Mac, and Linux machines. If you’re a Windows user, you can download and install Minimal ADB and Fastboot instead, which is the easiest method. However, we recommend installing the
Follow the instructions below for either installing the Android SDK tools or Minimal ADB and Fastboot.
Download and install the Android SDK tools
- Click here to download and install the Android SDK Tools from Google’s developer site. There are choices for Windows, Mac, and Linux. These instructions are for Windows machines.
- When asked what directory to install the software to, we recommend that you set it to C:android-sdk. If you choose a different location, just make sure you remember it.
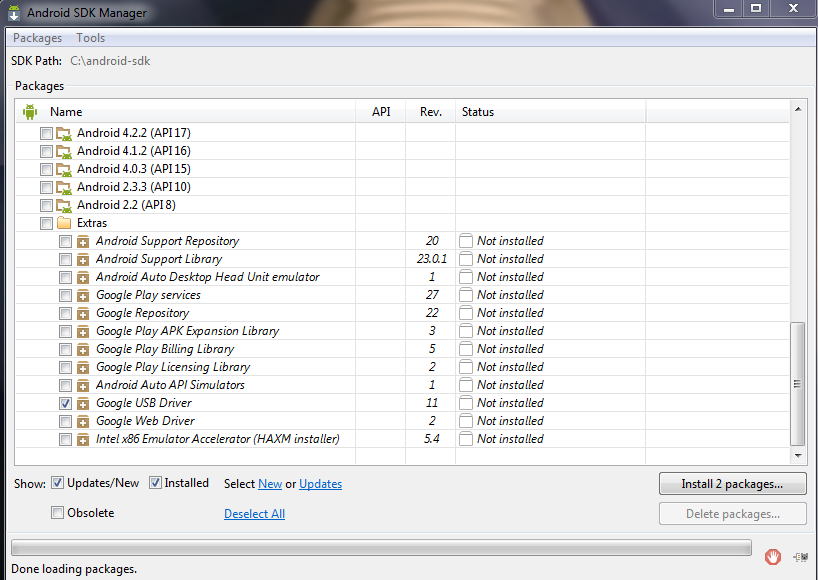
- Once the Android SDK Tools are installed, launch the download from the Start Menu.
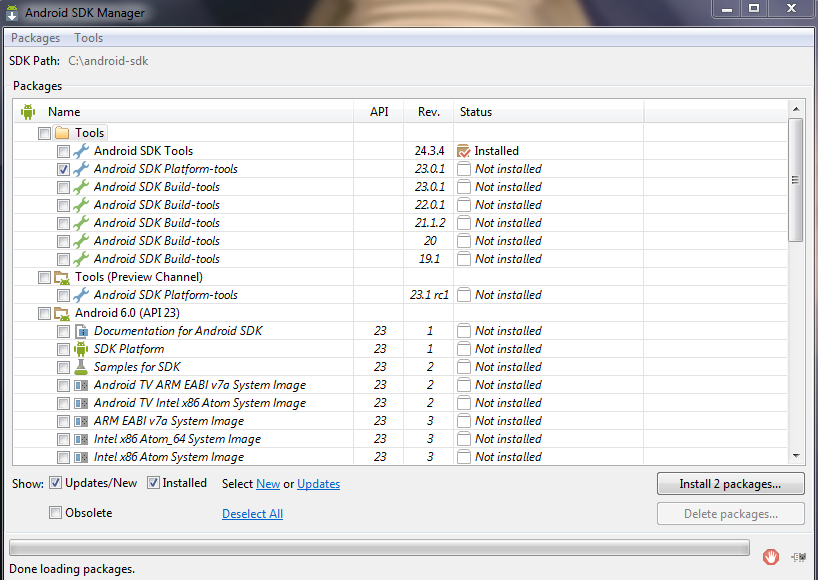
- The SDK Manager will open. Just uncheck everything except Android SDK Platform-tools and Google USB Driver. Android SDK Platform-tools is at the top and Google USB Driver is toward the bottom.
- Click on Install 2 packages at the bottom right.
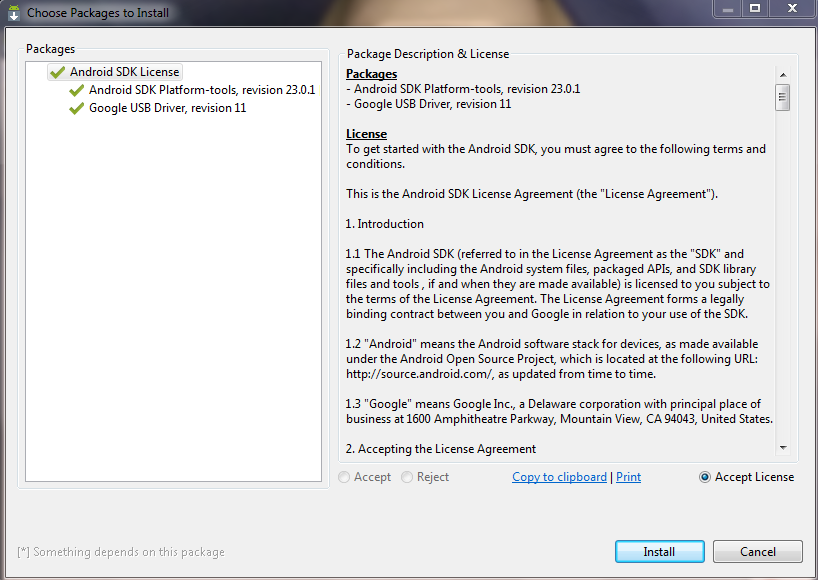
- Check Accept license and click Install.
ADB and Fastboot will now reside in the C:android-sdkplatform-tools folder if you followed step 2 as outlined. If you chose a different directory, than ADB and Fastboot will reside in the platform-tools folder under whatever location you chose to install the Android SDK Tools to in step 2.
Download and install Minimal ADB and Fastboot
- Click here to download minimal_adb_fastboot_v1.4.2_setup.exe from the XDA forums. Note: the version number could be different if a newer version is released after this post has been published.
- Launch the minimal_adb_fastboot_v1.4.2_setup.exe file.
- When asked which directory to install the software to, we recommend that you set it to C:android-sdkplatform-tools, since we will be using that location for the rest of this guide. If you choose a different location, just make sure you remember it.
Downloading the Android Oreo factory system image
Now it’s time to grab the most recent version of the Android Nougat or
- Google’s Android Developer site – Android Oreo updates
Just make sure to select the version that matches your device. This is very important, because you must flash the Pixel image on a Pixel. A Pixel XL image won’t work on a Pixel.
You will notice that each device has a bunch of links under it. Google makes it easy to revert back to an older update if you wish. The most recent update is generally at the bottom of the list. Android Oreo is available for the Pixel, Pixel XL, Pixel C, Nexus Player, Nexus 6P, and Nexus 5X.
Note: Google posts factory images for each and every update. This means that you can follow this guide again and continue to get the latest version of Android Oreo right away without the need to wait until your device receives the OTA update automatically.
Extracting the contents of the system image
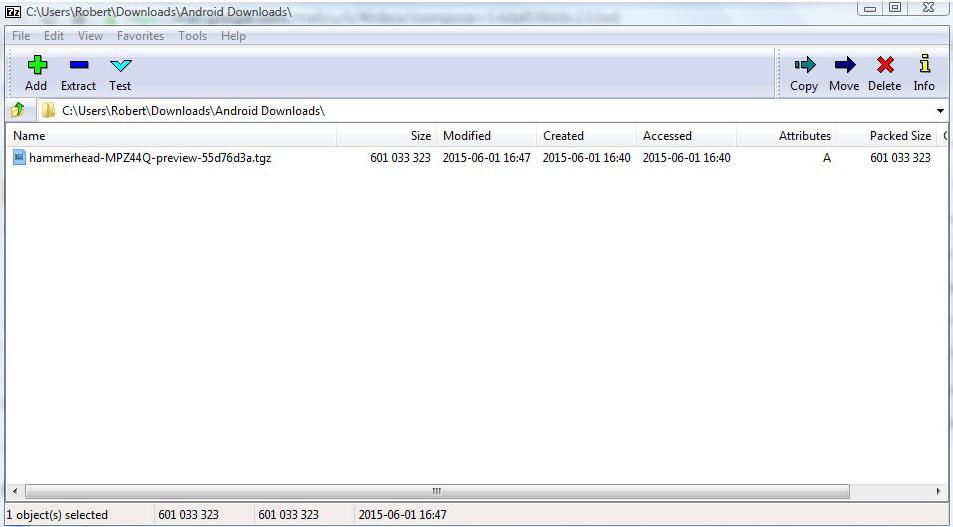
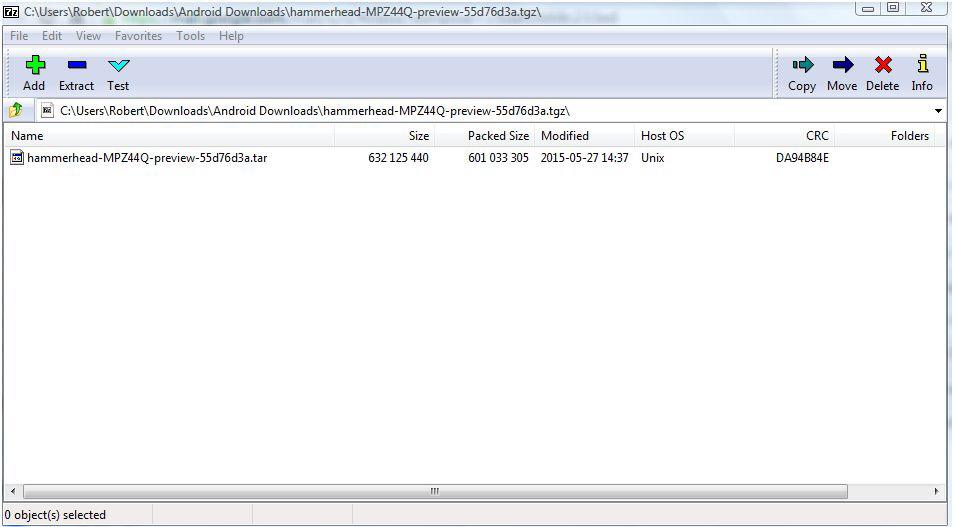
The downloaded file should have .tgz as its extension, and you need to extract the contents before going further. The best thing to do is download and install 7 Zip. Once 7 Zip is installed on your machine, follow these steps:
- Open the 7 Zip File Manager and navigate to the folder that you saved the .tgz file in.
- Double click on the .tgz file.
- You will now see a file with a .tar extension.
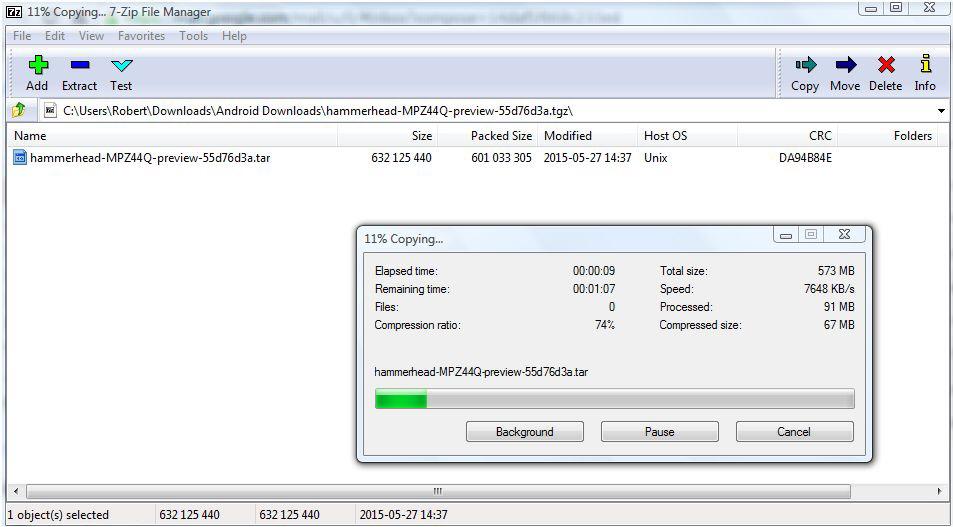
- Double click on this file to show the contents (this will take about a minute or more).
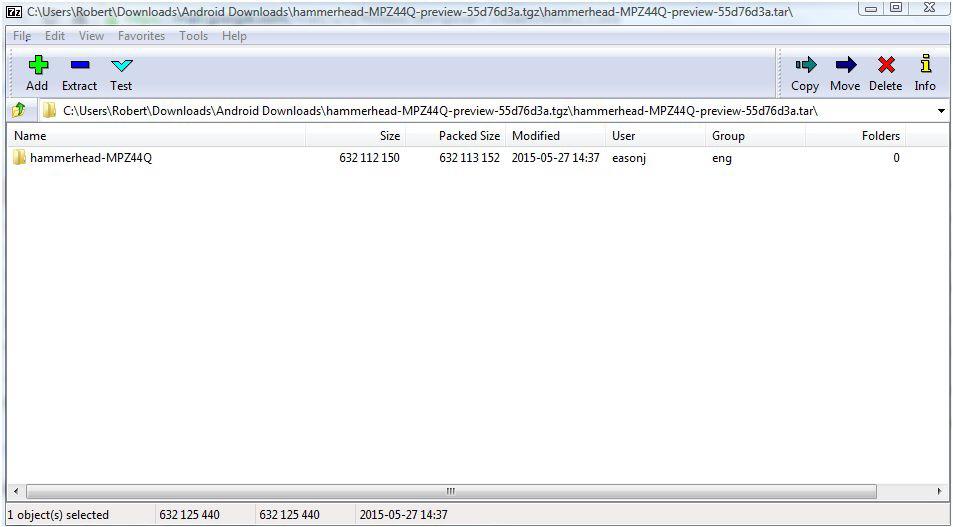
- After it has opened, you should have a folder with the codename of your device as part of the title (ex. marlin for Pixel XL), Double click on it.
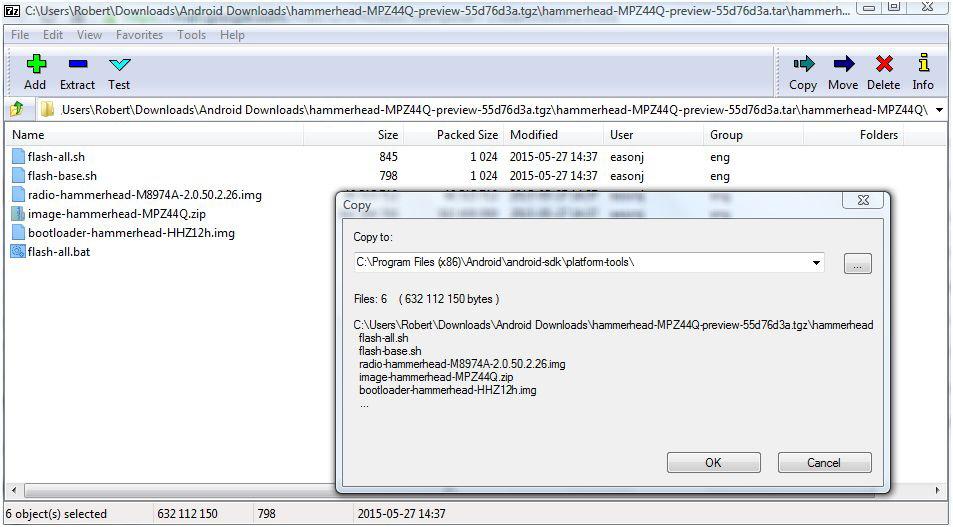
- You should now see a collection of files. Select all of them, and click on Extract to extract all the contents. Type in the destination C:program files (x86)androidandroid-sdkplatform-tools (if you installed the full SDK) or whatever directory ADB and Fastboot are installed in.
Enabling USB debugging and connecting your Nexus or Pixel device via USB to your desktop
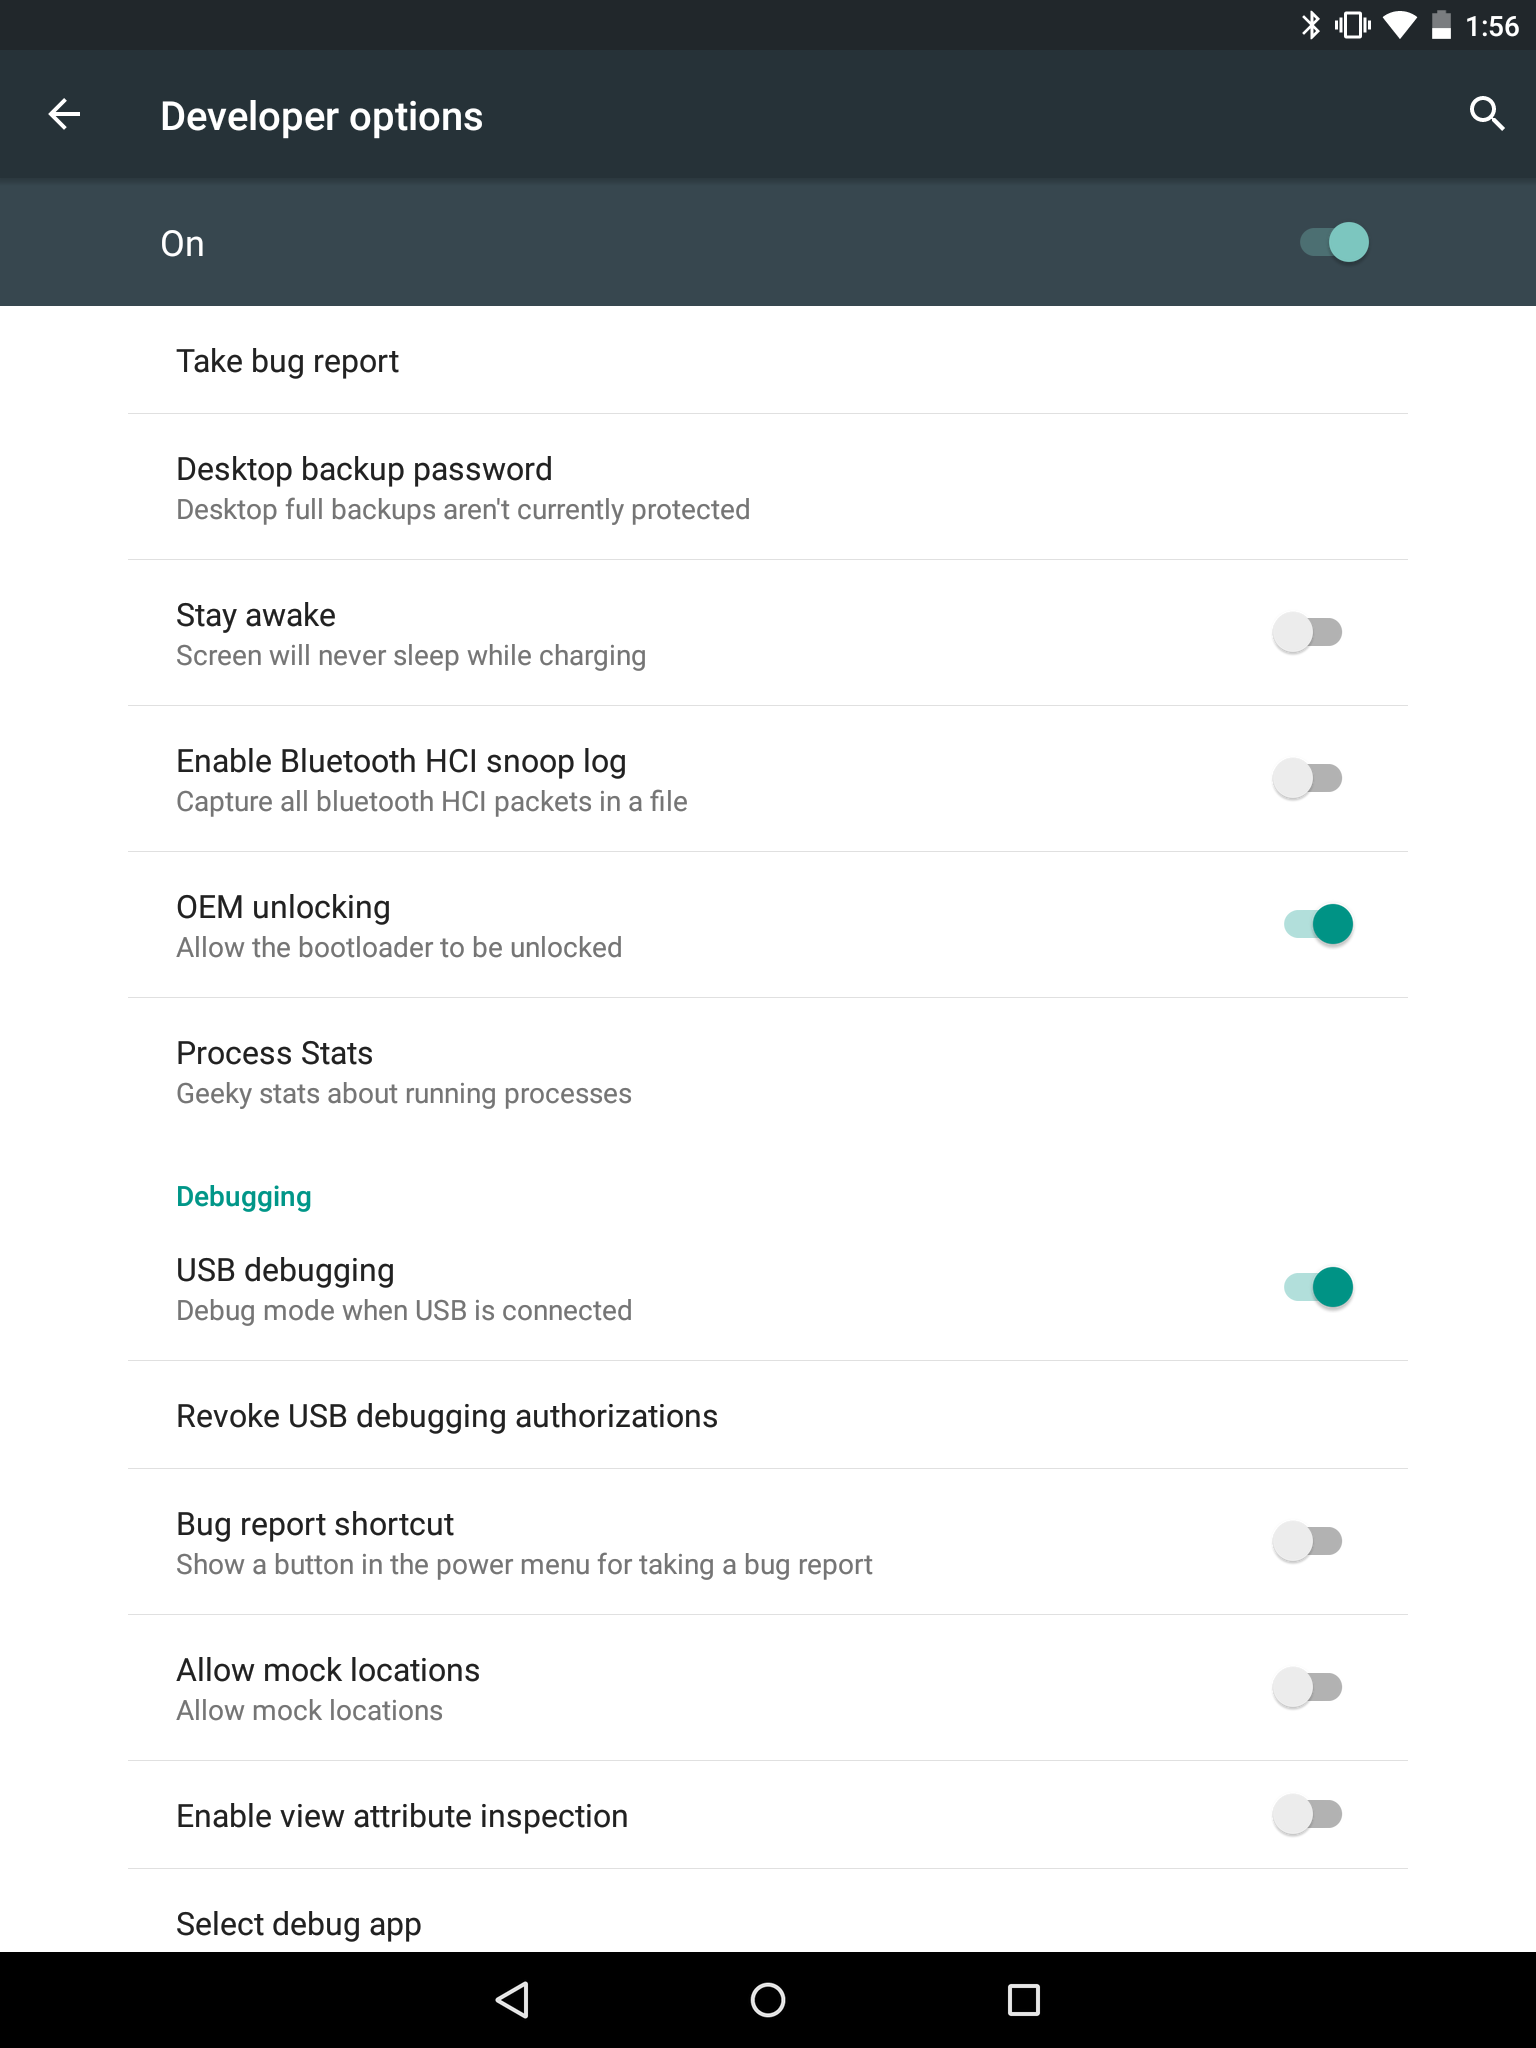
Now you need to make sure USB debugging is enabled on your Nexus or Pixel device. Open Settings on your Nexus or Pixel device. If you do not see Developer Options toward the bottom of the Settings screen on your device, follow these steps to activate them.
- Tap on About Phone and find the Build Number.
- Tap on the Build Number seven times and the Developer Options will appear on the main page of the Settings.
- Tap on the Back key to see the Developer Options.
- Tap on Developer Options.
- Check to enable USB Debugging.
Before you connect your device to the USB port on your computer, make sure that you have the appropriate drivers installed. You should be all set if you opted to install the Android SDK Tools. If you instead chose to install Minimal ADB and Fastboot, you can grab them here. Since you’re working with a Nexus or Pixel device, you want the Google USB Drivers. The download will be a zip file, so extract the contents where you wish, and remember the location.
Now connect your device via a USB cable, and you are ready to flash the zip file that you extracted earlier. If you’re connecting your Nexus or Pixel device to your computer for the first time, you will get a popup box on your Nexus or Pixel device stating what the computer’s RSA Key is. Just check Always Allow From This Computer and tap on OK.

If your Nexus or Pixel device doesn’t show the RSA key popup, then open the notification panel, select USB For Charging Only, and change the mode to Transfer Photos (PTP).

If your Nexus or Pixel device still doesn’t show the RSA key popup, then follow these instructions:
- On your Windows desktop, go to your Control Panel then Device Manager.
- You should see your Nexus or Pixel device under Other Devices with a Yellow ! mark on it.
- Right-click on it and select update driver.
- Choose Browse my computer for driver software, and choose the directory where the Google USB Drivers are located. If you chose to install the Android SDK tools and followed our instructions, they should be in the C:android-sdkextrasgoogleusb driver folder. If you chose to manually download the Google USB drivers, just navigate to the folder that you archived the contents of the Zip file in.
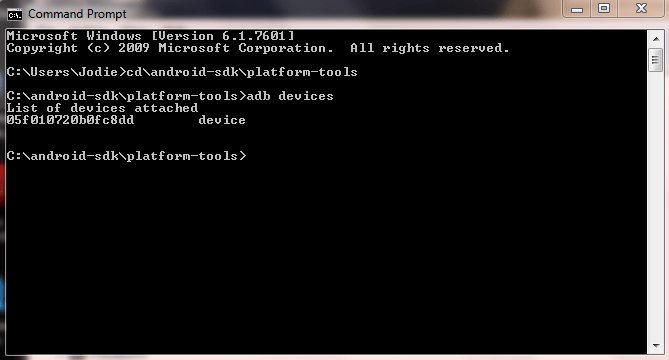
If your device still doesn’t show the RSA key approval popup, then open the command prompt on your desktop and navigate to the folder where ADB and Fastboot reside. If you followed our instructions from the Installing ADB and Fastboot section, it will be in the C:android-sdkplatform-tools folder. Just type cdandroid-sdkplatform-tools at the command prompt in Windows. If ADB and Fastboot are somewhere else, just navigate to that location instead.
Type “ADB devices” and you should get the following result:

The RSA key approval popup should now be visible on your Pixel device. Just check Always Allow From This Computer and tap OK.
Type “ADB devices” again, and you should get the following result with a different device key:
You are now ready to flash the factory image.
Flashing the Android Oreo factory image
If your device doesn’t have an unlocked bootloader, follow the instructions below.
This process will require a factory reset, so make sure you have your important data backed up.
- Open the Command Prompt in Windows or Terminal on a Mac and navigate to the folder that ADB and Fastboot are installed in. Again, if you followed our instructions from the Installing ADB and Fastboot section, it will be in the C:android-sdkplatform-tools folder. Just type “cdandroid-sdkplatform-tools” at the prompt in Windows. If ADB and Fastboot are somewhere else, just navigate to that location instead. To make things easier, so you don’t have to type out long directories, you can also paste it by pressing ALT and the spacebar, then choose Edit before selecting Paste.
If you’re using a Mac, you need to add the platform tools directory to your $PATH. In terminal, type “sudo nano/etc/paths”. Now enter your password, go to the bottom of the file, and enter the full path of the “platform tools” directory. Hit control-x to quit and enter Y to save.
The following ADB commands are for Windows machines. If you’re using a Mac, just add “./” before each command, for example: “./adb reboot bootloader”.
- Assuming you device is already connected to your computer via USB and USB Debugging is enabled, you need to re-start it in fastboot mode. Follow one of the two methods below. Option A may be preferable because it’s another confirmation that your computer recognizes your Nexus or Pixel device.
A) Type “adb reboot bootloader”
B) Turn your device off, then turn it back on while holding down the relevant key combinations for your device. For many devices it’s Volume Up + Volume Down + Power. You can see what your device’s key combinations are here.
- Type fastboot flashing unlock to unlock you device. As a final warning, this step will erase everything on your device.
- Type flash-all to install the bootloader, baseband firmware(s), and operating system. If you get a missing system.img error, then scroll down to bottom of this page for further instructions.
- This process could take several minutes, so it’s important not to power off or disconnect the device. Once it’s finished, your device will reboot and the latest version of Android Oreo will be installed.
- You can opt to re-lock the bootloader if you wish, but assuming you will do this again with a future update, you might want to leave it unlocked, so you don’t have to perform a factory reset again. If you do want to re-lock, just follow Step 2 above and replace the command in Step 3 with fastboot flashing lock. That’s it.
If your device already has an unlocked bootloader and you don’t want to do a factory reset and lose your data, follow the instructions below.
- Open the Command Prompt in Windows or Terminal on a Mac and navigate to the folder that ADB and Fastboot are installed in. Again, if you followed our instructions from the Installing ADB and Fastboot section, it will be in the C:android-sdkplatform-tools folder. Just type “cdandroid-sdkplatform-tools” at the prompt in Windows. If ADB and Fastboot are somewhere else, just navigate to that location instead. To make things easier, so you don’t have to type out long directories, you can also paste it by pressing ALT and the spacebar, then choose Edit before selecting Paste.
If you’re using a Mac, you need to add the platform tools directory to your $PATH. In terminal, type “sudo nano/etc/paths”. Now enter your password, go to the bottom of the file, and enter the full path of the “platform tools” directory. Hit control-x to quit and enter Y to save.
The following ADB commands are for Windows machines. If you’re using a Mac, just add “./” before each command, for example: “./adb reboot bootloader”.
- Assuming you device is already connected to your computer via USB and USB Debugging is enabled, you need to re-start it in fastboot mode. Follow one of the two methods below. Option A may be preferable because it’s another confirmation that your computer recognizes your Nexus or Pixel device.
A) Type “adb reboot bootloader”
B) Turn your device off, then turn it back on while holding down the relevant key combinations for your device. For many devices it’s Volume Up + Volume Down + Power. You can see what your device’s key combinations are here.
- You will need to edit the flash-all.bat file that you extracted from the factory image, which should be in the same directory as ADB and Fastboot. Just open it with any simple text editor such as WordPad. You will see a line that starts with “fastboot -w update……..” Just remove the -w from this line. The -w flag wipes your data, so removing it will obviously stop that from happening.
- Type flash-all to install the bootloader, baseband firmware(s), and operating system. If you get a missing system.img error, then scroll down to bottom of this page for further instructions.
- This process could take several minutes, so it’s important not to power off or disconnect the device. Once it’s finished, your device will reboot and the latest version of Android Oreo will be installed.
If you get a missing system.img error in Step 4 of either method, then follow these instructions
Extract all the files from the .zip file, which happens to be one of the files extracted from the original .tgz you downloaded from Google. The Zip file name probably begins with “image.” There should be various .img files within this Zip file. On top of this, you already have bootloader and radio .img files in the same directory. Just make sure all the .img files (from Zip file) and the ones that were already extracted are in the same directory as ADB and fastboot. Now you are going to flash each .img file separately.
If you don’t have either one of the bootloader or radio .img files, don’t worry, not all devices need them. It’s also important to follow this exact order. At the CMD prompt and in the C:program files (x86)androidandroid-sdkplatform-tools directory (if you installed the full SDK) or wherever ADB and fastboot reside. Remember, add ./ before each command if you’re using a Mac.
- type fastboot flash bootloader [name of your file].img
- type fastboot flash radio [name of your file].img
- type fastboot reboot-bootloader
- type fastboot flash recovery recovery.img
- type fastboot flash boot boot.img
- type fastboot flash system system.img
Lastly, if you want, you can wipe the cache with this command – fastboot flash cache cache.img
Now it’s time to enjoy your Android Oreo update. Remember, you can follow this guide again when Google issues its next Android update, so be sure to bookmark this page for later reference. If we missed anything, or if you have any other tips, please don’t hesitate to let us know in the comments.
Update: Revised for the the release of Android Oreo.
Editors' Recommendations
- Best Google Pixel deals: Save on Pixel 8, Pixel Buds, and Pixel Watch
- What is NFC? How it works and what you can do with it
- The 10 best photo editing apps for Android and iOS in 2024
- This Google Pixel 8a leak just spoiled everything about the phone
- How to change your Zoom background on Mac and Windows