In recent years, smartphones have relied less and less on local music and video, and iPhones and other Apple devices no longer need iTunes to be set up. iTunes had become something of a bloated monster, so much so that many desktop users have done away with it altogether to increase their performance, and simply have one less thing to deal with. If you want to fall in the latter category, ere’s how to get rid of iTunes in Windows and MacOS.
Uninstalling iTunes in Windows
In Windows 8 or later, press the Start button or Windows key, then begin typing “add or remove programs.” Then, click on the link that appears, and in the Settings menu, scroll down until you find “iTunes.” Click “Uninstall,” then “Uninstall” again to begin the process. In Windows 7 or earlier, click the Start button and find the Control Panel. Afterward, click “Programs and Features” and located iTunes in the list. Right-click the entry and click “Uninstall.”
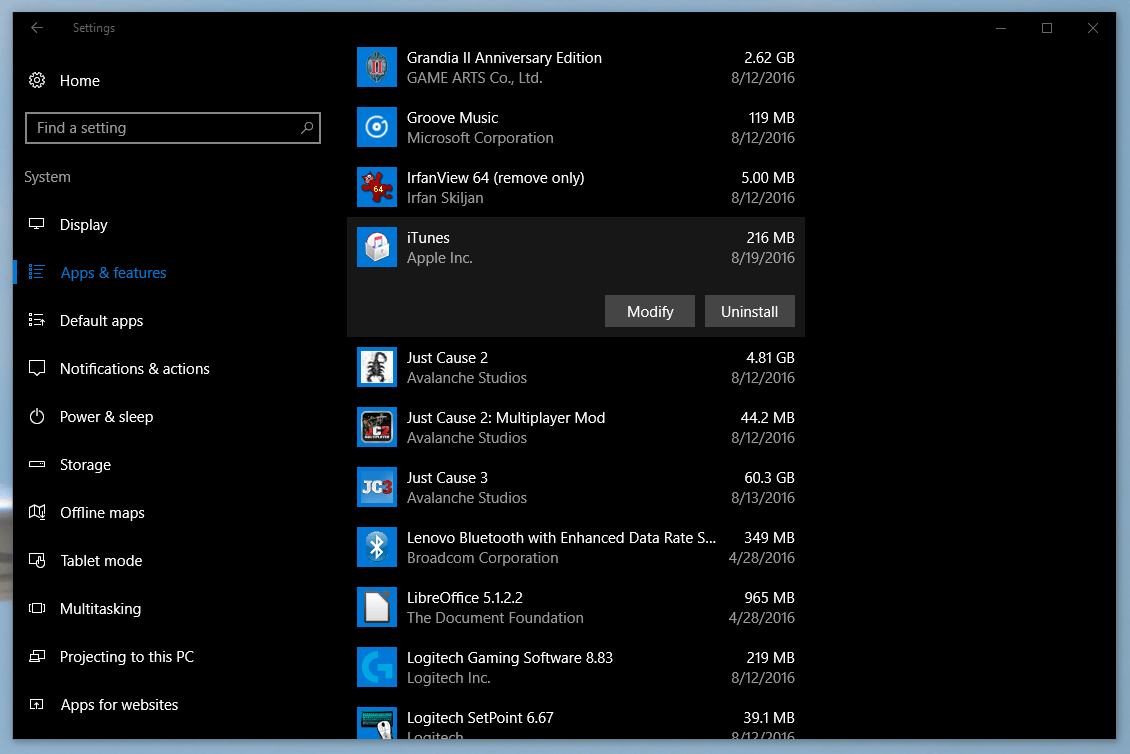
Follow the on-screen prompts in the pop-up windows to uninstall iTunes. The process will take several minutes. You may need to click “Yes” on Windows’ User Access Control dialog to continue. Don’t worry about any music you may have added to your iTunes library — the installation process won’t remove any music files.
Once you’ve finished the process above, repeat it for any other Apple programs on your computer, including Apple Application Support, Apple Mobile Device Support, Apple Software Update, and Bonjour (which is also made by Apple). You can also remove the Apple Computer folder in your Roaming folder — in Users>(your username)>AppData>Roaming — but this is optional. A reboot after you’re finished is recommended.
Windows Media Player remains the standard music program on Windows, and third-party music and video players can still play any non-DRM files in your digital library.
Uninstalling iTunes in MacOS
Every Mac computer that Apple sells comes with iTunes pre-installed, and the operating system considers it mandatory, so it can’t be uninstalled without a few extra steps. It is possible to do it from the Explorer window, however, or the Terminal command line tool. Just keep in mind that you’ll need to be an Administrator on your computer and enter the appropriate password in order to do so.
First, go to the Applications folder, then right-click on the shortcut for iTunes.app and click “Get Info.” Click the lock icon on the bottom of the window, enter your administrator password, and click “Sharing and Permissions” to expand the menu.
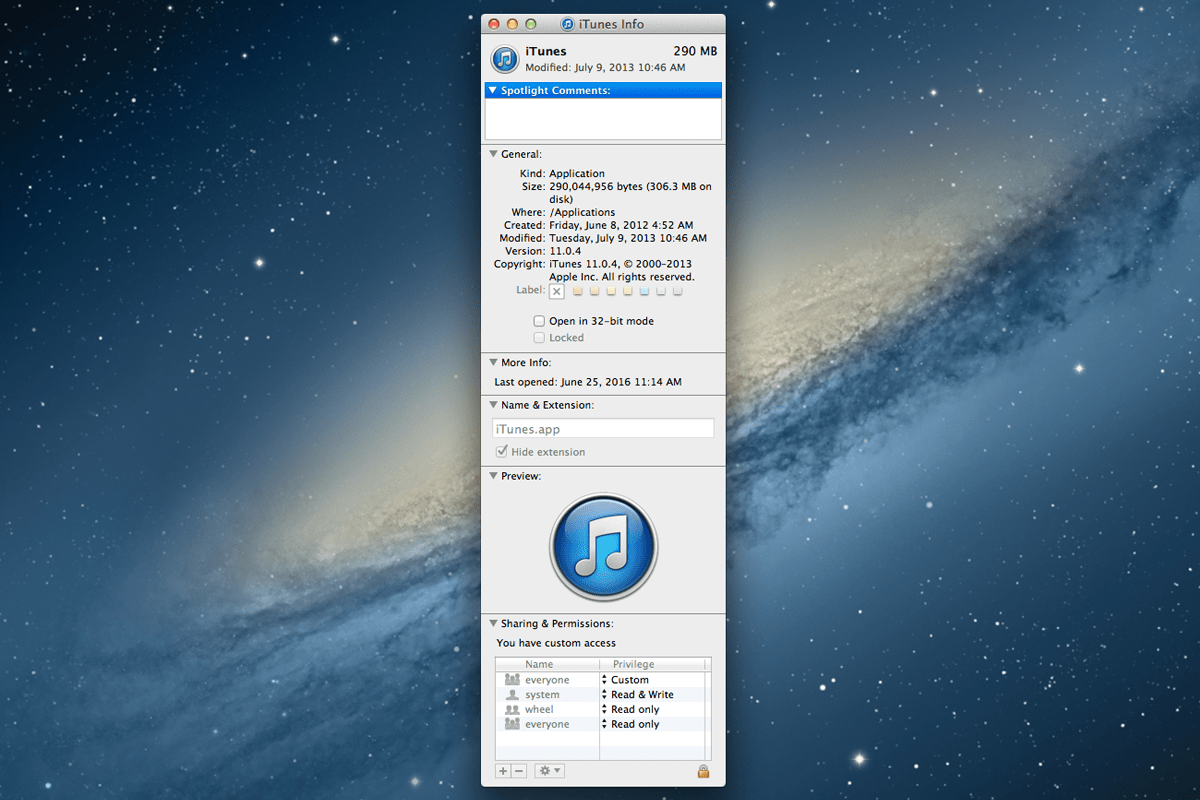
Click the menu item next to “everyone,” and under “Privilege,” select “Read & Write.” Close the Get Info window, then simply click and drag the iTunes.app icon into the Trash icon in your dock.
Alternately, iTunes can be uninstalled from the Terminal. To do so, open Terminal and navigate to the Applications folder. Then, type “sudo rn -rf iTunes.app” and your Administrator password. Once entered, iTunes will be removed from the folder.
Removing iTunes from OS X won’t affect any of your music files or other media, though you’ll no longer have access to iTunes purchases or rentals from your Mac. Ordinary media files, meaning those without Digital Rights Management locks, can still be played through Quicktime or other third-party programs.
Removing other files and re-installing iTunes
Users may want to remove the music and videos in their libraries to make space on their storage drives. Media files are among the largest that can be stored on personal computers, and removing them can make space for new programs or other libraries. Removing iTunes won’t affect those files — they need to be deleted or backed up manually from the Music folder, or any other folder that was added to the Library while iTunes was active. Once completed, don’t forget to empty the Recycle Bin (in Windows) or Trash (in MacOS) to permanently remove the files.
Thankfully, iTunes is no longer necessary for setting up or managing an iOS devices, but if you’d like access to the iTunes store again on your computer, you can re-download the program directly from Apple. Double-click the installer file and follow the on-screen prompts that appear to re-install the program.