It isn’t enjoyable when you miss a phone call, but it happens from time to time. The caller may leave a voicemail if the call was important enough, and sometimes they’ll even leave one even when it wasn’t. That said, no one wants the voicemail section of their phone to be cluttered with old messages. Luckily, you can save them either directly to your iPhone or your PC, thereby clearing up space and preserving precious messages for future reference.
Depending on which carrier you have, this process can be done on your phone or by using a third-party program. Either way, saving voicemails isn’t difficult, and with this guide, you’ll be saving your missed messages and organizing your voicemail inbox in no time.
How to save voicemails using your iPhone
This will be the easiest method, so long as you’re using iOS 9 or later and your smartphone carrier supports Visual Voicemail. Visual Voicemail is the list of voicemails you should see when you go to Phone > Voicemail. Carriers such as AT&T and Verizon support this feature, and it’s easy to set up. If you’re unsure if your carrier supports Visual Voicemail, your carrier’s support page or customer service department should be able to let you know.
If you can use Visual Voicemail, then it’s easy to save your voicemails using your iPhone. Here’s how.
Step 1: Launch the Phone app and select the Voicemail tab in the bottom-right corner.
Step 2: Tap the voicemail you want to save, followed by the Share icon. The icon resembles a box with an arrow pointing out of it.
Step 3: In the resulting pop-up window, choose a save location for the voicemail audio. You can either add it to your Notes app, save it as a Voice Memo, or send it to contacts via Messages. You can also email the audio or upload it to iCloud Drive.
Step 4: For any messages you don’t need to save, tap Delete in the bottom-right corner.
How to save voicemails using Explorer 4
If you’re unable to use Visual Voicemail or want another method, there’s always Explorer 4. The program allows you to save many things from your iPhone, including text messages, your call history, and other media housed on your device. The program starts at $40, but you can download it for free and use it in demo mode if you don’t want to pony up the cash.
First, you’ll need to install iTunes on your PC, as you need your phone to trust your machine before the two will interact. We also recommend that you back up your iPhone because Explorer 4 will uncover any missing or lost files from that backup storage. If you don’t have a full system backup established, the software will automatically make one, but it’s a lengthy process.
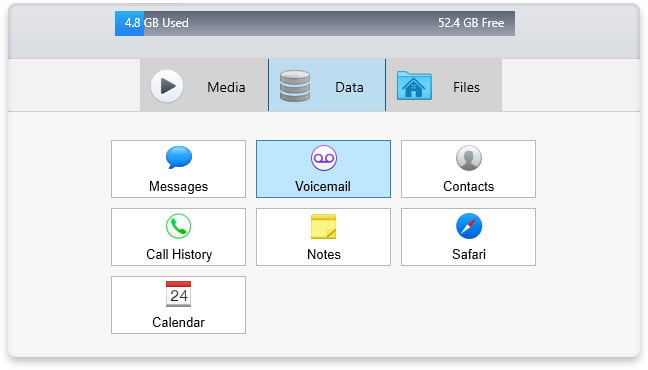
Once you’ve installed iExplorer and made a backup, connect your iPhone using a Lightning cable. When you open the program, you should be able to see your iPhone show up on the left side of the app’s display. When it does, select your iPhone and click Data > Voicemail on the right-hand side. You can also select your iPhone, click the drop-down arrow next to it, and go to Backup > Voicemail.
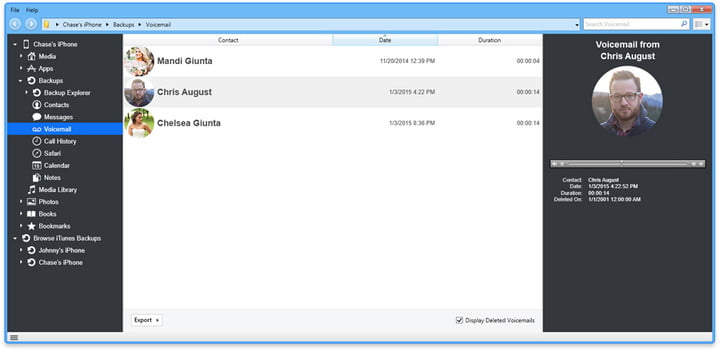
Once done, your voicemails will load in the main program window, and you’ll see the contact, the date of the voicemail or call, and the duration of the voice message. To save voicemails, select them individually and click the Export button at the bottom. You can click on Export All to simultaneously save all voicemails.


