Kodi (formerly known as XBMC) is an open source media hub that aims to make it easy to access all of your digital media, from music to movies and even live TV, all in one place. It’s available on a lot of platforms: Windows, Mac, Linux, Android, iOS, Raspberry Pi, and even the Xbox One, but one place you won’t find it natively is the Amazon Fire TV.
That doesn’t mean Fire TV users are out of luck, but installing Kodi on the Fire TV isn’t as easy as most apps — you can’t just download it from the store. That said, it’s a simpler process than you might expect. Installing Kodi only takes a few minutes, and we’ll show you how.
Before you start
If you’re looking to install Kodi on your Fire TV, you’re probably already familiar with the software, but if you’re just getting started, you might want to check out the company’s website to be sure you’re fully aware of its capabilities. There are alternatives like Plex that are somewhat easier to setup and maintain, Kodi is completely free and also highly customizable.
You’ll also want to make sure you’ve got everything you need before you get started.
What you’ll need
First things first, you’ll need a compatible Fire TV device. Fortunately, all Fire TV streaming boxes and Fire TV Sticks are compatible. As for software, Kodi works on both Fire OS 6, which runs on all recent models, as well as Fire OS 5 for older models. This guide is aimed at Fire OS 6, so some instructions may differ slightly if you’re using older hardware — mainly, the Device menu under Settings is called System on older versions of Fire OS.
Kodi doesn’t come with the ability to actually play anything on your Fire TV out of the box. You’ll either need to be running Kodi on another device in your house that acts as a media server, or you’ll need a USB hard drive, thumbdrive, or MicroSD card with video files you want to watch on the Fire TV. It’s also worth noting that the Fire TV only supports FAT32-formatted drives. Most thumb drives and MicroSD cards as well as some external hard drives come formatted this way by default, but if your drive doesn’t work with the Fire TV, this could be why. The Fire TV’s USB port isn’t able to provide power to full-sized USB drives either, so if you plan on using a bigger drive, you’ll need one with its own power supply.
A note on security
During the first step of the install process, your Fire TV will warn you that enabling unsupported apps (Kodi is one such app) could potentially pose a security risk. This isn’t a bogus warning either. Reports have been popping up since June 2018 that some users who enabled options required for installing Kodi have been seeing malware targeting their Fire TV devices. In August, Amazon updated older Fire TV models to give the warning (previously, this warning only occurred on newer devices running FireOS 6), but you’ll have to ignore this warning in order to install Kodi.
If you closely follow the instructions in this guide, you shouldn’t have much to worry about, but if this gives you pause you might want to look into a solution that is actually available in the Amazon App Store.
You have been warned.
Installing Kodi

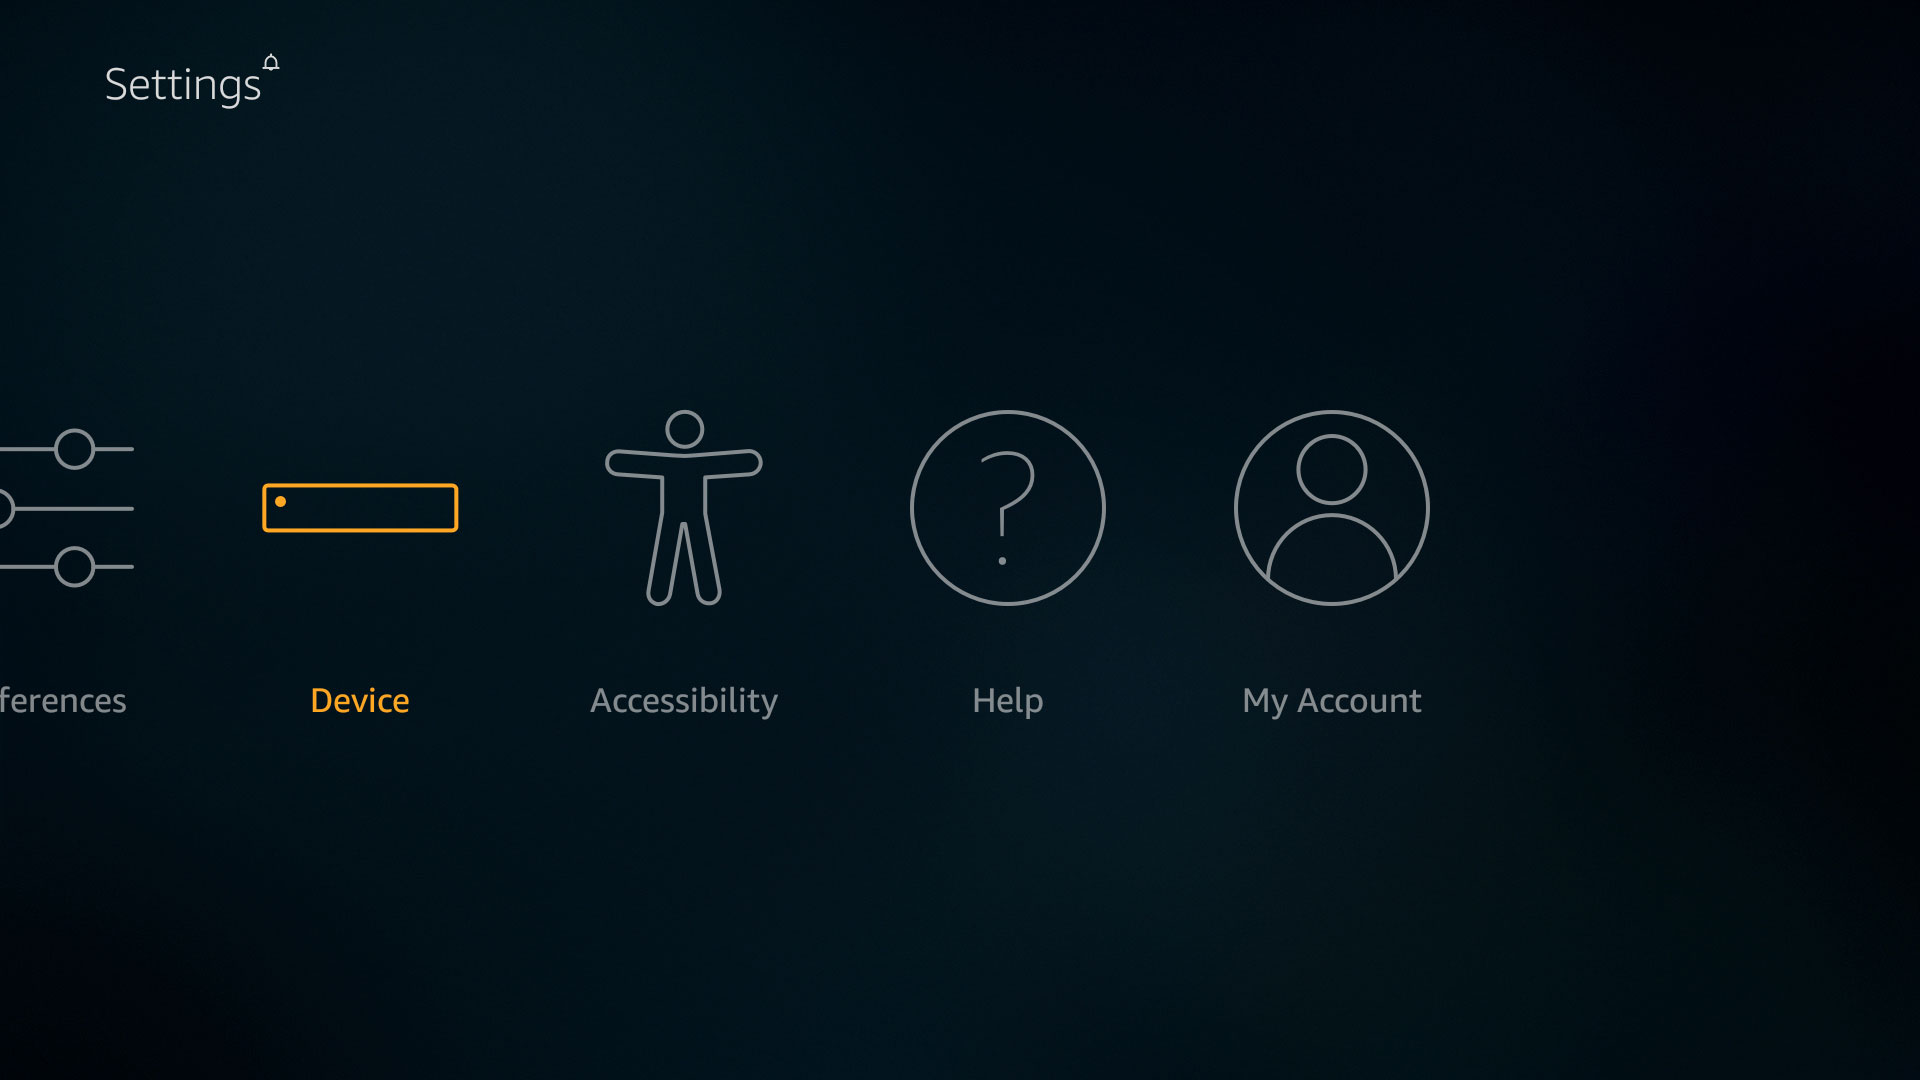
Step 1: Head to device settings — Open Settings, then navigate to the Device section (System on older models). From here, select the Developer menu (Developer Settings on older models).

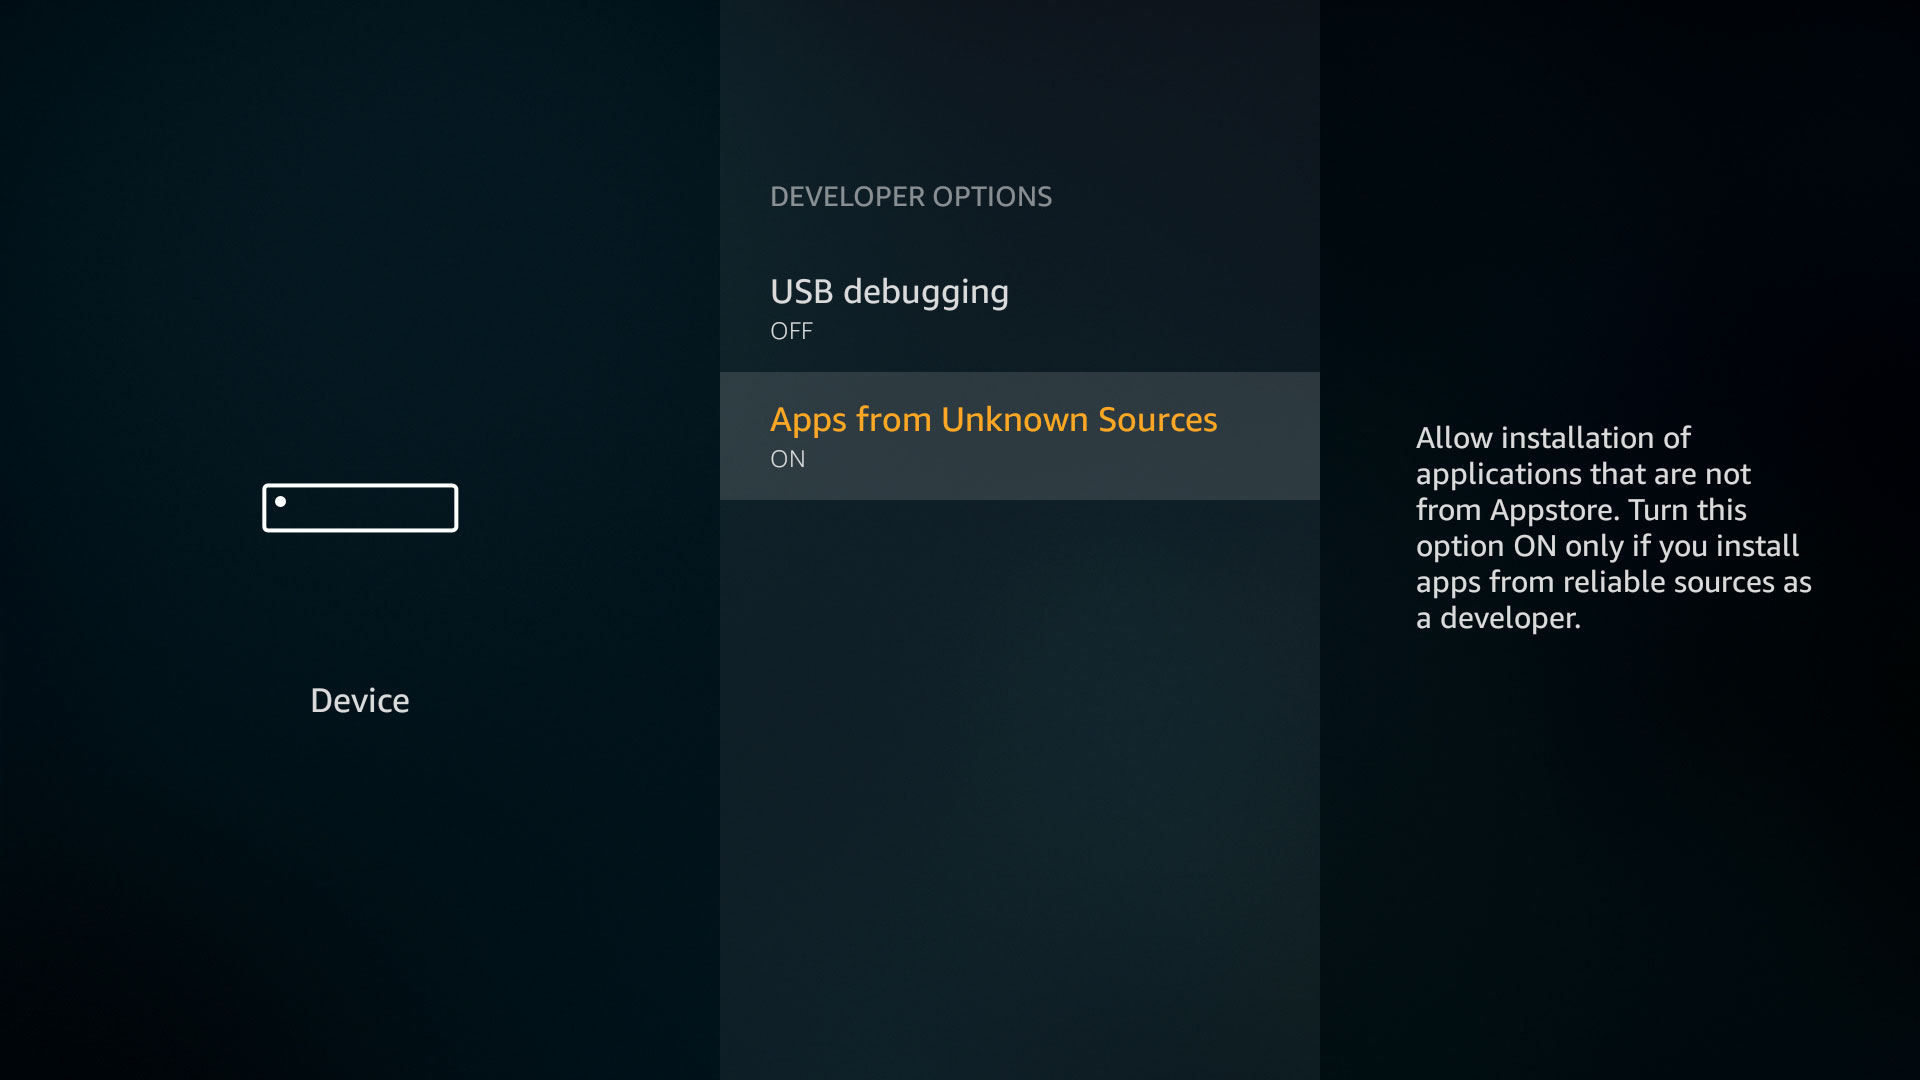
Step 2: Installing apps from unknown sources — Once you’ve located the Developer settings, select Apps from Unknown Sources and make sure this is set to On. This is where you’ll see the warning about device security we mentioned above.

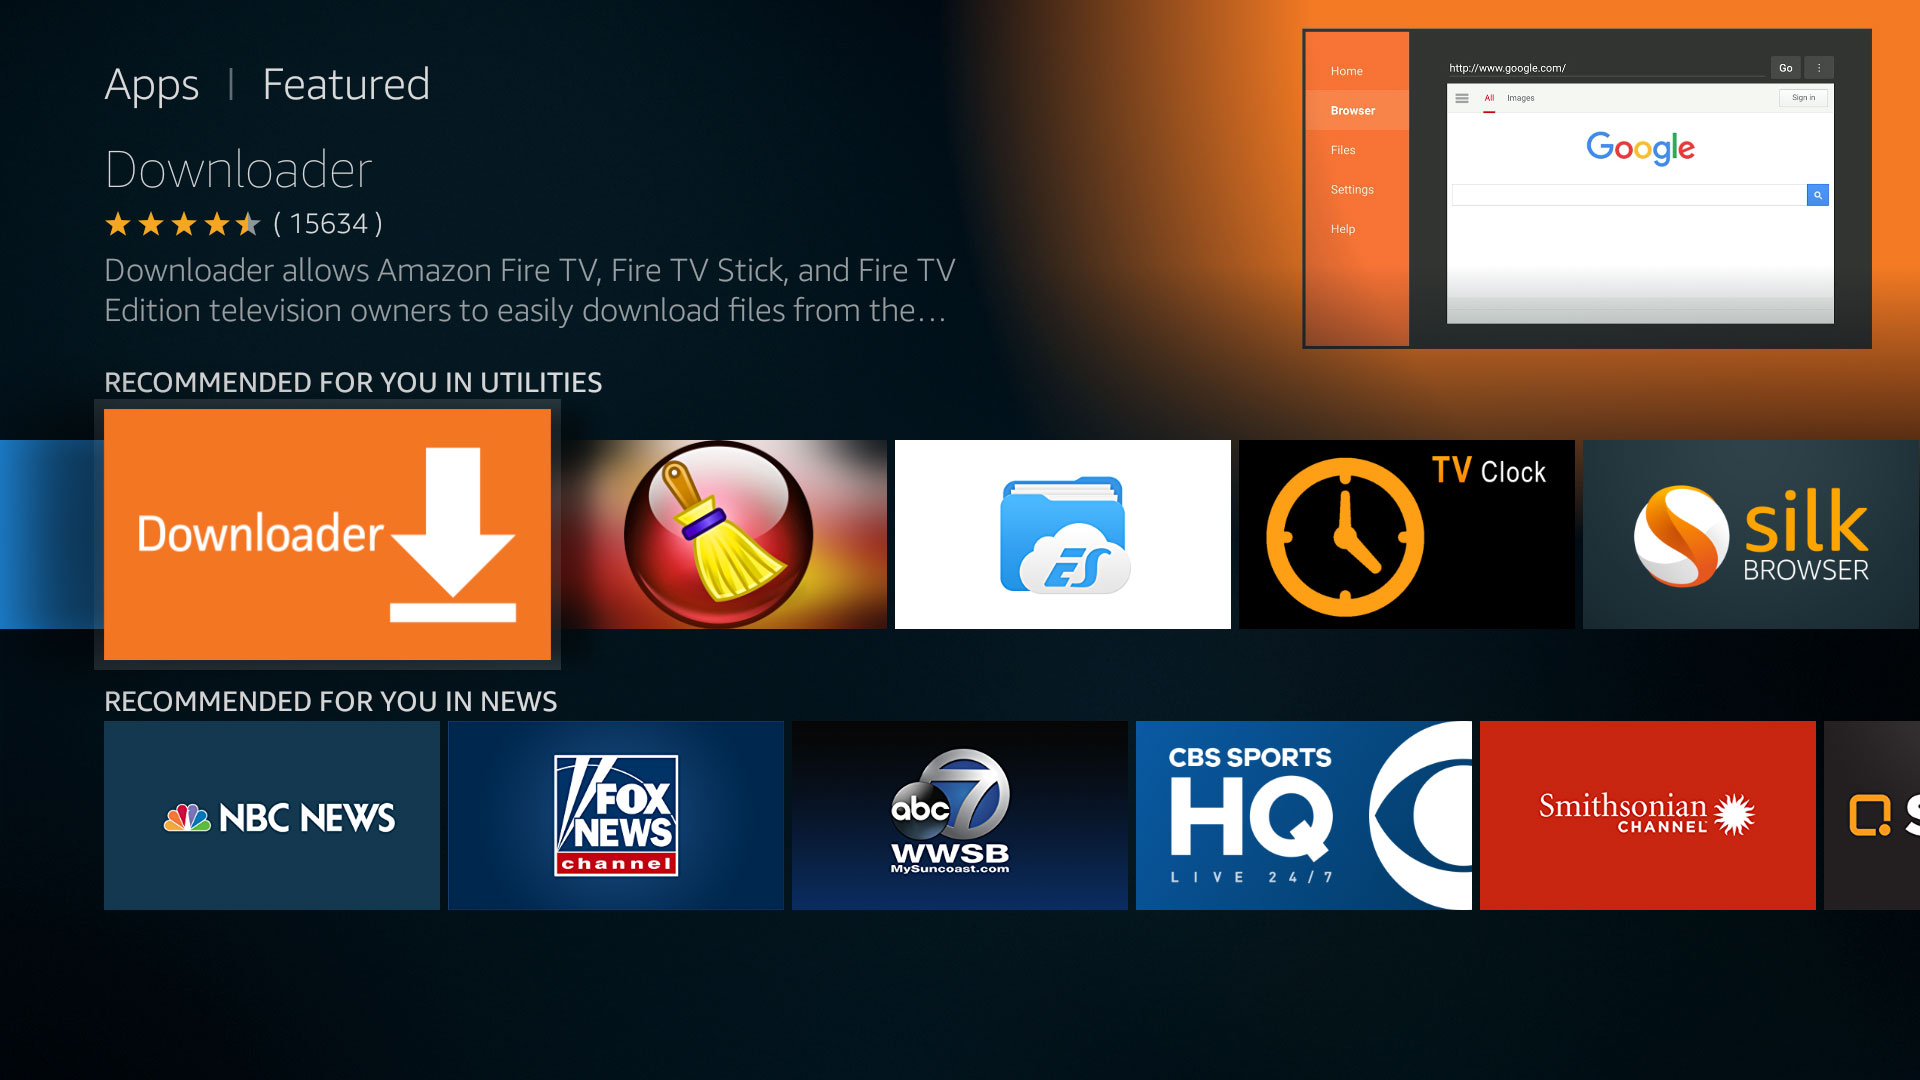
Step 3: Install the Downloader app for Fire TV — There are a few different apps you can use to download Kodi from its website, but neither Amazon’s Silk browser nor Firefox will get it done. The Downloader app by AFTVNews.com, found on the Amazon App Store, is the simplest option we’ve found. You can either search in the Apps section of your Fire TV or visit the app’s store page and install from there.

Step 4: Download Kodi — Once the Downloader app is installed, open the app and you should find yourself in the Browser section. Select the address bar and enter the following URL: kodi.tv/download. Once the page loads, scroll down until you see the Android app and click on it. Here you’ll see a link to the Google Play Store, as well as direct downloads for both 32-bit and 64-bit versions of the app. Click on the 32-bit version, and it should begin downloading.

Step 5: Install Kodi — Once the app has finished downloading, it should automatically open the installer. You’ll see a list of the permissions the app needs, as well as options to cancel or install. Select Install and let the process run its course. Once this is finished, you’ll be presented with the option to open the app. A shortcut to open Kodi will now also be on your Fire TV’s home screen.
What to do next

Now that Kodi is installed, you have two options for playback: You can point it at files on an external drive or MicroSD card plugged into the Fire TV, or you can connect to a UPnP server sharing media files. This is beyond the scope of this article but installing Kodi on a PC on your network can help streamline the process.
Keeping Kodi up to date
One of the drawbacks of Kodi’s absence in the Amazon App Store is that it won’t stay up to date the way other apps on your Fire TV do. When you want to update the app, you’ll need to repeat steps 4 and 5, and you’ll have the latest version of the app installed. This isn’t convenient, of course, but unless an official version of Kodi comes to the Amazon App Store (which doesn’t seem likely anytime soon), it’s your best option.
There is a whole lot you can do with Kodi, and it would be impractical to explain it all here. Fortunately, the official Kodi Wiki, maintained by members of the Kodi team and the community around it, is packed with information that should help you make the most of your newly Kodi-enabled Fire TV.


