If your Apple AirPods are acting up, we know how frustrating that can be. Whether it's something that's popped up since you read our AirPods 4 review, or the even the venerable 2nd-gen AirPods Pro, they're considered some of the best wireless earbuds money can buy, so when there's a problem with them, you want to get it solved fast.
Whether they're having Bluetooth connection or sound problems, they're not charging properly or they're falling out of your ears, we’ll help you diagnose (and hopefully fix) the most common AirPod problems — right here, right now.

Problems connecting to a phone or tablet
If you’re running into an issue where your AirPods aren’t connecting to your phone or tablet ...
Step 1: Put the AirPods back in the charging case, wait for around 30 seconds, then take them back out and pop them in your ears again.
Step 2: Or, try turning Bluetooth on and off on your phone or tablet. Then repeat the first step. In all but the most unusual cases, this should solve the issue.
Step 3: It’s not likely, but you may encounter situations where neither solution works. If this is the case, try fully resetting the AirPods. This is a catch-all fix for a lot of problems and one we’ll detail at the bottom of this article.
Left or right AirPod won’t connect
Another common issue AirPods owners run into is that one AirPod won’t connect. Here, we'll show you how to get them connected as well as look at adjacent problems that can mask as an AirPod not connecting.
Step 1: Just like when dealing with both AirPods, pop both of them back in the charging case, wait for about 10 seconds, then remove them and put them into your ears.
Step 2: Step 1 didn't work? Repeat step 1, but this time, turn Bluetooth on and off on your phone or tablet before removing the Pods from their charging case.
Step 3: Still nothing? Try resetting the AirPods (instructions at the end of this article).
Step 4: Next, try checking the charge status of your AirPods. You should see the charge level of both the right and left AirPod. If the contact points in the charger are blocked, try cleaning them gently to give the AirPod connection with your bud.
Step 5: If you've played with your settings and balance, you may have accidentally shut off one AirPod from playing sounds. Go to your Accessibility settings, then Audio/Visual, and finally Balance. From here, if the balance is all the way to one side, the opposite side's AirPod won't work.
Step 6: If a single AirPod has failed completely, visit Apple's replacement page to get info about how to replace it and what it might cost you.

Computer connection woes
This isn’t much of an issue with newer Macs, but sometimes maintaining a Bluetooth connection can be problematic with older machines.
Step 1: Put the AirPods back into their case for 10 seconds before removing again and inserting into your ears.
Step 2: If that doesn’t work, you will want to disconnect and connect them again, which can be done by turning Bluetooth off and on, but this could be a problem if you use a Bluetooth mouse on your computer.
Step 3: If this is the case, head to your Bluetooth settings (locate the Bluetooth icon in your status bar, or find the setting under System Preferences > Bluetooth), find the AirPods, and disconnect them.
Step 4: Your AirPods will now appear at the bottom of the Bluetooth devices list. Right-click on them and choose "Connect."
Call drops
Intermittent call drops have plagued the AirPods since they debuted back in 2017. Fortunately, there is a simple fix that often works.
Step 1: Try taking calls with only one AirPod in your ear, not both.
Step 2: If Step 1 doesn’t work, make sure your AirPods aren’t in need of a charge. You can also try turning Bluetooth off and back on again.
Step 3: If Step 2 doesn't work, open the Settings app and go to the Bluetooth section.
Step 4: Next to the AirPods entry on the list of devices, you should see an “i” icon inside of a circle. Tap this, then select microphone, and set it to either left or right.
Step 5: In extreme cases, you can also turn off Automatic Ear Detection in the same section, though this disables one of the earbuds’ most convenient features, and will also run down the battery faster.
Step 6: As with our other fixes, if you still have issues, you can try the full reset detailed at the end of this article.
Audio issues or static
Static and/or subpar audio quality can be caused by a lot of things, so it’s much tougher to diagnose. Bluetooth connections can be affected by interference, which can cause everything from static to reduced audio quality and even disconnects. If this always happens in one place, interference could be the problem.
Step 1: If this is happening in your home, you might be able to track down the device causing interference and move it or use your AirPods in a different area. If you’re in the office, you may be out of luck.
Step 2: Wi-Fi can cause interference with the AirPods, especially during calls, so you might want to try turning off Wi-Fi while making calls. Turn it back on when you’re done.
Step 3: If you’re getting stuttering instead of static or noise, you can also try turning off Automatic Ear Detection as detailed above.
Finding your lost AirPods
Considering the size and wireless nature of AirPods, losing them is a fairly common complaint. Fortunately, it’s easily fixed using Apple’s Find My tracking software.
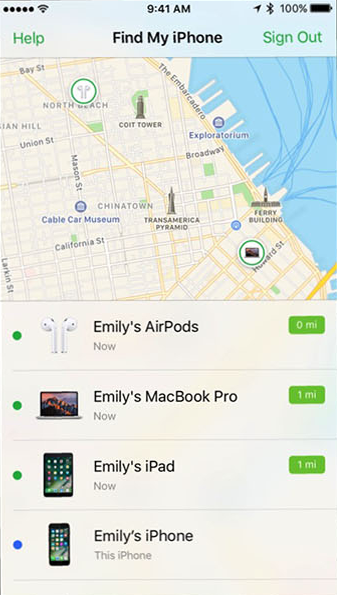
Step 1: Launch the Find My iPhone app on your iOS device or head to the iCloud website, then sign in with your Apple ID, and select Find My iPhone.
Step 2: From the list presented, select your AirPods, and you will see a map showing where they are or their last location before they were powered off.
Step 3: If you see a green dot next to the icon for your AirPods, it means they’re turned on, and you can play a sound to easily locate them.
Step 4: If you are looking for a single AirPod, you can see options for right and left AirPods to play a sound and locate a single missing pod. This sound (as long as your AirPod has battery life) will play louder and louder for two minutes. Make sure you remove your other AirPod from your ears first if necessary.
Step 5: This is new — if you have the AirPods Pro 2nd-gen, you can now also do all of the above Find My actions with the case as well, so even if your buds are dead, there's still a chance at locating the case.
Android volume trouble
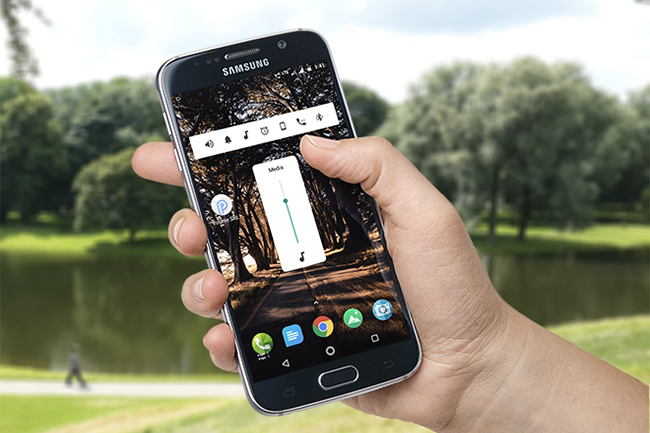
When you use Apple's earbuds with Apple's phones, tablets, or computers, the software automatically recognizes that you're using headphones and all volume adjustments work as you'd expect. But on some Android devices, Bluetooth volume is regulated separately from other volume settings, and this can lead to problems for AirPods users. Fortunately, it's easy to troubleshoot.
Step 1: For a stock Android device, tap the volume either up or down, and you should see the volume control appear on the screen.
Step 2: Tap the down arrow next to the volume control, and you'll see all the available volume sliders appear.
Step 3: One of these should be Bluetooth. Now, just turn this one up or down as needed.
Step 4: On Samsung Galaxy phones, it’s a little different (and better). Go to Settings > Connections > Bluetooth. Here, tap the three dots in the top right corner for more options, then turn on Media Volume Sync. Now you can use the volume control on the device in the same way you would on an iOS device.
No sound from fully charged AirPods
First, check your volume levels to see if they were accidentally turned down. This may be more likely on models like the second-gen AirPods Pro, which introduced swiping touch controls for volume but also made it easier to accidentally swipe volume down. If your AirPods are charged, connected, and at the proper volume, the problem often lies with your iPhone or iPad.
Step 1: Head to the Settings app in iOS and make sure that all software updates have been applied.
Step 2: If you have any updates waiting, plug your device in, update, and reboot your device. This often fixes problems with AirPods refusing to work entirely.
Bad battery life
Out of the box, the AirPods (second-gen) should last for around five hours on a full charge (up to six on the 3rd-gen AirPods), delivering up to three hours of talk time on the AirPods 2. The second-gen AirPods Pro deliver 6 hours of listening time (with ANC on), and 4.5 hours of talk time, just slightly better than the first gen. Over time though, this will start to wear down. There’s nothing you can do about this, unfortunately, but if you’re experiencing a dramatically shorter battery life than expected, there's still one thing you can try.
Step 1: Make sure that Automatic Ear Detection is on, as this puts the AirPods into a low-power mode that is essentially off when you’re not using them.
Step 2: If Automatic Ear Detection is on and you are still experiencing a much shorter battery life, we’re going to refer you one last time to that total reset option below.
AirPods won’t charge (wired connection)
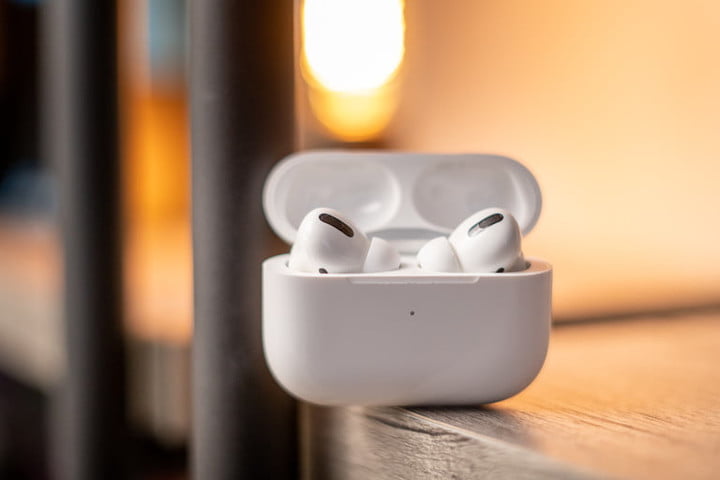
AirPods ship with two kinds of charging cases: Wired-only charging and dual wired/wireless charging. And while our first troubleshooting step applies to all models, the following step is just for when you're having trouble charging with a USB cable. If you’re unsure whether you have a wireless charging case, the LED light gives you your answer. If you see a light on the outside, it has wireless charging. If it’s on the inside, it doesn’t.
Step 1: If you’ve had your AirPods for a while, there may be some dust and grime buildup that’s preventing the Pods from making contact with the charging pins in the case. Take a soft cloth or a swab and carefully clean the inside and bottom of the case, and thoroughly clean the stems of your AirPods to see if that helps the charging process.
Step 2: On the charging case, work out any dirt and debris that may have snuck into the charging port. The crevice is small, so you’ll need something thin and pointy, and preferably not made of metal. A toothpick is ideal.
Step 3: If that doesn’t work, try a different Lightning cable. If all else fails, you may need a replacement charging case.
AirPods won’t charge (wireless connection)
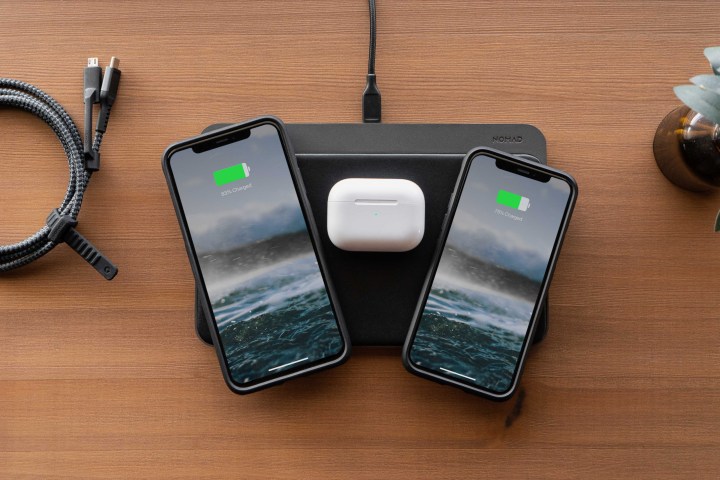
The AirPods second-generation wireless case (and cases for the 2nd-gen and AirPods Pro) can charge on a wireless charging pad, but it has to be compatible.
Step 1: Make sure you are using a Qi standard charger, and place your AirPods charging case on the pad with the charging light indicator facing up.
Step 2: Try repositioning the charging case on the charger a few times, and watch for the indicator to turn on. If this doesn’t work, your charging case or wireless charging pad may be faulty.

AirPods (1st and 2nd gen) keep falling out
Step 1: Try one of the many third-party hooks, loops, or other attachments to make it easier to keep them in your ears.
Step 2: Consider switching to the 3rd-gen AirPods as these have an updated shape that some folks find is more secure in their ears.

AirPods Pro keep falling out
Try one of the other sizes of silicone ear tips. The AirPods Pro come with three sizes, and it might be that the ones you're using simply don't fit as well as the others. In addition to a better fit, you'll also get better sound and better noise cancellation. The AirPods Pro 2 added a new smaller ear tip for the smallest ears, bringing size options to four in total.

Gestures not working
First- and 2nd-gen AirPods use touch sensors that you tap to control things like music playback, while the 3rd-gen AirPods and AirPods Pro 1/2 use force sensors, which you squeeze between your thumb and index finger. Force sensor gestures can't be changed, but touch sensors can be modified. Here's how.
Step 1: Go to Settings > Bluetooth after your AirPods are connected and click the (i) button next to the name of your AirPods.
Step 2: Here, you can choose what the double-tap gesture does. Make sure it's set to the action you're expecting. If you don't want to use the double-tap gesture on one or both earbuds, set the option to "Off."
How to update your AirPods
Keeping your AirPods up to date will make sure they function optimally and also unlock any new features that Apple may have added to the earbuds. Before you resort to resetting your AirPods, we recommend checking to see if there’s a new firmware update for them. If there is, there’s a good chance the fix you’re looking for is baked in, as Apple tends to use these upgrades as a way to distribute performance improvements and feature tweaks.
Typically, your AirPods should update automatically upon connecting to your device if there’s new firmware available. Unfortunately, there’s no simple way to force your AirPods or AirPods Pro to update. Having said that, here's something you can try.
Step 1: Connect the charging case (with the AirPods inside) to a source of USB power.
Step 2: Open the case with an iPad or iPhone nearby and wait for them to connect. This can sometimes force them to start installing an update (if there’s one available, of course). It may not happen immediately so be patient.
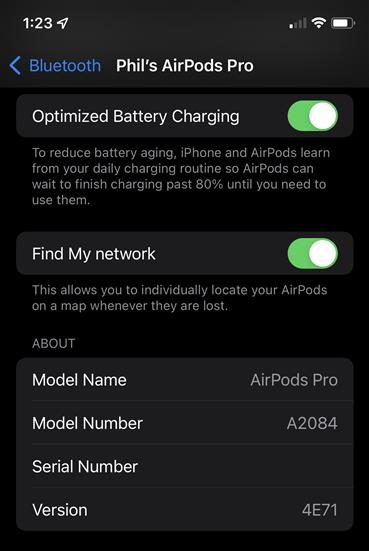
How to check your AirPods' firmware version
Want to check to see the specific firmware version your AirPods are running? Follow these steps:
Step 1: Make sure your AirPods are connected to your iOS device.
Step 2: Open Settings.
Step 3: Tap General.
Step 4: Select About.
Step 5: Scroll down until you see your AirPods listed, and tap them.
Step 6: Locate the number next to Firmware Version.
How to reset your AirPods
As noted above, completely resetting your AirPods can fix several issues. The good news is it won’t even take you a minute to do. Here’s how:
Step 1: Put your AirPods back in the charging case.
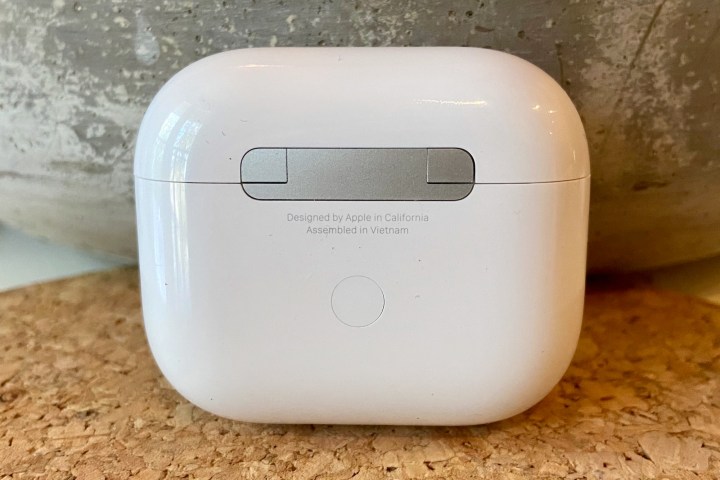
Step 2: Hold the button on the back of the case for roughly 15 seconds until the orange LED flashes.
Step 3: Open the case next to your phone and wait for the AirPods animation to show up on your device and tap "Connect."
Step 4: iCloud will sync this connection to your other devices now, assuming you’re using an iPhone. If you’re not using an Apple device, you can turn on Bluetooth and manually pair the headphones using your device's Bluetooth settings.
Dropped AirPods in water
Whether this occurs while taking a drink or washing the dishes, AirPods can also come into contact with liquid (in the form of sweat) while you run. This is a common problem, so don’t freak out and take immediate actions that might further damage your AirPods. For example, putting your cellphone in a bag of rice might save it after it was dropped in water, but putting AirPods in rice could cause rice dust to get stuck in them.
Step 1: Dry your AirPods with a soft cloth and let them stay out in the open for several hours. AirPods are durable little earbuds, and they should work again after they’re thoroughly dried.
Step 2: If the AirPod still doesn’t work, it may be time to service or replace it.
AirPod verifcation error
With the latest updates, you may get a message when pairing new AirPods that says, "These headphones could not be verified as genuine AirPods and may not behave as expected." That means that your Apple device detected that something was wrong with the AirPods connection, which makes it likely that the AirPods are counterfeit. This option was added in iOS 16, so it's a relatively new feature.
You can ignore the warning and continue using the AirPods — Apple is not blocking them. But counterfeit products come with plenty of risks and aren't likely to last as long as an authentic pair of AirPods.
AirPods Pro keep pausing
If you keep encountering issues where your music (or podcast or whatever you're listening to) keeps pausing with your AirPods Pro (or AirPods Pro 2) and no other AirPods, there are a number of possible things you'll want to fix.
Step 1: If the in-ear sensors are dirty (such as being covered by earwax) this can mess things up. Gently clean them.
Step 2: Should that not work, check your firmware version following the steps outline earlier in the article.
Step 3: If you have long hair, braids, or some specialized headgear, you might be accidentally double-tapping your AirPods as you move. This is set to automatically pause your AirPods. You can turn this setting off when you customize your AirPods Pro 2 touch controls.
Step 4: Lastly, check on the Bluetooth connection with your phone or other device you have your AirPods Pro connected to. If you walk too far from the connected device, the Bluetooth connection could fail, causing pausing.
A Genius solution
No one likes to step aboard the customer service train, but if you have an issue with your AirPods that isn’t listed above, or if they’re not working at all, your best bet is to contact Apple Support or head to the nearest Apple Store. Thankfully if one stops working or is lost, then you can buy a single replacement instead of a pair.
Looking for something similar to the AirPods but not quite as expensive? You should head over to our list of the best budget headphones to check out some more affordable alternatives.
