Apple’s iOS mobile phone operating system has always offered plenty of flexible ways to organize apps so you can easily access the ones you use most often, as well keep those you like — but use only occasionally — within easy reach. With the release of iOS 14, Apple debuted a new App Library that provides new ways to organize your app icons. We start off with new features exclusively for iOS 14, but even if you don’t feel like upgrading just yet, you can still benefit from iOS 13’s advanced, easy-to-use interface.
How to use the App Library in iOS 14
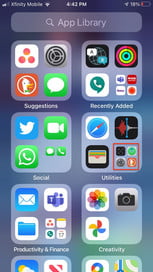
With iOS 14, we were introduced to the App Library, a space that appears after you swipe past the last page of your home screen. It automatically organizes all your apps into open boxes on a single, scrollable page. With the App Library, almost everything is visible at a glance, letting you access all the apps on your phone from this page without having to swipe through all your app pages. Instead, your apps come prearranged in folders, like Suggestions for apps that Siri has determined you will most likely want based on time of day, location, and other on-device algorithmic factors that may change over time. Category boxes are not assigned to a fixed location, but switch positions based on the apps you are currently using most often.
Other folders could include Recently Added, Social, Utilities, Productivity & Finance, Creativity, Information & Reading, Travel, Entertainment, Shopping & Food Health & Fitness, and other categories tailored to the specific apps you have on your phone. Large and small icon groupings show as many apps as possible.
Step 1: Tap on the large icon to launch that app.
Step 2: Tap on the small four-icon group, and it opens the whole box for you to choose which app you want to launch.
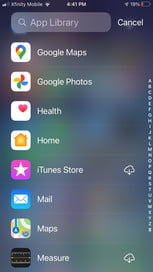
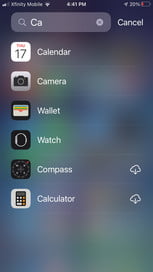
Step 3: The App Library also has a search feature, so if you don’t spot your app immediately, you can search for it by pulling down on the screen. The App Library lets you remove apps and whole app pages to declutter your home screen, so you can cut down on the amount of tapping and swiping when looking for the app you want.
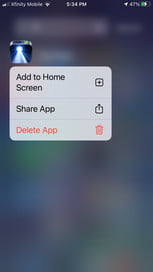
Step 4: Conversely, you can add any app from the App Library to a page or the home screen, if they are not already present.
Step 5: Tap and hold until you see the menu.
Step 6: Tap Add to Home Screen.
Step 7: To add apps to the App Library, tap and hold.
Step 8: Tap Move to App Library.
When you add an app to the App Library, Apple places it in the proper box, unlike in iOS 13, where you name your own folders.
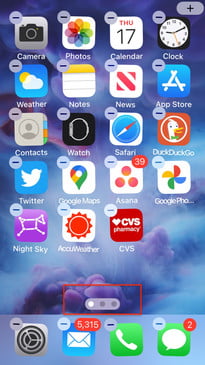
Step 9: If you’re really on a decluttering rampage, you can remove entire pages of apps from the home screen to consolidate all apps within the App Library. Tap and hold on any page of your home screen so the apps wiggle.
Step 10: Tap on the dotted page indicator at the bottom of the screen.
Step 11: This reveals an Edit Pages screen where you can choose an entire page instead of having to select individual app icons.
Any pages you deselect will disappear, but the apps will remain in your App Library. And don’t worry, you can easily restore those full pages by pressing the page indicator again and reselecting any pages you removed.
You don’t have to use App Library at all, of course. If you had your own folder-based system from iOS 13, and it’s working for you, there’s no need to change anything.
How to download apps directly to the App Library
Downloading apps from the App Store is one of the best parts about having an iPhone. When you download apps in iOS 14, they still land on the home screen — unless you would rather they bypass the home screen and go straight to the App Library.
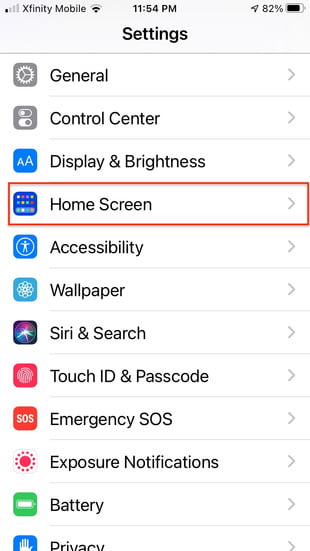
Step 1: In Settings, tap Home Screen.
Step 2: Check that you want the new app to appear in the App Library and the home screen, or only the App Library.
Step 3: You can also choose to show notification badges on App Library icons. App icons always show up in the App Library, regardless.
How to use folders
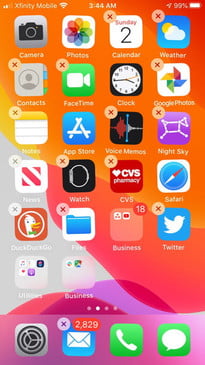
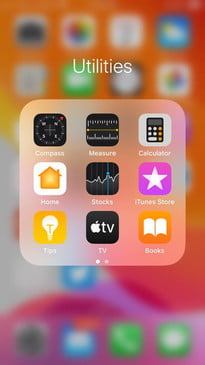
Folders are one of the easiest and most effective ways to clear clutter from your iPhone screen, and they work similarly in iOS 13 and iOS 14. To put your apps in edit mode:
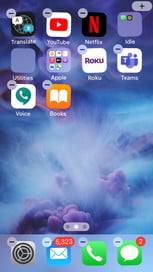
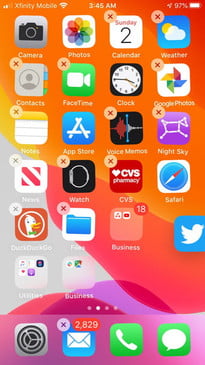
Step 1: Tap on one icon and wait until all the icons wiggle and show a little X at the top left of each.
Step 2: With your finger, you can move any icon around the screen. On iPhone X and later, tap Done. On iPhone 8 and earlier, press the Home button to save the new location.
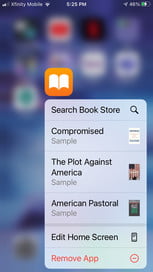
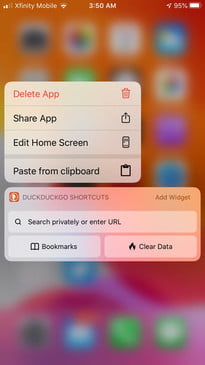
Step 3: If your phone supports 3D or Haptic Touch, you can tap and hold until you see the submenu.
Step 4: Choose Edit Home Screen to move the app around or Delete App to get rid of it.
Step 5: In iOS 14, if you hold that tap a fraction of a second longer, the icon wiggle begins automatically.
Step 6: One way to move apps into folders is to place one on top of the other, which automatically creates a new folder holding the two apps.
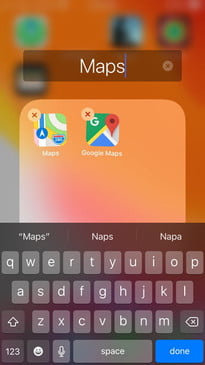
Step 7: Tap and use the keyboard to give the new folder a name that will help you identify all its resident icons and apps. Name the folder something appropriate and helpful so you can easily figure out its contents — or use the Emoji keyboard for a pictorial representation. You may want folders with apps for Photography, Drawing, Fitness, or Games — one-word or emoji descriptions work well for single app categories.
Step 8: Once you have a folder set up, you can drag more apps into it. Folders can contain multiple screens. If your app collection is out of control, you may want to tackle this project in increments by sorting through single categories of apps in sequence.
How to delete and re-download apps
Deleting unneeded apps is always a good solution. If you have hundreds of apps, there are bound to be many you rarely or never use, so get rid of them. Some may even be running operations in the background that drain your battery.
Step 1: To delete an iPhone app, simply tap and hold on the app icon until they all start wiggling.
Step 2: Tap the X at the top left.
Step 3: Tap Delete
For iOS 14, Apple has replaced the X with a Minus sign (-) at the top left, but it’s the same procedure.
Step 4: If you think you might use the app again in the future and don’t want to delete associated data, then go to Settings > General > iPhone Storage and pick the app in question, then tap Offload App instead of Delete App.
Step 5: If you ever need to use that app again, you can re-download it from the App Store whenever you want. Apps you have previously downloaded or purchased may have Get or a cloud icon next to them in the App Store for downloading. You can view your entire purchasing history to re-download any app you have used on your device at any time.
Step 6: Go to Settings > User Name > iTunes and App Store > Apple ID > View Apple ID > Purchase History. You may have to type in your Apple ID or password. There you will see all the apps you have ever downloaded in chronological order, whether they were paid or free.
Step 7: Tap on Date Range, and you can find all the apps you used by year and re-download any ones you have deleted.
In iOS 14, this works a little differently. Tap Settings > Media & Purchases > Purchase History to get this information.
How to organize apps on home screens and the dock
Even after you’ve sorted all your apps into handy folders, you could still end up with several screens full of apps. The new iOS App Library in iOS 14 can quickly solve that problem, as described above, but you can still choose to stick with the old folder arrangement to organize folders in a convenient way. On the front screen, you may want to have your most frequently accessed apps, or perhaps the default apps that Apple includes. Alternately, you can just dedicate individual screens or parts of screens to specific app categories. The App Library in iOS 14 can do this for you, but you may want more discretion in how to name your folders and what goes inside them.
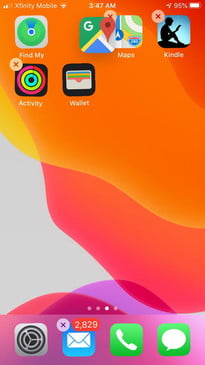
Step 1: You can move icons to various positions on the same screen, or move them to a different screen by dragging the icon to the edge so that it moves automatically. When you’re moving apps around on the screen, you don’t have to do one at a time.
Step 2: You can tap and hold an icon until it wiggles.
Step 3: Start dragging it.
Step 4: Once you start moving it around, you can tap other apps with another finger to move them all to another screen or folder.
Let’s not forget about the dock at the bottom of the phone. Apple places certain apps it thinks most people will always use in the most accessible place, but you can sub out the apps that reside in the dock for any apps you prefer.
It’s fairly simple to change between the various app pages. The page will display a bright dot in the dotted page indicator located above the dock. This dot indicates the specific page you’re currently viewing and enables you to switch from page to page or build new ones.
Step 5: If you notice dots sitting next to the bright dot, you can drag an app to the screen’s right side to relocate it to the next page or swipe left to see that page’s apps.
Step 6: If there are no dots displayed by the bright dot, you can simply create a new page when you drag an app to the right.
It’s best to leave some blank space in your screen’s bottom row because it allows you the opportunity to rearrange your apps without disrupting your previously organized layout. It also gives you extra room to experiment with new apps that you may decide to delete later. Overall, it also creates a cleaner look.
How to search for apps
Hunting for particular apps enables you to find them quicker.
Step 1: To begin a search, drag down from the center of your screen. You can decide to search for either a particular app’s name or a generic category. For instance, if you type in “video,” multiple apps may appear, including the Camera app and supplementary video apps that use the developers’ exact keywords. This can make locating an app more of a pain-free process because users don’t have to memorize every single one of their apps’ names to find them immediately.
Step 2: Search is convenient if you order your apps by color or by name, and iOS 14 lets you swiftly search the App Library, as we just explained.
Step 3: If you pull down on your page, iOS 14 will lead you to Siri Suggestions or let you enter a search term.
How to set default app layout
You can always restore your iPhone to its default settings and application arrangement.
Step 1: To do this, click Settings > General > Reset > Reset Home Screen Layout > Reset Home Screen.
Step 2: This will give you a clean slate to work with. You’ll also notice any specific apps you installed later on. The controls for iOS 13 and iOS 14 are identical.
