Adobe Photoshop’s artificial intelligence can now handle one of the most time-consuming manual editing tasks: Creating a mask around hair. In a major update across its entire photo and video ecosystem, Adobe announced a bevy of new features, including smarter selections in Photoshop, a new local hue tool in Lightroom, and a Lightroom-esque overhaul for Adobe Camera RAW.

Photoshop’s Select Subject tool isn’t new, but today’s update will make it much more useful to anyone working with photos of people. The tool uses A.I. to automatically select and mask the subject of the photograph, but previous implementations fell short when it came to complex selections — like hair. That’s changing, Adobe says, with an update to the algorithm that allows Select Subject to first recognize what that subject is and refine its selection based on that context. When a person is detected, additional algorithms are used specifically to mask out the subject’s hair.

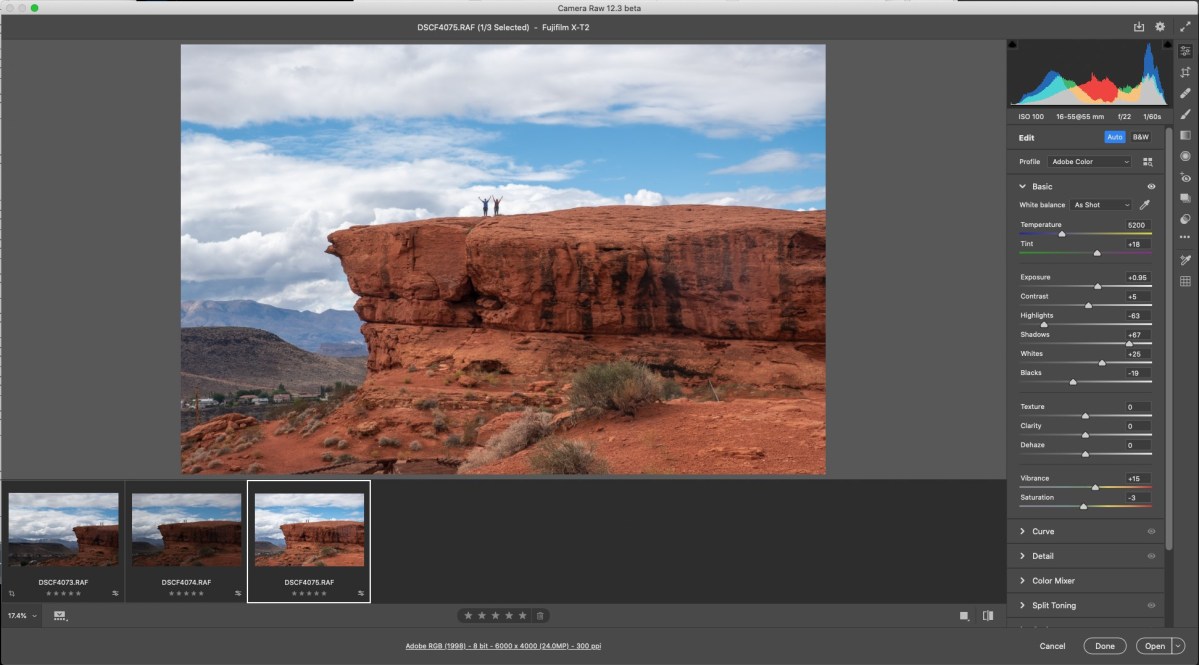
Adobe has also given Camera RAW a major interface makeover. The longstanding but clunky user interface feels much more like Lightroom. The same controls are there, Adobe says, but now organized in a right-hand toolbar. The redesign also leaves more screen real estate for the image itself.

Photoshop also gains the ability to rotate patterns, to auto-activate Adobe fonts, and to use Adobe Capture to pull colors and patterns from an image as a Photoshop plug-in instead of a mobile app.
Photoshop for iPad will also now easily be able to open photos from Lightroom with a new “send to Lightroom” button. The option brings a Desktop-like ability to move from Lightroom to Photoshop and back again to the iPad version.
New Lightroom features
Lightroom also gains a long list of features, starting with a new hue tool available in both Lightroom CC and Lightroom Classic (as well as Adobe Camera RAW). The hue adjustment — which changes one color to another — is now an option in all local editing tools, including the brush, graduated filter, and radial filter. Adobe says that the tool can be used to perfect skin tone without affecting the rest of the image, something that previously would have required opening the photo in Photoshop.
Photographers can also get a jump-start on editing with RAW defaults, which come to Lightroom CC for the first time and have been expanded for Lightroom Classic. RAW defaults determine how Lightroom initially processes a RAW file on import. There are three basic choices: Adobe Default, Camera Settings, and Edit or Develop Preset. Camera Settings will edit the RAW to match the look of an in-camera JPEG as closely as possible, while Edit/Develop Preset will automatically apply a selected preset — this lets the photographer add any Lightroom adjustment on import, from white balance to sharpening, if first saved as a custom preset.
Lightroom Classic and Adobe Camera RAW take things a step further, allowing photographers to set custom defaults for different cameras based on make, model, or even serial number. Plus, new ISO adaptive presets allowing photographers to automatically apply more or less noise reduction based on the ISO setting.
Lightroom CC is also finally receiving a much-requested feature: versions. Photographers who want to edit a photo in multiple ways, perhaps to save it for different aspect ratios or to have both color and black-and-white options available, previously had to duplicate the file within Lightroom. A version, instead, is merely a virtual copy, allowing the same file to be edited and displayed in multiple ways. Versions also sync with Lightroom mobile.
Adobe also updated its video editing apps. Premiere Pro gained the ability to import stock audio without leaving the app, while Premiere Rush inherited the auto reframe tool already available in Pro. Later this year, it will also gain a pan and zoom tool for adding motion to still photos.


