With the addition of Apple Music and updates to MacOS, Apple has been busy changing how users listen to music and buy new albums — and that’s caused a bit of confusion among those used to the old iTunes and the previous iTunes Stores. Even more recent changes have made it harder to find the iTunes Store in the Apple Music app, which is a sure disappointment to anyone hoping to pick up their favorite band’s new tracks.
Don’t worry! The iTunes Store is easy to find and easy to get back if it looks like you suddenly lost it. Here’s what to do.
Step 1: Open the Apple Music app
Start by accessing the Apple Music app. You can find it in the MacOS Dock after login or locate it in your Applications folder (apps there are arranged in alphabetical order).
If this is your first time using the Apple Music app, you will probably have to sign in and let it access your music library from iTunes before you can start using the iTunes Store. Note that signing in does not mean you are signing up for the Apple Music service, which has the same name as the app but is a separate subscription service (this option is found under the Account section in the Apple Music app.).
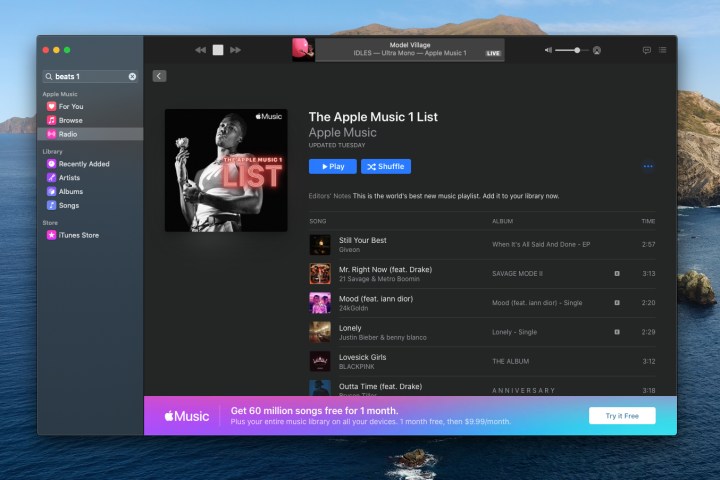
Step 2: Search specific music on the iTunes Store

Once you are in Apple Music and ready to go, look at the top of the left-side menu for the Apple Music search box. Search for the artist, album, or genre you’d like to look at in the iTunes Store.
Now the search results page will come up. Look to the upper-right corner of the search results window, and you will see a series of options that shows where the search is pulling results from. This is typically set by default to the iTunes Store, but if not, you can select iTunes Store to search there.
This is great for searching for specific music that you want to buy but not suited for generally browsing the iTunes Store. For that, you need to go to the Store directly, which brings us to the next step.
Step 3: Enable iTunes in Preferences if necessary

To visit the iTunes Store directly, look again to the left-side menu on Apple Music and look for a section called Store, under which should be the iTunes Store. Simply select it to head on over!
That’s very easy, but as many users have found, the iTunes Store option doesn’t always show up in Apple Music, especially after some of the MacOS Big Sur updates went into effect. The good news is that the iTunes Store wasn’t removed, just hidden, and you can make it re-appear with a few settings changes.
If the Store is missing, make sure that the Apple Music app is still open, then look to the upper-left corner of your Mac screen to see the Menu. One of the menu options should be Music. Select this, and in the dropdown menu that follows, choose Preferences.
Make sure Preferences is on the General tab, then look for the section called Show. Here, you can select several things to show up in Apple Music. The top option should be iTunes Store, so make sure it is checked, and then select OK.
Step 4: Shop iTunes and purchase

Give the Apple Music app a quick reboot and take another look. The Store section should now be present, with the iTunes Store right beneath. You now have two full-fledged options to use the iTunes Store: Either make specific searches in the Apple Music search box to find a particular song or artist or select the iTunes Store to visit its home page and browse around the latest drops. Choose which option works best for you until you find something you would like to purchase!
Now that you’ve found iTunes again, you may also be interested in taking a look at our collection of additional Mac tips and tricks.


