How to easily automate smart lights

The whole point of getting smart lights is so they can activate on their own without you needing to step in. Every smart light comes with its own native application that includes basic automations, like setting a schedule, or turning them off when you leave the house. We’re going to run through some of the ways you can activate these automations with the most popular smart light platforms available.

How to set a light schedule with Philips Hue

Philips Hue four pack of smart bulbs with hub.
Image used with permission by copyright holder

Philips Hue is one of the most popular smart lights available, and it has an entire menu within its app for automations. The easiest way to get started with them is to use one of the prebuilt automations (aka recipes). These include recipes for common use cases like waking up with light, going to sleep, and coming home. Here’s how to build an entirely customized schedule.

  1. Tap the Automations tab at the bottom of the Hue app.
  2. Tap Create automation.
  3. Scroll down and tap Custom.
  4. Select a start time.
  5. Select an end time.
  6. Select dates to activate, and tap Next.
  7. Select which rooms for the schedule to activate in, and tap Next.
  8. Select which color recipe should activate, and tap Next.
  9. Type a name for the automation, and tap Done.
  10. Hue can use your location to determine times for sunrise and sunset. This way the light schedule remains dynamic, and can kick in at relative times, like 15 minutes before sunset.
Recommended Videos

The Philips Labs has a wide selection of fancier automations that are worth digging into if you want to do something more complicated.

How to set a light schedule with Lifx

Smart home devices LIFX Wi-Fi Smart LED Light Bulb.
Image used with permission by copyright holder

LIFX has a similar menu within its app. Here’s how to use it:

  1. Tap the + icon in the bottom-right corner of the LIFX app.
  2. Tap New Schedule.
  3. Pick either New Schedule (user-set times) or Day & Dusk (times set by sunup and sundown).
  4. Select which lights or groups to activate.
  5. Select when they’re to activate.
  6. Select how frequently the schedule repeats, then tap Save.

You can review the entire schedule by tapping the calendar icon in the top-right corner of the app. LIFX and most other smart bulbs plug into If This Then That (IFTTT), which can connect otherwise independent smart home systems. Be sure to dig into what’s possible with IFTTT to set up more advanced triggers and actions.

How to set a light schedule with Wyze

Wyze Color Bulb and Smart Bulbs in a 4 Pack.
Image used with permission by copyright holder

Wyze is a little trickier to set up since its app also houses functions for a wide range of products.

  1. Tap the menu button in the top-right corner of the app.
  2. Tap Add/Edit Rules.
  3. Tap the + button in the top-right corner of the app.
  4. Select Schedule from the list.
  5. Select the bulb for your Device action.
  6. Select the brightness and color for when the bulb turns on, and tap Save.
  7. Select when you’d like to turn the lights off, if at all, and tap Save.
  8. Set which days the automation happens.
  9. Tap Save to complete.

This larger ecosystem can interact seamlessly with one another, so, for example, a light can turn on when the security camera senses motion. Wyze also has a clever “Vacation” mode which turns on random lights while you’re away to give the impression that someone’s home. If you’re looking for more light recipe ideas, these are some of our favorites.

Setting your home lights to a schedule is just the tip of the iceberg when it comes to what you can do. Here are a few other ways in which you can automate your lights in surprising ways.

Simon Sage
Former Digital Trends Contributor
Simon Sage is a green tech contributor at Digital Trends. He looks at all sorts of devices that can help reduce emissions…
How to control the Nanoleaf Matter Outdoor String Lights
The Nanoleaf Matter Outdoor String Lights with a smartphone.

Nanoleaf smart lights are always highly customizable, but that's especially true of the Matter Outdoor String Lights. These unique lights can be controlled in a variety of ways – and if you're new to the world of smart lights, you might be missing out on cool functionality by not knowng them all. From using the built-in controller to using the Nanoleaf mobile app and smart home platforms, here's a look at all the ways you can control your Nanoleaf Matter Outdoor String Lights.
Control the Matter Outdoor String Lights with the built-in controller
The most obvious way to control your Nanoleaf Outdoor String Lights is with the included controller. You'll find a variety of buttons here that let you quickly access a variety of features without the need for a mobile app. Here's a look at what all the buttons do:

Minus Sign: Single press to decrease your light's brightness.
Plus Sign: Single press to increase your light's brightness.
Right Arrow: Single press to change to the next preset Scene. Double press to change through colors.
Power Button: Hold for one second to turn the lights on or off. Hold for 10 seconds to reset the device.

Read more
The best smart light switch for Alexa, Google Home, and HomeKit
The Kasa app being used to control the Kasa Smart Dimmer Switch.

One of the most satisfying smart home devices to see in action are smart lights. The thrill of dimming bulbs and changing colors with an app or voice commands has yet to wear off, and it’s one of the easiest products to set up, schedule, and troubleshoot. But what if you want to add smart capabilities to an existing light fixture? If you’re dealing with a ceiling fan, sconce, or some other pre-wired bulbs, you’ll just need to invest in a smart light switch.

These web-connected products come in multiple gang box sizes, and are sold by many different companies. Not all switches are created equal though, and we wanted to round up the best options for those with Alexa, Google Home, and HomeKit ecosystems. So we’ve done just that!

Read more
How to save Ring Doorbell video without a subscription
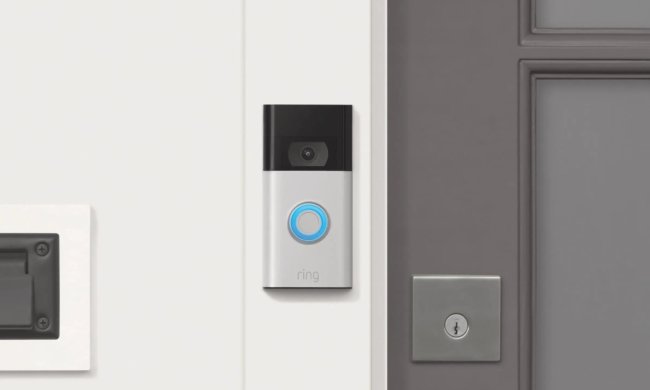
Ring Doorbell mounted outside a front door.

Take a walk through any neighborhood, and you're bound to see a few Ring video doorbells installed next to front doors. The brand is increasingly popular, thanks to an ever-growing product lineup that makes it easy to find a device for all budgets and security needs. But one of the peskier features of Ring is the need for a Ring Protect Plan -- a monthly subscription service that unlocks the majority of the camera's most useful features.

One such feature locked behind a Ring Protect Plan membership is the ability to save Ring doorbell videos. Without a plan, you'll really only be allowed to view a live feed of your video doorbell. The plans are pretty generous, with the Basic plan costing $5 per month and offering video history for up to 180 days, making it a worthwhile investment for homes worried about their security.

Read more