Everyone has a different method for keeping items organized. What’s nice about MacOS is that Apple gives you a handy, built-in feature that can help you organize your files and folders called "tags." Tags are colored and similar to flags you use in an email client to make important messages stand out.
Knowing how to use tags can make a world of difference to your organizational skills. You can add tags to items that make them easy to spot. Plus, you can edit the default tags to give them more meaning, remove a tag from an item you no longer need, and search for an item based on its attached tag.
If you’re new to using tags on Mac to organize your files, take a look at how to make effective use of this helpful feature.

Add a tag to a file or folder
You can add a tag to any type of file, like a text file, ZIP file, or image. You can add tags to folders, too.
Keep in mind that you can add more than one tag to the same file or folder. This allows you to tag that item for multiple purposes. For example, maybe you use a blue tag for work items in progress and a green tag for financial documents. You can add both tags to a financial document in progress for your company.
Step 1: Open Finder and select the file or folder you want to tag.
Step 2: Go to File in the menu bar.
Step 3: Choose a tag color in the Tags section.
Step 4: Like many other tasks on MacOS, there’s more than one way to tag an item. You can also do one of the following:
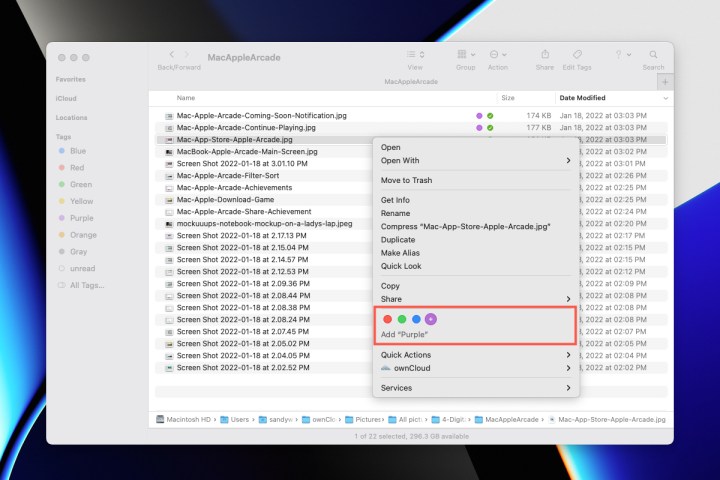
- Right-click the file or folder and choose the color to add below Tags.
- Select Add tags in the Finder toolbar, select the color, and press Return.
- Select Action in the Finder toolbar and choose the color to add below Tags.
- Drag a file or folder to the color in the Tags section of the Finder sidebar.
- You also have the option to tag an item when you save it. At the top of the Save dialog box, pick a color in the Tags field directly below the Save as field.
Note: With all of the above ways to add tags, you can also select multiple files or folders to tag them all at once.

Remove a tag from a file or folder
After you add a tag to an item, you might decide to remove it. Maybe the tag was temporarily attached to the item or simply no longer applies.
Step 1: Open Finder and select the file or folder you want to tag.
Step 2: Go to File in the menu bar.
Step 3: Choose Remove for the current tag color in the Tags section.
Step 4: As with adding a tag, you have a few more ways to remove one.
- Right-click the file or folder, select the tag color, and pick Remove.
- Select Add tags from the Finder toolbar, remove the color at the top, and press Return.
- Select Action in the Finder toolbar, select the tag color, and pick Remove.
If you have more than one tag attached to an item, you can simply remove the one you want if you don’t want to remove both.

Edit the tags on Mac
By default, MacOS provides you with tags in basic colors, and the tags are named with that color. So, your blue tags are named Blue, red tags are named Red, and so on. You can change the color or the name of a tag.
Step 1: Open Finder and expand the Tags section in the sidebar.
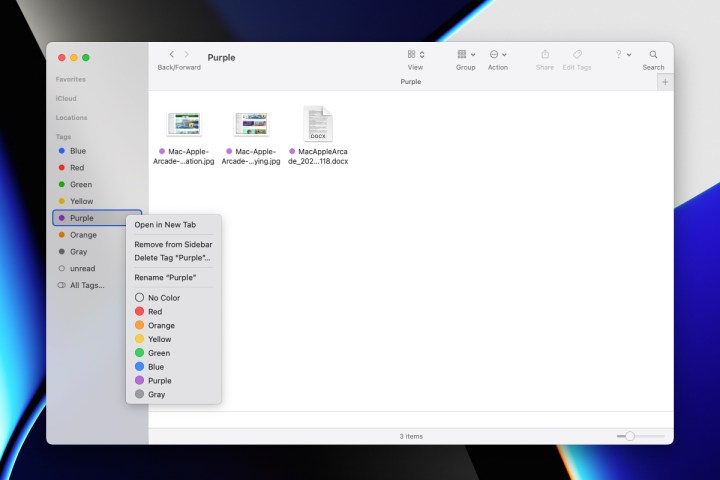
Step 2: Right-click the tag you want to edit.
Step 3: Choose a new color for the tag.
You can also pick Rename to give the tag a new name or Delete to remove the tag.

Manage the tags on Mac
There is another location on MacOS where you can make edits to the tags. In addition, you can add a new tag, delete one, and arrange your favorites for easy access.
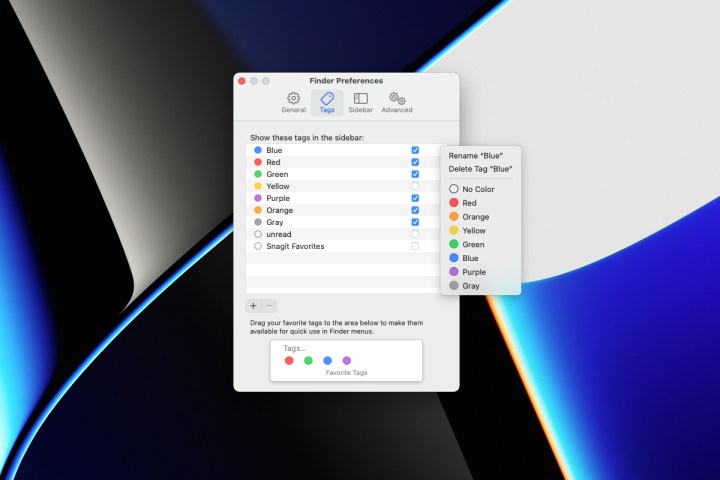
Step 1: With Finder active, select Finder > Preferences from the menu bar.
Step 2: When the small window appears, pick the Tags tab at the top.
Step 3: You’ll see a list of all current tags. You can then take one of the actions below.
- Rename a tag: Select the tag’s name two times (not a double-click) or right-click and choose Rename.
- Delete a tag: Select the tag and pick the Minus sign at the bottom of the list.
- Add a tag: Select the Plus sign at the bottom of the list and give the new tag a name.
- Change a tag’s color: Right-click the tag and choose the new color.
- Rearrange tags: Drag a tag to a different position in the list and release when you see the bold line.
- Show or hide tags: Use the checkboxes to the right of the tags for those you want to show in the Finder sidebar.
The Favorite tags area in the window lets you select those you use most often. These are the tags that display in the shortcut menu when you right-click or hold Control and select an item.
- Add a favorite tag: Drag a tag from the list to the Favorite Tags section to add it.
- Remove a favorite tag: Drag a tag out of the Favorite Tags section to remove it.
- Rearrange favorite tags: Drag a tag to its new position in the Favorite Tags section.

View tagged items
When you add a tag to a file or folder, you’ll see this tag next to the file name on your desktop and in Finder. You can also group items in Finder by tag or add a tag column if you use many tags often.
- To group by tag, choose Group in the Finder toolbar and pick Tags.
- To add a Tags column, right-click the column headers in Finder and select Tags to add the field.

Search for tagged items
One of the benefits of organizing items with tags on a Mac is the ability to find items quickly. The fastest way to see all items with a specific tag is to select that tag in the Finder sidebar. No matter where that item resides on your Mac, you’ll see it on the right.
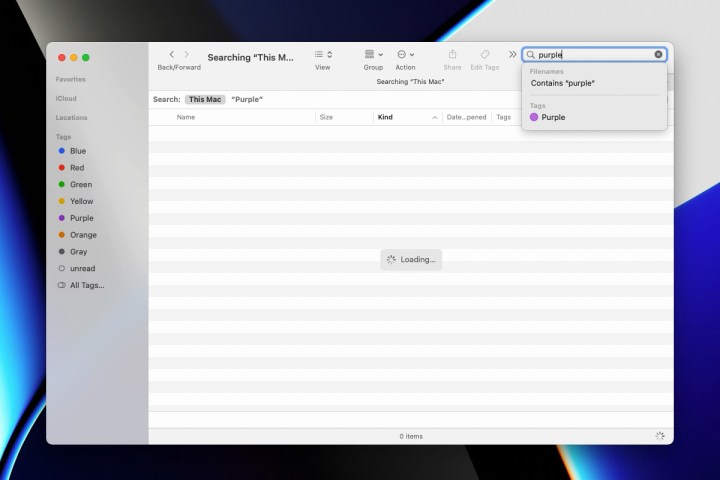
You can also use the Search bar in Finder to see items with a particular flag. Type the name of the tag and you should see an option in the suggestions containing the same named tag.
As well as using Stacks to organize files and folders on Mac, consider using another tool that’s built right in — tags!


