The Windows clipboard history is a useful tool for looking back on something you copied and pasted not too long ago. Operating systems like Windows 11 use the clipboard to help store text and images that you have copied in the past, and the clipboard history stores everything you've been working with recently. The clipboard can hold up to 25 of your most recent copies in its history, so here's how to use the Windows clipboard history.
How to use clipboard history on Windows
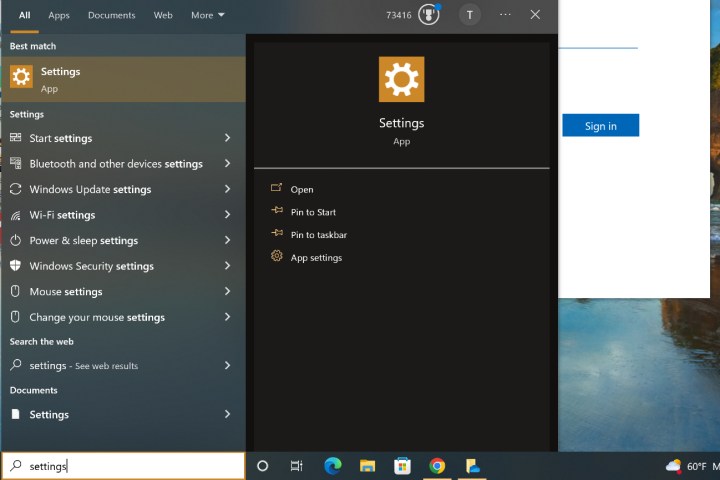
Step 1: Using the search box in your Windows taskbar, search for “settings.” When the app appears in the results window, select it.

Step 2: Select System to continue.

Step 3: In the left-side menu, select Clipboard to show all the clipboard settings.

Step 4: Find the option to enable clipboard history and toggle it on.
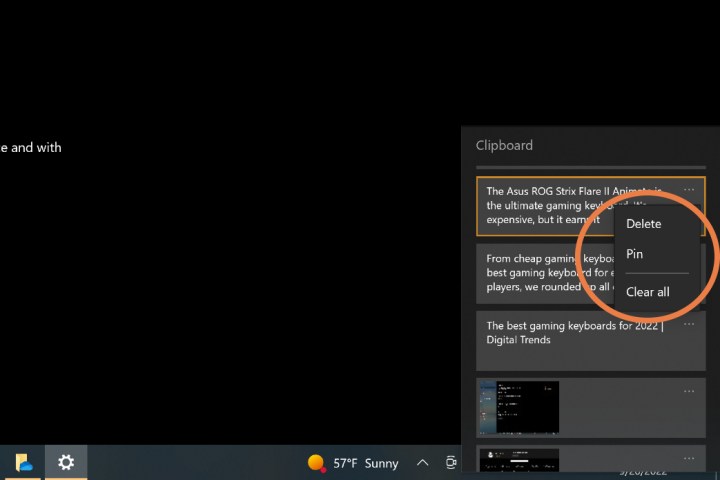
Step 5: Now, whenever you are working, you can press the Windows + V keyboard shortcut. This will bring up a side window that will show you the last copies that you have made, in chronological order. Find the copy that you want, and select it to paste that content into whatever you are working on at the time.

Step 6: When selecting copied content, you’ll see options to “pin” individual copied content (again, this will look a bit different depending on your version of Windows 11, but the menu is there either way). Pinning a copied bit of content will save it in your clipboard history for the long term. Then, even when you choose to clear your clipboard, the pinned content will stay, ready to be pasted whenever you need.
This important Windows shortcut is useful if there’s a certain template or similar block of information that you end up pasting very frequently. Pin that content so you’ll always have access to it when you need it.

Step 7: The clipboard settings section also has a few other options you may want to consider to make your work easier. You’ll notice there's also a Share or Sync option you can use (depending on your version of Windows). This allows you to set up pasting from another device to the Windows computer you are using. In other words, you can copy something on your Surface laptop, then move to a desktop PC and paste it into a project you are working on. You just need to make sure that you are signed into the same Microsoft account. Note that if you choose the Clear all option, it will clear all content on either device.
If you want to save even more time working on Windows, you may be interested in our guide on Microsoft Word tips that can make your projects a lot easier.


