How to enable ray tracing in Minecraft for better graphics

minecraft call of duty ray tracing gamescom minecraftblocks01
Image used with permission by copyright holder

Minecraft is known for many qualities, but graphics are not typically among them. The incredibly flexible and dynamic building game chose a more simple yet pleasing art style to better serve its mechanics. That being said, while that blocky aesthetic will never go out of style, there are plenty of ways to improve the looks since it originally came out in 2011. Aside from graphics packs and shaders, the most impressive visual update you can add to Minecraft is ray tracing.

Recommended Videos

Difficulty

Moderate

Duration

30 minutes

What You Need

  • PC that can run ray tracing

  • Xbox Series X/S

  • Ray tracing-compatible resource pack

Ray tracing is one of the latest and most impressive graphical improvements video games have seen in the last few years. This system focuses on making light sources behave more realistically, which alone can make a game look years newer than it really is. Everything from shadows and reflections to world lighting just feel more real. However, it isn't something that's on by default. Whether you're playing on PC or the Xbox Series X/S, here's how you can try out ray tracing in Minecraft for yourself.
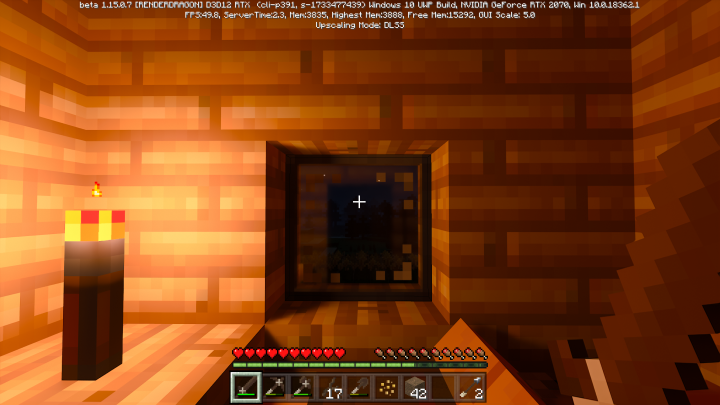
Minecraft RTX ray tracing beta
Matthew Smith / Digital Trends

How to turn on ray tracing on PC

PC is the most popular Minecraft platform and where ray tracing is most common in games since it is generally too taxing for consoles to handle. Here's how to turn it on.

Step 1: Load up your copy of Minecraft Bedrock Edition.

Step 2: If you don't have a ray tracing-enabled texture pack, open the Marketplace.

Step 3: Use the search function and type in "ray tracing."

Step 4: Download a ray tracing-enabled pack.

Step 5: Wait for the download to complete.

Step 6: Create a world using this pack.

Step 7: Return to the main menu.

Step 8: Go into Settings.

Step 9: Select Video.

Step 10: Scroll down and toggle on the Ray tracing slider.

Step 11: Load back into your world and enjoy the view!

How to use Ray Tracing with an Nvidia graphics card

If you have an Nvidia brand graphics card, turning on ray tracing is a much simpler process.

Step 1: Open the Settings section of the GeForce Experience

Step 2: Select General.

Step 3: Enable Experimental Features.

Step 4: Move to the Game tab and select the Enable Nvidia RTX option next to Minecraft.

Step 5: Launch Minecraft and enable RTX in the Video Settings.
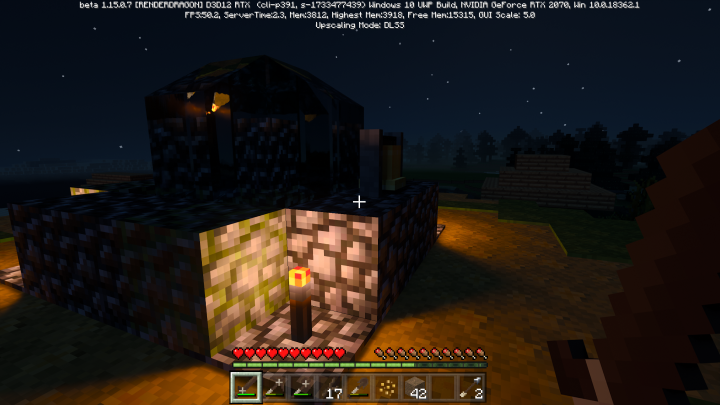
Minecraft RTX ray tracing beta
Matthew Smith / Digital Trends

How to turn on ray tracing on Xbox Series X/S

While ray tracing is technically available for Xbox Series X/S users, it is still in a preview stage, meaning you will need to do all the steps above on PC as well as the ones following to make it work.

Step 1: Host a Minecraft world on PC with ray tracing enabled.

Step 2: Download the Xbox Insider Hub app on your Xbox console.

Step 3: Sign up to be an Insider.

Step 4: Locate the Minecraft preview option under Previews.

Step 5: Select Join.

Step 6: Invite your Xbox account to your PC Minecraft world.

Step 7: Once in the world on your Xbox, open Settings.

Step 8: Select Video.

Step 9: Scroll down and toggle on Ray tracing.

Eventually, ray tracing should come to the standard Xbox versions of Minecraft, but for now, this is the only way to experience high-end lighting on your console.

Jesse Lennox
Jesse Lennox has been a writer at Digital Trends for over four years and has no plans of stopping. He covers all things…
How to unlock the secret ending in Dragon Age: The Veilguard
A dark and dreary landscape in Dragon Age: The Veilguard.

There are many, many quests and diversions to distract you from the main quest in Dragon Age: The Veilguard. All of them are rewarding in their own way, whether it be story, gear, or a Trophy, but not all will help you get the game's true ending. If you want the complete story, you will need some very specific tips on what to do and when or you will most likely miss out on in completely. Without spoiling anything, we'll make sure you know exactly what to do to get the true ending in Dragon Age: The Veilguard.

Read more
How to play Stardew Valley multiplayer on mobile
Three Stardew Valley players visiting the Night Market.

Farming with friends in Stardew Valley is one of most relaxing ways to spend your day. While the game itself doesn't have cross-platform support, you can at least still play multiplayer with friends on the same platform. Well, any platform except for mobile. Before the 1.6 update, anyone playing the mobile version only had their villagers to keep them company, but now there's a way to invite your real friends to the farm. Using a hidden cheat code, you can now access an experimental mobile version of Stardew Valley. Here's how to test it out.

Read more
How to respec in Dragon Age: The Veilguard
A character draws a bow in Dragon Age: The Veilguard.

You can spend a long time making your character in Dragon Age: The Veilguard. Between their race, appearance, background, and class, there are a lot of ways to customize the game to your liking. Once you do make your choice and get into a few battles, you will earn your first skill point and be prompted to spend it in the skill tree. That's all basic stuff for an RPG, but even seasoned veterans of the genre might get a little overwhelmed by the size of the skill tree here. It's more like a bush, and you will begin at the center and can carve any path you want toward the edges, where the specializations are. However, you will never have enough points to unlock them all. In fact, you will only be able to reach a single specialization at one time. While you could spend an hour reading and mapping the perfect upgrade path, why not just have fun and try things out and respec your points later? Here's how to reset your skill points in Dragon Age: The Veilguard.
How to respec in Dragon Age: The Veilguard

Respecing in Dragon Age: The Veilguard is easy, free, and can be done as many times as you like. When you want to refund your points after you've unlocked the skill tree and spent your first points, you have two options. The first is to simply select the individual skills you want to refund (as long as they aren't connecting two nodes) and refund them one by one. Or, you can start from a clean slate by pressing Y or Triangle on the controller to refund every single point you've spent.

Read more