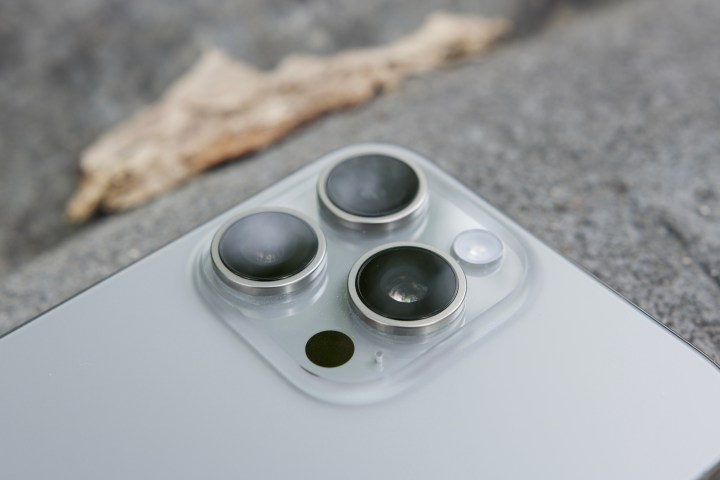
I’ve been traveling frequently this year, and an iPhone has always stayed in my pocket. I wasn’t a fan of Apple’s camera system until the iPhone 14 series, and I’ve been more mindful of a few settings and features lately.
With the iPhone 15 Pro, Apple has added more flexibility and versatility to the three-sensor system. These have changed the way I click photos – or at least how they appear at the end. I’m not a photographer and would rate myself as a beginner, so this is not a guide for professionals. It’s for beginners who can get better photos with just seconds of adjustments with a few settings.
Here are seven iPhone camera settings that you should know about to get the most out of your camera system.
Play around with Photographic Styles
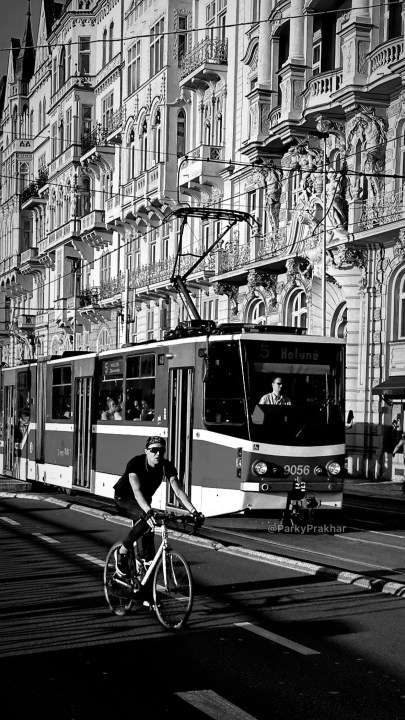
- 1. Rich Contrast makes the shadows darker for a more dramatic look
- 2. Rich Contrast helps with better contrast
For years iPhones have stuck to a specific, warm color tone, but that changed a couple of years ago. Apple now lets you choose from four styles that let you adjust the vibrancy, contrast, and overall tone of your photos.
It’s called Photographic Styles, and I started using it when I went to Kashmir recently. I noticed that the greens weren’t saturated enough in the normal mode, so I switched to the Rich Contrast style, and it made my photos appear much better. I also like the Vibrant style for its bright and vivid colors – it comes in handy when you are shooting flowers or wall art. I default to Rich Contrast for the darker shadows and better contrast when I’m shooting nature, but it’s not the best for each shot. For instance, Standard would give you a better look than Rich Contrast for darker skin tones.
As you can see from the above gallery, each Style has its own look and feel. The Standard Photographic Style is great for the most part, but sometimes I prefer Vibrant Cool when I’m on the beach to get better blues on the seawater. But if you don’t want the extra vibrancy, you can go with the Cool Photographic Style.
I recommend you messing around with these Styles to find the one you like. To configure Photographic Styles, swipe up above the shutter button and tap on the fourth icon from the left that appears like three frames one behind another. You can then swipe horizontally to choose your preferred style.
Understanding Live Photos
- 1. The main photo when clicked
- 2. Made Key Photo with Live Photos
Live Photos is a feature that lets you record 1.5 seconds before and 1.5 seconds after clicking the shutter button. You must understand if your use case requires capturing Live Photos or not.
For instance, if you are short on storage and only want to post photos on social media, it is a good idea to toggle the feature off because Live Photos can take a lot of space once they start stacking up. Most of them are twice the size of the normal photo. However, if you are someone who creates TikToks or Reels, Live Photos can be an excellent way to capture unintended candid moments. These could add flavor to your videos in a way that framed shots usually don’t.
I’m glad I captured most of my photos in Live mode on my recent trip to Vienna. It allowed me to add those clips to my first-ever travel Reel on Instagram. As you can notice from the video below, portrait shots in a Reel don’t have the same feel to them as moving clips. These short videos make a lot of difference when you’re making content on social media.
Live Photos also gives you the option to be more creative by playing around with other settings — including Loop, Bounce, and Long Exposure, or exporting it as a short video. These can add perspectives that a normal photo cannot. I mostly use it to capture frames from walking shots to get that perfect, genuine click that looks like the person isn’t posing deliberately but actually walking.
Use grid lines
- 1. Grid lines helped frame the shot better
- 2. Grid lines helped frame the shot better
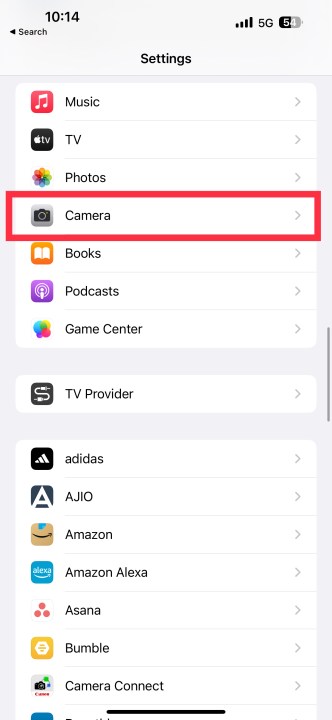
Grid lines can be an excellent way to frame compositions. I take a lot of architecture and sunset photos, and if you are like me, you’d want to turn on the grids on your camera screen. While these lines help with the rule of thirds – something I learned from my friends who are into photography, I mostly use the grid lines for three reasons.
First, these help me keep the horizon level while capturing sunsets. Second, they allow me to keep the lines straight in architectural photos. Third, I’m able to click symmetrical photos that are usually not possible without grid lines. You can turn on the feature by going to Settings > Camera > Grid > Toggle on.
Preserve Settings are key
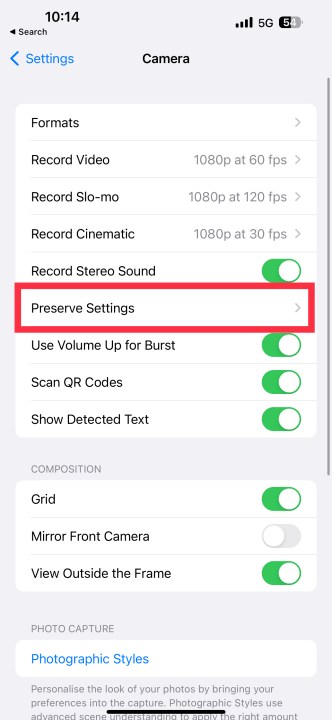
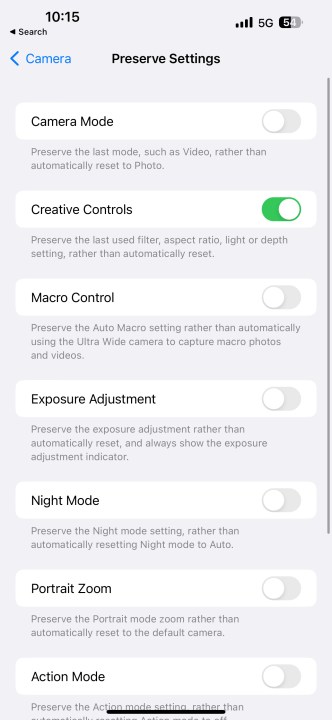
The iPhone Camera app is notorious for reverting to default settings if you don’t have the Preserve Settings option enabled. For instance, if you have chosen Rich Contrast Photography Style in the app and close it, you’ll be defaulted to the Standard style when you open the app again. But Apple allows you to save the last camera mode, Live Photos, lighting, filter, and more, so they don’t revert to default when you next open the Camera app.
This is one of the first settings I change before every vacation, especially when I need Live Photos on for short videos. After all, I don’t want to toggle on the feature every time I’m clicking a photo – the random moment will pass by the time I switch it on. You can go to Settings > Camera > Preserve Settings to toggle it on for the preferred settings.
Enable Geolocation for organizing photos
I didn’t have geolocation on before, but with the frequent travel this year, I’ve found that it was one of my best decisions to switch it on. The feature embeds your location data into the photo, and it’s perfect for all the travelers out there.
Personally, it helps me organize my photos on the basis of location, which helps me create backups of thousands of images in folders named according to locations. It helps immensely when I’m taking 1,000+ photos within a few days of travel. To enable it, go to Settings> Privacy & Security > Location Services > On Camera > While Using the App.
Adjust the Focal Length on the iPhone 15 Pro
- 1. iPhone 15 Pro 1x (24mm)
- 2. iPhone 15 Pro 1.2x (28mm)
- 3. iPhone 15 Pro 1.5x (35mm)
Apple added more focal lengths to the Camera app of the iPhone 15 Pro. With a couple of taps on 1x, you can now toggle between the standard 24mm of the main camera: 28mm (1.2x) and 35mm (1.5x). While Apple says, “It’s like having seven pro lenses in your pocket,” these aren’t optical zoom but digital crops. However, because these are outputted in 24MP, you retain most of the details that you get in 24mm (1x) shots.
You might be wondering about what’s the use case for these new focal lengths. These can be used for when a photographer needs a narrower focal length to change how they frame their photos. Moreover, with the new iPhone 15 Auto Portrait feature, the new settings give you more flexibility with portrait shots.
If you prefer one over the other, you can choose your favorite focal length out of the three on the primary camera as default. To do this, you need to Go to Settings > Camera > Main Camera > Choose the focal length (28mm or 35mm if standard is 1x) you want as default.
The Level setting is a lifesaver

You can have grid lines on the preview but still not click a straight photo. It happens to me, and I have to straighten the image in edits. However, with iOS 17, you can now switch on a Level setting that displays a horizontal line to help you capture a straight image.
When you are holding the iPhone horizontally or vertically, you get a white line in the middle of the viewfinder that rotates as you level your iPhone. It turns yellow when the device is straight. It also works with videos. This helps with the composition of your shot. The purpose is to help you take a level, straight image. For instance, when shooting architecture, you can use it to frame and match the building lines with it, so the resulting image is on-axis.
The Level setting is automatically enabled in the Camera app on the iPhones running iOS 17. But if it’s not enabled on your iPhone, you can go to Settings > Camera > Level (under the Composition section).
A few easy ways to improve your iPhone photos
These are some of the camera settings that have helped me in the recent past. You don’t need to be a professional photographer to click good-looking photos from your iPhone for your social media. Just a few toggles can help immensely and make you stand out from the crowd.
With Apple introducing more features to help you frame a shot better, it’s the best time to explore the camera settings on your iPhone.


