If there’s one thing that Adobe Photoshop is known for, it’s the photo editing tools. You can take an ordinary picture and add some pizzazz or one that’s lacking vibrancy and liven it up. You can also apply a warming filter, change color to black and white, or correct the brightness and contrast.
We’ll walk through how to make these types of edits and more for images in Photoshop.
Choose an adjustment preset
Do you have a photo that you aren’t sure how to improve? Maybe you’re not familiar enough with things like saturation or contrast to enhance the image correctly?
Photoshop offers many adjustment presets for portraits, landscapes, photo repair, and more that apply several modifications at once. What’s great about this feature is that you can see a preview before applying preset, so you can get just the right look.
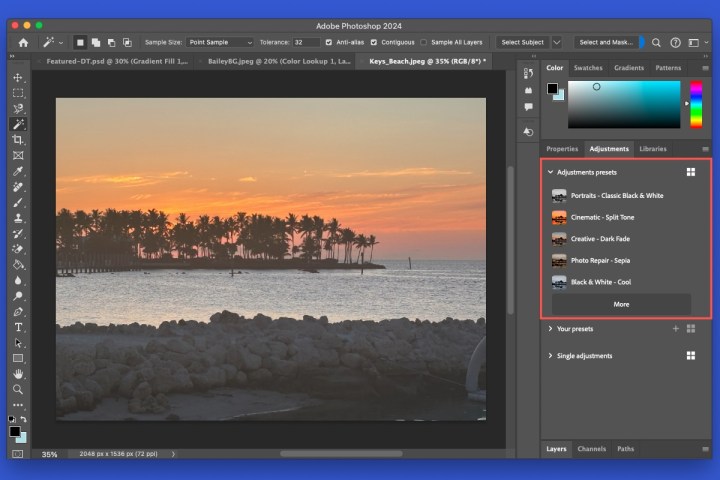
Step 1: Open the Panels on the right and select the Adjustments tab.
Step 2: Expand Adjustment presets and you’ll see a handful of options.
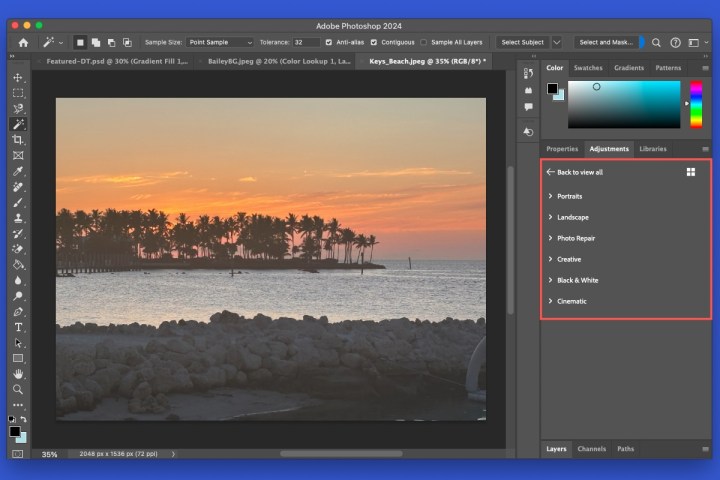
Step 3: Choose More to see all available presets. You can expand the categories to view the options.
Step 4: Hover your cursor over a preset to see the effect on your image. This allows you to preview different presets one by one.
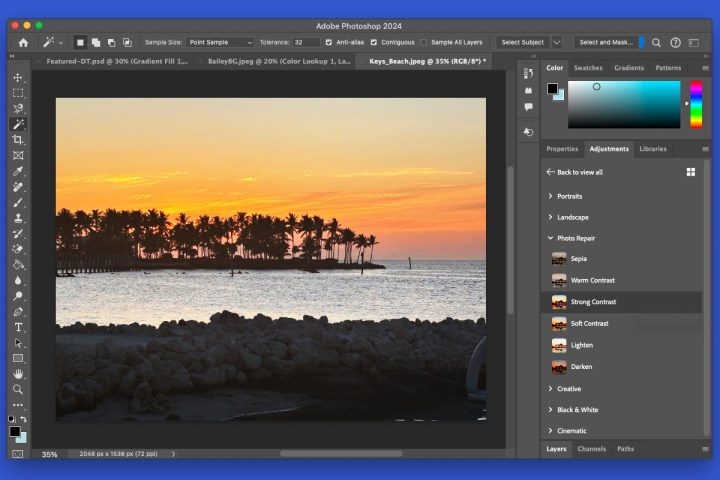
Step 5: Choose the adjustment preset you like, and it’ll apply to your photo.
If you prefer to make your adjustments individually, this gives you more control. Review the steps in the following sections to make single adjustments in Photoshop. And don’t worry, if you apply a change that you don’t like, you can undo it using the Edit menu.
Change the hue, saturation, and lightness
Hue represents color, such as blue, green, or red; saturation refers to the intensity of the color; and lightness is the amount of black or white in the color. By adjusting these three settings, you can increase or decrease color vibrancy.
Step 1: Open the Panels on the right and select the Adjustments tab.
Step 2: Expand Single adjustments and choose Hue/Saturation.

Step 3: Select a Preset to change the photo automatically. If you want to adjust all colors at once, leave the box beneath set to Master; otherwise, you can choose a color. When you choose a preset, you’ll see the Hue, Saturation, and Lightness settings update immediately.
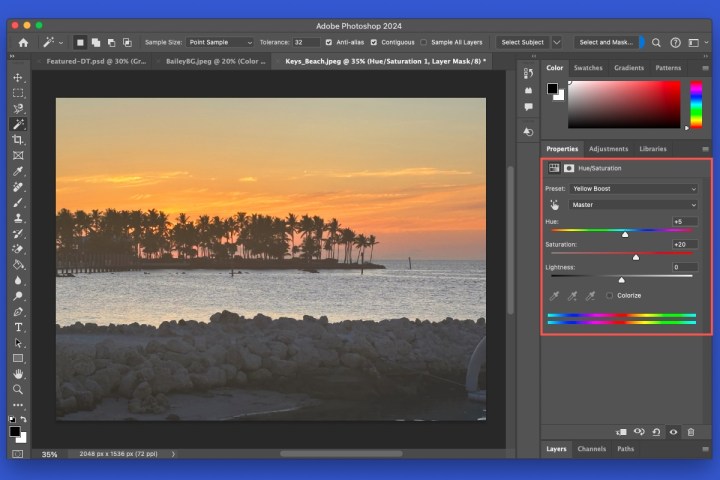
Step 4: You can also use the sliders and corresponding value boxes to adjust each setting manually, with or without a Preset.
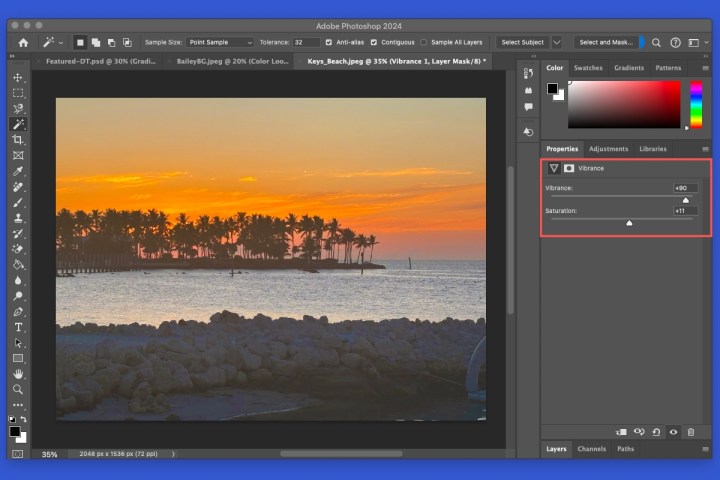
Fine-tune the vibrance
If you want to boost the dull colors in your photo, you can adjust the vibrance settings. You’ll notice a saturation adjustment within the vibrance setting as well. While vibrance is a “smart tool” that normally leaves the saturated colors untouched, you can use this additional setting to change that if you like.
Step 1: Open the Panels on the right and select the Adjustments tab.
Step 2: Expand Single adjustments and choose Vibrance.
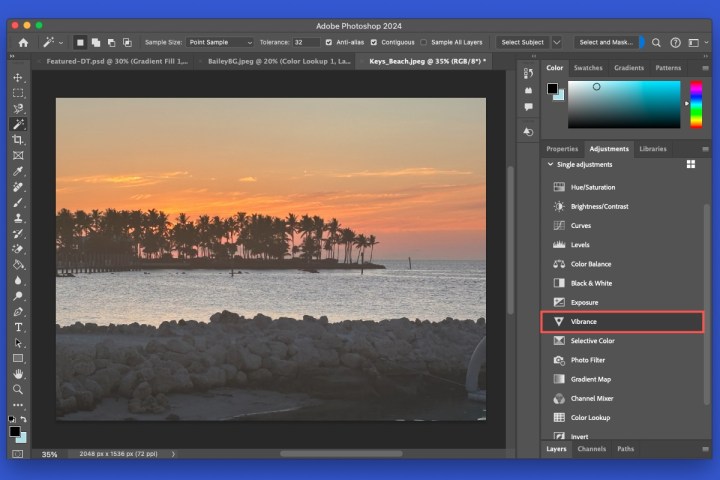
Step 3: Use the slider or value box to increase or decrease the amount of Vibrance. Optionally, do the same for the Saturation setting.
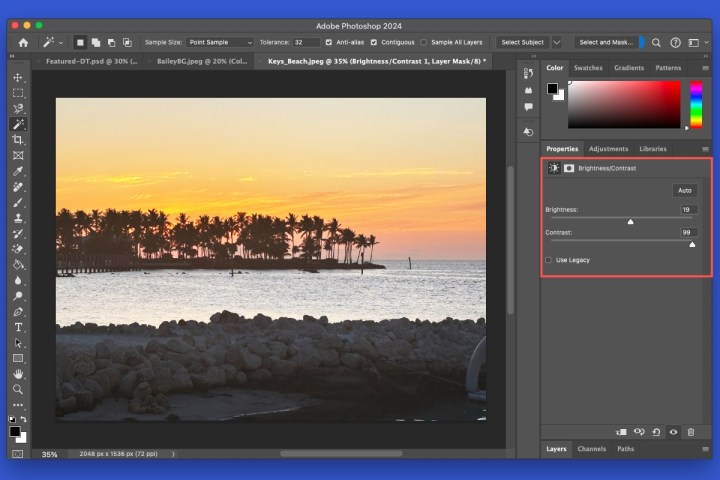
Edit the brightness and contrast
You may already be familiar with brightness and contrast in photos. If you increase the brightness, this expands the highlights, whereas if you decrease it, this expands the shadows. You can then use the contrast settings to adjust the range of the brightness.
Step 1: Open the Panels on the right and select the Adjustments tab.
Step 2: Expand Single adjustments and choose Brightness/Contrast.
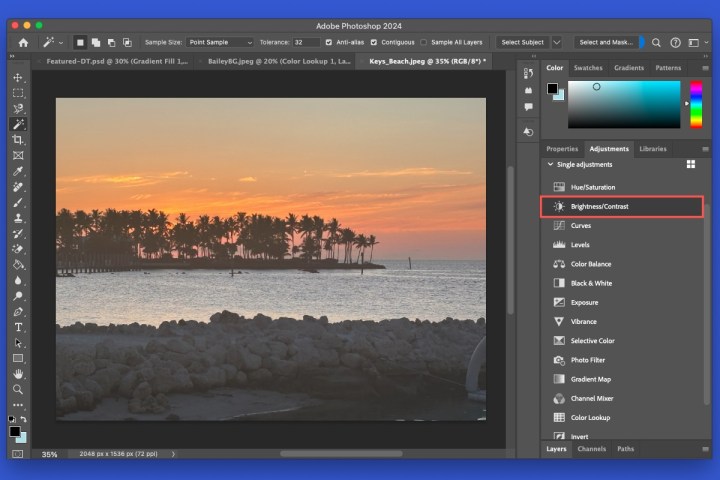
Step 3: Select Auto to allow Photoshop to smartly change both settings or use the sliders and value boxes to manually change the Brightness and Contrast.
Note: If you created this image layer with a previous Photoshop version, you’ll see Use Legacy box automatically checked.
Apply a filter
Maybe it’s not corrections you want but a different look and feel for your photo. You can review the Photoshop filters to apply a warming, cooling, or specific color effect.
Step 1: Open the Panels on the right and select the Adjustments tab.
Step 2: Expand Single adjustments and choose Photo Filter.

Step 3: Do one of the following:
Select Filter and then choose an option in the drop-down menu.
Select Color, pick a color from the palette, and then adjust the Density.
Step 4: Optionally, check the box for Preserve Luminosity to maintain the photo’s brightness.

Transform color to black and white
One more popular photo editing effect is to change a color picture to black and white. This can provide a classic or elegant appearance. With this Photoshop feature, you can go beyond basic black and white for the exact look you want.
Step 1: Open the Panels on the right and select the Adjustments tab.
Step 2: Expand Single adjustments and choose Black & White.

Step 3: Select a Preset to change the photo automatically. You can pick from the default black and white to one with maximum black or white to another for infrared.

Step 4: Optionally, you can check the box for Tint and choose a color from the palette.

Step 5: You can also adjust the colors individually if you like. Use the sliders or value boxes to increase or decrease the intensity of each shade.
Additional photo editing tools
The above is just a handful of editing tools you can use to enhance or correct your images in Photoshop. Explore the Adjustments tab for tools like Curves, Exposure, Color Balance, Invert, Posterize, and others.
For even more, take a look at our how-tos for resizing an image and blending in Photoshop.
FAQs
How to I cut and edit an image in Photoshop?
You can crop a photo in Photoshop to keep only the portion you want. Select Crop in the Tools panel on the left, drag an edge or corner on the frame around your image, and press Enter or Return.
How do I select and edit part of an image in Photoshop?
To change only a section of an image in Photoshop, you must select it first. Depending on which fits your needs best, you can use one of the Selection tools in the Tools panel on the left. Use the Object Selection Tool to automatically select an object, the Quick Selection Tool to select a portion by finding the edges, or the Magic Wand Tool to select an area based on color.
Once you select the part you want to work with, you can continue to make the changes you need.
Where is the Edit menu in Photoshop?
The Edit menu is the second tab from the left at the top of Photoshop on Windows or in the menu bar on Mac. You can use the Edit menu to undo or redo changes in order, perform actions like cut, copy, and paste, access features like fill, generative fill, and content-aware fill, and much more.