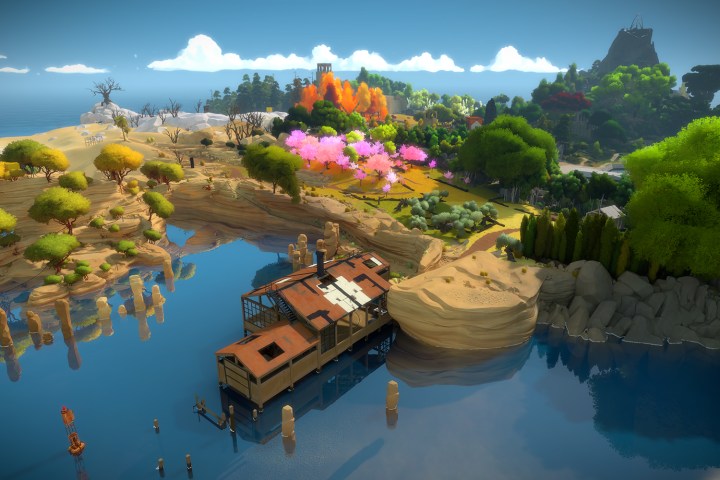
The Witness is best experienced on one’s own and without assistance, but if you’re stuck on a particular puzzle, we’re here to help. Note that this guide will not spoil puzzle solutions outright. Instead, we’re going to explain how the game’s basic puzzle mechanics work, giving you the knowledge you need to come up with your own solutions. Think of our advice as a gentle nudge in the right direction.
General tips
Tip #1: All panel-based puzzles involve tracing a line from a starting point to an exit. It helps to begin each puzzle by identifying both, then devising a path between them.
Tip #2: Puzzle panels featuring geometric shapes and other patterns follow rules specific to these icons, and operate in consistent, predictable ways. Puzzle panels that don’t feature icons often require you to search your surroundings for clues. Look for nearby patterns, inconsistencies, and environmental details that grab your attention before you attempt to solve these puzzles. It also helps to listen for audio cues — we recommend wearing headphones during gameplay.
Tip #3: Some puzzles have multiple solutions. If one solution leads to a dead end in the game’s environment, try retracing your steps and charting a path to an alternate exit.
Tip #4: If you find yourself getting frustrated, walk away and search for new puzzles elsewhere. The Witness is designed in such a way that you’ll intuitively pick up on new puzzle-solving strategies throughout the quest, and returning to difficult puzzles after completing other areas of the game often reveals solutions you wouldn’t otherwise notice.
Advanced tips
Introductory puzzles
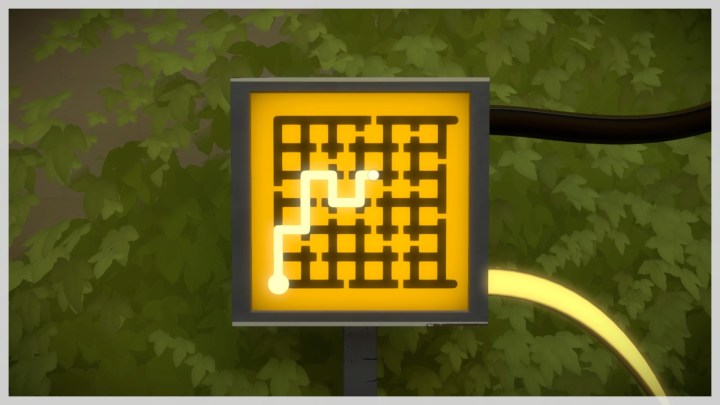
You’ll see this tutorial-like sequence of panels featuring black and white squares shortly after starting The Witness, and the lessons you’ll learn here apply to a majority of puzzles featured throughout the game. It’s easy to complete many puzzles in this sequence without fully understanding the rules it’s trying to teach you, however, this makes it difficult to identify your mistakes when you fail. If you’re unable to complete this sequence on your own, here’s what you need to know: differently colored squares must be separated with a dividing line.
Puzzles with multiple colored squares often require you to chart convoluted paths from entrance to exit, in order to fully enclose clusters of one particular color and separate them from other colors. It may help to think of the line you draw as a border that separates elements within each puzzle, rather than a trail leading from entrance to exit. Feel free to spend some extra time with these puzzles before you move on. Once you master the principles at work here, you’re ready to take on the bulk of the game’s challenges.
Pathway Dots
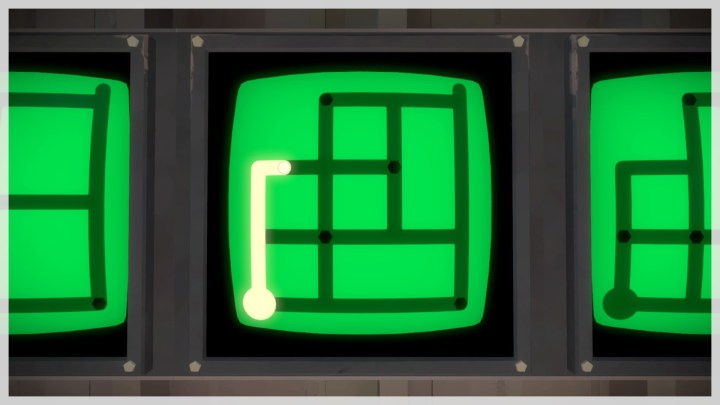
If you see black, hexagonal dots laid atop a puzzle pathway, you’ll need to trace over all of these dots in order to solve the puzzle. This concept is easy enough to grasp on its own, but charting successful paths becomes more difficult when pathway dots combine with other puzzle elements.
Symmetry Puzzles

These are among the simplest puzzles in The Witness, but they’re still a challenge for beginners. Symmetry puzzles put players in control of two lines at once, both of which must reach a valid exit. Unlike other challenges, many symmetry puzzles can be figured out via experimentation. Don’t be afraid to jump right in and start drawing lines on these puzzles, even if you don’t have a solution in mind. Just be aware that your input affects each line differently — this is something you’ll need to remember for later puzzles.
“Tetris” Shapes

These icons require a unique approach. When you see a shape that resembles a Tetris piece on a puzzle panel, you need to create a surrounding, bordered pathway that matches that shape. Note that these icons are divided into squares. Likewise, you’ll need to section off a specific number of squares within each puzzle’s layout in order to create a valid solution. In many cases, you’ll simply need to duplicate the exact shape shown on each icon. If these icons are tilted, however, that’s an indication that your pathway can be flipped or rotated. Solutions will still be valid as long as the tilted icon’s basic shape is preserved in your pathway.
Also note that you can encase two or more Tetris shapes within a single outline. This gives you some leeway in how you can shape your pathway as you work your way toward a solution.
Red Hexagons

These puzzles first appear in a desert area where the sun’s rays are their brightest. You’ll notice that, unlike other panels, these puzzles are coated in a reflective paint. Take a moment to observe how natural light reflects off of their surfaces and you’ll think up a solution in no time.
Star Icons
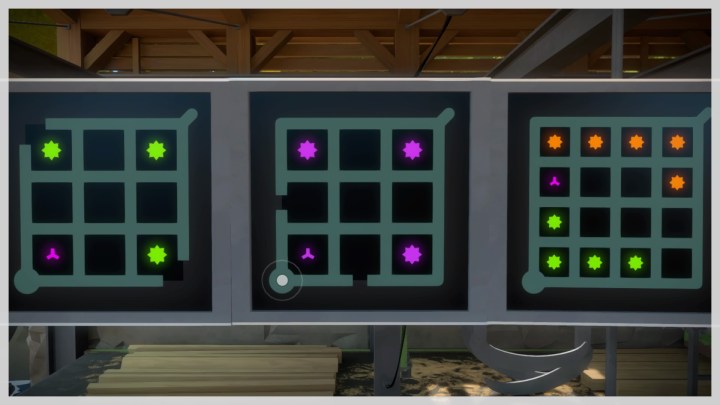
Every star icon within a puzzle must be paired up with another star icon of the same color in order to create a valid solution. When dealing with these icons, focus on drawing borders that separate them. Bear in mind that they must always exist in pairs, as your solution will fail if a star icon is left on its own or if it occupies the same physical space as three or more star icons of the same color.
Tri-Wing Icons
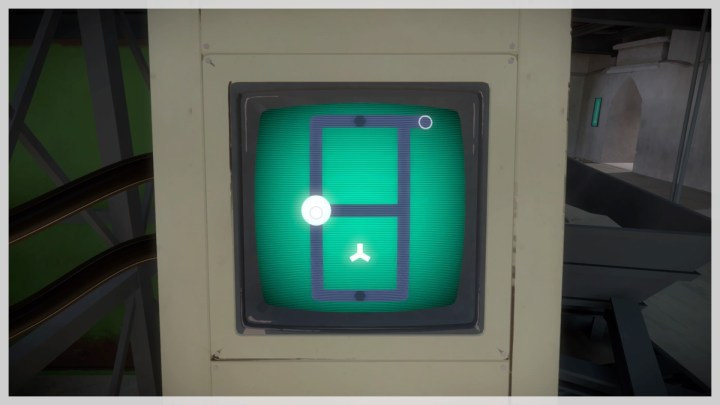
These shapes always appear in conjunction with other icons, so make sure you’re aware of how every element in one of these puzzles works before you try to devise a solution. Tri-wing icons typically appear in advanced puzzles, so you may want to check out other parts of the island instead if you end up stumbling across one of these early on in your adventure.
Tri-wing icons delete surrounding puzzle elements, but only after you’ve committed to a solution. Basically, you’ll want to create a solution that follows all of the rules established by the icons within each puzzle except for one. If a tri-wing shape occupies the same physical space as this leftover icon without a border separating them, both icons will vanish after you’ve charted a path from the entrance to the exit. If a puzzle element is deleted by a tri-wing icon, you don’t need to follow its rules in your solution.
Tri-wing icons can delete pathway dots, colored squares, Tetris shapes, or any other element present within any given puzzle. Experimentation is key when dealing with tri-wing icons. The way they work is not immediately apparent, but with practice, you’ll be able to use them to your advantage.
Good luck!
These tips will prepare you for many challenges, but be warned that The Witness builds on its basic puzzle mechanics throughout, requiring you to be keenly aware of how different icons interact with one another. The Witness is a true test of patience, and it’s incredibly satisfying to craft solutions on your own without seeking out spoilers. Best of luck — you’ll need it.


