If you’ve ever left your charger at home, you probably know the stress of trying to make your Mac battery last through the day. The M1 MacBooks certainly have more battery life, but you will inevitably find yourself in a situation where you want to make the battery last for as long as possible. For that, you need to know how to enable Low Power Mode.
Low Power Mode was first introduced in MacOS Monterey, and it improves your MacBook’s battery life by reducing the screen brightness and clock speed on the processor. Not only will this make your battery last longer, but it will also make your Mac quieter as the fans run slower (if it has fans, that is). Here's how to enable Low Power Mode on a Mac.
How to enable Low Power Mode
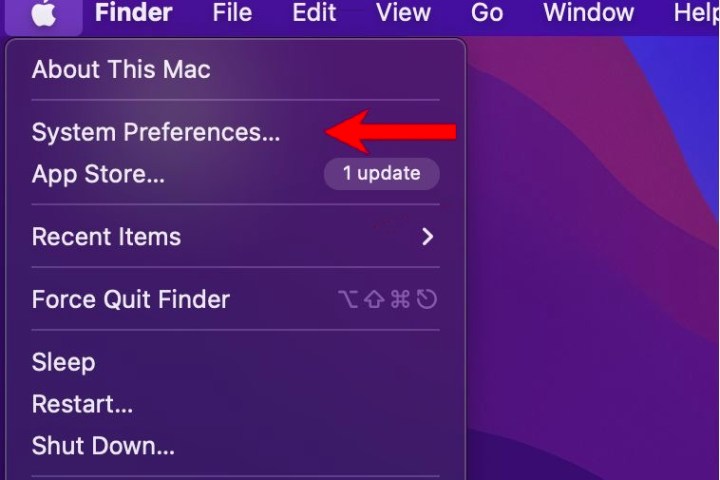
Step 1: Click on the Apple logo in the top-right corner, then click System Preferences.

Step 2: Scroll down and click the green Battery icon.

Step 3: On the left side of the next screen, select Battery again and click Low Power Mode at the bottom of the list.

Which MacBooks support Low Power Mode?
Low Power Mode was first introduced in MacOS Monterey and MacBook and MacBook Pro models from 2016 and later. That includes Intel and M1 models.
Your Mac should be in Low Power Mode now. You may notice the screen dim, and that’s a good indicator that it’s working. Low Power Mode dramatically slows the clock speed on the processor. It should be enough for simple tasks like watching videos or typing emails. Just make sure to turn it off when you open more intensive apps like Adobe Premiere.
For more on the Mac, check out our guide to resolving audio issues, as well as our review of the latest MacBook Pro, which we think is the best MacBook to come out in years.


