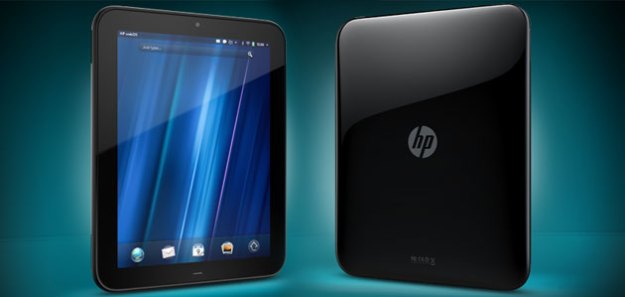
Maybe you just rushed out to buy a $100 or $150 HP TouchPad, or maybe you’ve had one for months. No matter the reason, you now own a tablet that has a lot of great qualities. Unfortunately, speed is not one of them. WebOS, HP’s mobile operating system, runs quite slow on the TouchPad and we’re fairly certain its one of the major reasons why it wasn’t selling, which prompted HP to cancel the tablet and hold a firesale to rid itself of excess inventory (most places report it as sold out).
Yesterday, I went through 5 ways to use your new HP TouchPad. I encourage you to check that article out if you haven’t already and read up on what is happening with HP and why it won’t make any more webOS hardware. But before all that, you have a slow tablet that needs a speed boost. Let’s deal with that first. Below is one really simple way to speed up your TouchPad, and two more techniques that require more steps, but shouldn’t be too difficult if you’re somewhat tech savvy. If you’re not, find someone who is!
(Note: I’m running webOS v3.0.2. That is the only version that I have tested these instructions on. Check to make sure you’re up to date and proceed at your own risk.)
Set logging to minimal (super easy)

Steps to set logging to minimal:
- Open up the Phone & Video Calls App
- Type ##5647# and hit the green call button
- In the new window that pops up, click on “Change Logging Levels…”
- On the next screen hit “Set Logging To Minimal”
- Click OK to confirm on the “Are You Sure?” popup
- That’s it!
You’ll begin to notice a difference immediately. This doesn’t completely fix webOS’s issues, but it does end the consistent lag.
Eliminate logging altogether
If you want to take it a step further and completely eliminate logging, you’ll have to put the TouchPad into developer mode and sideload some homebrew software. It’s not hard to do, at all, but this is a bit longer of a process and could take a few minutes. I didn’t notice a huge improvement in speed, but I do like the Preware app, which allows you to install a number of fun little patches and changes to the OS that do everything from fixing bugs to changing the search text from “Just type…” to “Make it so…” If you’re a level 2 geek, this process is for you. This section comes mainly from advice I learned at the pre|central forums.
Okay, so first things first. You need to enable Developer Mode on your TouchPad.
Phase 1: Enabling Developer Mode

- In the “Just type…” search box on your homescreen, type in “webos20090606”
- Touch the Developer Mode icon. A “DeveloperMode” window will appear
- Do not Set/Change Password. Instead just hit the “Off” toggle to turn developer mode On (it will be blue)
Now that you’re tablet is in Developer Mode, you can install apps onto it outside of the HP App Catalog. Cool, right? Okay, now you need to install Preware. It’s an app that allows you to easily toy with a lot of options and, for our purposes, turn off logging.
Phase 2: Installing “Preware” onto your PC or Mac
- Don’t connect your TouchPad to your computer yet
- Download the Preware PC/Mac software here. Put the file in a folder somewhere.
- Install the “WebOSQuickInstall-4.2.3.jar” java software on your computer
- Let it install the Novacom drivers
- The software will then prompt that there is no device attached. Use a USB cable to connect the TouchPad to your computer
- Click on the globe-like button on the right. A new window will pop up
- Type in “Preware” in the search box in the Applications tab
- Hit the Install button on the Preware page

Okay. Now you have installed Preware on your TouchPad. Now you need to install the patches. You can do this through the Patches tab on your desktop software (assuming your TouchPad is still connected).

- Connect your TouchPad to your computer (hopefully it’s still connected), open up the desktop software again, click on the Globe, and go to the “Patches” tab
- Search for “Muffle System Logging.” Install it
- Search for “Remove Dropped Packet Logging.” Install it
- Install anything else on the list that looks fun (I installed “Remove Tap Ripple,” and “Smooth Scrolling” as well)
- Open up Preware on your TouchPad and check to see that all of your patches have been correctly installed. If they haven’t, then try installing again from the desktop or look them up through the TouchPad interface
- Reboot your TouchPad
You’re done. Enjoy. Some of these changes will improve your experience, while others are just fun. You can learn more about Preware at its official Wiki page.
Overclock your TouchPad
If you still aren’t satisfied with the speed of your TouchPad, there is one more option, but it’s going to take concentration and some time. It’s also dangerous. But hey, your middle name is danger, right? Here are the steps I followed to overclock the HP TouchPad and speed it up significantly.
Note that you’ll need to have completed the Preware installation from the last section to attempt this modification. Also, please read the many warnings on the Wiki feed. (Thanks to ZDNet for the link to these instructions.)
To start, we need to install some webOS Internals Testing Feeds. DO NOT make any mistakes during these instructions. Also, you’re probably voiding your warranty, so keep that in mind.
Steps to install Testing Feeds:

- Open Preware and wait for it to finish loading
- Tap on the “Preware” name in the upper left corner of the screen to open the application menu
- Select “Manage feeds”
- Enter a new feed:
- Name: webos-testing-all
- URL: http://ipkg.preware.org/feeds/webos-internals/testing/all/
- IS COMPRESSED: YES
- Click “Add Feed” and then press OK to confirm
- Enter another new feed:
- Name: webos-testing-armv7
- URL: http://ipkg.preware.org/feeds/
webos-internals/testing/armv7 - IS COMPRESSED: YES
- Click “Add Feed” and then press OK to confirm
- Hit the Back arrow in the upper left. Preware will ask if you’ve changed the feeds and ask to update the package list. Tap “Do it Now”
Steps to Install Kernels and Govnah:
- Open Preware and click on “Available Packages”
- Go to Kernels
- Install UberKernel (TouchPad). Press OK when it asks to restart
- Now go back to the main menu and click on “Available Packages” again
- Click on “Applications” and find “Govnah” in the list (you can sort A-Z using button on the bottom)
- Install Govnah
- Open Govnah and click on “Profile”
- Instead of Palm, select “OnDemandTcL 1512”
- Once selected, enter “Advanced Settings” then “CPU Frequency”
- Set the Max Freq to 1.512 GHz. Save your profile
- You can mess around more, but please read about Govnah and UberKernal first
And you’re done. There are other ways to overclock your TouchPad further, but I haven’t tried them. If you know of any other tips or tricks, please let us know in the comments below. I am not an expert in any of this, so please feel free to point out if I made any mistakes. I hope you enjoy your speedier TouchPad.


