How to back up emails in Outlook on Windows and Mac

how to back up emails in outlook laptop
Dell

Whether you have emails you want to make sure to hang onto because you’re getting a new computer or you're troubleshooting a problem, you can create a backup in Microsoft Outlook.

By exporting your inbox to an Outlook file format, you can easily import it again later if needed. Alternatively, you can export a CSV file that you can open in Excel to review and analyze. Here, we’ll explain how to back up emails in Outlook using both file types.

Recommended Videos

Difficulty

Easy

Duration

10 minutes

What You Need

  • Computer

  • Microsoft Outlook

Back up emails with an Outlook file on Windows

If you want to create a backup of your emails that you can easily import back into Outlook later, the best option is to create a PST file. Unfortunately, this technique is not available on the Mac version of Outlook.

Step 1: Open Outlook and select File > Open & export. Then, pick Import/export.
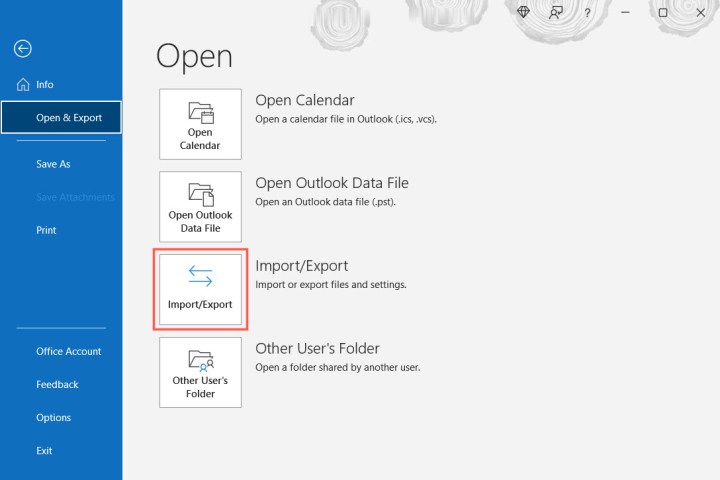
Import/Export button in Outlook.
Image used with permission by copyright holder

Step 2: When the Import and Export Wizard window opens, select Export to a file and choose Next.

Export to a file in Outlook.
Image used with permission by copyright holder

Step 3: In the subsequent window, pick Outlook data file (.pst) and select Next.
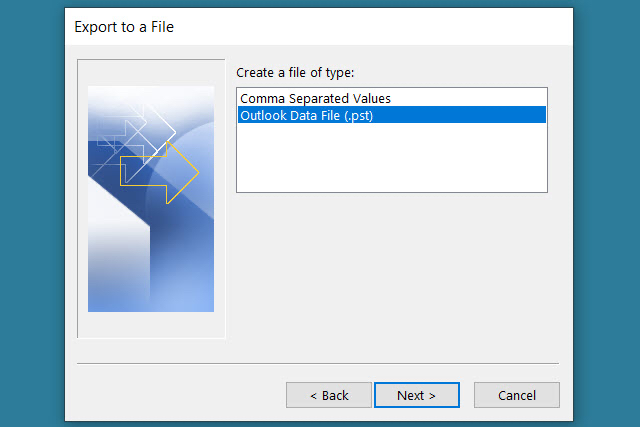
Export file selection window.
Image used with permission by copyright holder

Step 4: Then, select your Inbox and check the box for Include subfolders to make sure you have all of the folders you created. Optionally, you can choose a different, specific folder if you prefer.
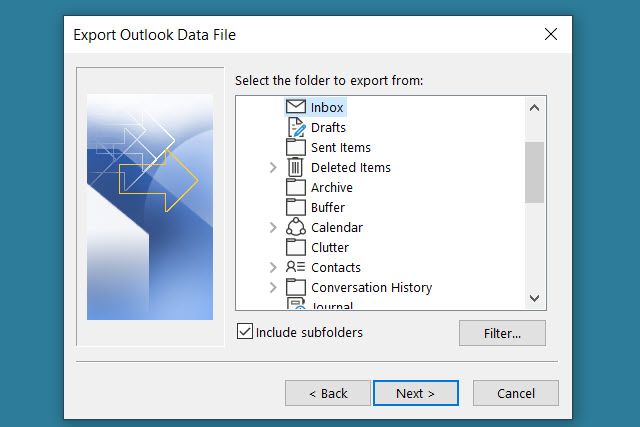
Inbox and folder selection window.
Image used with permission by copyright holder

Step 5: If you want particular emails, such as those from a certain sender, during a time frame, or with specific keywords, select Filter. Add the criteria, and pick OK.
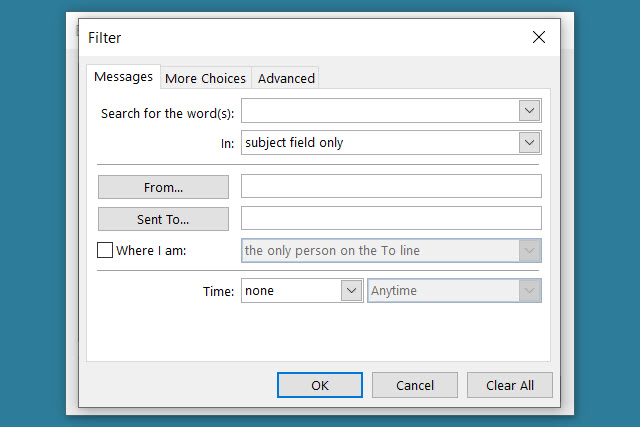
Outlook export filter options.
Image used with permission by copyright holder

Step 6: Select Next after you pick the inbox, subfolders, and filters.

Step 7: Choose a location to save the file. You can use the Browse button to select the location or enter the full path into the box at the top.

Step 8: Then, pick one of the options to replace duplicates, allow duplicates, or not export duplicates. Select Finish.

You can then visit the location you selected for the file to open it.

File path and duplicate selection for the export.
Image used with permission by copyright holder

Back up emails with a CSV file

If you want to back up your emails so that you have a readable file that you can open in Excel if needed, you can create a CSV file instead. Try this technique on Windows of Mac versions of Outlook.

Step 1: Follow the first two steps as above to select Import/export and open the Import and Export Wizard.

Step 2: Select Export to a file and pick Next.

Step 3: This time, pick Comma separated values in the Export to a file box and select Next.
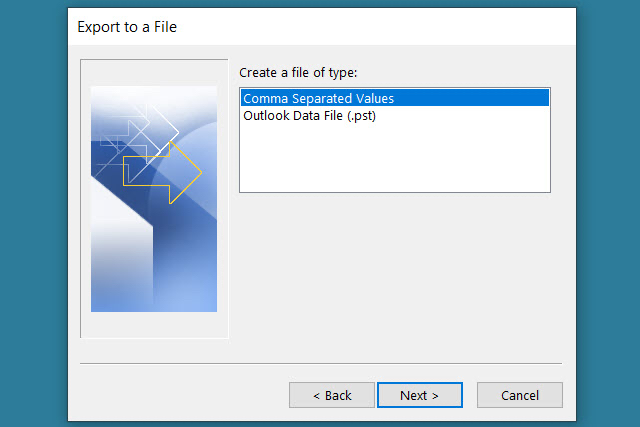
Export file selection window.
Image used with permission by copyright holder

Step 4: Choose your Inbox from the list and pick Next.
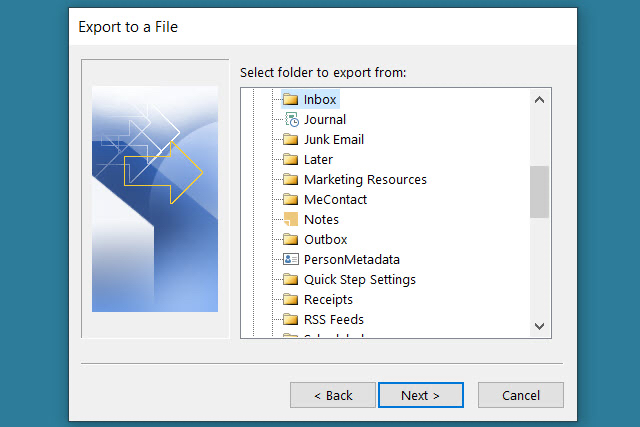
Inbox and folder selection window.
Image used with permission by copyright holder

Step 5: Enter the location and file name using the path, or select the Browse button to pick the location for the file.

If you use the Browse button, navigate to the location, enter the file name you want to use, and select OK.
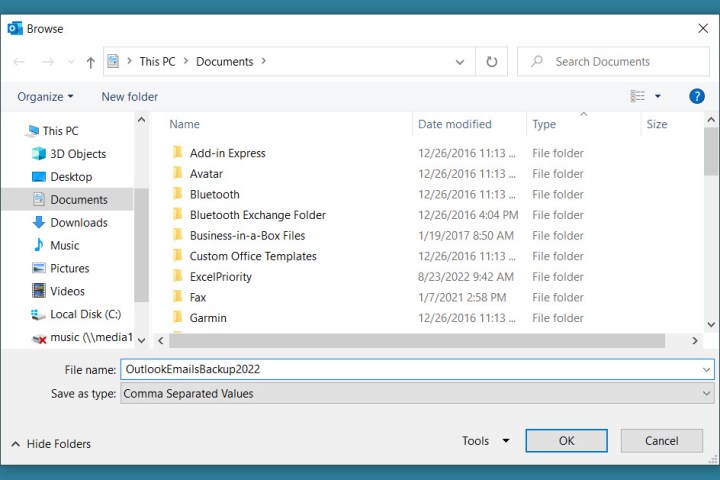
Browse box for the file location and name.
Image used with permission by copyright holder

Step 6: When you have the location and file name in the Save Exported File As box, select Next.
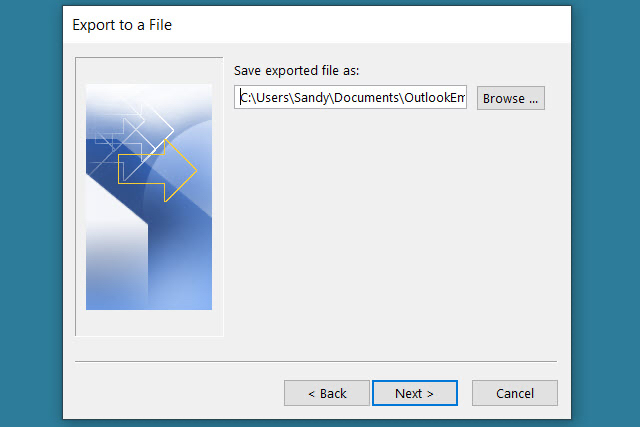
File path field with Browse button.
Image used with permission by copyright holder

Step 7: Confirm the inbox you are exporting and select Finish.

You’ll see a brief message as the file is created, and you can then visit the location you picked to access the file and open it in Excel or a similar application.
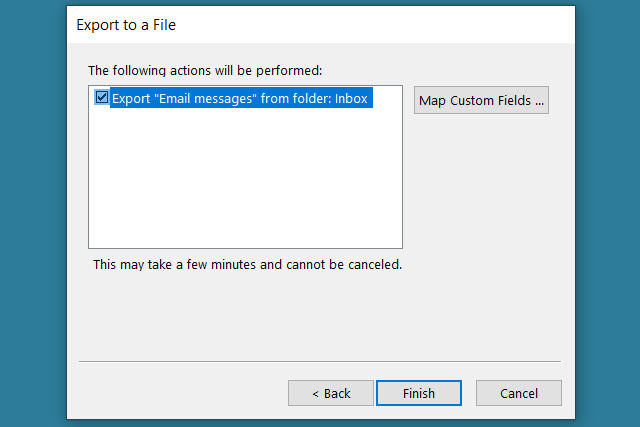
Export confirmation and finish window.
Image used with permission by copyright holder

Backing up your Outlook emails for safekeeping or importing again later takes only a few minutes. And, it’s probably worth your time to make sure you don’t lose any important messages.

For more, look at how to recall an email in Outlook or how to change your Outlook signature.

Sandy Writtenhouse
Sandy has been writing about technology since 2012. Her work has appeared on How-To Geek, Lifewire, MakeUseOf, iDownloadBlog…
How to insert footnotes in Word on PC and Mac
A person drinking coffee while using a laptop at a table.

When you're working on a text document and making sure to cite your sources, it's helpful to have a way to keep your footnotes organized and in order. And footnotes can be useful for functions beyond citations too, as a place to add extra notes or commentary which you want to keep as part of your document but without interrupting the flow of your main text.

If you're using Microsoft Word to develop a document that requires footnotes, there's a special footnote function which will automatically formats them to look neat and professional. It's a nice Microsoft Word trick to have up your sleeve, and we'll show you how to add footnotes to a Word document in this guide.

Read more
How to create a bibliography in Word on Windows and Mac
A family using the computer to browse Fios internet together.

A bibliography is an important part of any well-structured college essay, dissertation, article, or other researched writing sample. It lets your readers know what sources you used as building blocks for your work, and isn’t too difficult to make without a template tool. Still, if you’d like to skip a few steps, there’s a terrific bibliography generator built right into Microsoft Word.

If you already know how to use Microsoft Word, it's useful to also know how to build a quick and easy bibliography for your next assignment or presentation.

Read more
How to recover unsaved Word documents on Windows and Mac
Microsoft word document.

If you're using Microsoft Word and the document fails to save, how do you recover it? It could be a system crash, the power fails, or your laptop battery suddently dies.

Whatever the scenario, if you're begging to get that 1,200 word term paper back in time for class tomorrow, just remember that where there is a will there is a way. Here’s how to recover unsaved Word documents using every trick in the book.

Read more