Upgrading storage on your Mac isn't always easy, or even possible, so knowing how much storage space you have, and how to free up more, is a great idea. Often when you buy a Mac, that's the storage you're stuck with -- although external drives and cloud storage are always an option.
Luckily, checking your available storage -- and then freeing up space for the things you want to keep -- is very easy to do. This is just as well, as it makes it easier to update macOS.
In this guide, we’ll walk you through the process of checking your Mac’s storage space, then show you a few quick ways of clearing out the junk you no longer need.
How to check disk space on your Mac
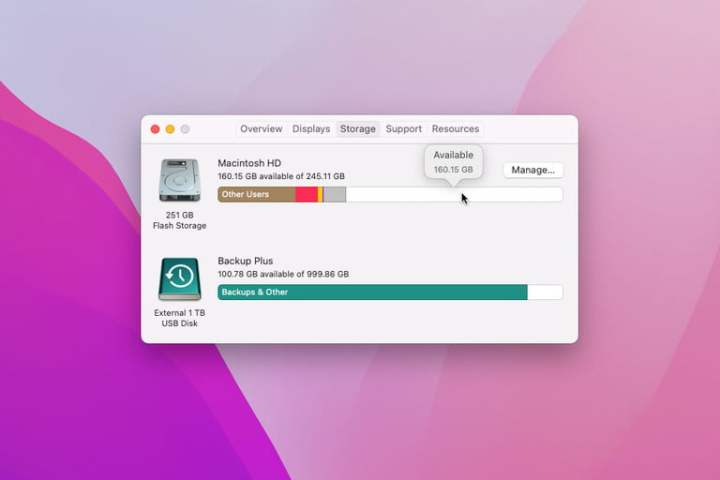
Step 1: Select the Apple menu in the top-left corner of your Mac’s screen, then select About This Mac.
Step 2: Select the Storage tab. This will show how much of your Mac’s storage is taken up, divided into color-coded sections. If you hover your mouse over each one, your Mac will tell you how much space that section is occupying.

Step 3: Use this to work out what is taking up the most space and whether you can delete some files from this section to free up space. For example, if the Applications section is very large, you could try deleting some apps.
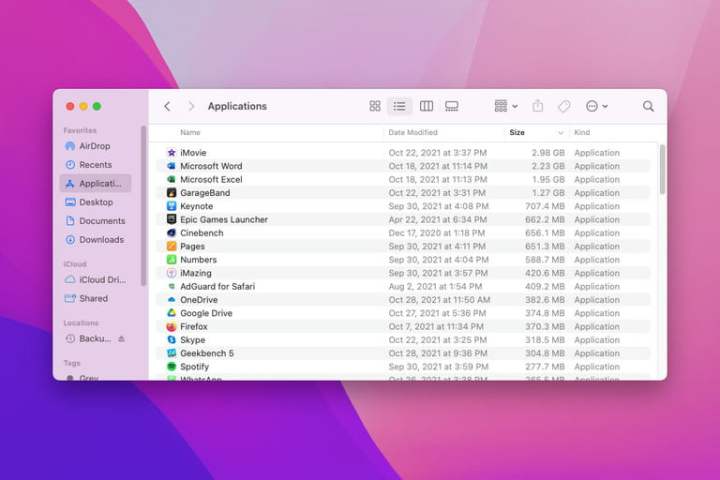
To do this, open Finder and select Applications in the left-hand sidebar. Select the Icon view button at the top, then select the Size column to sort your apps with the largest at the top.
This way, you can work out if you want to keep the most space-hungry apps installed -- those you don’t can be moved to the Trash.

Step 4: Note: If you have divided your Mac’s drive into multiple APFS containers or HFS+ partitions or you have attached any external hard drives, they will also show up in About This Mac as separate drives, each with its own storage breakdown.
How to find more storage space on your Mac
There are many ways to free up space on your Mac, but one of the quickest and easiest is to use Apple’s own built-in tool within the About This Mac window. Here, we’ll show you how to use it.
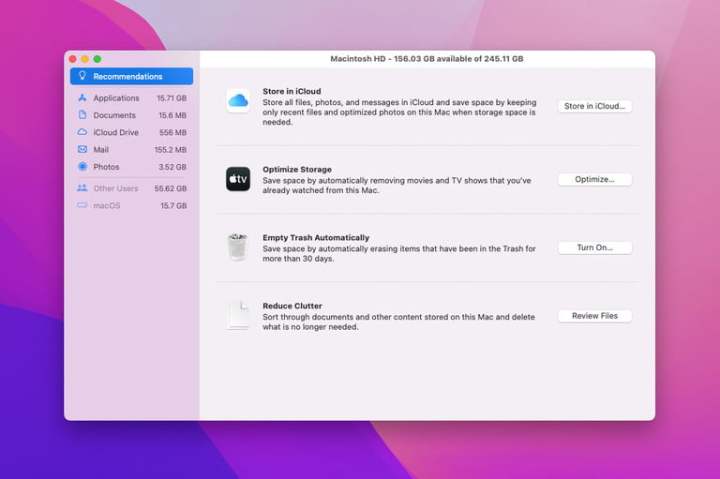
Step 1: On the Storage tab in About This Mac, select Manage.
Step 2: If it is not already selected, select the Recommendations tab on the left.

Step 3: Step 3: Here, there are four options:
- Store in iCloud uploads documents, photos, and messages to your iCloud storage. You can choose to upload everything or just some file types (such as photos), but you need to have enough available iCloud space to store what you want to upload.
- Optimize Storage removes Apple TV content once you’ve watched it and only keeps recent email attachments on your Mac.
- Empty Trash Automatically deletes anything that has been in the trash for more than 30 days.
- Reduce Clutter suggests files that could be deleted to save space, such as downloaded files and apps that do not work in your version of MacOS.
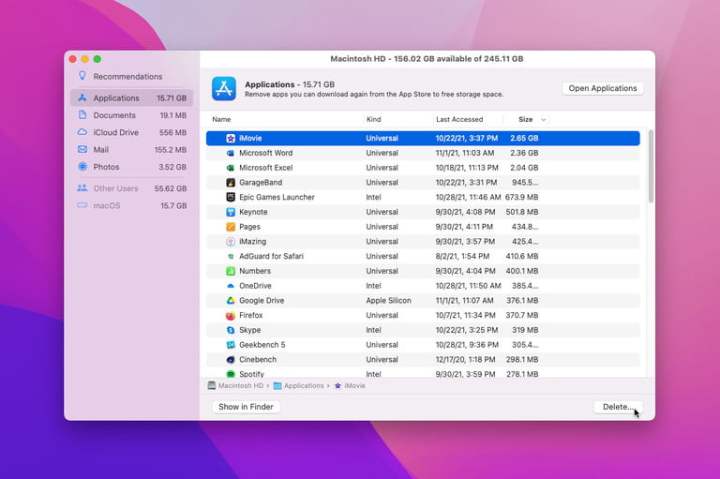
Step 4: Below Recommendations in the sidebar, there are additional sections that show you what is taking up the most space in different categories. For example, Applications shows the largest apps at the top. Select an app or file in the list, then select Delete to remove it.

Step 5: As you delete files, keep checking the Storage tab in About This Mac to see how much free space you have. Apple suggests that you check storage space this way rather than using third-party apps or different settings in MacOS, which might measure free space differently and thus paint an inaccurate picture.
If you need more in-depth help with freeing up space on your Mac, we’ve got a guide for that, too. Once you’re done, you should have a lot more storage space on your Mac.


