Clearing the printer queue on a Windows PC or a Mac is a simple task that can help get rid of old documents that didn’t print for some reason. Those pending documents in the queue cause problems even if you've refilled paper and taken care of other printer issues.
Even the best printers can have temporary glitches that result in a document becoming stuck in the printer queue. This is usually an easy problem to clear up. The only trick is knowing where to find the right controls so you can get back to enjoying your color printer or finish the print job you’re waiting for.
Find the Windows printer queue
On a Windows PC, there are three easy ways to open the printer queue and clear up documents that won’t print:
- Find Windows printer queue with the printer notification.
- Find Windows printer queue with the Notification center.
- Find Windows printer queue with the Settings app.
Find Windows printer queue with the notification
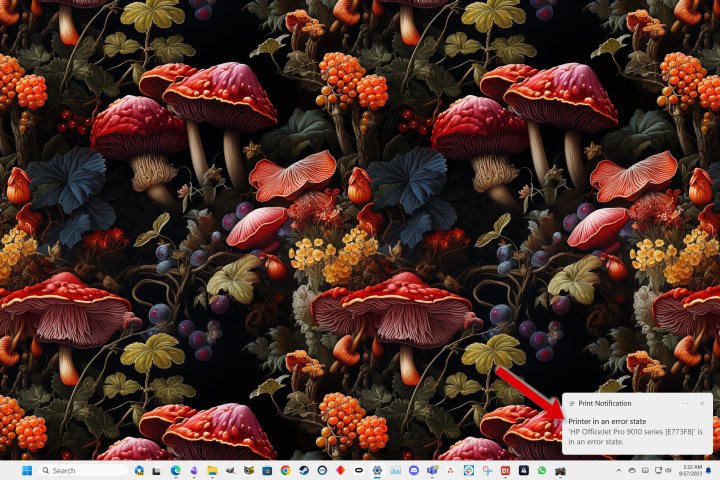
You might see a notification of a printer error pop up at the bottom right of the screen after you try to print. That makes it very easy to open the queue.
Select the notification to open the printer queue and show the list of documents for the printer that had an error.
Find Windows printer queue with the Notification center
If you saw the notification, but it disappeared before you selected it, you can get to it again in the Windows Notifications center. Select the time in the system tray and scroll through notifications to find the printer error and choose it to open the printer queue.

Find Windows printer queue with the Settings app
If your printer isn’t working and you suspect the problem is with documents stuck in the printer queue, you can check via the Settings app.
Step 1: Open the Windows Settings app, choose the Bluetooth & devices tab from the left sidebar, then select Printers & scanners at the right.
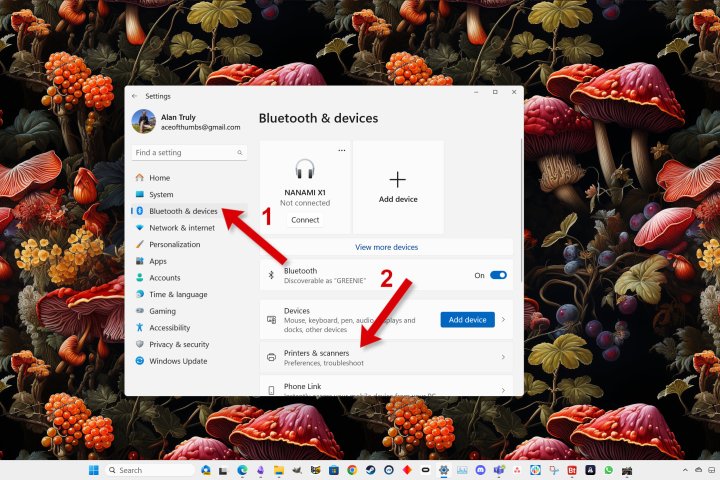
Step 2: In the Printers & scanners section, scroll to find the printer that’s not working or the one you suspect has a queue problem.

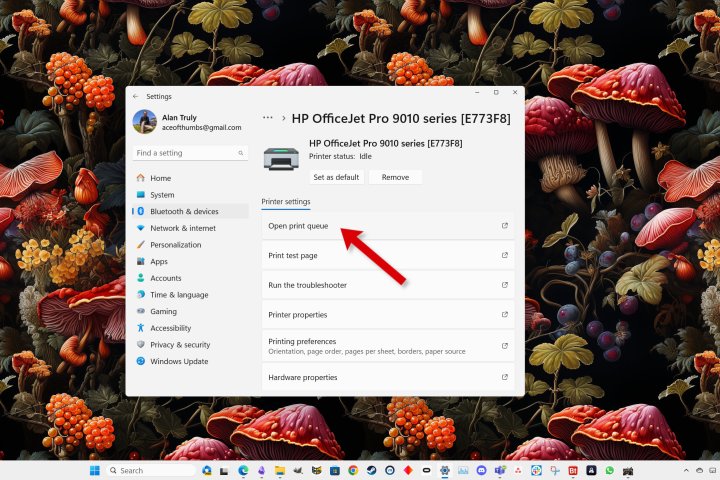
Step 3: In that printer’s settings, select Open print queue.
Clear the Windows printer queue
Once you’ve got the printer queue open, you’ll see any documents with errors. The next step is to clear those old errors so your computer can send current jobs to the printer.
Step 1: If you don’t see any printer errors or documents that are pending, select the Printers menu at the top left, then check the box beside any printers of which you’d like to see the queue.
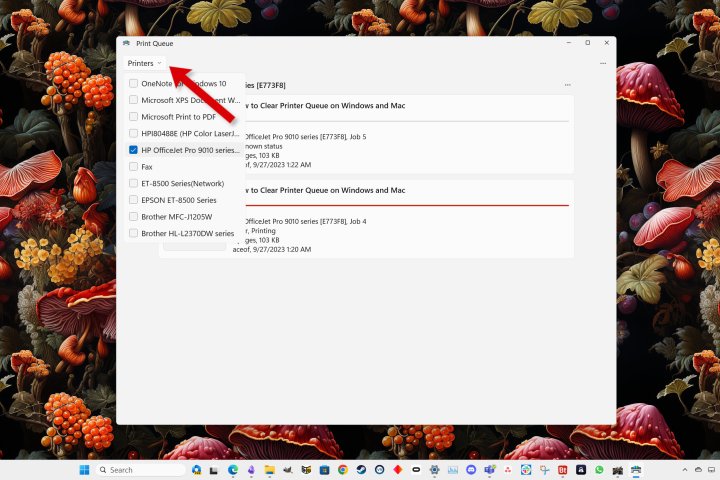
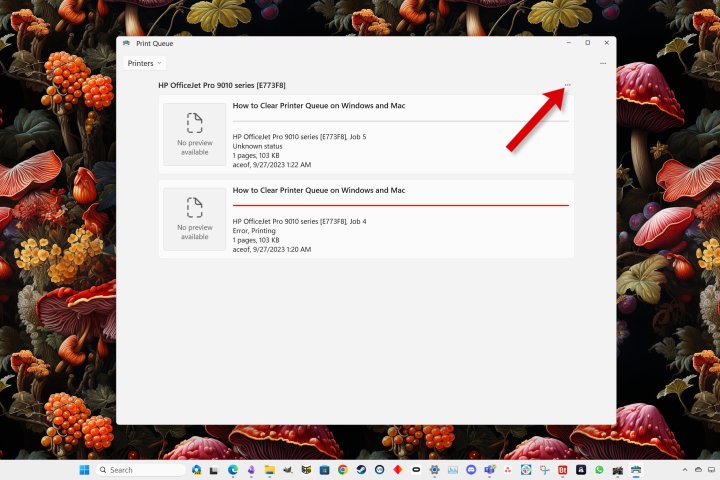
Step 2: To clear the documents you see, select the ellipsis “…” to see more options.
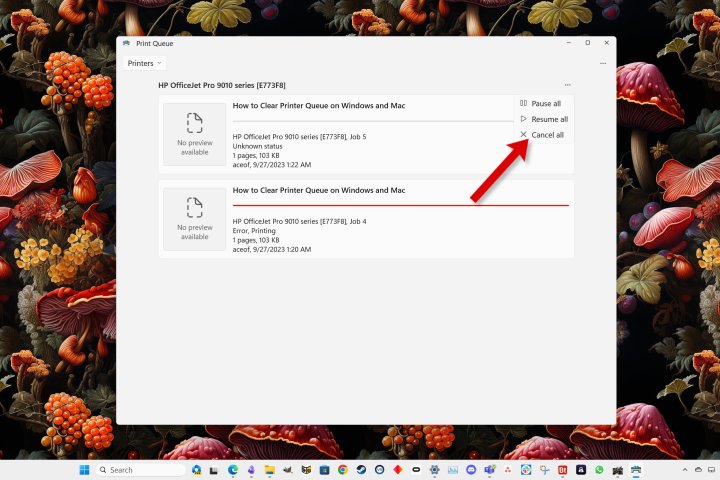
Step 3: Then choose Cancel all to delete all the print jobs that could clog up your printer queue.
Find the Mac's printer queue
On a Mac, you’ll see printer errors in the dock, but there’s another way to open the printer queue and double-check to see if there are any lingering issues that explain why your printer isn’t working as expected.
There are two convenient ways to find the queue: 1. Find the Mac's printer queue with the dock icon. 2. Find the Mac's printer queue with System Settings.
Find the Mac's printer queue with the dock icon
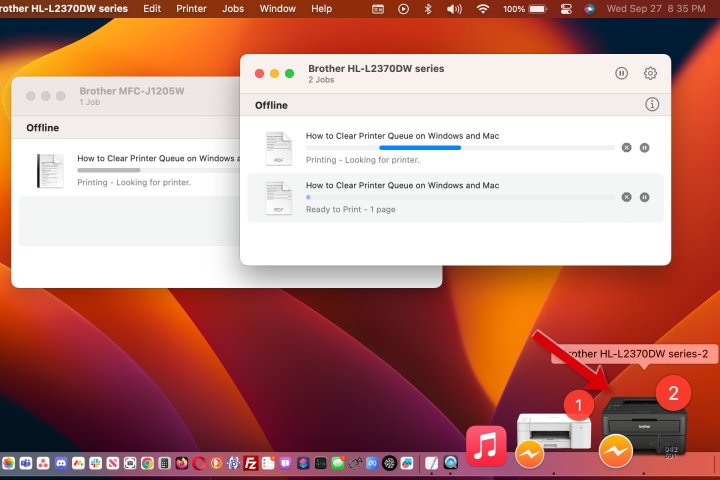
If you just tried to print a document or a photo and your printer isn’t working, you should see an icon for that printer in the dock.
Step 1: It should appear at the bottom right unless you've changed the default position for the dock.

Step 2: Select the printer icon to open that printer’s queue.

Step 3: If you see more than one printer icon, you can open each printer’s queue separately.
Find the Mac's printer queue with System Settings
Another way to find the Mac’s printer queue is by using the System Settings app.
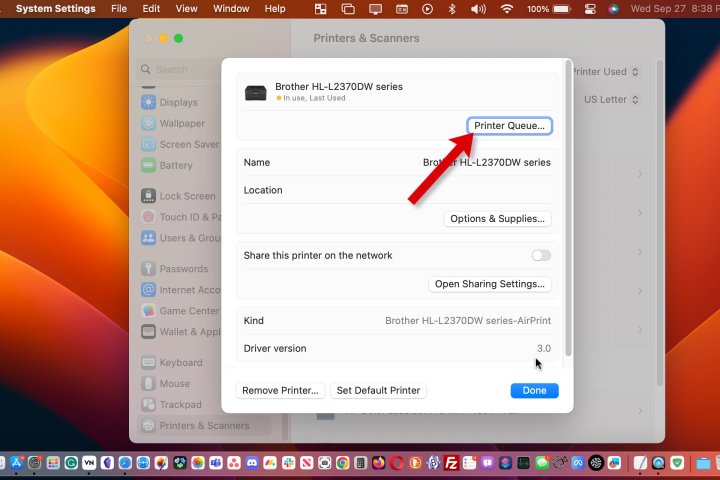
Step 1: Scroll the left sidebar to the bottom or type “printers” in the search box at the top left and select the Printers & Settings tab.

Step 2: Choose the printer with the issue from the list on the right.
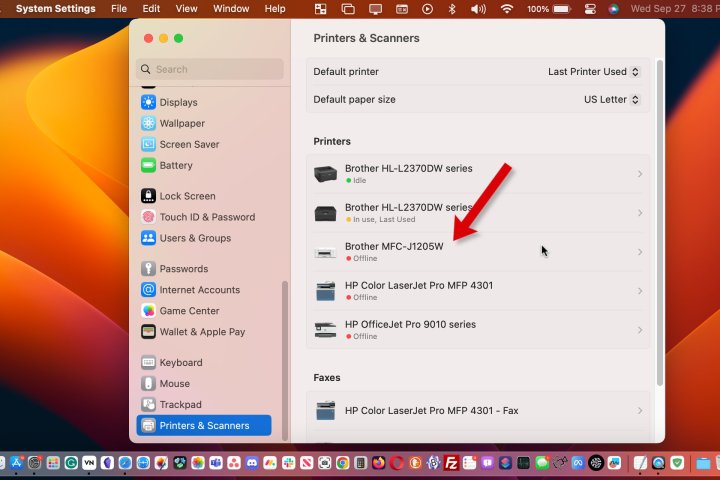
Step 3: In the windows that opens, select the Printer Queue button at the top right to see any print jobs that are stuck.
Clear the Mac printer queue
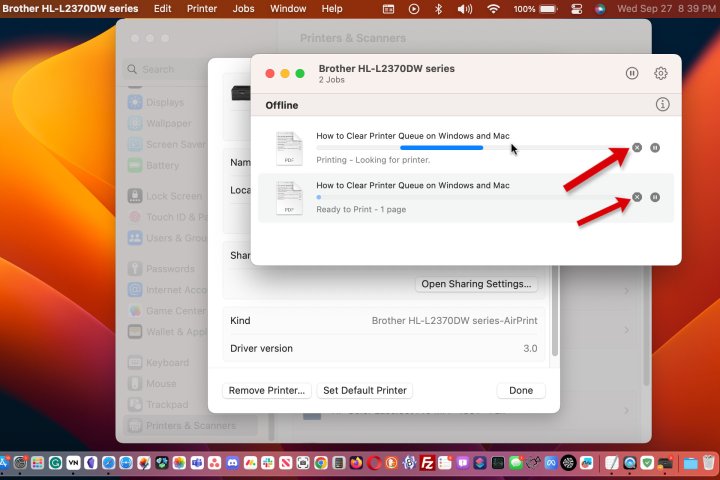
If you have documents remaining in the printer queue, you must clear them before you can print.
Step 1: Any documents that are pending will appear in the list. Select the button that looks like an X beside each print job that you want to delete.

Step 2: You might find more than one job that is waiting. Clear any or all of these backed-up documents until you resolve the problem with printing, or all jobs are gone.
Why is it called a queue and how do documents get stuck?
A queue is a computer term for a list of items arranged by the date and time of arrival. The oldest item is first in line. It’s also a word that's more common in the U.K., which refers to waiting in a line.
Print jobs get stuck in a queue when something has gone wrong with the printer. That means clearing the queue might not resolve the problem if the original issue persists.
It might be as simple as your Wi-Fi connection dropping for a moment. If this happens too frequently, it might be time to upgrade your network’s router.
While the best printers have long-lasting supplies of ink and toner, running out of paper, ink, or toner could be the reason you can’t print. Cable connections can also wear over time, so a new Ethernet cable might help.
Whatever the cause, you might need to fix your printer trouble, as well as clear the queue before you can continue printing.
Clearing your printer queue is one of those little details you might not think of if you’re focused on dealing with a hardware problem. After taking care of paper, ink, and checking that your connectivity is good, clearing the printer queue might be the final step needed to get your printer working again.


