Google Drive is an excellent cloud storage platform for individuals and teams. You can use Drive to upload, share, and collaborate on just about everything, from docs to spreadsheets, images, and videos. Best of all, every Google Account receives 15GB of free storage. So what’s the best way to start moving files around? You should probably start by creating some folders in Google Drive, and load them up with content.
Luckily, creating folders and sorting files in Google Drive is a quick and painless process. Here’s a step-by-step guide to help jumpstart your Drive uploads today.
How to create folders in Google Drive
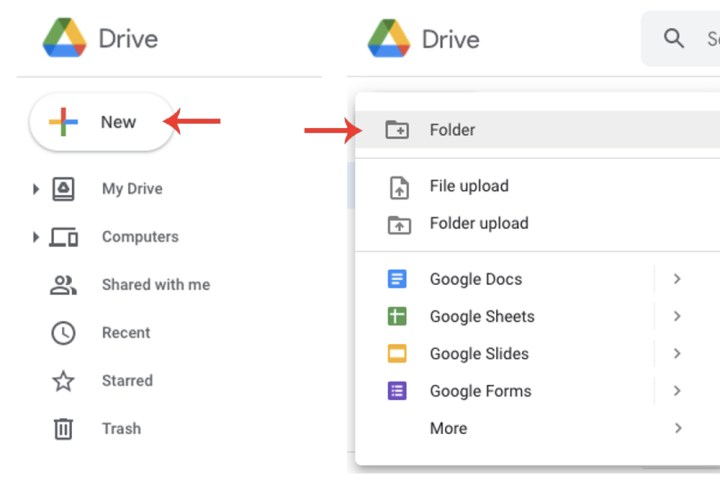
Step 1: Go to the main home page of your Google Drive account. Click the New button and select Folder.
Step 2: Enter a name for the new folder. For demonstration purposes, I will be naming this folder Work Projects. Once you’ve entered a name, click the Create button.

Moving files
Now that you’ve created a new folder, let’s go through how to move files into it.
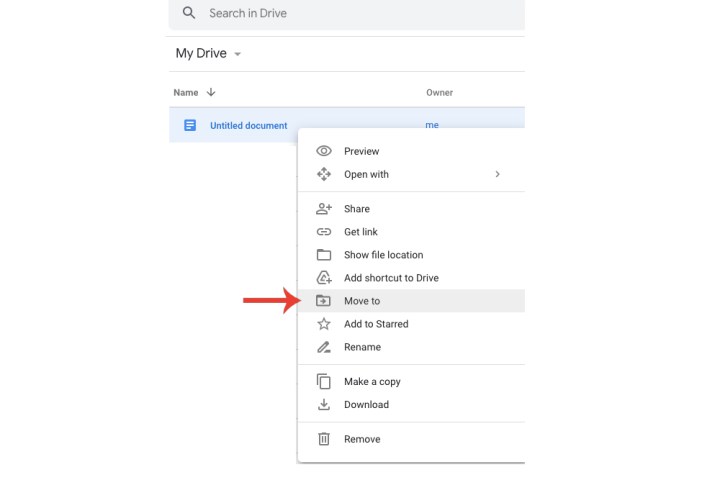
Step 1: Go to your Google Drive’s homepage. Right-click on a file you want to move to the folder you’ve just created and select the Move to option.
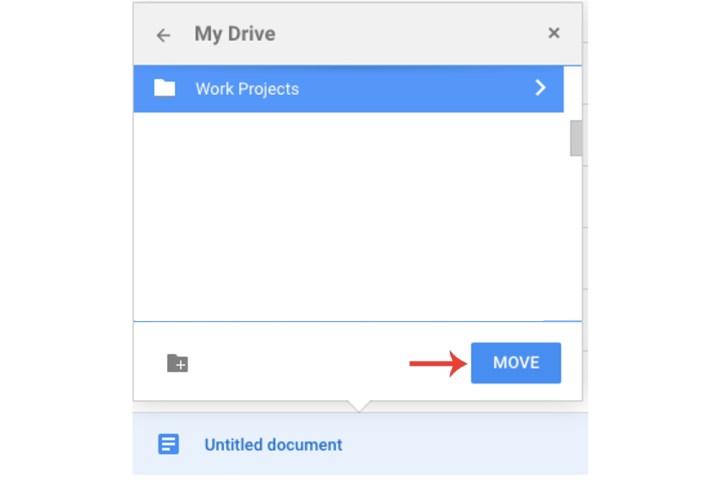
Step 2: Click the newly created folder, and then click the Move button.
Step 3: If you have more than one file you want to move to a folder, you don’t have to repeat the above step for every single file. Click and hold the CTRL button (or Command if you’re using a Mac) and then select all the files you want to move. As shown in step 1, right-click a file and select the Move to field. Finally, select the folder and click Move.

Other folder tips
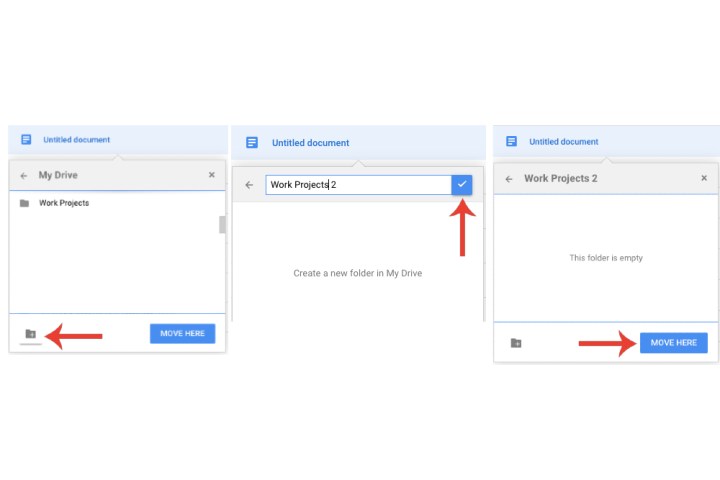
Step 1: Another way to create a folder is right-clicking on a file, selecting Move to, and then clicking the New folder button. Enter a name for the folder and click the blue tick mark. Click the Move here button.
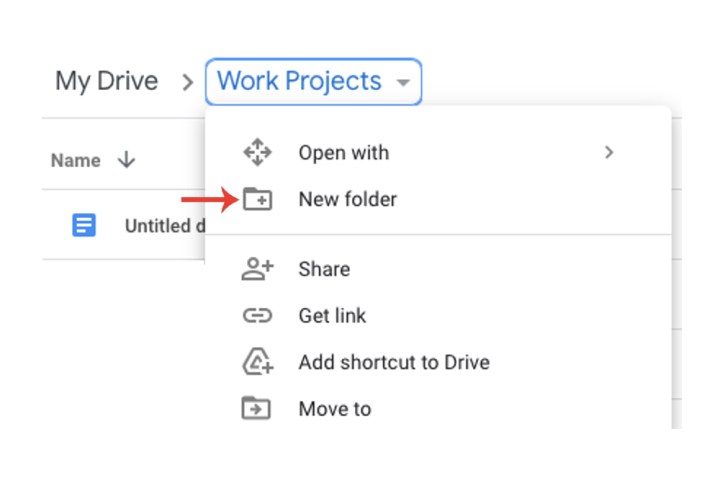
Step 2: Creating folders within a folder is another way you can manage your files in Google Drive. Open a folder and then select its name next to My Drive. Select the New folder option, enter a name, and click the Create button. Now follow the same steps explained above for moving files.
Removing a file or folder in Google Drive
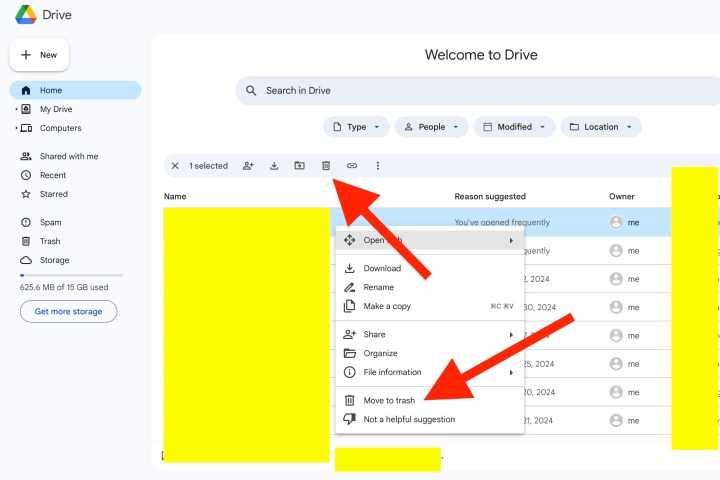
Maybe you’ve decided you’d like to part ways with some data. If your files are stored in Google Drive folders, deleting the contents couldn’t be easier. Simply right-click the folder you’d like to nix and then click Move to trash. You can also left-click a file or folder, then click the trash can icon at the top of the page.
Doing so will keep file and folders intact for 30 days, at which point Google will permanently delete them. You can restore deleted files by clicking the Trash option in the left-hand column, selecting a file or folder, and clicking Restore at the top of the page.
How to find files and folders in Google Drive
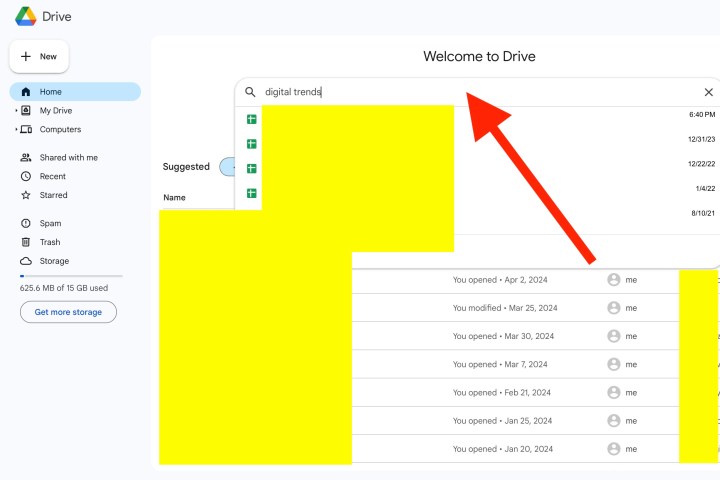
Once you’ve uploaded a lot of files and created a ton of folders, you may be wondering how you’ll be able to find these digital tokens. Luckily, Google Drive has a pretty savvy search tool built right into the platform.
Once you start typing in a file or folder name, or a file extension, the search field will start returning results that match what you’re inputting. You can also filter your Drive results by applying search chips (type, people, modified). You can even filter results by file size, or use more advanced search methods to locate your files and folders.
These include quotes to highlight certain words or phrases, minus signs to exclude certain vocabulary, and more.
For more general tips on how to use Google Drive, be sure to check out our comprehensive guide explaining its features.
If you're still on the fence in regard to which cloud storage service to use, then head over to our detailed breakdown outlining the best cloud platforms.

