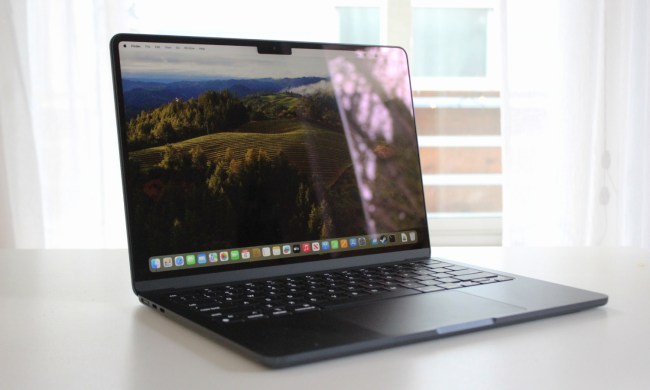
Apple likes to make things easy for its iPhone, users. When signed in with the same Apple ID on multiple iOS and macOS devices, you’ll be able to sync your messages from one Apple product to the next. This means when you get a text on your iPhone, you’ll be able to pull it up through the Messages app on your Mac desktop.
You’ll also be able to delete these same messages from your Mac. We’ve written up this guide to teach you how. Our instructions should work for the latest macOS versions.
How to delete messages on your Mac
Within the Messages app, you can do all sorts of things to your messages, including deleting them.
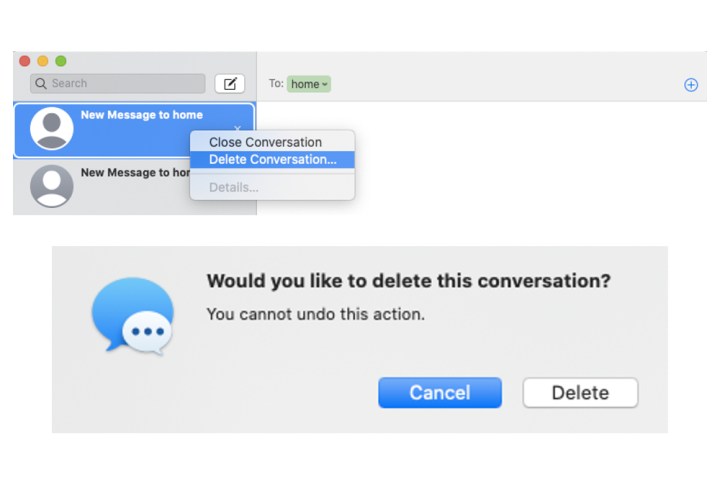
Step 1: Select a message you want to delete by right-clicking on it (the Ctrl + Click combination on the touchpad).
Step 2: Choose the Delete conversation option and then confirm it by hitting the Delete button. This will delete the entire message thread and whatever it contains.
Once the message is deleted, it will be removed across all your iOS devices (providing you’re signed into your Apple ID), including your iPhone.
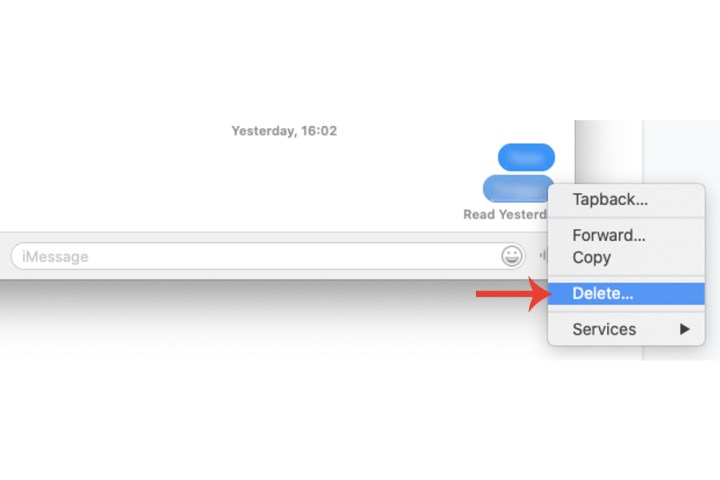
Step 3: If you want to delete a specific message within a conversation thread on your Mac, whether that’s text, images, etc., then right-click on the message itself and select Delete.
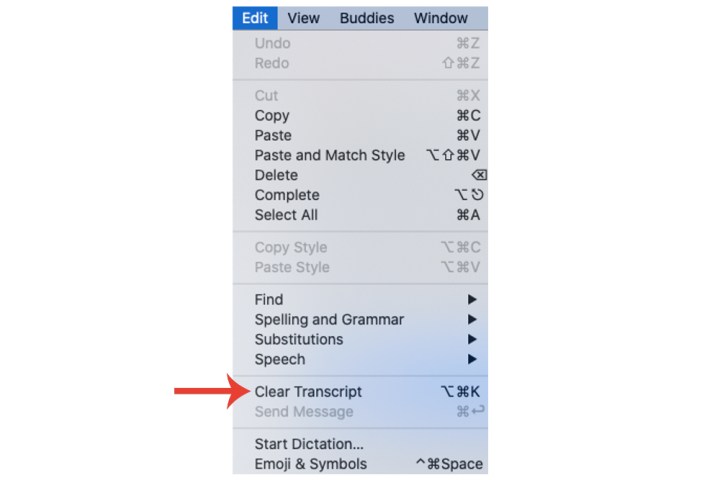
Step 4: To delete all the messages within a text without getting rid of the conversation on the sidebar so it can still be accessed, open the message by selecting it, choose the Edit tab from the menu, and select Clear transcript.
How to delete SMS messages on Mac
When setting up the Messages app on your Mac, it’ll be limited to iMessages only by default. To view your SMS messages on the system (texts sent to smartphones other than the iPhone) and subsequently delete them, you’ll need to adjust some settings on your iPhone.
Step 1: Select Messages within Settings.
Step 2: Select the Text message forwarding field.
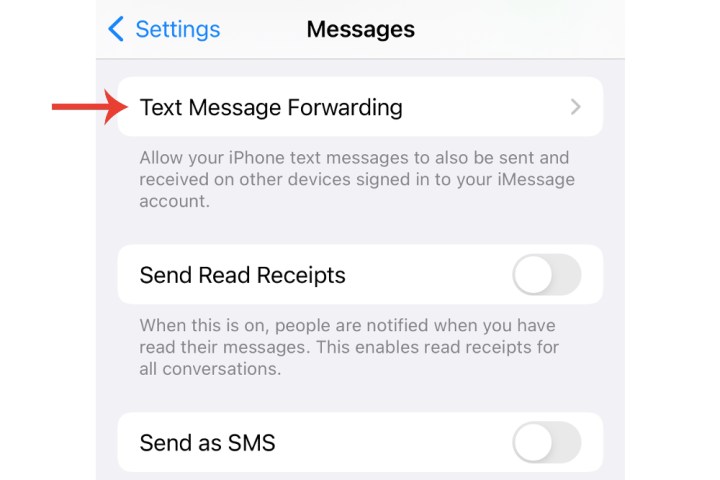
Step 3: Toggle the Gray button adjacent to your Mac system that’s listed.
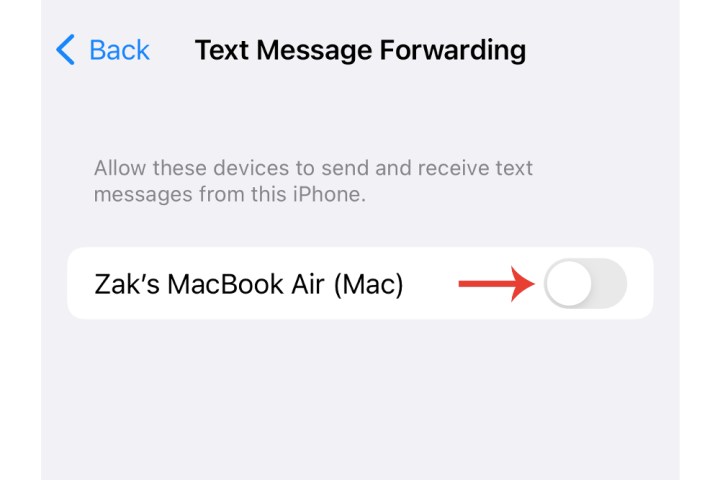
Step 4: Follow the same steps as explained in the previous section to delete SMS messages on your Mac.
How to restore deleted messages on Mac
In the event that you delete an iMessage or SMS text, it’ll remain in your Recently Deleted folder (located in the Messages app) for 30 days, at which point it will be deleted from all your devices. And after 40 days, the messages are completely removed from the iCloud drive.
Step 1: To restore an old text, open the Messages app, then click View > Recently Deleted from the top menu bar.
Step 2: Click the conversation you’d like to recover. Click Restore to put it back into your regular message queue, or Delete to permanetly delete the message from your Mac.
How to block messages on Mac
Blocking messages from specific contacts and numbers is pretty easy to do in macOS. Here’s how:
Step 1: Launch the Messages app and select a conversation. This needs to be a one-on-one chat with an individual, not a group message.
Step 2: Click Conversation (located at the top-left of the screen), then click Block Person.
Step 3: You can manage your blocked callers, you can click Messages > Settings > Blocked to access your log of blocked senders.
Step 4: From this dashboard, you’ll be able to click the Add button to pull up your iCloud contacts. Click one to add the person to your blocked list. You can also click a blocked caller, followed by the Remove button, to un-block the contact.
If you accidentally removed someone's details, don't worry - deleted iPhone contacts can also be restored.
You can delete messages on your phone, too. Here's our guide on how to delete messages on your iPhone.


