Wanting to get out of the YouTube business? If you want to delete your YouTube account, all you need to do is go to your YouTube Studio page, go to the Advanced Settings, and follow the section that will guide you to permanently delete your account. If you need help with these steps, or want to do so on a platform that isn't your computer, you can follow the steps below.
Note that the following steps will delete your YouTube channel, not your associated Google account.
Using desktop
Step 1: Log in to YouTube Studio using the account of the channel you want to delete. Choose Settings from the left side of the screen.
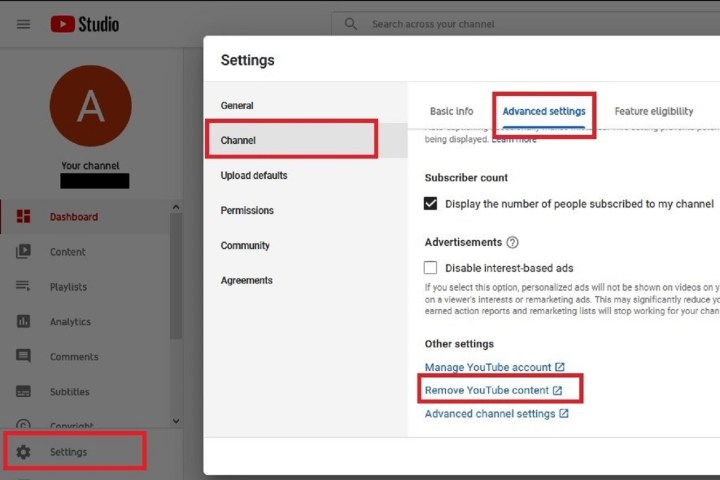
Step 2: On the next screen, choose Channel and then select the Advanced settings tab.
Step 3: Under Advanced settings, scroll down until you see the Remove YouTube content option. Click on that option. This will open another tab, and you’ll be asked to sign in to your account again. Go ahead and do so.
Step 4: Click on the option labeled I want to permanently delete my content. Selecting this option will expand it into two short explanations of what this decision actually means, with check boxes next to each explanation section. Read these explanations, and if you still want to delete your content, select both check boxes.
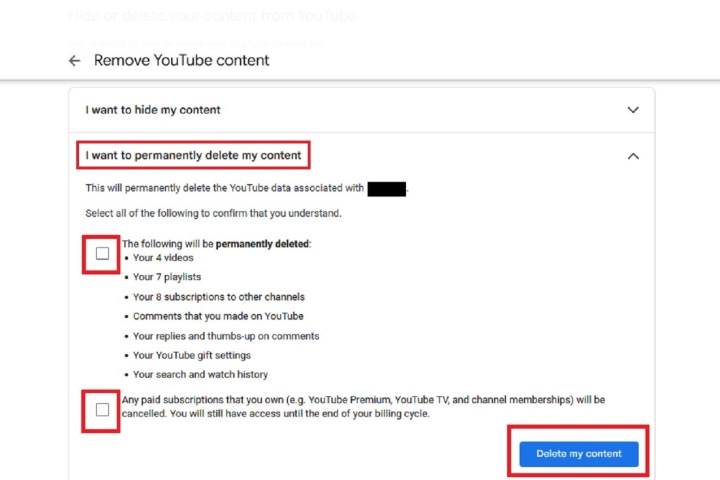
Step 5: If you’re absolutely sure that you want to delete your YouTube channel, go ahead and click on the blue Delete my content button.
Using Android
If you'd rather delete your YouTube channel via the mobile app, you can. Android users can use the following instructions to do so:
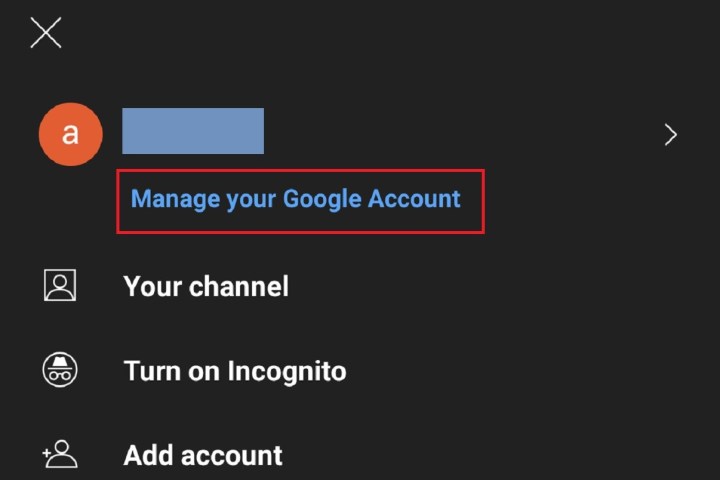
Step 1: Open the YouTube app on your device. Select your Profile picture icon in the top-right corner of your screen. Select Manage your Google account.
(If you have multiple Google accounts signed in on your device, you may need to select Manage your Google account again on the next screen.)
Step 2: Choose Data and privacy.
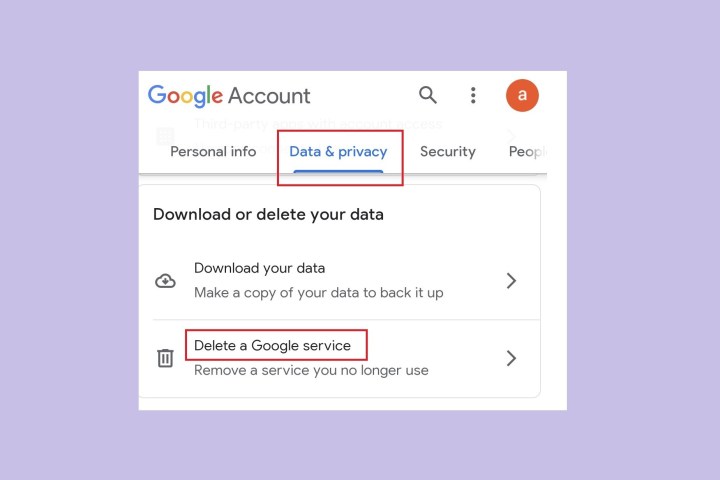
Step 3: Scroll down until you see the Download or delete your data section. In this section, select Delete a Google service.
Step 4: You’ll be prompted to log into your account. Do so. Afterward, you’ll be given the option to download your data before deleting your YouTube channel. If you want to do so, choose Download your data. If you’re ready to delete your YouTube channel, tap on the Trash can icon next to YouTube.
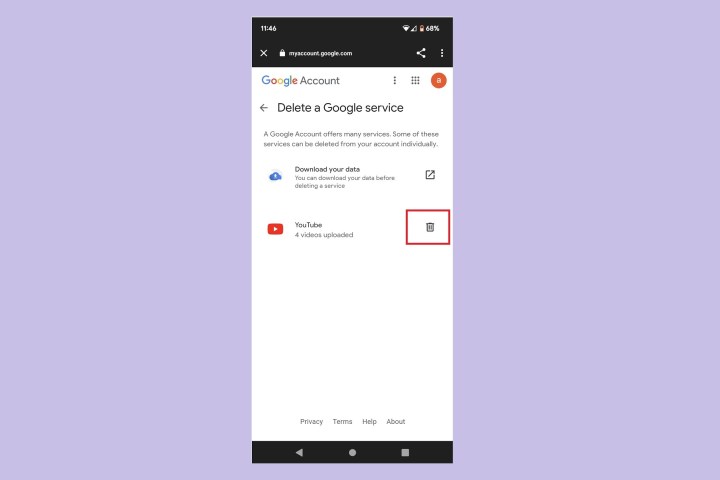
Step 5: You’ll be asked to log in again. Do so. Then, tap on the option labeled I want to permanently delete my content. Selecting this option will expand it into two explanation sections that describe what this decision actually means, with a check box next to each section. Read the explanations, and then select both check boxes if you understand it and still want to delete your YouTube channel.

Step 6: When you’re ready to delete your YouTube channel, tap on the blue Delete my content button.
Using iOS
Deleting your YouTube channel on iOS is pretty simple and can be done right from the YouTube app. Just follow these steps.
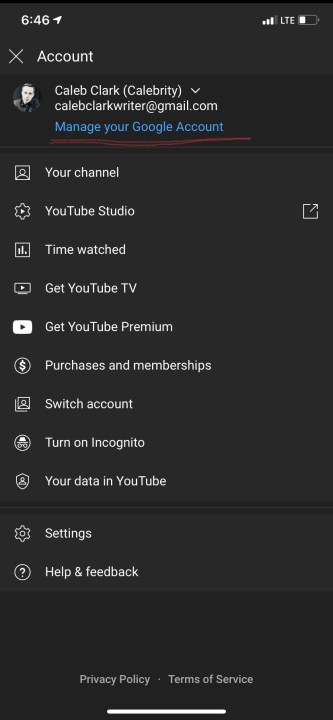
Step 1: From the home screen, tap on your Profile icon in the top-right corner and click Manage your Google account.
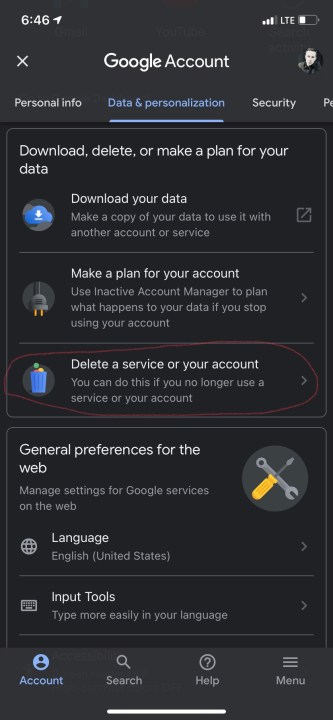
Step 2: Click on Data and personalization from the top tab. Scroll down and click Delete a service or your account.
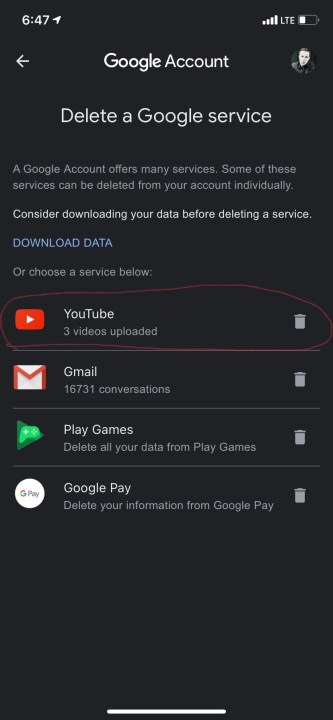
Step 3: From there, you can decide to delete individual services or your Google account entirely. To delete your YouTube channel, select Delete a Google service. You will be prompted to enter your password.
Step 4: After you enter your password, hit the Trash can icon next to YouTube, and all of your data will be removed.
That’s it! Your account is now deleted.

