It might be one of the best web browsers, but tabs can get disorganized in Google Chrome. If this has happened to you, check out the group tabs feature. Rather than having your tabs randomly scattered along the top of the Chrome window, you can now choose to group your tabs, labeling them with a chosen name and color. If you want to get a bit more organized, here is how to enable group tabs in Google Chrome.
What are group tabs?
Google released the group tab feature to help users organize their collection of open tabs in the Chrome web browser. By choosing to group tabs together, you can identify them based on given names and colors quickly. Once grouped, you can move and reorder your tabs on the tab strip. Best of all, when you close Chrome, the tabs remain in place. When you’re done with a group, just right-click on it and select Close group to remove it.
If you only need to organize a few tabs, it is also possible to pin a tab in Google Chrome.
How to create a new group

If you want to begin organizing your workspace, here’s how to create a new tab group:
Step 1: Begin by opening the tabs you wish to group.
Step 2: Right-click on the first tab and select Add to New Group.
Step 3: A dot appears to the left of your selected tab — click it.

Step 4: In the blank space, enter a name for your tab group.
Step 5: Select one of the given colors for your tab group.
You have just created a new tab group! Now let’s stuff it with more tabs.
How to add tabs to a group

Once you create a new tab group, you can begin adding other tabs. This process will help you better organize your Chrome browser. Follow the steps below, after you have created a new group, to add additional tabs.
Step 1: Right-click on a tab you wish to add.
Step 2: Select Add to Existing Group.
Step 3: Select the target tab group listed in a second roll-out menu.
Move the location of grouped tabs
Exactly how you would move a standard tab is how you would move a group of tabs. Hold down the left mouse button while hovering over the name of the group you wish to move, then move your mouse left or right. Once satisfied with the new location, release your left mouse button. It’s as easy as that!
Make changes to a tab group
If you wish to alter your tab group by either ungrouping it or completely closing it, you can follow these steps. Ungrouping a tab group will leave the existing tabs open while closing a group will close all tabs that have been grouped.
Step 1: Right-click on the group you wish to edit.
Step 2: Select either Ungroup or Close Group.
Note: Under this same menu, you can rename your tab group and/or select a new color.
What if group tabs are unavailable?
Tab groups were initially added to Chrome 83. If you have not yet updated, we recommend updating to the latest version. Here’s how:
Step 1: Click the three-vertical-dot More icon in the top right corner.
Step 2: You may see the Update Google Chrome option listed on the drop-down menu. If not, highlight Help and select About Google Chrome in the second roll-out menu.
Step 3: Chrome should automatically update and display a Relaunch button. If there is no update, it will simply say Google Chrome is up to date.
Please remember that the tab group feature will not be immediately available in Chrome 83. Instead, Google is slowly rolling out this feature to the masses over time. However, you can enable tab groups early in Chrome 83 by activating its corresponding flag. Here’s how:
Step 1: Type chrome://flags in the address bar.
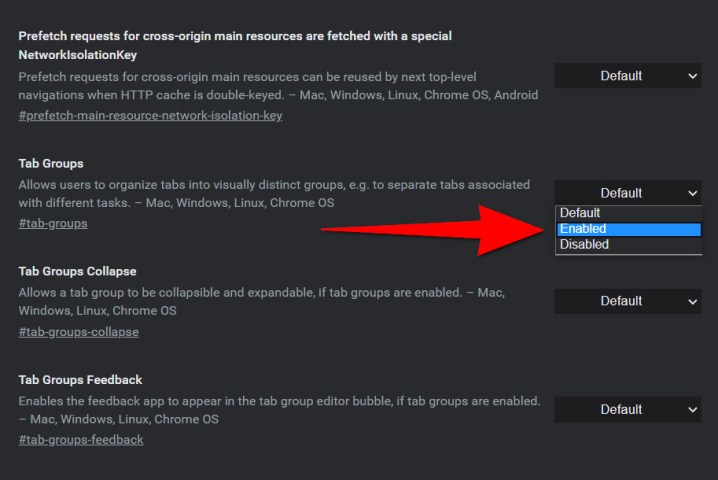
Step 2: Scroll down the long list until you find the Tab Groups flag.
Step 3: Click the down arrow next to Default and select Enabled in the drop-down menu.
Step 4: Click the Relaunch button at the bottom of the browser window.
Tired of unscheduled interruptions while you browse? Learn how to disable notifications in Google Chrome.