Cutting out the background from an image can be time-consuming and fiddly, especially if a lot is going on within it. Fortunately, there are several tools to make the job quick and easy — and some of them don’t even require a download.
Remember, removing a background means eliminating everything behind the foreground object. You want the background to be nothing more than a grid of gray squares, signifying that it’s now transparent. This allows you to use the resulting image as a layer to place over another image, like adding a mustache to someone’s face.
Online background-remover tool
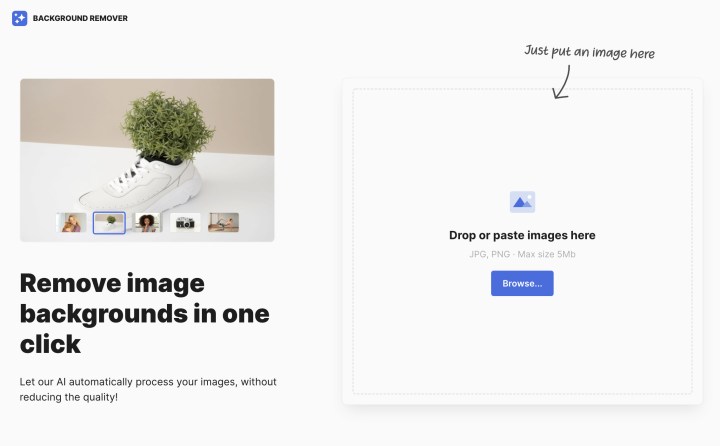
Web apps are generally free to use, and you can access them from any device you’re working on, so they’re often the fastest option. Here, we’ve chosen Icons8 Background Remover, a particularly user-friendly option that allows you to get three free removals without needing to register at all. Let’s go through what to do.
Step 1: Have your photos ready for removal. Navigate to the Background Remover app here.
Step 2: Drag your photo file to the indicated space or select Browse to get it from local storage.

Step 3: The tool generally takes a few moments to process the image, and then it will give you an easy PNG image with the background cut out. It’s the most accurate tool we’ve found, but fuzzy or busy images may not be as clear, in which case you should probably use one of the other solutions we go over below.

Step 4: If you don’t like your image results, you can choose Delete and try a new image. If you do like it, choose Download, and you’ll get the PNG file on your local storage to work with.
Step 5: Now you can add the image to any background you want with basic editing tools. Icons8 can’t help with that, but if you’re still online and looking for a quick, free solution, we suggest heading over to Pixlr for its quick image-editing tools. Upload your background, then choose Add element image > Add media to get your cut-out subject. It’s that easy!

How to remove the background from an image in Photoshop
If you want more control over your images other than removing backgrounds, like combining images into a single, shareable file, desktop software may be the way to go.
Photoshop is a pretty amazing program, and with such a massive selection of tools, the program offers several different ways to strip backgrounds from images. It isn’t the cheapest, but there is always a free trial that you can take advantage of. We’ll start with the easiest method, which works well if you’re dealing with a neutral, solid, or otherwise basic background.
Step 1: Open the image in Photoshop.
Step 2: Select the Magic wand or Lasso tool, the latter of which is excellent for customizing your selection.

Step 3: Click the background and hit the Delete button, which will cause the background to disappear.
Step 4: Save your new image as a PNG.
Remove more complex backgrounds with Photoshop
To strip away a more complex background in Photoshop, you’ll need to dig a bit deeper into your toolbox. Photoshop is a full-featured program, and as such, it supplies you with a myriad of different ways to remove backgrounds. Some of these methods carry far steeper learning curves than others, so for this tutorial, we’ll go over a fairly straightforward method. Here’s how it’s done:
Step 1: Open your photo in Photoshop.
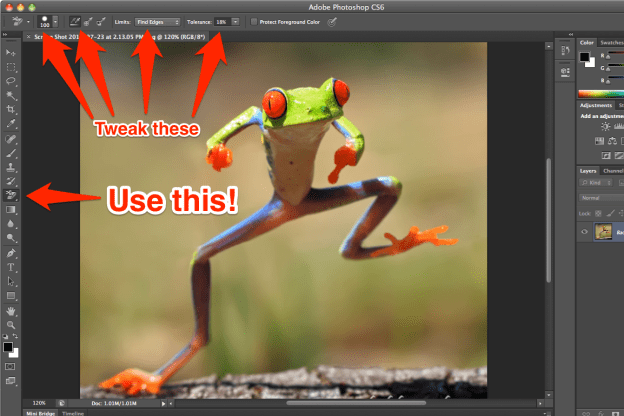
Step 2: Select the Background eraser tool.

Step 3: Adjust the brush size to your liking and set Sampling to Continuous.
Step 4: Set the Limits to Find edges and adjust the Tolerance. Lower is generally better since a high setting will remove more colors.
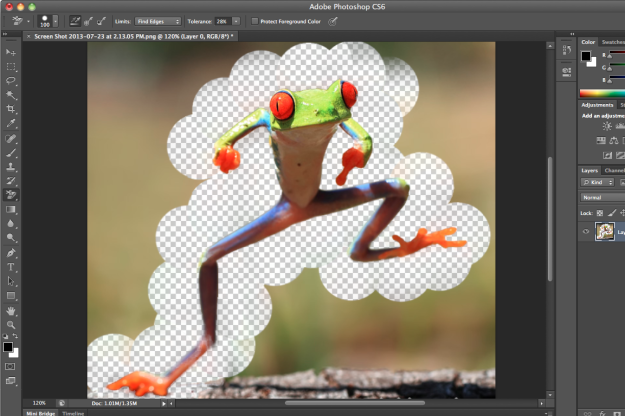
Step 5: Hover over an area of the background that’s near your object. Now, simply click, and it will be removed.
Step 6: Continue this process until you’ve created a background-free border around your entire object. Feel free to adjust the tolerance as needed, where your image gets lighter/darker around the edges.

Step 7: Once you’ve created a solid border around your object, switch to the Eraser tool and remove the rest of the background.
Remove the background from an image using GIMP
Many photo-editing programs have borrowed the look and feel of Photoshop’s highlighting tools for their own removal tools. So, even if you’re using freemium software like Pixlr — or other tools highlighted in our roundup of the best free photo-editing software — knowledge of these tools can carry over.
In this case, we chose GIMP, an open-source alternative to Photoshop that costs you nothing but time to download and use. Removing the background is mostly similar to Adobe’s subscription software, although the toolset isn’t quite so robust.
If you’re removing the background from a simple image, like deleting a white backdrop draped behind a black mustache, the Fuzzy select tool may be your quickest option.
Step 1: In the Layers window, right-click on the image’s layer and select Add alpha channel on the pop-up menu. This adds transparency to the layer, which we want if we’re sticking this mustache on a co-worker’s photo.

Step 2: Click the Fuzzy select tool on the Toolbar.
Step 3: Click on the subject. In this case, we chose the black mustache. You’ll then see a strobing outline appear along the inside edge.
Step 4: Click Select followed by Invert on the drop-down menu. This tells GIMP to revert the selection to the background, not the subject.
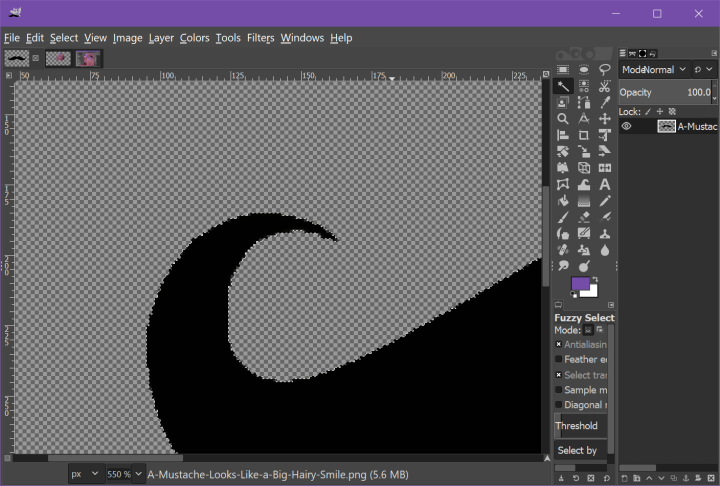
Note: We took this route because the Fuzzy Select Tool selected the mustache from within the black area. Had we used the Select By Color Tool, the result would have created a fuzzy white border around the subject.
Step 5: Press the Delete key. The white background should disappear, leaving the transparency grid.
This is a quick method to delete the white background, but it’s obviously not perfect. The edge is jagged, but you won’t have the white debris associated with the Select By Color Tool.
Step 6: The more unpleasant process to eliminate all the white is to utilize the Paths tool. This method is tiresome and requires a lot of time, but the effects are significantly better than the other two techniques.
This means implanting anchors and modifying their handles so the resulting lines curve around the mustache. It’s comparable with the conventional approach of cutting color overlays with an X-Acto knife and a collection of French curves, except it’s digital, and you don’t withdraw blood.


