Spreadsheets are ideal for tracking finances, orders, inventory, and so much more. If you’re a Mac user, you can take advantage of the spreadsheet app that comes free with macOS. Here’s how to use Apple Numbers.
Create a workbook in Numbers
With Numbers, you can jump right into your tasks by using a pre-built template or set up your workbook from a blank canvas.
Step 1: Open Numbers from the Applications folder. You can do this with Finder active using Go > Applications.
Step 2: In the first dialog box that pops open, pick New document.
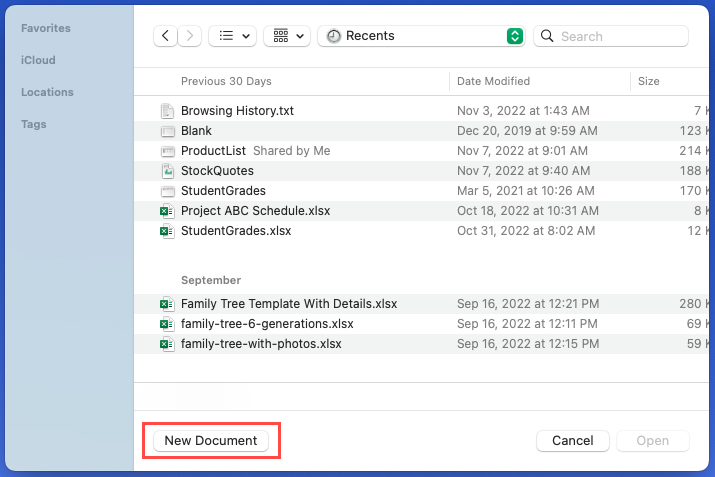
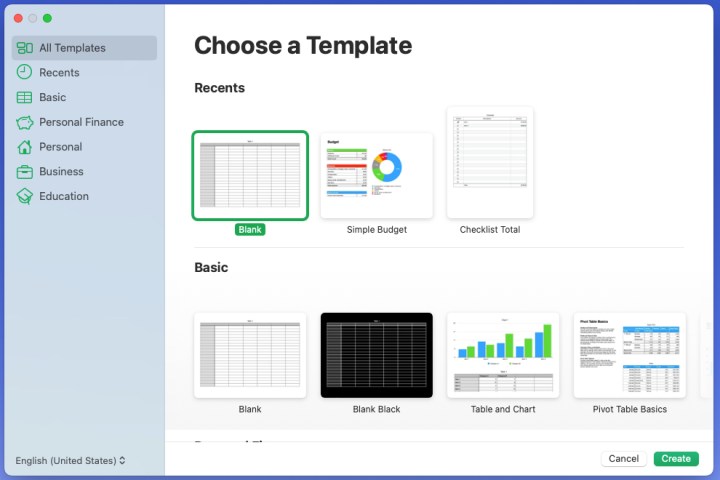
Step 3: You’ll then see a list of templates you can choose from for a quick start on your project. The templates are categorized on the left to help you easily find the one you need. You can also pick Blank to create a workbook from scratch.
Choose the template or Blank and pick Create on the bottom right.
Step 4: When the workbook opens, begin by giving it a name and selecting a location to save it. This lets you save your progress periodically as you work in Numbers.
Either select the Title bar at the top of the Numbers window or go to File > Save. Enter the name, pick the location, and optionally add tags.
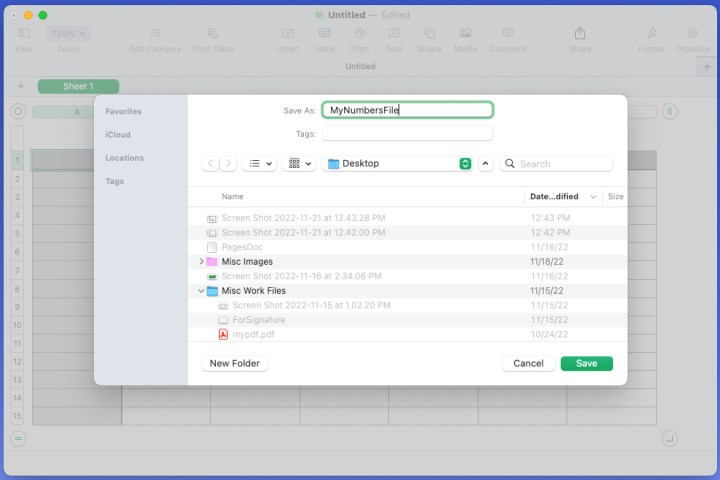
Step 5: Select Save.
Manage sheets in a workbook
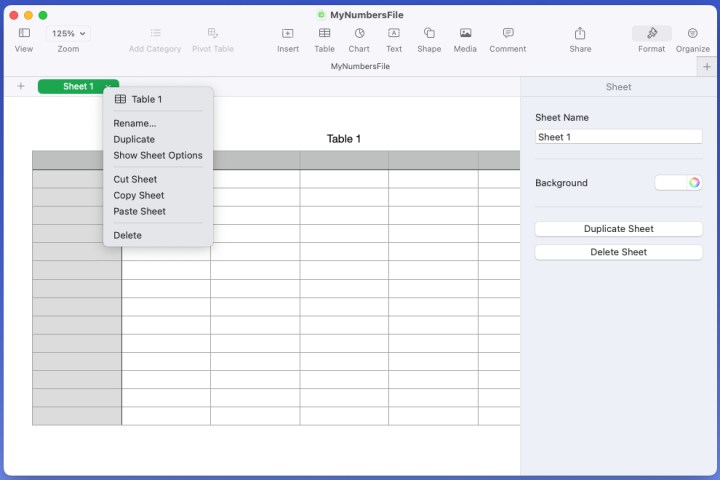
You start each workbook with one sheet, labeled Sheet 1 on the left side of the tab row at the top. You can create additional sheets for various related parts of your project if you like, as well as rename, duplicate, rearrange, and color the background.
Add a sheet: Select the Plus sign on the left side of the tab row or go to Insert > Sheet in the menu bar.
Rename a sheet: Either double-click the sheet name or select the Arrow to the right of it and pick Rename. Then, enter the new name and press Return.
Duplicate a sheet: Select the Arrow to the right of the sheet name and pick Duplicate.
Rearrange sheets: Drag a sheet tab to the right or left and drop it in its new location.
Color a sheet background: Select the Arrow to the right of the sheet name and pick Show sheet options. When the Format sidebar opens on the right, use the Palette drop-down box next to Background to choose a color.
Enter and format data in Numbers
A spreadsheet is only as good as the data you put in it. You can enter text, numbers, dates, currencies, percentages, and more.
Step 1: Select the cell where you want to add data, and then simply type in it and press Return.
You’ll see the data appear in the cell as well as in the bar at the bottom of the window.
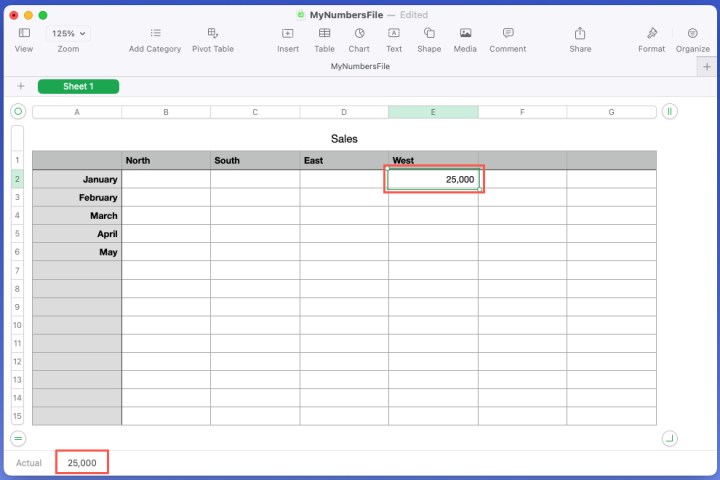
Step 2: Depending on the type of data you enter, you may need to format it. For example, you might want the number you enter to be a percentage.
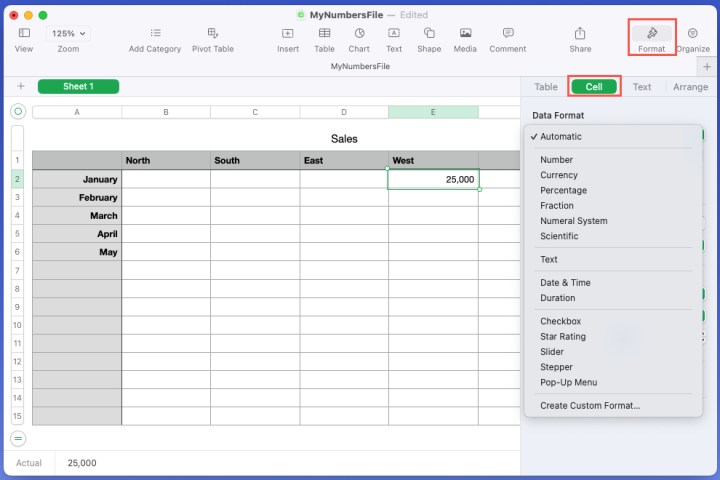
Select the cell containing the data and use the Format button on the top right to open the sidebar. Then, head to the Cell tab.
Step 3: At the top of the Cell tab, you’ll see the Data format section. Use the drop-down box to choose the type of data you want. Depending on the format you select, you may see additional options below the drop-down box.
For instance, if you pick Date and time, you can choose the formats for each.
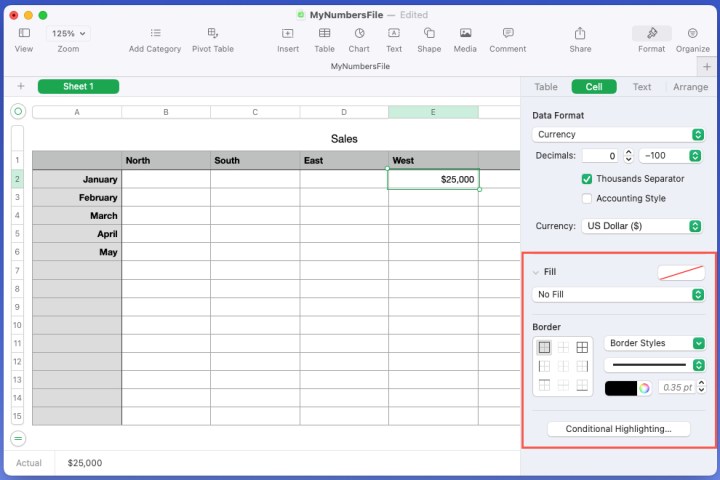
Step 4: To format the cell itself, use the remaining options in the Cell tab of the sidebar. You can choose a fill style, add a border, or set up conditional highlighting.
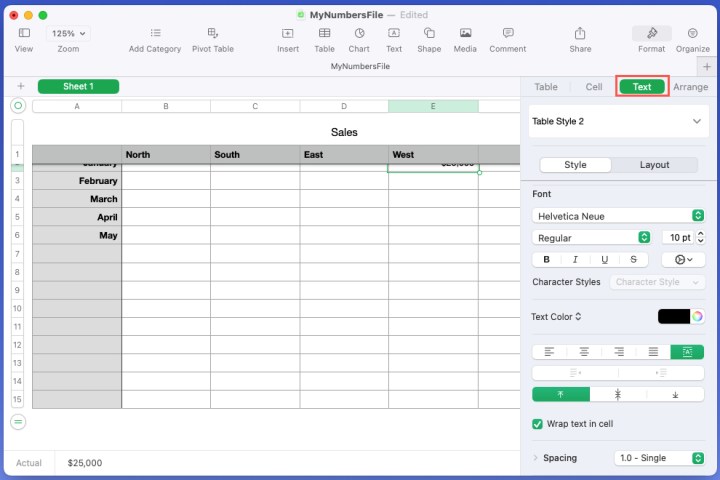
Step 5: To change the font style, size, color, alignment, and similar options, go to the Text tab in the Format sidebar.
Perform basic calculations
Most spreadsheets contain numbers of some sort, and with those numbers can come calculations. You can quickly perform basic calculations and either view the result or include it in a cell.
Step 1: Select the cells for which you want the calculation.
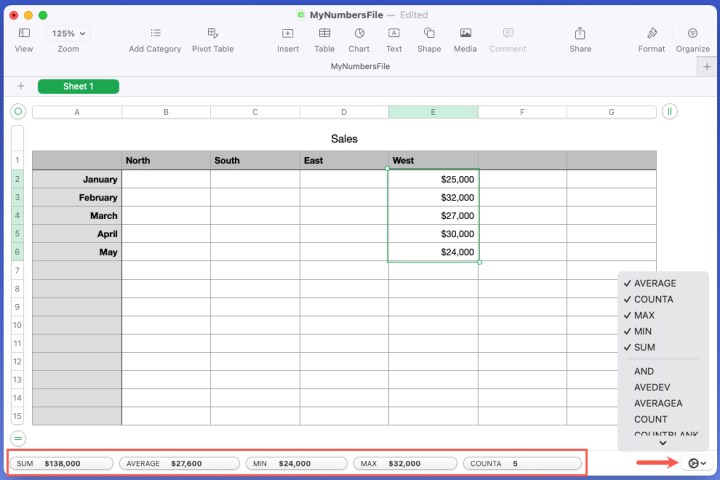
Step 2: To only view the result but not add it to your sheet, simply look down the bar at the bottom. You’ll see results for sum, average, min, max, and count.
To adjust which calculations display, use the Gear drop-down box on the right to select the ones you want.
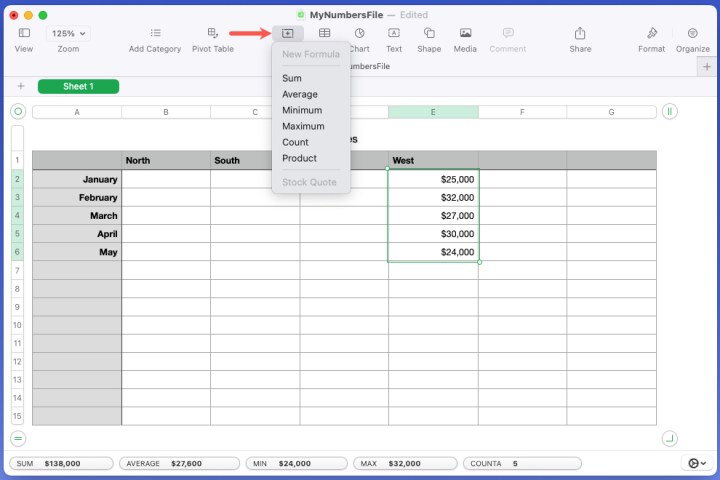
Step 3: To add the result to your sheet, pick Insert in the toolbar or Insert > Formula in the menu bar.
Then choose the calculation you want. As you can see, you can quickly sum, average, count, multiply (product), or get the minimum or maximum for your selected cells.
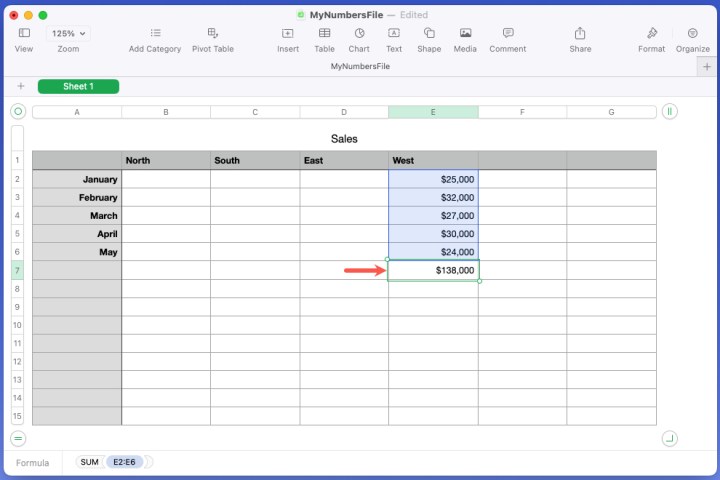
Step 4: Once you choose the calculation, you’ll see the result display. If you select cells in a column, the result displays in the bottom cell, and if you select cells in a row, the result displays in the right cell.
Create formulas in Numbers
Along with basic calculations, you can create complex formulas using the functions in Numbers.
Step 1: Select the cell where you want to enter the formula.
Step 2: Either pick Insert in the toolbar or Insert > Formula from the menu bar and select New formula.
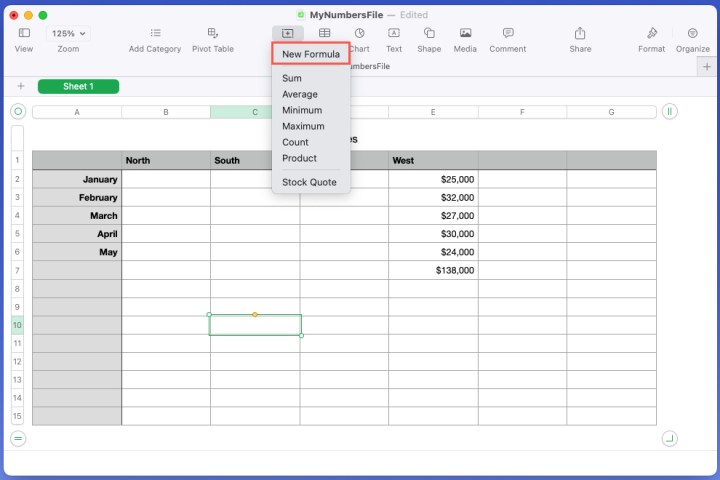
Step 3: When the formula box displays, type your formula and select the Check mark to add it to the cell.
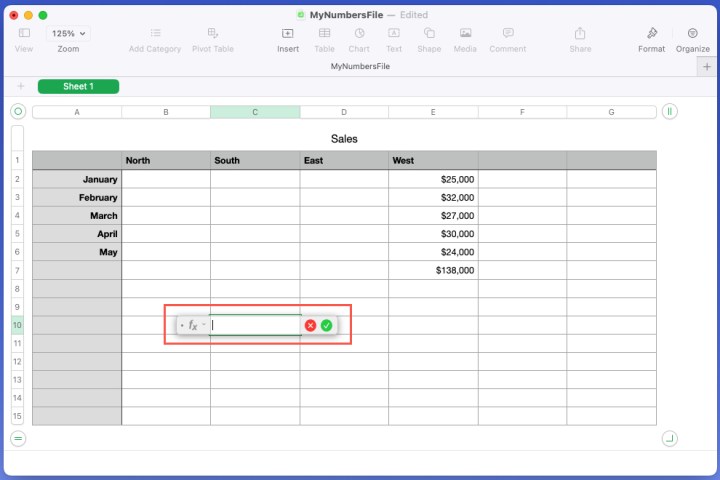
Step 4: If you’d like assistance with the functions available in Numbers, select the Format button on the top right when the formula box displays.
You’ll then see a list of functions in the sidebar. You can choose a category to view those particular functions, use the Search box to find one, and review a description of a function by selecting it in the list.
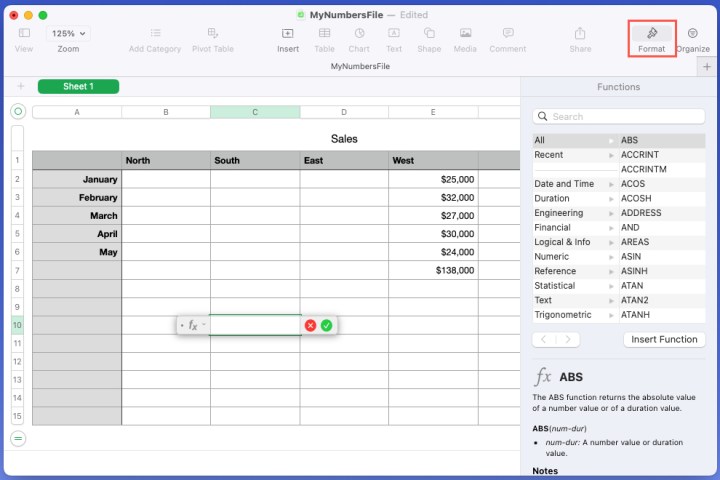
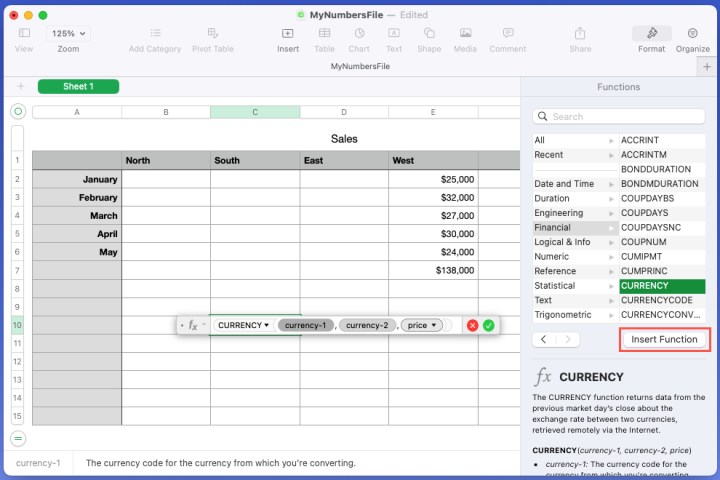
Step 5: When you find the one you want to use, pick Insert function below the function list.
The function then appears in the formula box, and you can complete the formula.
Insert a table, chart, shape, or media
One more Numbers feature you may want to try out is inserting an item. This lets you add objects like tables, charts, shapes, text boxes, lines, photos, videos, and audio files to your sheet.
Step 1: Use the corresponding buttons in the toolbar or go to Insert in the menu bar to add these types of items.
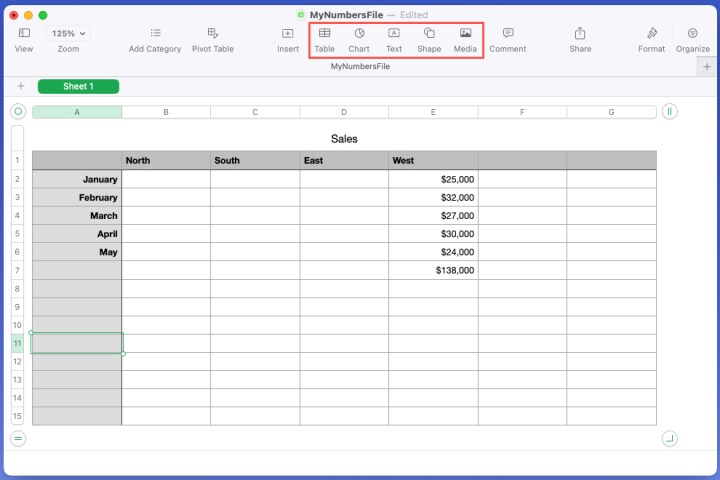
Step 2: Once you add an item to your sheet, select the Format button to adjust its settings. Depending on the kind of object you add, you can do things like change a chart’s style, a shape’s color, or an image’s size.
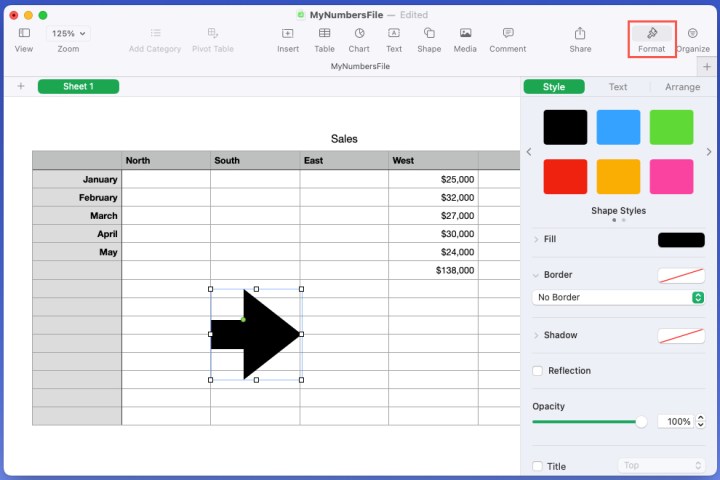
Step 3: If you insert an item and want to remove it later, select it and either press Delete or use Edit > Delete in the menu bar.
Numbers is a handy, built-in Mac app that can help you with everything from company financials to household budgets to inventory tracking.
So now that you know how to use Apple Numbers, why not check out how to use Google Sheets too for another spreadsheet option?


