With Apple’s Continuity features for Mac, iPhone, and iPad, you can seamlessly move to another device, continuing where you leave off. This includes things like AirPlay, Handoff, AirDrop, and Universal Clipboard.
To make the most of it, though, you need to know how to use Continuity Markup and Continuity Sketch. With Markup, you can use your iPhone or iPad to make annotations and markups on a document or image and have it display on Mac. With Sketch, you can create a drawing on your mobile device that pops into a document on your Mac.
Requirements for Continuity Markup and Sketch
To get started, make sure that you’re using compatible devices. You can check Apple’s list for the iPhone, iPad, and Mac you use. Then, confirm that you have the following in place:
- You’re signed into iCloud on all devices using the same Apple ID.
- You have both Wi-Fi and Bluetooth enabled.
- Your iPhone is running iOS 13 or later.
- Your iPad is running iPadOS or later.
- Your Mac is running MacOS Catalina or later.
If you have everything in order, it’s time to put these continuity features to work! You can use the features in Apple’s apps like Notes, Messages, Mail, Pages, and TextEdit. Some third-party apps also support these continuity features.
How to use Continuity Markup
Have you ever wanted to sign a PDF or annotate an image with your iPhone or iPad, but use it on your Mac? Continuity Markup is the ideal tool for bringing markups from your mobile device to your computer.
Step 1: Select the item you want to mark up in Finder on your Mac.
Step 2: Press your Space Bar to open a preview and click the Markup icon in the toolbar. Alternatively, you can right-click the item and select Quick Actions > Markup.

Step 3: In the Markup toolbar at the top, click the Annotate button. If you have more than one connected device, choose the one you want to use.

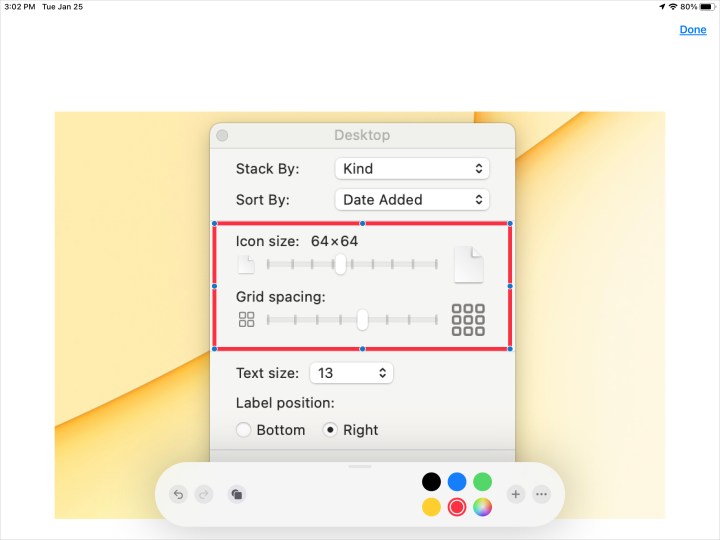
Step 4: The Markup window will automatically open on the device you select. You can then use your finger or Apple Pencil to make your annotations. In this example, we’re using an iPad.

Step 5: You’ll see the same Markup tools as if you were using Markup without the continuity feature. Select a pen, pencil, or marker, choose a color, or use the plus sign to insert text, a signature, or shape.

Step 6: As you mark up the document or image on your iPhone or iPad, you’ll see the changes in real time on your Mac.

Step 7: When you finish, tap Done on your mobile device.

Step 8: To save the changes, click Done on your Mac.

How to use Continuity Sketch
If you like drawing items on your iPhone or iPad for use on your Mac, this feature is for you. You can request the sketch using your Mac, create it on your mobile device, and then use it on MacOS for whatever you like.
Step 1: Open the app where you want to insert the sketch and do one of the following:
- Go to File > Insert from iPhone or iPad > Add Sketch from the menu bar.
- Go to Insert > Insert from iPhone or iPad > Add Sketch from the menu bar. This applies to Pages, Numbers, and Keynote.
- Click the Media button in the toolbar to select Add Sketch for the device.

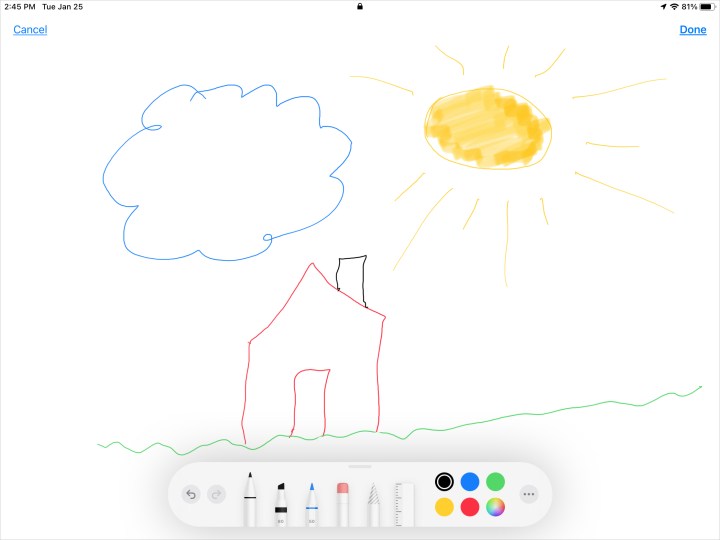
Step 2: The Sketch window will automatically open on the device you select. Then use your finger or Apple Pencil to draw your picture. We’re using an iPad for this example as well.
You have most of the same tools as in the Markup window. Choose a pen or pencil, change the color, or use the undo and redo arrows. When you finish, tap Done on your mobile device.

Step 3: Unlike Continuity Markup, you won’t see the progress of your drawing on Mac. You’ll only see the finished product after you tap Done on iPhone or iPad.

Continuity Markup and Continuity Sketch are convenient tools for annotations, signatures, or drawings. You can have your Mac work with your mobile devices to get the exact documents or images you need.


