Google Sheets is a web-based spreadsheet application that’s equivalent to Microsoft Excel. If you’ve never used Sheets (or Excel, for that matter), you might need help getting started.
In this beginner’s guide, we’ll show you to use Google Sheets. From adding sheets to entering data and formatting it, here are the basics you need to start using Google Sheets.
Getting started in Google Sheets
When you land on the Google Sheets main page, sign in with your Google account. You’ll then open a workbook that contains the sheets.
Step 1: You can pick a template from the top if you want a jumpstart on your project. You’ll see options like budget, schedule, and time sheet.
If you prefer to start with an empty workbook, choose Blank on the top left.

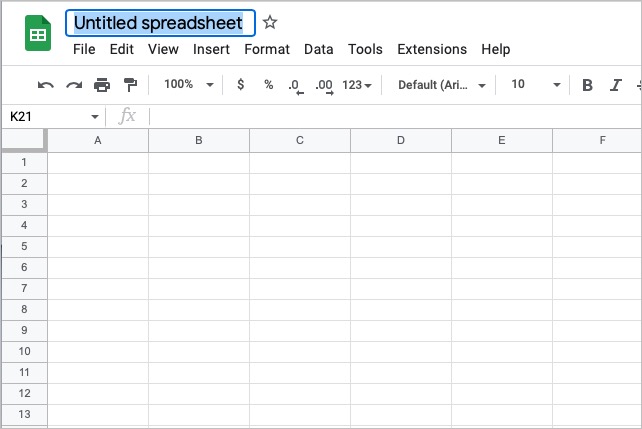
Step 2: The first thing to do when the workbook opens is to name it. By default, the name is “Untitled spreadsheet,” which you’ll see on the top left. Select that text, enter your own, and press Enter or Return to save it.
If you start with a template, you’ll see its name instead. You can keep this name or select it and enter your own text.
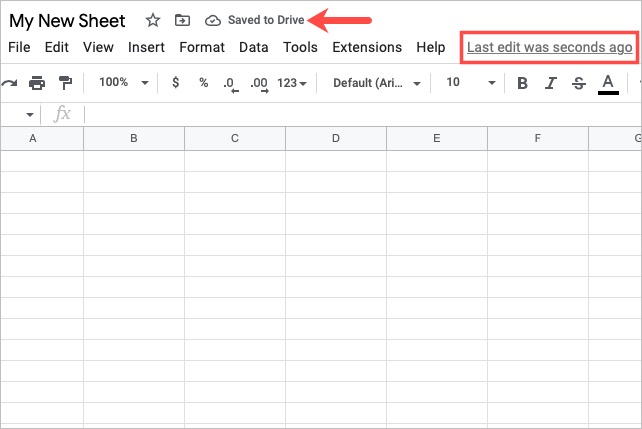
Step 3: Everything you do in Google Sheets is saved automatically — you don’t have to worry about hitting a Save button.
With every change you make to your sheet, you’ll see the timing of the last edit and a brief message that your sheet is saved to Drive at the top.
Step 4: To return to the main Google Sheets screen at any time, select the Google Sheets logo on the top-left corner, next to your workbook’s name. You’ll then see all workbooks you create in a list. Select one to open it.
Adding sheets to a workbook
At the bottom of your workbook, you’ll see the spreadsheet tabs. This allows you to create multiple sheets and keep them all in the same workbook. By default, the name for each is Sheet1, Sheet2, and so on, but you can rename any sheet you create with something more meaningful, as well as give it a color.
Step 1: To add a new sheet, select the Plus sign on the bottom left.

Step 2: When the new sheet displays to the right, you can rename it. Either double-click the default sheet name or select the Arrow to the right of the name and pick Rename in the menu.
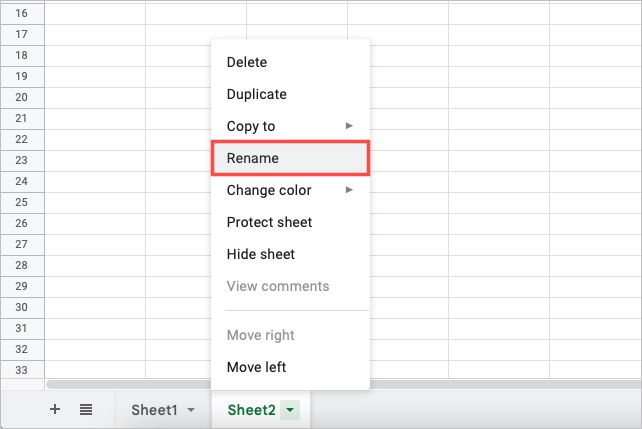
Step 3: Enter the new sheet name and press Enter or Return.
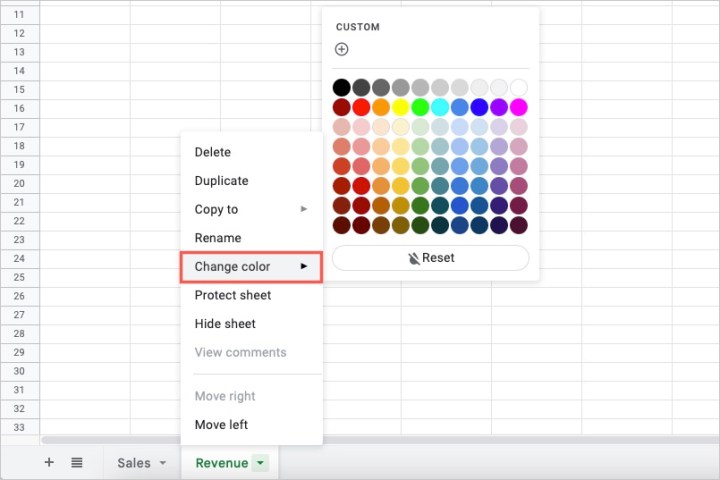
Step 4: You can also use the menu to apply a color to your sheet’s tab. This is handy for spotting certain sheets at a glance.
Select the Arrow next to the name, move your cursor to Change color, and pick the color you want to use.
Step 5: You can create up to 200 sheets in your workbook. To move to a different sheet, simply select its tab at the bottom.
When you have many sheets that fill the tabs across the bottom, you can use the Arrows that display on the bottom right to scroll through them.
Entering data in Google Sheets
Once you set up your workbook and sheets, you can start entering your data.
Step 1: Entering data into your spreadsheet is as simple as selecting a cell, typing in it, and pressing Enter or Return.
You’ll see the cell highlighted, making it the active cell. In addition to seeing the contents in the cell itself, you’ll see it in the Formula bar at the top.
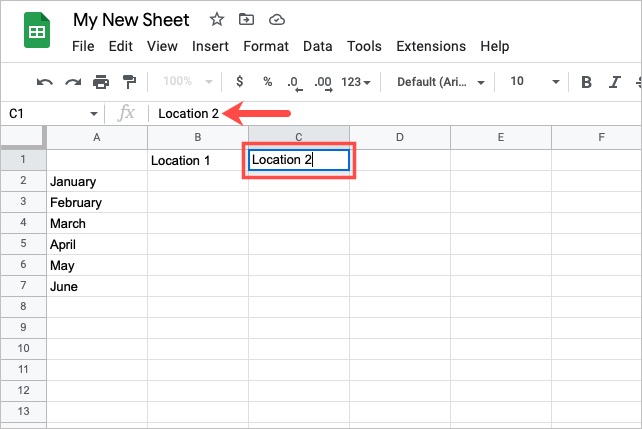
Step 2: Another way to enter data in your sheet is by pasting it from another location. You may have a note, report, or other item containing text or numbers you want to add.
Copy it from that location, select the cell in Google Sheets where you want the data, and do one of the following to paste it:
- Select Edit > Paste from the menu.
- Right-click and choose Paste.
- Use the keyboard shortcut Ctrl + V on Windows or Command + V on Mac.
You’ll also see a Paste special option in the Edit and Shortcut menus. This allows you to paste values, formatting, or formulas, along with a few more advanced options.

Formatting your data
One action you’ll find yourself doing with your Google Sheets data is formatting it. This ranges from formatting a number as currency to applying bold to make text stand out.
Step 1: Select a cell or range of cells containing the data you want to format. To select a range, drag your cursor through the cells to highlight them.
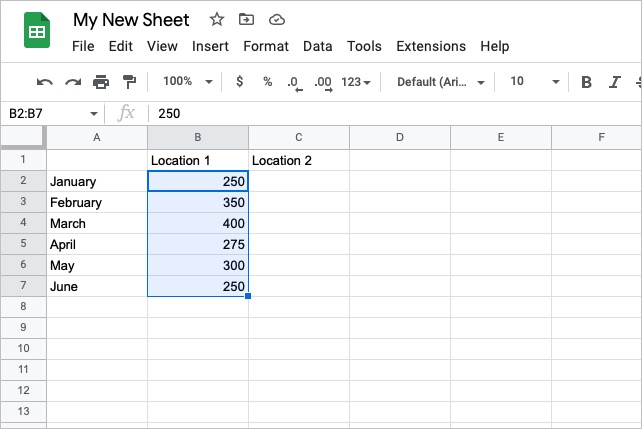
Step 2: Either open the Format menu or take advantage of the handy toolbar across the top of the sheet.

Step 3: Choose the format you want to use, and you’ll see your data update immediately.
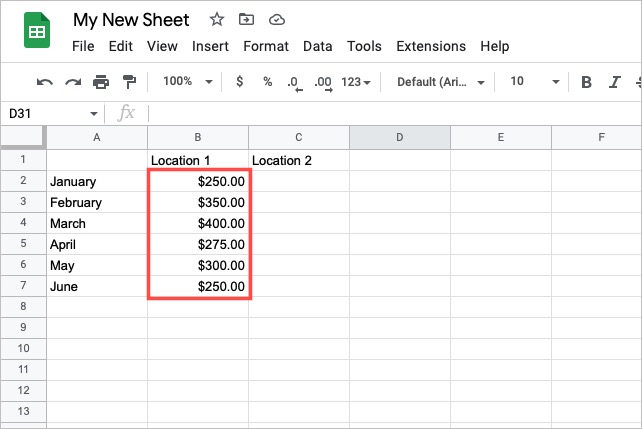
Step 4: You can choose from number, font, or cell formatting right from the toolbar. Hover your cursor over a toolbar button to see a screen tip of its description.
Doing basic calculations
A main feature of a spreadsheet application is the ability to do calculations. Google Sheets gives you a handful of common calculations right in the toolbar, like sum, average, and count.
Step 1: Select the cells you want to calculate. Note: For some functions and formulas, you’ll choose the cell where you want the result and create the formula there rather than selecting a group of cells first.
Step 2: Choose the Functions drop-down arrow in the toolbar and pick a calculation from the top. Here, we’ll add our values for a total using the Sum function.

Step 3: When the formula appears on your sheet, confirm the cells for the calculation and press Enter or Return.
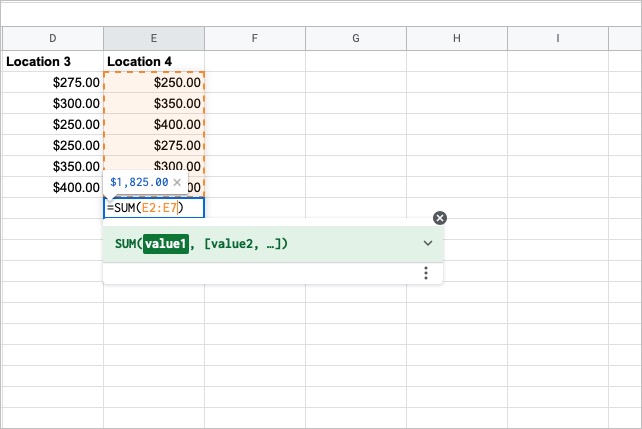
Step 4: The formula result displays below our selected cells. If you select that cell, you’ll see the formula in the formula bar.

Step 5: You can review the other options in the Functions drop-down menu for additional calculations and actions for use with formulas.
Exploring the menu options
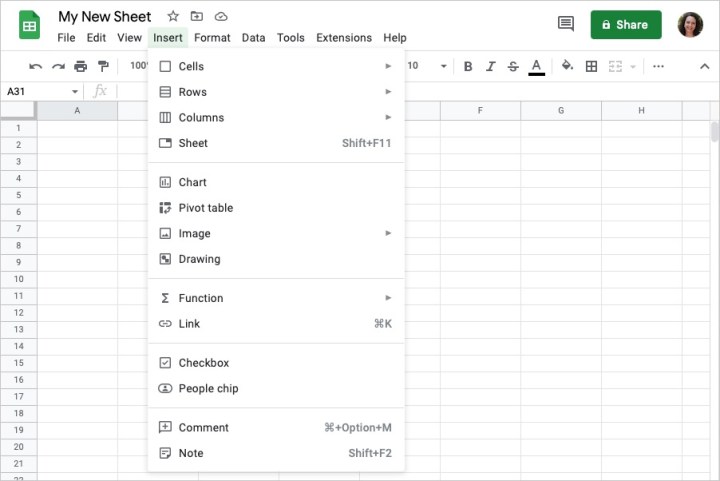
As a new Google Sheets user, you may want to take a moment to review the tabs in the menu and what each has to offer. So far, we’ve mentioned the edit and format menus, but as you can see, there are more.
Here are the tabs in the menu, per the above screenshot, along with some of their most common actions.
File: email, share, import, settings, and print
Edit: copy, paste, paste special, delete, undo, and redo
View: Show gridlines or the formula bar, freeze columns or rows, and group columns or rows.
Insert: Insert cells, columns, rows, charts, images, links, and comments.
Format: Format numbers, text, alignment, and wrapping, and apply conditional formatting.
Data: Sort, filter, protect, and use data validation.
Tools: spelling, autocomplete, notification rules, and accessibility
Extensions: Get, manage, and access add-ons.
Help: Search the menus, get help, view a function list, and see keyboard shortcuts.
You’ll also see Comment and Share buttons on the top right of your Google Sheet that you can use if you plan to collaborate with others. You can also access your Google account with your Profile icon.
There’s a lot more to Google Sheets than what you see here. But this beginner’s guide should get you off to a good start with the basics of how to use Google Sheets.
If you’re also new to Docs, take a look at our guide for how to use Google Docs too.


