Creating a presentation that stands out is no small task. So, if you’re new to Microsoft PowerPoint, you’ll need to familiarize yourself with the features and tools you need to build a presentation.
We’ll guide you through the process of creating a PowerPoint slideshow by adding slides and elements as well as how to present the show when you finish. These basics are just what you need as a beginner and should get you off to a terrific start with PowerPoint.
Note: The information in this tutorial applies to PowerPoint for Microsoft 365 on Windows. While you may see variations in features or menus, most PowerPoint versions have the same basic options.
How to create a slideshow
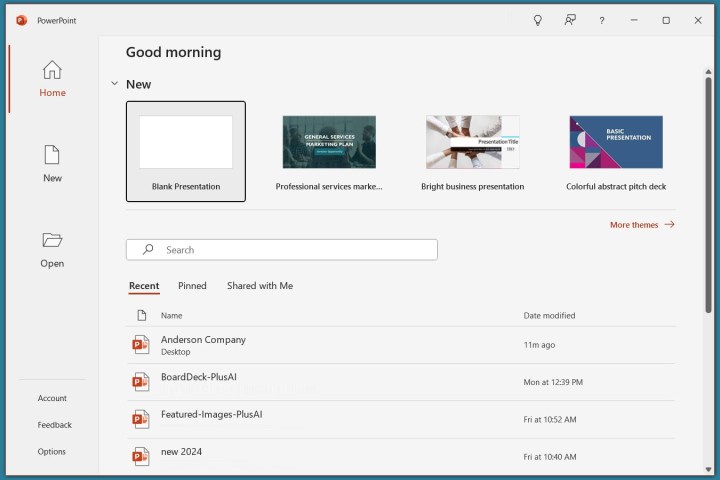
When you open the application, you can create a new blank slideshow or use a built-in PowerPoint template. Alternatively, you could convert a PDF file to PowerPoint format and use that, if suitable. To best familiarize yourself with the application and the items we’ll walk through here, select a Blank slideshow on the Home screen and follow along.
Next, you’ll want to name and save your presentation file. Select File > Save or Save As name the file on the right, choose a location for it, and select Save.
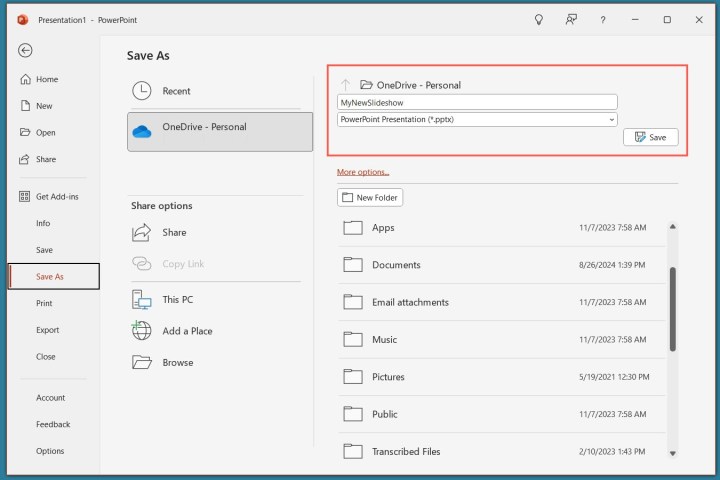
Be sure to continue saving your slideshow regularly as you work on it by selecting Save in the Quick Access Toolbar.
How to add a slide
A blank presentation in PowerPoint starts you off with a main slide. You’ll notice a text box at the top for the title and one beneath for the subtitle. Simply click inside these boxes to enter your text.
While it’s good to get in the habit of using title slides like these to begin future presentations, you’ll also need to know how to insert the additional slides.
Go to either the Home or Insert tab and open the New Slide menu in the ribbon.
Choose the layout you want to use for the new slide. You’ll see several options that include placeholders, which is handy for popping in what you need like text, lists, or images.
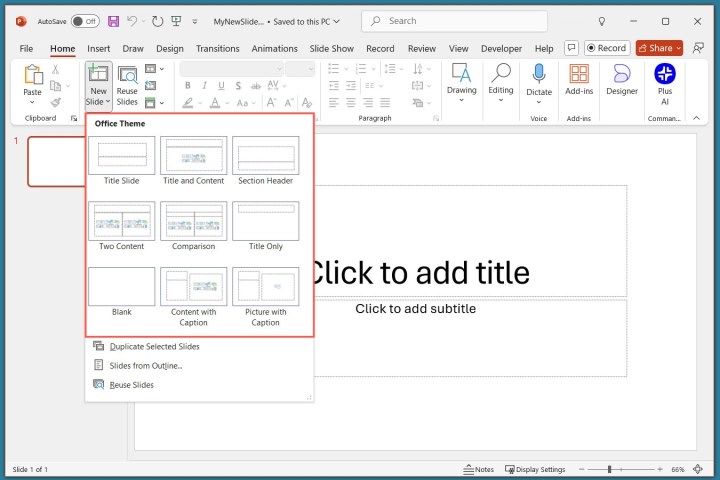
Once the slide appears, click inside a placeholder to add the necessary elements.

Continue to insert as many slides as you want the same way.
How to insert slide elements
Along with using the placeholders on the slides, you can add your own items. This is helpful if a slide doesn’t contain the number or type of placeholders you need.
Add a text box
One popular slide element to add is a text box, which is just like the title and subtitle boxes on the title slide. With it, you can insert and format text as you wish.
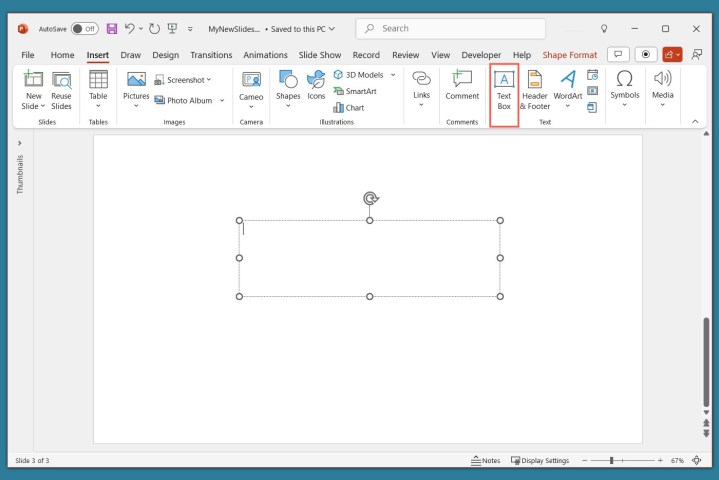
Go to the Insert tab and select Text box in the Text group.
You can use your cursor to draw the size of the box you want or simply click the slide and begin typing inside the box.
To format the text in the box, select it and go to the Home tab. Use the options in the Font section of the ribbon to adjust the style, size, color, or emphasis.
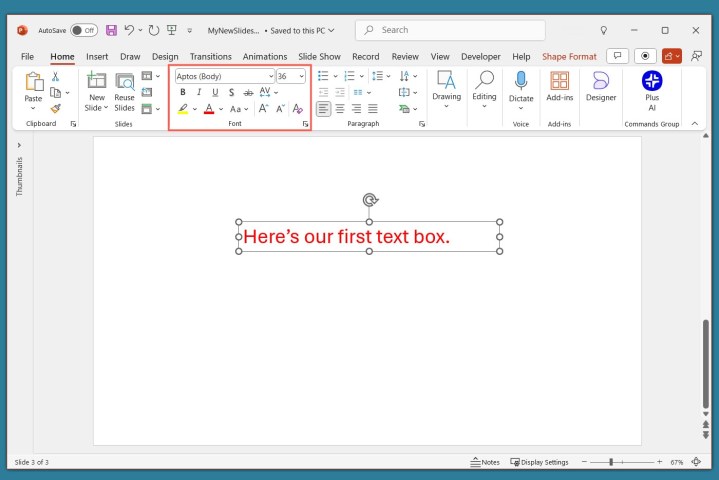
Specific to PowerPoint on Windows, you’ll also see a floating toolbar appear near the text that you select. This toolbar contains the same features as on the Home tab along with additional options.
Add images, shapes, and icons
Because a slideshow is a visual tool, you’ll likely want to add photos, illustrations, shapes, or icons to slides.
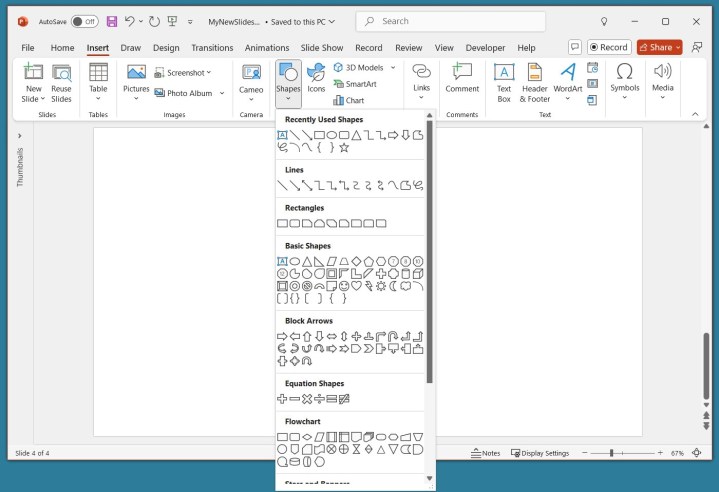
Go to the Insert tab and open the Pictures, Shapes, or Icons menu.
- Pictures: Pick an image from your device, one of the stock images, or an online picture and select Insert.
- Shapes: Pick a shape from the menu and use your cursor to draw it on the slide.
- Icons: Search or use the categories to find the icon, select it, and click Insert.
Once you insert one of the above on your slide, you’ll see the corresponding tab appear to format the object. For pictures, you have a Picture Format tab, for shapes, you have a Shape Format tab, and for icons, you have a Graphics Format tab.
You can use the tools in the ribbon to do things like change the color, add a border, align or rotate the object, and resize it.

Add audio or video
Another useful object to add to your slides is an audio file, music, or video. You can then play the sound or video clip during your presentation.
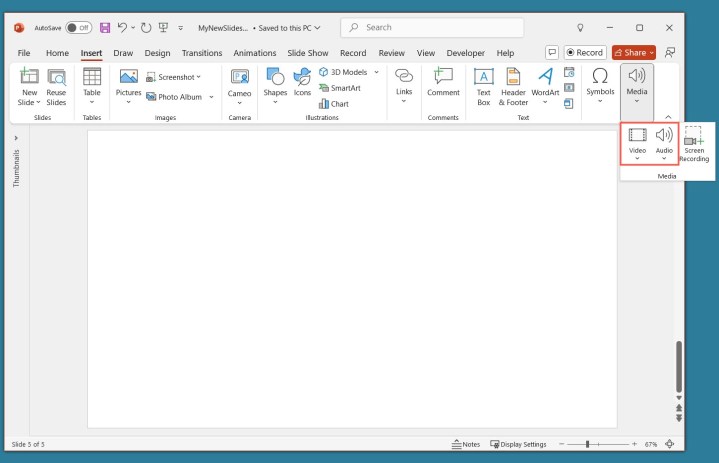
Go to the Insert tab and open the Audio or Video menu.
- Audio: Pick an audio file to add to PowerPoint from your device or record audio on the spot.
- Music: There are five ways that you can add music to PowerPoint.
- Video: Pick a video to embed into your presentation from your device, one of the stock videos, or an online video and select Insert.
Like with images and shapes, you’ll see tabs appear to format the file you insert. For audio, you have an Audio Format tab, for video, you have a Video Format tab, and for both types of files, you have a Playback tab.
Use the Format tabs to adjust the color, add a border, or apply an effect and the Playback tab to set a fade in or out effect, loop the playback, or play it in the background. You might also change the background image for your presentation.

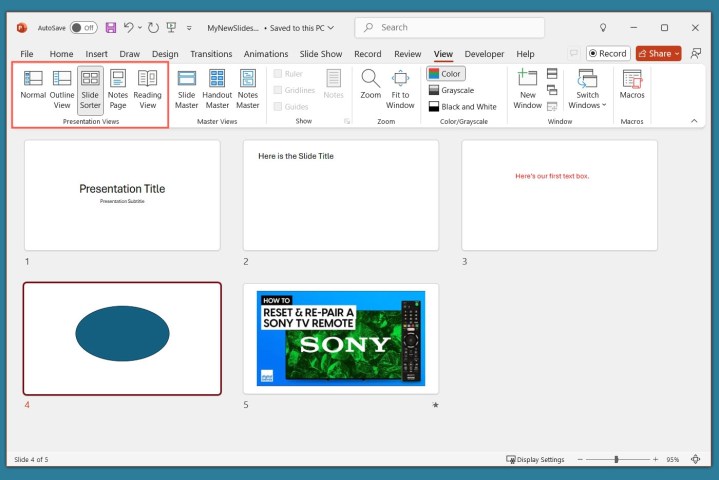
How to use different views
You can take advantage of different views in PowerPoint for accomplishing various tasks. This is helpful for seeing all of your slides in a grid, viewing a notes page, or working with an outline.
Go to the View tab and you’ll see the options in the Presentation Views group.
- Normal: Use this to create and edit your slides.
- Outline View: Use this to work with an outline of your presentation. Each slide is numbered with a hierarchy of slide elements.
- Slide Sorter: Use this to see your slides in a grid format for an overall slideshow view.
- Notes Page: Use this to view your presentation with notes — this is where you print a PowerPoint presentation with notes.
- Reading View: Use this to play your slideshow in the same window without entering full-screen mode.
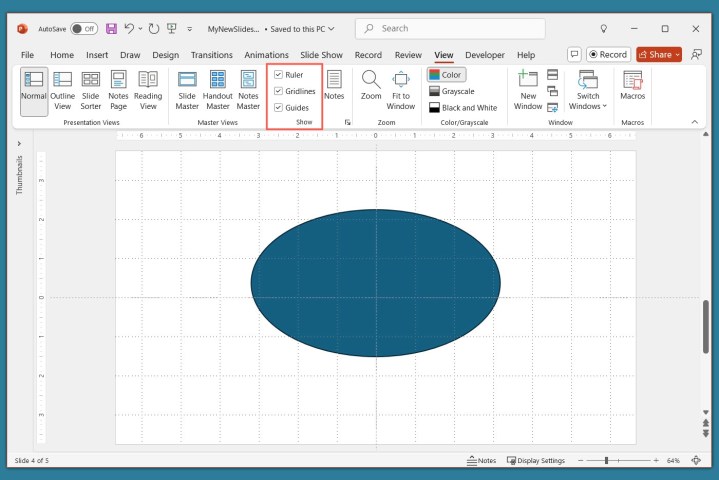
Use the tools in the Show section of the View tab to display a Ruler, Gridlines, or Guides. These items can help you line up your slide elements.
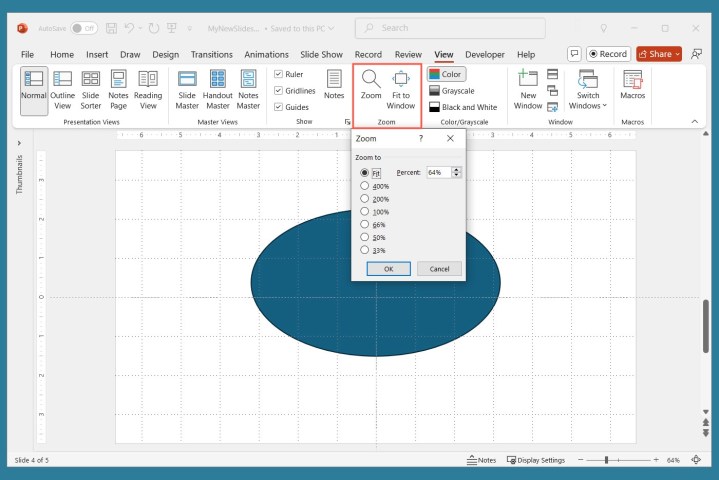
You can also select the Zoom and Fit to Window options in the Zoom section of the ribbon to get a better view of slide items or the overall slide.
How to add speaker notes
Presenting a slideshow is similar to giving a speech where you may want to use speaker notes. Like note cards, you can add notes to each slide in your presentation. When you present the slideshow, only you can view your notes; your audience cannot see them.
Select Notes in the Status Bar at the bottom of the PowerPoint window or go to View > Notes.

Add your notes in the section that appears below the slide.
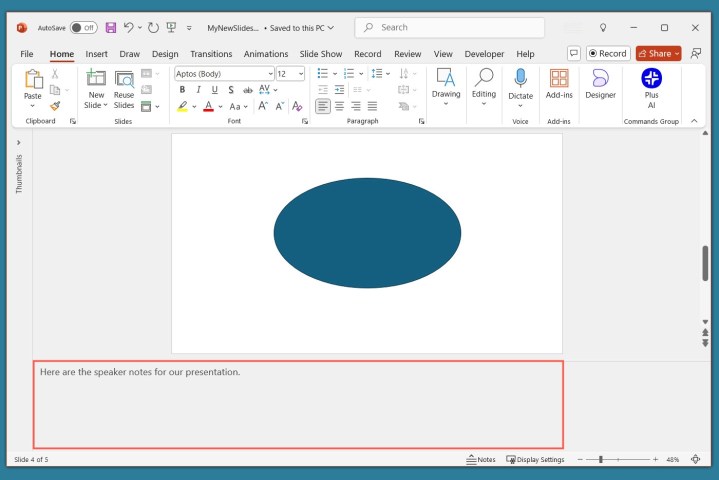
You can use the options in the Font section of the Home tab to add emphasis or create a list.
For more detail, check out our how-to for adding notes in PowerPoint.
How to start and end a presentation
When you’re ready to present your PowerPoint slideshow or to see it as your audience will, you can start the presentation anytime.
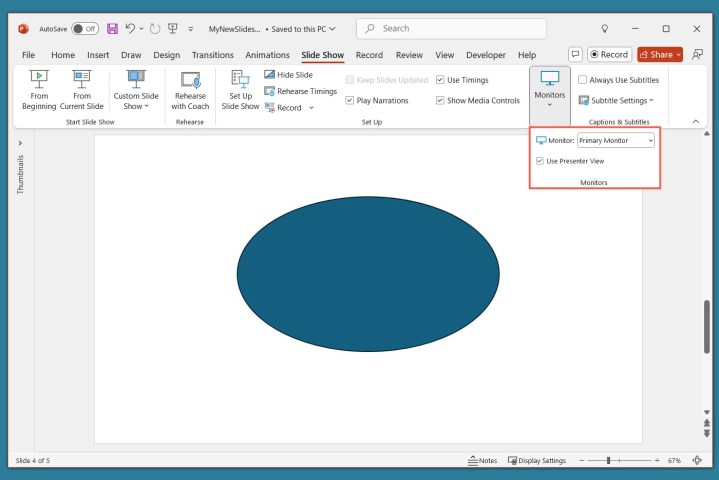
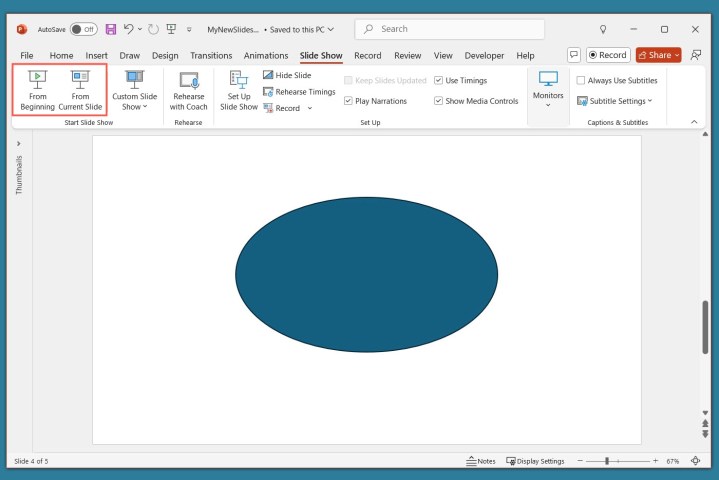
Go to the Slide Show tab.
To display your speaker notes and a dashboard of controls while you present, check the box for Use Presenter View in the Monitors section. Then, select the monitors for the slideshow display and presenter view using the Monitor drop-down menu.
On the left side of the ribbon, pick From Beginning or From Current Slide per your preference.
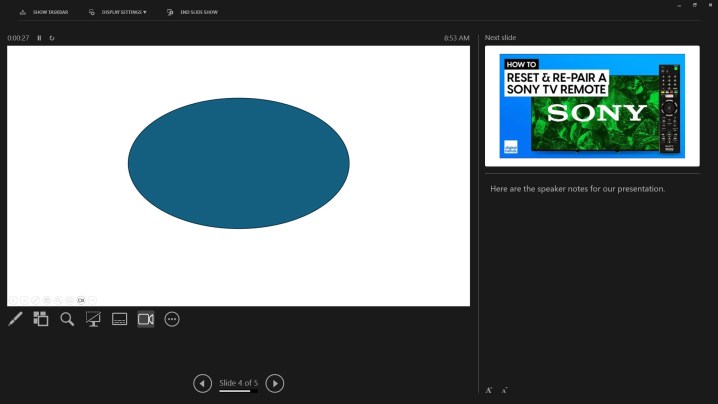
When the slideshow starts, you’ll see what your audience sees on one monitor with Presenter View on the other. This is a super helpful way to present your slideshow because the Presenter View window provides you with controls.
If you’re unable to use more than one monitor, you’ll also see controls on the bottom left of the slides.

In the Presenter View window, you’ll see the current slide on the left with the controls beneath and the next slide on the right along with your speaker notes.
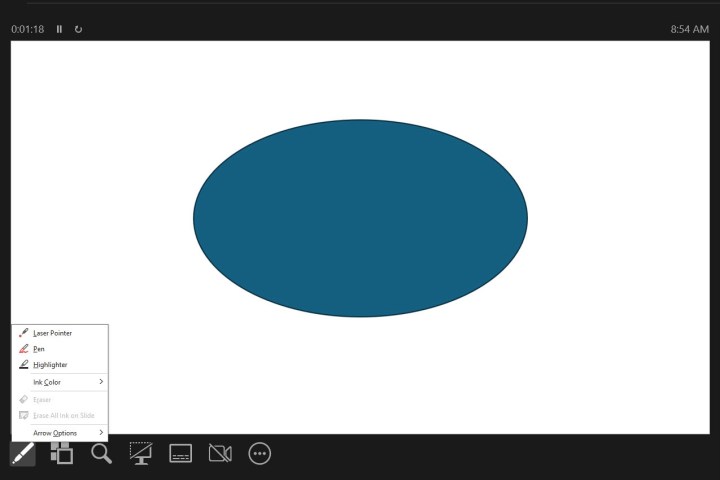
To use a control, hover your cursor over each button for a brief description.
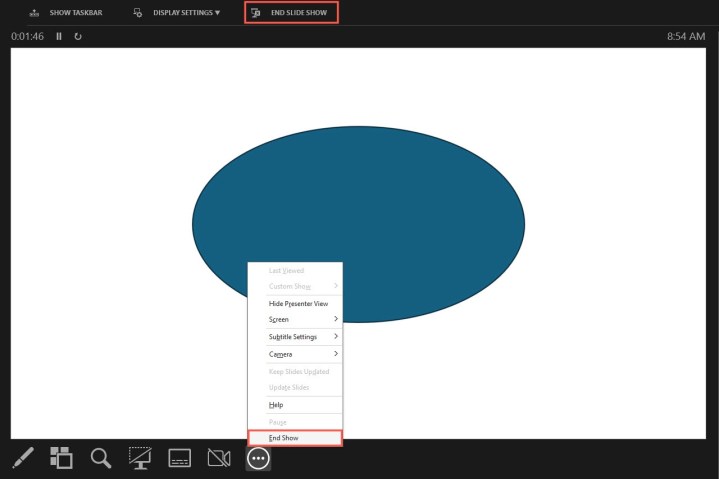
From left to right, you can choose a laser pointer or pen, see all slides in a grid, zoom in on the slide, display a black screen, turn the subtitles or camera on or off, and view additional options like changing the subtitle settings or ending the presentation.
To stop presentation mode, press your Esc key, select End Slide Show at the top, or use the three dots to choose End Show.
While this beginner’s guide to using PowerPoint should get you off to a great start creating and presenting your first slideshow, there’s plenty more to learn. Check out how to use Speaker Coach for rehearsing your presentation and best practices for making awesome PowerPoint slides for tips and suggestions.
If you would rather use Google Slides instead, it is simple to convert PowerPoint presentations to Slides.