Want to compress multiple files on your Chromebook or open an archive you recently downloaded? It’s easy, as Chrome OS includes an integrated tool to pack and unpack ZIP-based archives. There’s no need for third-party software.
In this guide, we’ll show you how to zip and unzip files on a Chromebook. We’ll also list two free applications designed to add support for even more file types.
Further reading
- How to take a screenshot on a Chromebook
- Best games for the Chromebook
- How to install Windows on a Chromebook
Create an archive
Since the archive tool is built into Chrome OS, you don’t need to load or find anything except for the files you want to compress. If you simply compress a single file — a huge PSD, for example — the resulting file will have the same name. If you compress multiple files, the archive will automatically save as archive.zip. The built-in tool does not allow you to create and save an archive in a different location than the source file(s).
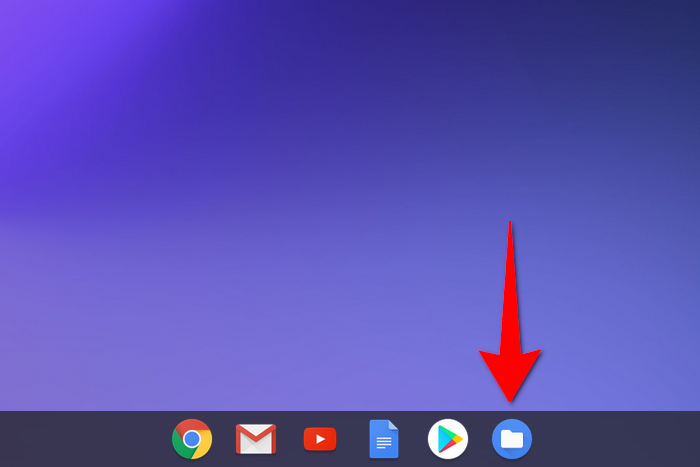
Step 1: Click the Files icon located on the Shelf. It resembles a folder.

Step 2: Locate the files you want to compress into a zip file.
Step 3: Click and hold your mouse button to draw a box around the files you want to add. To select specific files in a directory, don’t draw a box. Instead, press the Ctrl button while clicking.
Step 4: With your files selected, right-click and select Zip Selection on the pop-up menu.

Step 5: Right-click on your new archive and rename the file if needed.
Unzip an archive
Unzipping files is fairly easy. The only unusual aspect of Google’s built-in method is that Chrome OS mounts archives like a drive versus opening them like a standalone folder. This is different than how Windows and MacOS handle archives.
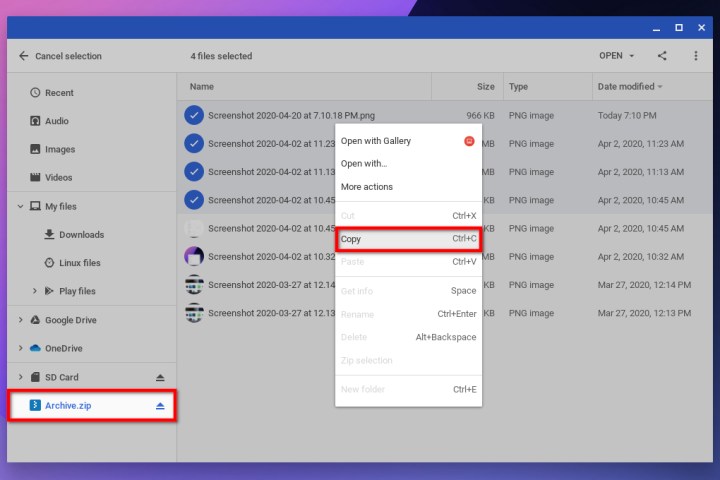
Step 1: Double-click on the archive you want to unload. Chrome OS mounts and lists it on the left (see below) in Files.
Step 2: Select the files you want to extract.
Step 3: Right-click and select Copy on the pop-up menu.

Step 4: Navigate to the destination where you want to save these files.
Step 5: Right-click and select Paste in the pop-up menu.
Step 6: When done, click the arrow-based Eject icon displayed next to the mounted zip file in Files (see above).
Step 7: Delete the archive if needed.
Alternative methods
Zip Extractor
External tools, like Zip Extractor, can help extract and store zip file contents. Zip Extractor is a web-based Chrome application that manages and keeps files on your Chromebook or Google Drive. When you use Zip Extractor, the tool will automatically sort the unzipped files into folders instead of sorting them as a hard drive would. When you open Zip Extractor, you will be given the option to set it as your default app for working with zipped files.
One bad thing about Zip Extractor is that it’s a web-based application, so if you’re not connected to a Wi-Fi network, then you won’t be able to use it. However, as long as you never need it offline, this tool is still an uncomplicated, handy option.
Archive Extractor
Archive Extractor is a Chrome extension that is an ideal choice for decompressing a variety of zipped files. We mean 7-Zip, TAR, DMG, crunch, NSA, and many others. Archive Extractor is capable of supporting password-protected files and multi-faceted archives.
If you regularly use various file types, then Archive Extractor will make everything easier for you.


