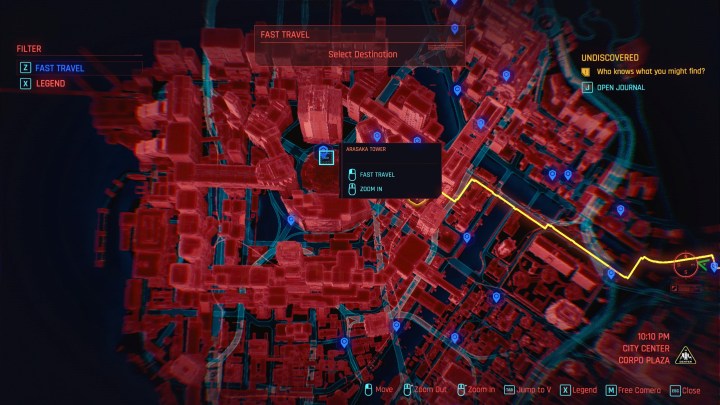
Night City is big — like, really big — and although it’s a treat to drive around on the city streets, you’ll need to fast travel to level up fast in Cyberpunk 2077 and unlock the best Cyberware in the game. Cyberpunk 2077 uses a rather dated system for fast travel, however, leaving many players wondering how to get around quickly.
In this guide, we’re going to show you how to fast travel in Cyberpunk 2077, as well as cover all of the fast travel locations dotted throughout the game’s map. Getting the fast travel locations out of the way first will allow you to focus on increasing your Street Cred and making money fast to buy new weapons, crafting specs, and Cyberware (and lead you to some of the best Easter eggs in the game).
Further reading
- Which lifepath should you choose in Cyberpunk 2077?
- The best PS4 settings for Cyberpunk 2077
- How to build a gaming PC for Cyberpunk 2077
How to fast travel in Cyberpunk 2077

Fast travel isn’t available immediately in Cyberpunk 2077. You’ll need to progress past “The Ride” main story quest. It comes shortly after the prologue, about an hour into the game, where you meet Evelyn, one of the featured characters in Cyberpunk‘s marketing. After completing the quest, you’ll unlock the first fast travel point in the game.
Yes, Cyberpunk 2077 uses fast travel points. You can’t freely fast travel in the game. Rather, you have to use one of the many Travel Information kiosks dotted around Night City to get around. All you need to do to fast travel in Cyberpunk 2077 is find one of the Travel Information kiosks in Night City and interact with it. Then, you can choose another kiosk on the map and travel to it immediately.
Note that there’s no other way to fast travel. You can’t immediately jump to locations of interest — say, a Ripperdoc or a weapons shop. However, most Travel Information kiosks are located around shops and other points of interest.
Like other markers, you can set a route to a fast travel kiosk, which we recommend doing. It’s hard to nail down where the Travel Information kiosks are on the mini-map, but you can select a kiosk on the full map to create a route (just like a normal objective). In fact, you can mark a kiosk while you’re tracking another objective, which is very useful for progressing a quest on the other side of Night City.
Unlocking fast travel points in Cyberpunk 2077

You need to complete “The Ride” quest to unlock fast travel, but you won’t be able to immediately start jumping around Night City. On the, very crowded, Night City map, you’ll find the kiosks you’ve discovered as a blue hexagon with a pin in the center.
To unlock more kiosks, you’ll need to pass them. You don’t need to actually interact with every kiosk in Cyberpunk 2077 to unlock them, but you do need to get relatively close (simply driving by might not do the trick). There isn’t any indication in the game that you’ve discovered a new fast travel location, so open the map to double-check if you’re going for all of them. If you can actually see the kiosk — both on the screen and on your mini-map — you should be fine.
All of the fast travel locations in Cyberpunk 2077

There are a total of 150 Travel Information kiosks in Cyberpunk 2077, most of which are focused within the limits of Night City. The Badlands has fast travel locations, too, though there are fewer, and they’re more spaced out.
You won’t unlock all of the fast travel locations just by playing the game, but you will unlock a good chunk of them. Many of the locations tied to main and side quests have fast travel locations nearby, so you’ll slowly start filling the map just by playing through the game.
If you want to go for all of the locations, here are the number of Travel Information kiosks, broken down by district:
- Pacifica – 7 kiosks
- Santo Domingo – 17 kiosks
- Westbrook – 25 kiosks
- Heywood – 25 kiosks
- City Center – 14 kiosks
- Watson – 33 kiosks
That adds up to 121 fast travel locations within the limits of Night City. There are an additional 29 fast travel locations situated around The Badlands. Two of them are immediately north of the city limits in Watson, close to the waterfront in an unmarked region. We can’t break the others down by district since they’re outside the limits of Night City, but because they’re so spaced out, we can break them down by region:
- Rocky Ridge – 10 kiosks
- Sierra Sonora – 1 kiosk
- Red Peaks – 3 kiosks
- Laguna Bend – 2 kiosks
- Jackson Plains – 5 kiosks
- Rattlesnake Creek – 1 kiosk
- Biotechnica Flats – 5 kiosks
Remember, there are an additional two kiosks located north of Watson (the above list adds up to only 27 locations). Once you’ve tracked down all of them, you’ll be able to travel from the docks in Watson to the Las Palapas Motel in The Badlands in an instant.


