Final Fantasy 7 Remake: How to find all six Happy Turtle flyer locations

Early on in Final Fantasy 7 Remake Intergrade‘s Episode Intermission DLC, you learn about a Happy Turtle location coming to Midgar. After arriving in town, you’re tasked with heading to six Happy Turtle flyer locations to retrieve the ads and return them to Old Snapper.

However, the only direction you’re given is a vague list of clues. To help you track down everything you need, we rounded up all six Happy Turtle flyer locations and how to find them.

Recommended Videos

If you’re just starting Final Fantasy 7 Remake Intergrade, make sure to read our guide on how to upgrade to the PS5 version

How to start the Happy Turtle Ad Campaign side quest

Image used with permission by copyright holder

You will automatically unlock the Happy Turtle Ad Campaign side quest during chapter 1 of the Intermission DLC. Progress through the story until you reach the Residential Area of the Sector 7 Slums. Once you’re there, you need to head to the Avalanche base to talk to some of the members, who will point out interesting things to do around town. One of those things is to talk to Old Snapper.

Right next to the Avalanche base, you’ll find Old Snapper swinging a sign back and forth. Talk to him — he should be marked on your map — to pick up the Happy Turtle Ad Campaign discovery quest. He’ll give you a list of clues of where to find the six Happy Turtle flyers scattered around the Slums. Along with the clues, you’ll hear the Happy Turtle jingle whenever you’re near a flyer.

Happy Turtle Ad Campaign: All Happy Turtle flyer locations

First Happy Turtle flyer

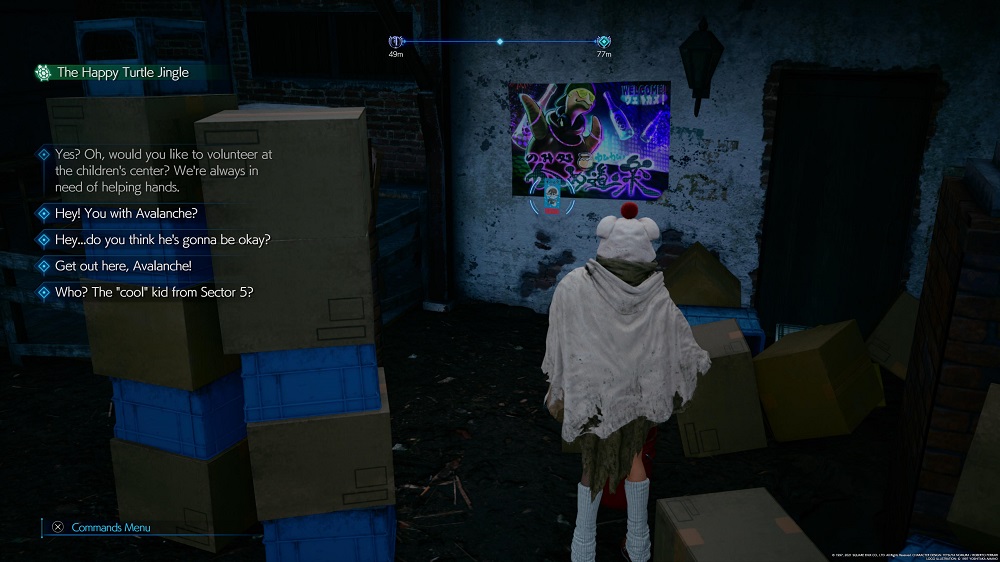
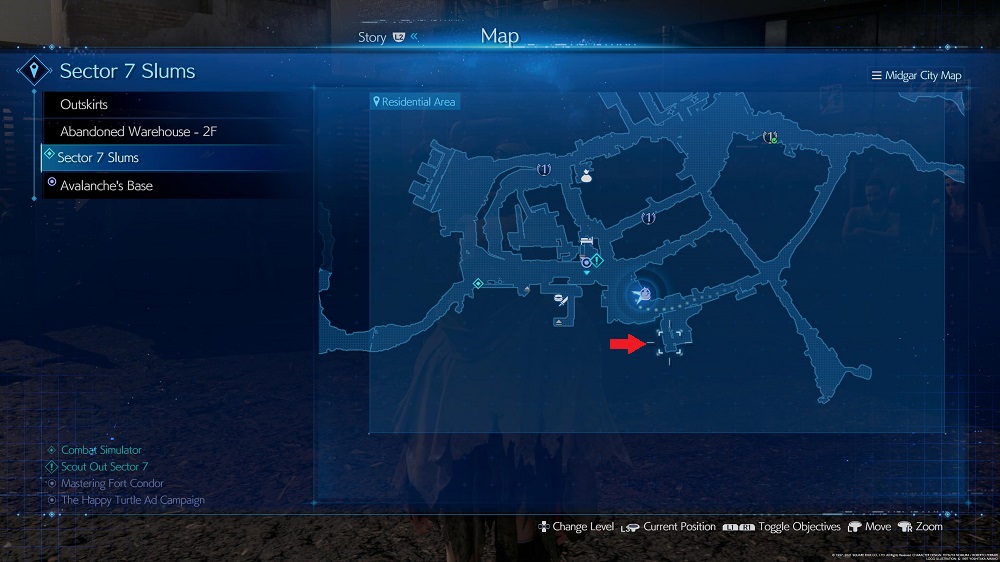
The first clue says “some kids hid one somewhere,” which is the vaguest clue of the lot. Thankfully, this one is easy to track down. Head southeast from Old Snapper to find a group of kids playing (still in the Residential Area). Behind them, you’ll see a stack of cardboard boxes. Smash through the boxes to find the Happy Turtle flyer posted on the wall.

Second Happy Turtle flyer

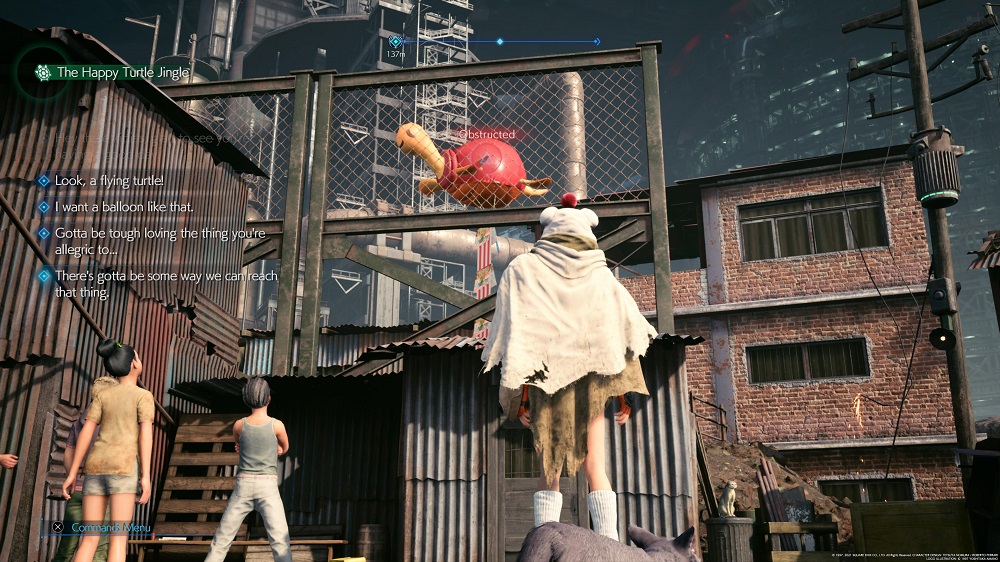
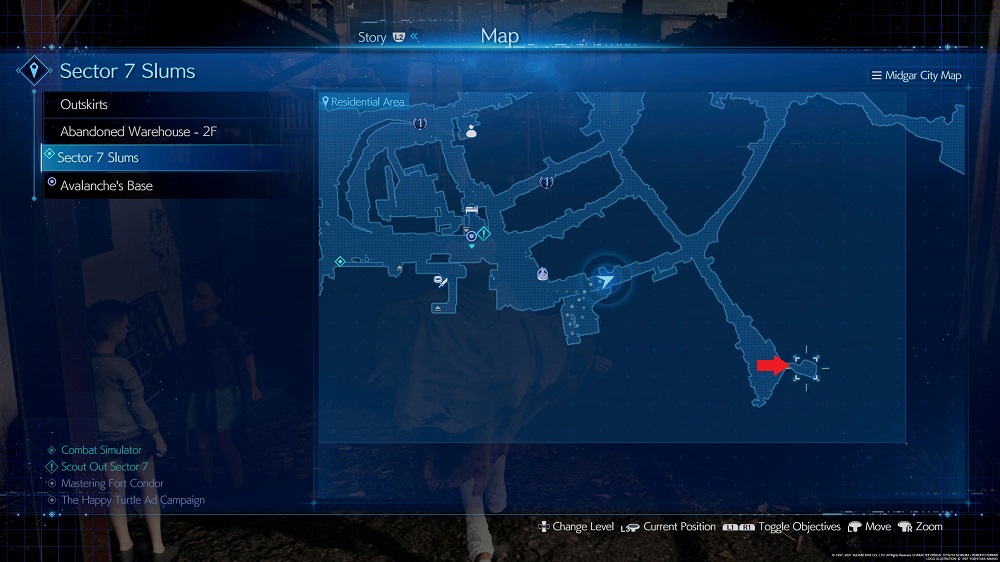
The second clue says “floating through the air.” This flyer is attached to a balloon in the Sector 7 Slums, and you need to use your weapon to pop it to retrieve the flyer. Head east from the last flyer and take the first path heading south (still in the Residential Area). At the end, you’ll see a group of kids standing in front a balloon. Walk behind the balloon to trigger the prompt to throw your weapon. Throw it, pop the balloon, and check the ground to find the flyer.

Third Happy Turtle flyer

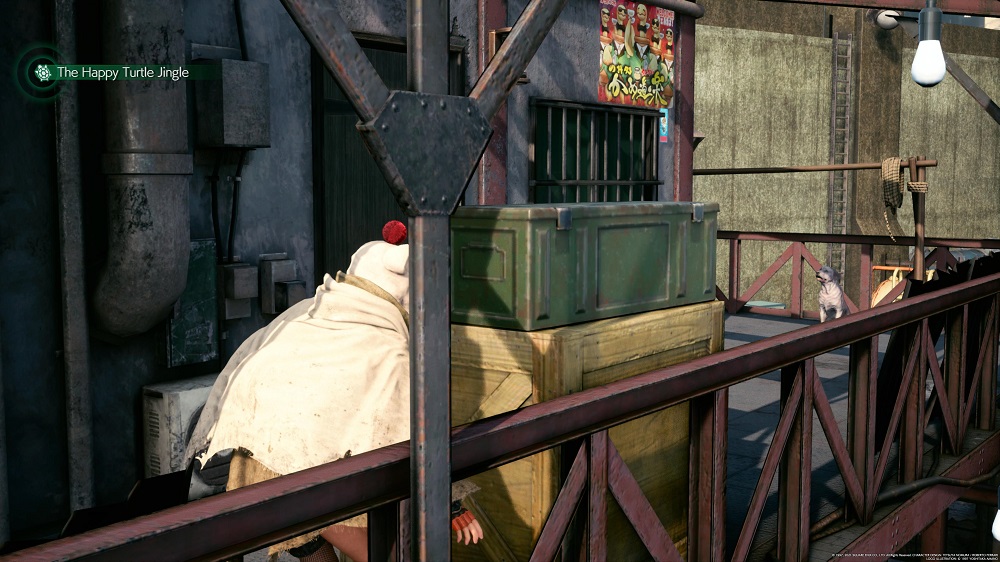
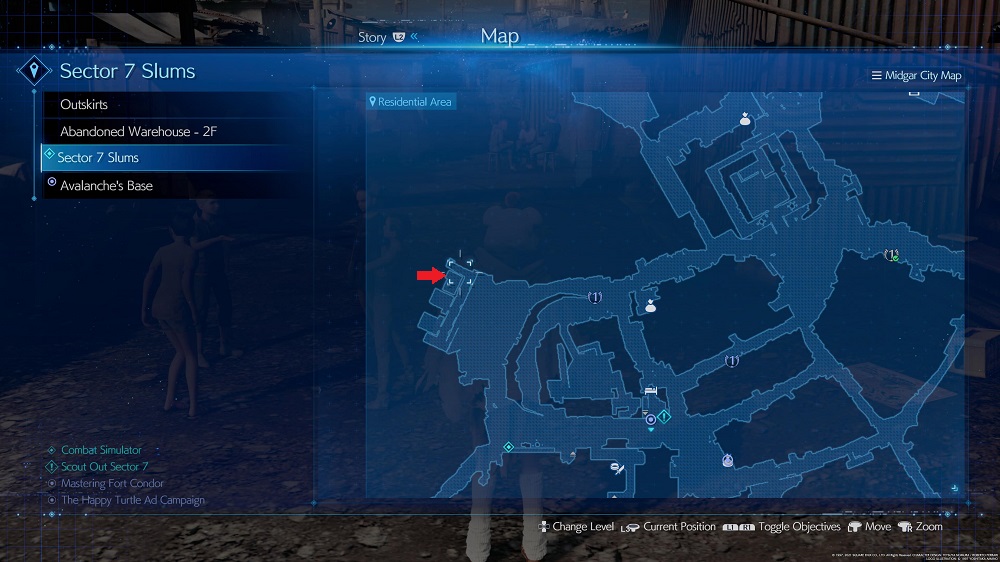
The third clue says “near Old Snapper’s friend’s apartment building.” The apartment building is the motel you sleep in during the main Final Fantasy 7 Remake story. Head there — located in the northwest section of the Residential Area — and go up to the second level. You’ll see a dog sleeping at the end of the upper level, and you have to sneak past it to get the flyer.

Using the boxes, sneak up the balcony while the dog sleeps. The dog will wake up every few seconds, so only move up one box at a time. At the third box, wait for the dog to sleep again and check the wall next to the box. You’ll find the flyer there. The timing is tight on this challenge, so pay attention to the dog’s patterns before moving.

Fourth Happy Turtle flyer

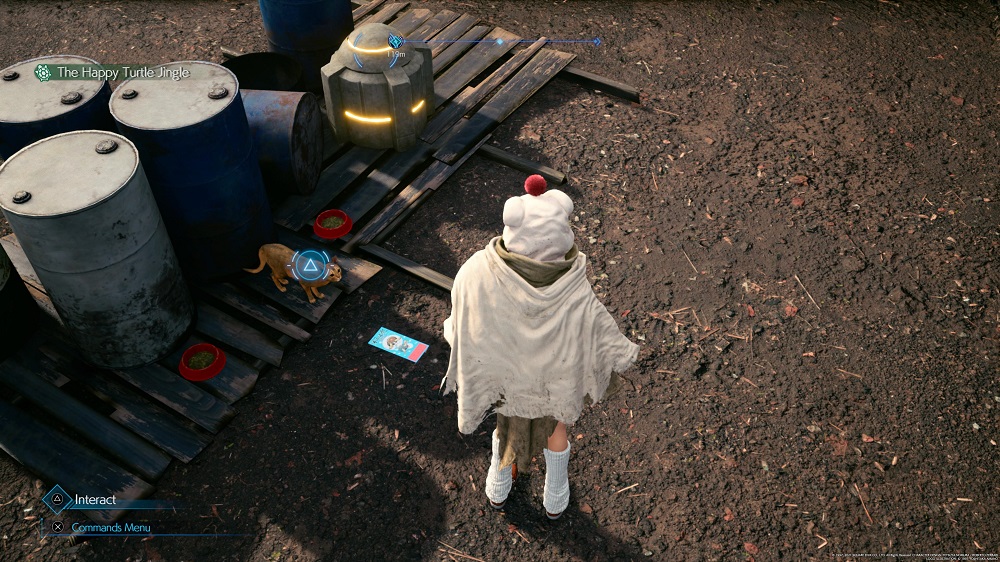
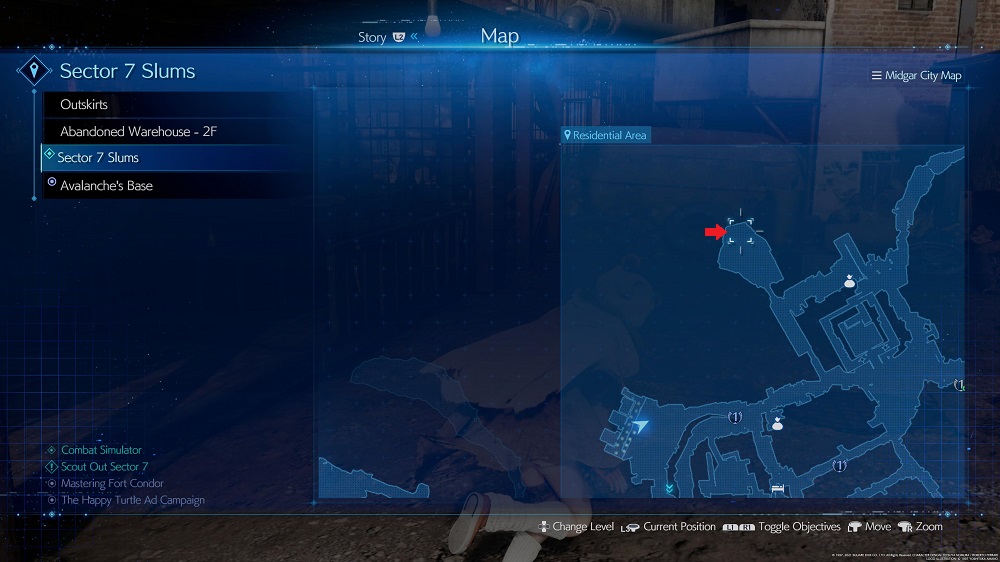
The fourth clue says “a cat took one on Culvert Street.” You’ll find this flyer at the northern tip of the Residential Area by following a cat back there. Yuffie will make a comment on it, so you know you’re heading in the right direction if you hear the dialog. After following the cat, you’ll end up in a location with a bunch of cats messing around with various pieces of trash.

The one you’re looking for is behind some barrels in the back of the area. Head behind them to find the flyer.

Fifth Happy Turtle flyer

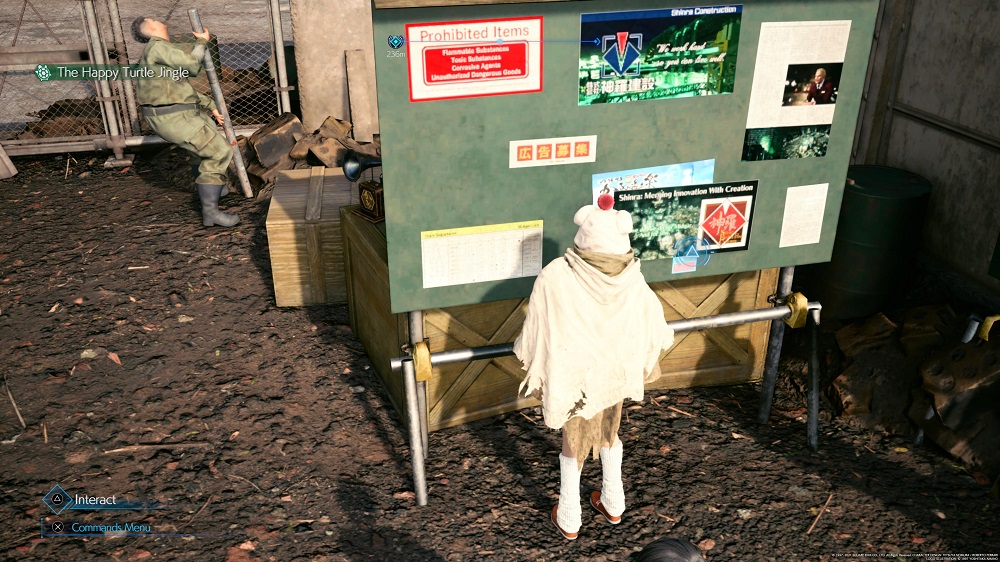
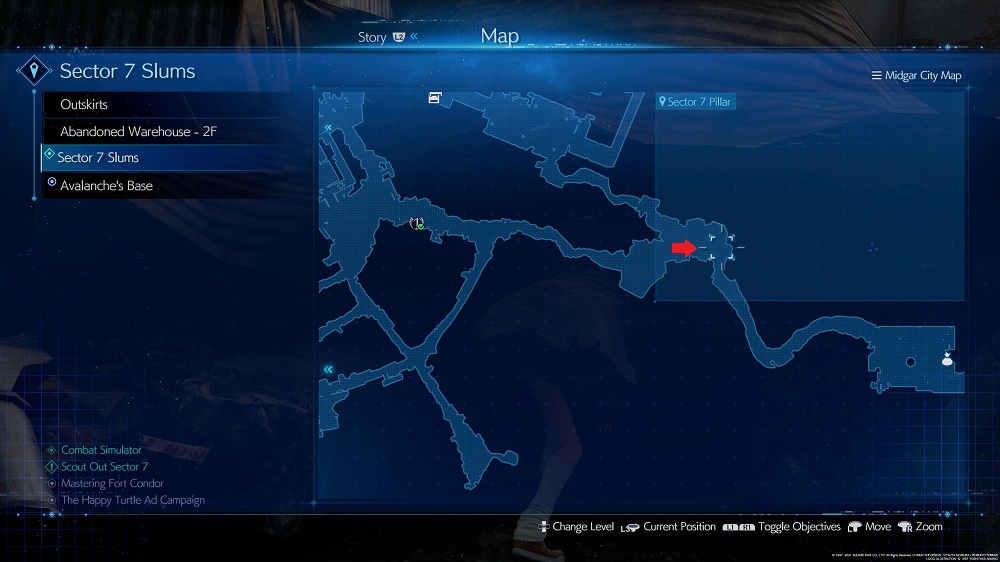
This one is easy. The fifth clue says “on the town bulletin board.” The bulletin board is located on the path to the train station in Pillar Plaza. Head toward the train station and stop when you reach an intersection with three paths. If this is your first time visiting this area, you’ll trigger a short dialogue scene. At the intersection, find the bulletin board. The flyer is posted there.

Sixth Happy Turtle flyer

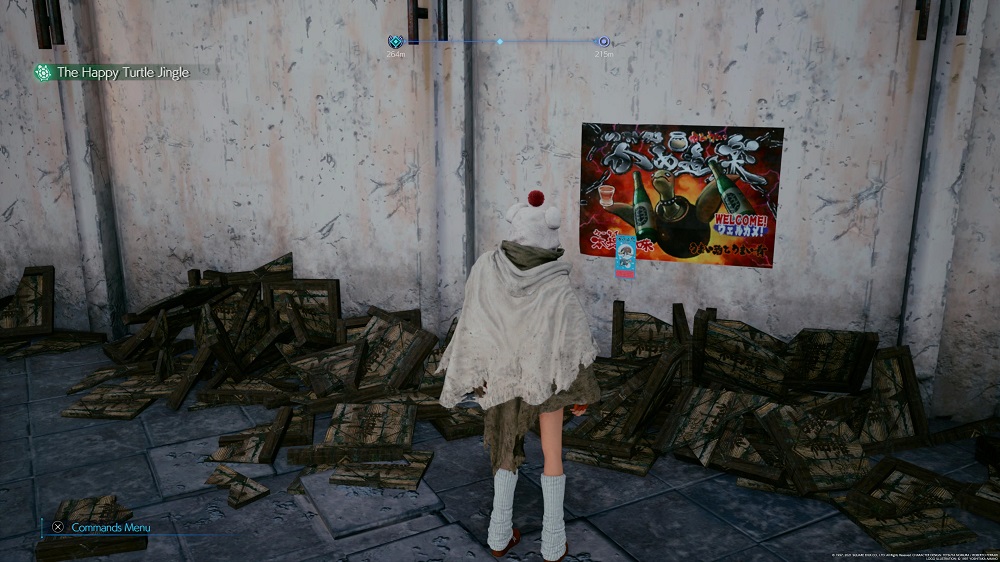
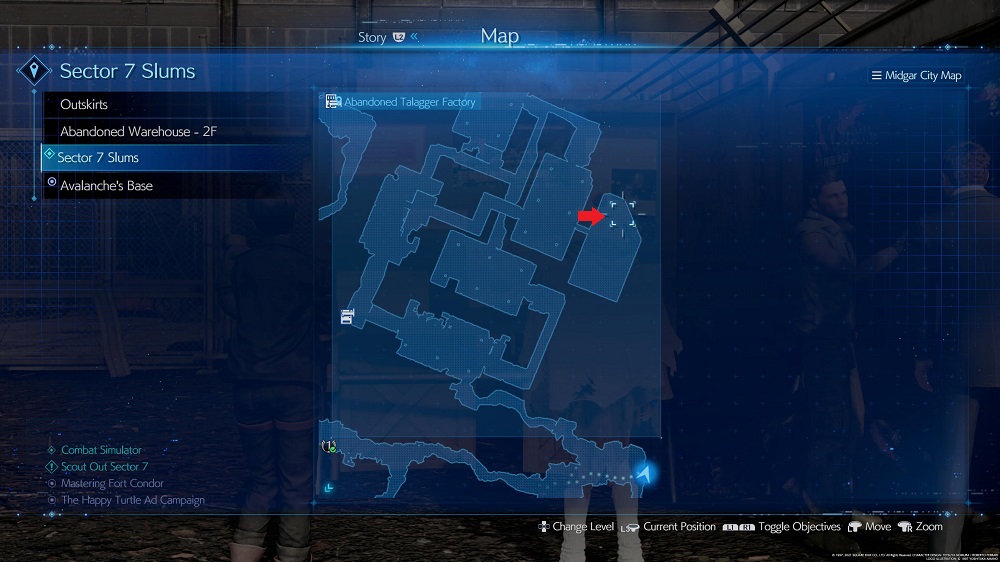
The final clue says “near the old Talagger factory,” which tells you exactly where this flyer is. From the last flyer, head through the door with a guard standing by it to enter the Abandoned Talagger Factory area. You’ll fight a few mobs of enemies as you progress through the facility. Your goal is to reach a secluded section in the southeast section of the area. There, you’ll find two tough enemies that you’ll need to defeat before grabbing the flyer.

They’re a challenging fight if you just started the game. Make sure to equip your Ice Materia before battle, as that’s the only weakness the enemies have. As long as you can hit each of them with a Blizzara and follow up with a string of attacks, you should be able to build up the stagger bar and take them down. If not, return to this area after your party grows.

After finding the final flyer, you can teleport immediately back to Old Snapper. Talk to him to complete the quest and earn the Magnify Materia and Turtle-Tastic bronze trophy.
Jacob Roach
Lead Reporter, PC Hardware
Jacob Roach is the lead reporter for PC hardware at Digital Trends. In addition to covering the latest PC components, from…
How to use an external hard drive on PS5
Two versions of the PS5 side by side.

The PlayStation 5 is a remarkable system, but it doesn't come with much storage space. Breaking from the 1TB the Xbox Series X offers, the PS5 only offers 825GB. Worse, after accounting for the storage space the PS5 takes up by default, users are left with just over 650GB of space. That's not enough to install more than a handful of the best PS5 games, let alone the slew of upcoming PS5 games.

You could install a new SSD in your PlayStation 5, selecting from the best SSDs available, but using external storage to expand your space is simpler. In this guide, we're going to show you how to use an external hard drive on PS5.
How to use an external HDD or SSD on PS5

Read more
When will Final Fantasy 7 Rebirth be on PC?
Cloud,. Aerith, and Tifa stand together in Final Fantasy VII Rebirth.

PlayStation 5 players have been raving about the second part of the FF7 remake project Final Fantasy 7 Rebirth. As with the first part, it was made clear well in advance that this game would be a PlayStation exclusive at launch, however, we did eventually get Remake of the first part on PC around a year later. This gives PC players hope that the same treatment will be given to Rebirth, but the big question becomes how long will we have to wait this time? Is it possible to see it come to PC storefronts faster than its prequel, or will we need to bide our time avoiding spoilers for months on end? Here's our best estimate as to when you can expect to see Final Fantasy 7 Rebirth on PC.
What is the Final Fantasy 7 Rebirth PC release date?

Square Enix revealed at The Game Awards 2024 that Final Fantasy 7 Rebirth is coming to PC on January 23, 2025, just 11 months after its timed-exclusive PS5 release.

Read more
Final Fantasy 7 Rebirth: all piano sheet music locations and rewards
Cloud playing the piano in Final Fantasy 7 Rebirth.

While there's no shortage of ways to distract yourself while playing Final Fantasy 7 Rebirth, one of the most unexpected minigames is the surprisingly deep piano system. In most of the major hub towns you encounter across the expansive world, Cloud can find a piano to sit down at and tickle the keys. You're free to play any song you want in free play, but you can turn this system into a full-on rhythm game, almost like Guitar Hero, by collecting sheet music of some of the game's most iconic tracks. There's even an NPC near each piano who will reward you if you get a high enough rank on each song. Cloud may not be the most expressive in his words, but he can sure play the piano with heart. Here is where you can find all the sheet music and what rewards await if you can master them.
Where to find all sheet music

Sheet music, thankfully, isn't hidden away in chests or has to be purchased for crazy amounts of Gil, but a few do have some hidden requirements. Each new composition is found on a piano in the world and is free to snag once you sit down. Even if you don't feel like playing right then and there, make sure you always at least grab the music to add to your collection so you don't have to backtrack later and get it. There are eight in total to find, and some will only come later in the story, but none are missable once you open up fast travel back to previous areas. This is the natural order you can collect them.
On Our Way
Our first piece of music can be picked up once you hit Chapter 4. During this section, go to the Crow's Nest town in the Junon region, which you can only enter by doing the "When Words Won't Do" side quest. Once you complete this quest and can freely enter the town, hit up the bar and grab this tune.
Tifa's Theme
After a rather exciting cruise to Costa del Sol in Chapter 6, you can add this piece to your collection by making a quick stop at the fancy Royal Crown Hotel.
Barret's Theme
Not much further into the game in Chapter 7 you will visit Barret's old hometown of Corel. The Rock Bottom Bar is waiting with his song.
Cinco de Chocobo
Chapter 9 takes you through the town of Gongaga. Even a town way out in the forest has a piano, which means yet another song to snag.
Two Legs? Nothin' to it
One chapter later, in Chapter 10, you need to do a little exploring in Cosmo Canyon to find your way to the piano, but the icon on your map won't lead you astray.
Aerith's Theme
Perhaps the most iconic song in the entire game, if not the franchise, is hidden behind a completely optional side quest. Once you reach Chapter 11, return to Nibelheim and do the "White-Haired Angel" side quest. It may seem totally irrelevant, but the quest ends with you playing and collecting this song.
Let the Battles Begin!
Once you prove your skills and get an A rank or better on all prior songs, you will get this new one as a reward from the NPC Dorian next to all pianos.
One-Winged Angel
We're not sure if fighting Sephiroth or getting this song is harder. If you want to play this terrifying arrangement, you need to donate all 88 Treasure Trove items to Johnny. This more or less requires you to 100% the entire game
All song rewards
For every song you A rank, Dorian will give you a prize when you talk to him. Here's everything you can get:

Read more