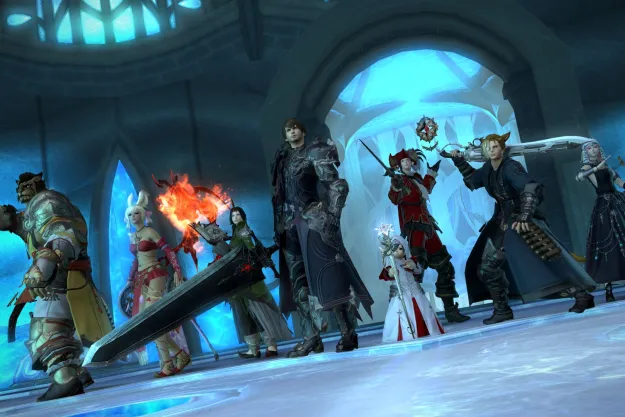
At long last, the NieR: Automata crossover has arrived in Final Fantasy XIV. The Copied Factory is the first of three planned 24-man raids centered around Yoko Taro’s brilliant android drama. We’ve fought through the raid to bring you this exhaustive written guide of The Copied Factory – because not everybody wants to sit through a video guide before jumping into the action.
More FFXIV guides
- Final Fantasy XIV Patch 5.1: These are the biggest new features announced
- How to level grind in Final Fantasy XIV
- From Kefka to card games, here’s our beginner’s guide to Final Fantasy XIV
Prior knowledge of NieR: Automata will make it easier to predict and quickly adapt to the killing potential of these bosses, but it hardly matters when you’re at the mercy of 23 other bumbling baffoons.
Serial-Jointed Command Model

The Copied Factory gets right in the boss fights. There’s no trash pull before this thing. It’s not massive in its own right, but what this machine lifeform can pull out of its hat makes this fight a rude awakening for anyone expecting a forgiving first fight.
Serial-Joined Command Model kicks things off by summoning multiple cannon-wielding machine lifeforms on the outer edge of the arena. These move and fire large ball-like “energy” bullets across the arena. Any NieR fan will instantly recognize these, and anyone else will know to dodge them.
They don’t last long, but do end with a bullet drop from above. Avoid the red markers to dodge these. The boss will then deal raid-wide damage (expect this after every major attack) and then turn to face the group before firing off a barrage of “Energy Assault” bullets in a frontal cone, so head to the flanks.
Machines will then descend and begin to lock onto random players for piercing laser shots. These can be positioned away from the group, but its easier to just have everyone side-step the beams. Then comes another raid-wide hide.
Machines will appear above and begin dropped bullets all across the arena. Arrows on the floor denote the path they take, so its just a matter of paying attention to the location and avoid any hotspots. They’ll follow this up with laser shots across each half of the area. Position yourself on whichever side glows second, and move to the first right after they fire.
At this point, mechanics begin to repeat and stack. Bullet dodges with lock-on lasers, air strikes with shockwaves, and additional arena-length lasers. This is all mixed in with various types of area attacks stemming from the boss itself. Just keep on your toes and avoid staying too close to the boss if you don’t have to. Stick to the rear.
Hobbes

After each alliance group is sorted by a series of tubes, you’ll end up in Quality Assurance chamber on seperate plates with Hobbes looking down on you from the centre. Assuming you’re a bunch of machine lifeforms, it’s here to test you on logic, pain tolerance, and a bunch of other aspects.
The key to defeating Hobbes is to watch for the type of wall-mounted arm it brings against your group from outside the arena. The right spider-like arm uses rotational, conal, and circular attacks, the flamethrowers use linear moves, and Hobbes itself will periodically use stack or raid-wide lasers to amp up incoming damage. Flammable oil bubbles up and erupts through either the inner four vats on each platform, or the platform itself, so you’ll need to watch the ground, too.
Just like the last boss, these mechanics begin to stack at around 50%. Most single hits won’t KO anyone. But repeated blows will deal significant damage. The biggest one to watch out for is a falling crate of explosive machines toward the end. These drop as the right arm begins its outward-in radial strike, so be sure to stick to the closest outer edge to avoid being squashed by the falling box.
Engels

We all knew it was coming. The original Goliath. Engels uses many attacks fans of NieR: Automata will instantly recognize. You’ll be dodging large, unyielding saw arms, energy bullets, and plenty of missiles. here. And each major attack begins with a flash of Engels’ cold, red eyes.
The key to avoiding the saw arms is to watch how both they and Engels are positioned. The arms deal area damage across halves or quarters of the arena. This depends on how they’re turned. If Engels pulls back before a strike, they’ll land on the closest half to it, and the back half if it nudges forward instead. If they come down blade first (like in the center) be aware that they’ll roll back down the arena for extra damage soon after.
Missiles are aplenty here, too. Tanks will have their own single-shot missiles to run away with, and anybody else might have tracking missiles to run with away from the group. Both lasers and energy bullets will litter the battlefield from time to time, but most of these can be avoided by simply paying attention to Engels’ face.
“Energy Barrage” is one to watch out for. This slowly drops around 12 black energy bullets onto the front section of the arena. There needs to be at least one player stood under each of these bullets by the time they strike to avoid a full wipe. This happens again toward the end of the fight. A laser will block the center drops early on. Just wait for this to resolve before taking a spot.
There is an add phase close to the half-way mark, but this is a simple DPS check. Each tank just pulls a large mob away while the rest of the group focus them down. If the meter hasn’t topped out by the time the mobs die, run to the back of the platform to avoid Engels blowing it up.
Phase 2 sees the saw arms take on a life of their own along the left and right of the arena, so you’ll need to watch their position to dodge their attacks until they join back up. Avoid the arena attacks and survive another Energy Barrage and you should be good.
Yorha No.9 Type S

It’s 9S! Best boi returns to shake up the storyline in this climactic final battle. The fight takes a few different forms, but you’ll be dealing with the 9S-operated Walking Fortress first.
Neutralization threatens your tanks, Laser Saturation will burn down your team, and frontal lasers, fore-hind / dual-flank cannons, and a few missile drops will hit everywhere else. After introducing all of these attacks, 9S calls in the all-too-familiar Goliath arms to dunk a corner of the arena each. Get out from under them to avoid this insta-kill mechanic.
After a brief cut-in, 9S begins to bomb the arena from his flight unit. They’re gradual strikes, so just stay in the middle to quickly step away from the red markers as they resolve. “Anti-personnel Missile” then targets specific squares of the arena in sequence before dropping bombs on each. Memorize the target patterns and simply move from the second target area to the first as they land (and back again if there’s a third).
Then come tanks. Actual tanks. This add phase is just a matter of dodging lasers and bombs while you burn the two tanks down. At a point, 9S decides to have one self-destruct, so be sure to sprint behind whichever doesn’t have the progress ring above it at this point. After a brief intermission, copies of the first boss drop in buy 9S time as he hacks some very large missile. Tanks treat these like the machines from the last fight by splitting them. Just avoid taking too many obvious attacks, burn the machines down. and get into 2P’s shield when they fall.
Now it’s a matter of just surviving repeated blows as you whittle away whatever health 9S has left. This includes a repeat of the Goliath and Flight Unit phases. Don’t skimp on the sprint.
Editors' Recommendations
- Square Enix console exclusivity may be coming to an end soon
- How long is Final Fantasy 7 Rebirth?
- Final Fantasy 7 Rebirth: Queen’s Blood tips and tricks
- Final Fantasy 7 Rebirth preload guide: release time, file size, and preorder
- Final Fantasy VII Rebirth finally launches next February