Hidden inside the Warmind expansion of Destiny 2 are a handful of awesome new weapons that’ll elevate your Guardian game as you fight the Hive, other players, and anybody else who gets in the way. You’ll have to put in a serious amount of time and effort in a lengthy grind, but Warmind revives one of the coolest guns from the original Destiny in Destiny 2: Sleeper Simulant. A powerful Exotic fusion line rifle, Sleeper Simulant is a Rasputin-themed gun that chews up bad guys with powerful critical hits.
The road to the Sleeper Simulant starts after the end of the story campaign, through subsequent series of blue Quest missions you get from Ana Brey. You’ll want to try to complete your other Milestones so that your Power level is decently high, since some of the content in Warmind is pretty tough. If you’re angling to do this as quickly as possible, we also recommend you avoid doing Patrols, Public Events on Mars, and Heroic Strikes on Mars until you’re prompted by the quest.
Here’s everything you need to do — and what you should know — to unlock Sleeper Simulant.
Further reading
Finish the story
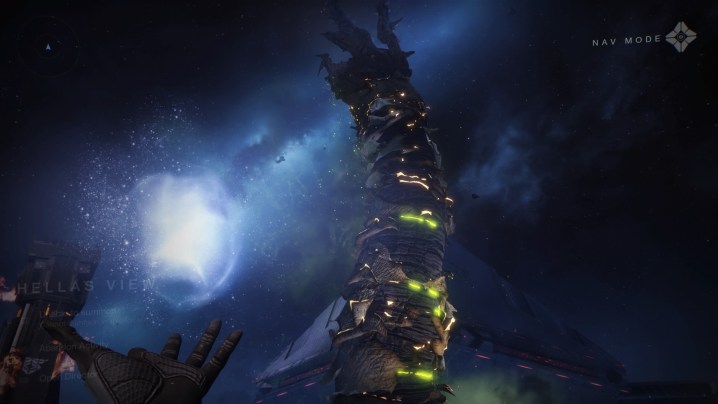
Your first order of business should be fighting through Warmind‘s main campaign, which should take you about three hours, give or take. It’ll introduce you to the various locations of Hellas Basin on Mars, and take you through the “Will of the Thousands” Strike, which is just a rehash of the last story mission in the Warmind campaign. Once you’ve done all that, return to Ana Brey in Hellas Basin, and she’ll activate a new set of Quests.
Take on the Quests

Once you’ve cleared out the story campaign from Mars, you’ll activate a new set of quests from Ana, marked with blue indicators on your map. These will take you back through Rasputin’s complex to get a special engram, which you’ll eventually take to Rasputin’s core for him to decrypt. Once you’ve completed the post-game questline, you’ll get a new gun, the IKELOS_HC_v1.0.1 hand cannon. You’ll need it for the rest of the weapon quest, so go ahead and equip it now.
Return to Ana Brey once you have the IKELOS to pick up a new “Pursuit,” which will task you with completing a number of open-world missions while using it. First, you’ll need to bang out three Patrols on Mars and then find a Lost Sector. This process will also walk you through how to open the various diamond-shaped Sleeper Nodes scattered across the Hellas Basin.
Now that you know how to get the keys for the Sleeper Nodes, it may be tempting to hunt them down to see what’s inside them. We suggest waiting, though. You’ll be prompted to go find a bunch of these later, and there’s no real reward (other than random blue and purple gear) for opening them now. Save your effort for when it’ll count toward the quest.
Shoot some bad guys

The next step is killing a bunch of stuff with the IKELOS. You’ll need to rack up a ton of “precision kills” — hitting headshots or weak spots — against both Cabal and Hive enemies using the hand cannon. The easiest way to get them is in completing various battles on Mars, including its adventures and public events (if you go for weekly Flashpoint, you can kill two birds with one stone).
As you work your way through waves of enemies, you might want to stockpile some Resonate Stems, which you can turn into keys that open Sleeper Nodes and speed up that leg of the quest.
Time for Heroic Strikes
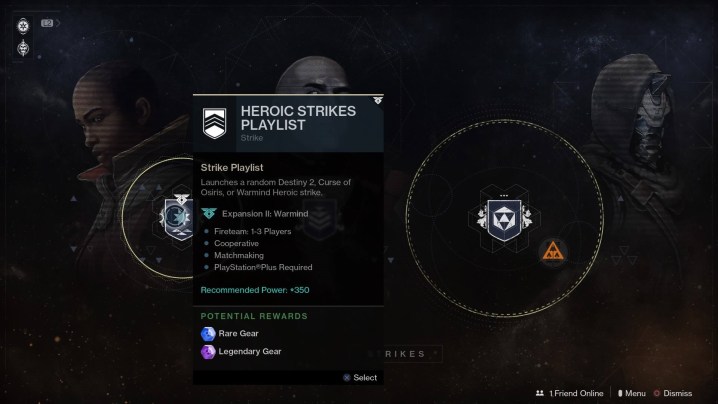
The next step requires you to complete five Heroic Strikes with the IKELOS hand cannon equipped, which can be tough since the recommended Power level for those activities has been upped to 350 in Warmind. To complete the step, you need the hand cannon equipped at all times from the start, so make sure you’ve got it ready to go before you start the activity, just to be safe. Since you’ve got a Milestone for completing Heroic Strikes, you can knock out both requirements at the same time if you’ve saved it up until now.
Another caveat here: As of February 10, 2021, there seems to be a bug associated with this step — at least on PlayStation 4. We found that several of the Heroic Strikes we completed didn’t count toward the quest for no discernible reason. Specifically (and anecdotally), it seemed like strikes from Destiny 2‘s base game counted toward the requirement, but the new strikes added in Warmind did not (we didn’t end up doing any strikes from Curse of Osiris). Then again, the last strike we completed, Nessus’ “Exodus Crash,” counted twice, so who knows.
The annoying part: Sleeper Nodes

Your next step is a two-parter that takes you back to Mars. First, you’ll need to find and unlock 15 Sleeper Nodes — those diamond-shape caches — scattered around Mars. Remember those Resonate Stems we told you to hoard? You’ll need them now to make Override Frequencies. You’ll need to collect 60 Resonate Stems to make all the Frequencies you require, so get cracking.
The best way to earn Resonate Stems is to pick up patrols while also doing Public Events. We had the best success focusing on Supply patrols (the ones marked with a triangle icon) and Kill Missions (marked with a diamond surrounded by triangles). These patrols mostly involve killing groups of enemies, and are not particularly tough or time-consuming. You’ll find yourself knocking them out handily even as you play Public Events.
Speaking of Public Events, you’ll want to try to trigger the Heroic versions of the events as often as possible. While there are no guarantees, heroic events often dish out two Resonate Stems, instead of one.
Bounce back and forth between the two main areas of Hellas Basin, completing Public Events and cleaning up patrols. If you run out of easy patrols to do, generate an Override Frequency event, and take a minute to go find a Sleeper Node. When you return, you’ll have more patrols and publics to complete.
The tough part: Escalation Protocols

The second requirement for this stage of the quest is also the hardest, because you need other people. You’ll need to complete three “levels” of Escalation Protocols, the new Public Event found on Mars. They are easy enough to trigger — simply activate one of the glowing red patches on the ground in either Breytech Futurescape or Glacial Drift to begin. They’re very tough, though, as indicated by their suggested Power level of 370. What’s more, your progress in the Escalation Protocols only count toward your quest requirement if you have the IKELOS hand cannon equipped, so don’t forget!
Escalation Protocols are basically wave-based Gears of War-horde-style fights, and you’ll need lots of people around to clear them since they’re so hard. Each protocol has four rounds: the first is a swarm of Hive Thralls, which you have to clear within a certain time limit, and it’s easy enough. The second opens a “shadow rift” somewhere in the area that will spawn acolytes, marked by three crystals hovering around it. To complete the wave, stand on the rift until the timer completes, then shoot the three crystals. That’ll spawn an elite Knight, which you can kill to steal its sword and use against the third wave, a mix of Hive bad guys that includes Thralls, Acolytes and Knights. The fourth wave is a tougher version of all that, with a boss Ogre that you’ll need to take down to complete it.
Basically, you need to do that three times. Each quest “level” includes four steps of an Escalation Protocol, so you’ll need to have the Guardians on hand to beat that Ogre if you want it to count. This is definitely easier said than done, so try to activate the Escalation Protocol only when there are a bunch of people around on Mars, or you’ll be doomed to fail. If you clear one Protocol, you’ll be prompted to head to another activated beacon to start the second step, which is even tougher. The good news is you can repeat the first level three times to satisfy your IKELOS requirements. That still isn’t easy, but it’s more attainable than trying to do three increasingly difficult levels in a row.
The final step: Will of the Thousands
After you’ve finished your Escalation Protocols and unlocked your Sleeper Nodes, you’ll only have one thing left in your way: The Worm God Xol. You’ll need to head to the Breytech Futurescape to activate one last story quest, which will require you to run the “Will of the Thousands” Strike again but with the IKELOS hand cannon equipped. It’s the same as the final story mission of Warmind, so you should already know how to handle it.
The final IKELOS mission has a suggested Power level of 360, which sounds tough to do alone, but don’t let that fool you. The strike is not particularly difficult if you know what you’re doing, and routinely spawns the Valkyrie javelin for you to use, which can make up for any firepower you might be lacking. We successfully ran the strike at 350 with no backup.
Our suggested strategy: stay toward the back end of the arena, on the elevated platform at the far end of the area where the Valkyries spawn, when you fight Xol. We found it was easy to hide from Xol’s attacks up there. It’s also a decent sniper’s nest, giving you an easy way to pick off incoming Hive bad guys once they have spawned. The proximity to the Valkyrie also makes it easy to grab without taking the chance of getting blasted by Xol’s energy attacks. Take your time to clear out enemies, stay behind cover, and hit Xol when it’s safe to do so, and you shouldn’t have a problem.

Once Xol goes down, you’ll have everything you need. Return to Ana Brey in the Breytech Futurescape and claim your Sleeper Simulant. The Exotic Power weapon is very powerful, specifically if you can land precision hits with it. It should be useful in finishing those tough Escalation Protocol bosses.