Knowing how to record Xbox One gameplay is a skill every gamer should have, especially since sharing gameplay highlights has become an integral part of the landscape of modern video gaming. Luckily, the latest generation of consoles makes it easier than ever to capture and broadcast footage, even without dedicated equipment like expensive capture cards. Are you preparing for a thrilling match in Halo Infinite? Or maybe you're gearing up to face a difficult boss in your latest RPG? Either way, you're going to want to know how to capture the moment, and we're here to show you how.
How to record Xbox One gameplay
You won't always know when your best gaming moments are going to happen, so the Xbox One uses a handy buffer that records the last 10 minutes of gameplay, giving you plenty of opportunities to capture some awesome in-game moments.
The Xbox One's interface only allows you to capture in-game footage, however. If you need to record the menus, you'll still need to use an external capture card.
Step 1: If you want to share a cool moment you just experienced while playing a game, simply press the Xbox button at the top center of your controller. This will open up a guide. Along the bottom of the screen, you'll find a few choices, including a menu dedicated to capturing and sharing. This lets you take a screenshot, record footage, and adjust capture options.
Step 2: If you would like to take a screenshot, most of the work is already done. The moment you press the Xbox button on your controller, navigate to the Capture & Share menu and then select Capture Screenshot to save an image of whatever is on-screen.
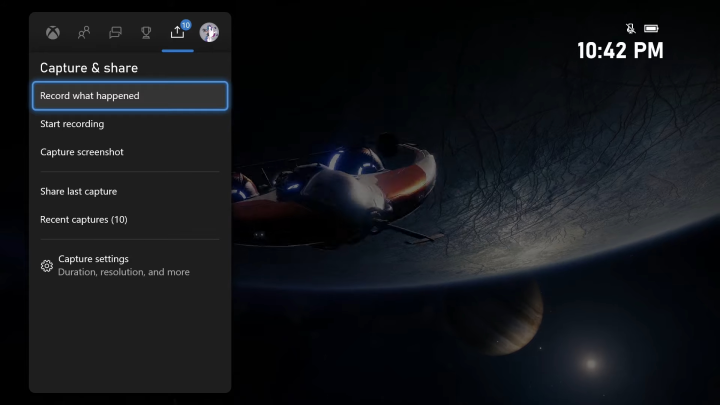
Step 3: If you would like to share recent gameplay, simply press Record What Happened and your Xbox One will automatically grab the last 30 seconds of footage it has saved in its buffer. This is the default amount of time for a clip, which is plenty for most gaming highlights, especially moments like the dramatic comeback combo finisher in your last Street Fighter match.
Step 4: However, if you want to access more footage than the last 30 seconds, press the Capture Settings option from the Capture & Share menu. Here, you can adjust the recent record time up to 1 minute.
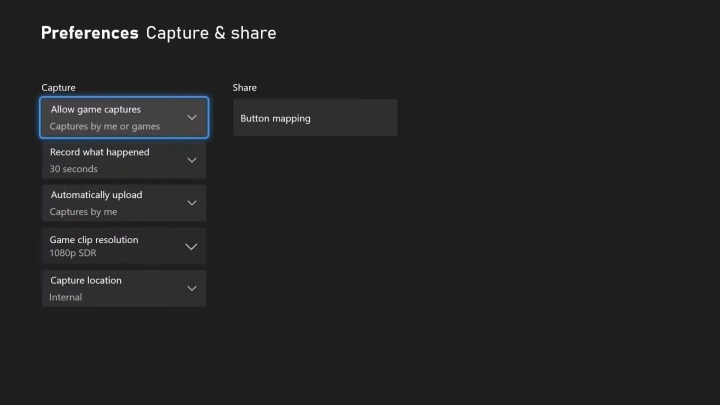
Step 5: According to Xbox support, you can record up to 10 minutes of gameplay at a time on the Xbox One's internal storage, depending on the resolution of the footage and the amount of space available on your hard drive. By connecting an external hard drive, you can extend the amount of time you can continuously record by up to an hour.
To change the location of where your clips are saved or to change the resolution it's recorded at, go to the guide and select Capture & Share. Then, scroll down to Capture Settings. You'll be given a few options in the column entitled Capture. At the very bottom is where you can select to change the capture locations. This menu has more detailed settings listed on the screen, including several different resolution options (720p is one of them).
On the Xbox One X, we were able to record for as long as 5 minutes by selecting a 720p resolution instead of the default 1080p, which has a cap of 2 minutes. This screen also lets you capture at 4K in HDR, but the reduced clip length allowed in this resolution makes it a less-than-ideal option for sharing your gameplay.
How to view and export your gameplay clips
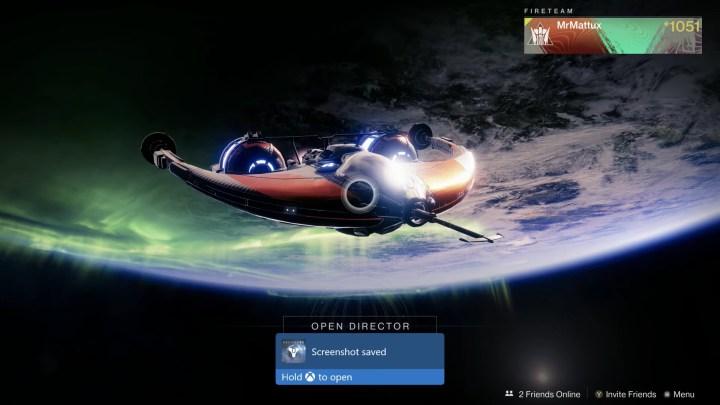
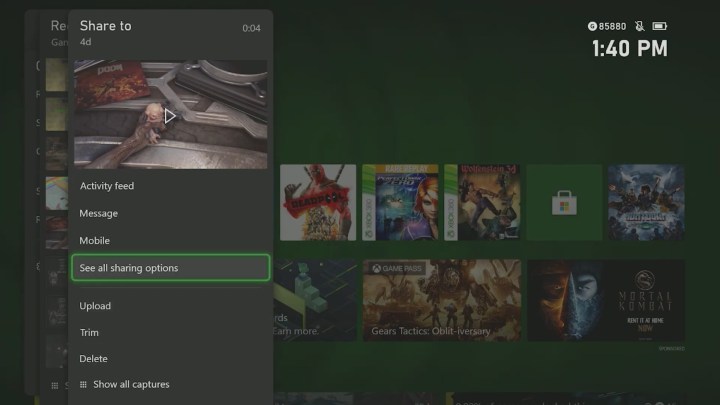
To view your capture immediately after saving, hold down the Xbox button when the blue notification confirms your recording has been saved.
Step 1: From this overlay, you can view your new clip, upload it to Xbox Live or Microsoft OneDrive (if either is set up and linked to your Xbox account), delete the clip, or go to manage all of your saved gameplay. Selecting Edit will send you over to Microsoft's free Upload Studio app or to its entry in the store if you don't have it downloaded.
Step 2: To view your gameplay clips at any time, press the Xbox button to bring up the guide. Scroll to the right until you're back at the Capture & Share menu. This menu has a Recent Captures option for you to select and view your saved game moments. On this screen, you'll see a chronological list of all recently captured gameplay.
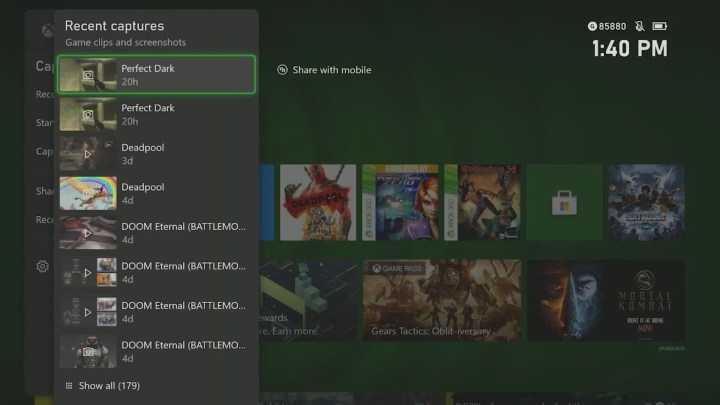
Step 3: An alternative to managing your clips is to select Show All at the bottom of your screen. Here, you can easily choose whether you want to remove, categorize, and copy clips to your activity feed, Xbox Clubs, Twitter page, or OneDrive account.
Share clips from the Xbox mobile app
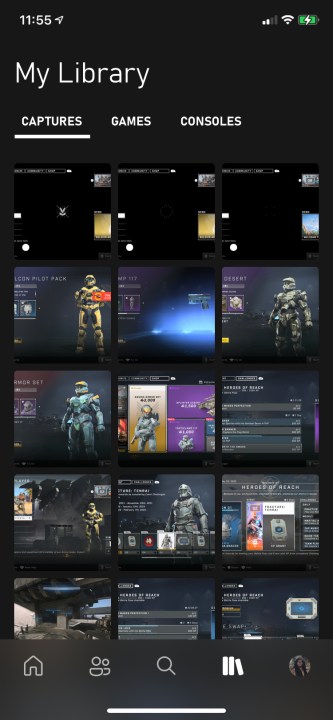
Xbox mobile app developers released an update in 2019 that improves the sharing process. This upgrade lets you do more than just simply record a game. It also allows users to share their game recordings to their social media pages to see their friends and followers. You also can save your recordings in your smartphone's photos. As long as your Xbox One is connected to the internet, it will automatically upload images to the cloud and you can access them from the mobile app.
Step 1: You only have to follow a few easy instructions to achieve this. Begin by opening up your Xbox app and looking at your captures by tapping the "books" icon to the left of your profile image on the bottom.
Step 2: Next, select the image and then you'll see a Share option at the bottom. Once you press this, you'll see a bunch of networks pop up. You can choose which social media platform you want, whether it's Facebook or Twitter.
Step 3: The Xbox mobile app lets users save their photos the exact same way. If you happen to run into problems while trying to do this, we suggest updating your device's privacy settings. This is critical if you're using the most recent software updates.

