Xbox users have been taking advantage of external drives for some time now, allowing them to expand their storage and back up their content. For PlayStation users, however, delving into external storage is a more novel endeavor. Recent firmware updates have made it so you can finally install an external hard drive on your system with relative ease.
Here is our brief guide for all of your external storage needs — how to choose the right hard drive for your console, how to install your external hard drive, how to troubleshoot, and how to manage your storage. Read on for more information.
Xbox One

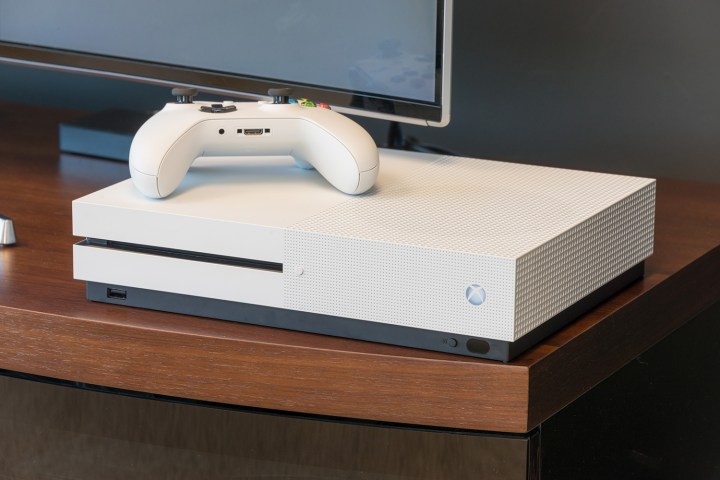
Your Xbox One or Xbox One S will connect to an external hard drive via USB 3.0, so long as it has a storage capacity of at least 256 GB. You can use a hard drive with lower specs, but it will only save your media, and it will not work for your games. You can also connect two external drives simultaneously, using a USB 3.0 hub, or use multiple hard drives on one system, swapping them out and using them two at a time.
Choosing your hard drive
How do you pick the right hard drive? This depends on a few factors, such as the amount of money you want to shell out, your gaming setup, and your speed and storage needs. External hard drives come in a variety of flavors, and Xbox is liberal with its requirements, allowing for all sorts of drives, including both HDD and SSD solutions.
What the hell is the difference between SSDs and HDDs anyway? A solid state drive (SSD) stores data on microchips, and there are no moving parts within the drive, hence the name. A hard disk drive, however, uses moving parts to read and write data on a disk. With an SSD, you’re likely going to pay more for less storage space, but faster load times.
As of late 2016, SSDs typically cost between 20 and 50 cents per GB, while HDDs are generally less than 5 cents per GB, Extreme Tech reports. HDDs are better for those who prioritize budget and large amounts of space, while SSDs are better for those who value speed and are willing to shell out cash for something a bit more reliable and high-end. However, keep in mind that your system will operate faster with an SSD, but you may not see the huge difference you’re expecting. You’ll likely see about a 20-percent reduction in load time if you have a good SSD, as opposed to an HDD. But, a game that took 90 seconds to load before is not going to all of a sudden load in a single millisecond. It’s also wise to remember that a hybrid (SSHD) will be “almost as fast” as an SSD, so their value is really in the eye of the user.
Whether to go with an HDD or SSD is not the only thing you have to decide on, either. Some drives come with their own power source — a power cord and an AC adapter — while others rely on power from the console’s USB 3.0 port to operate. If you like a clean setup (without a lot of cords) or you’re looking for something small and portable, these are factors to consider as well. In terms of price, you’ll pay anywhere between $40 and upwards of $300, depending on the type of drive and its specs.
A few of the best Xbox One hard drives you can buy for a decent price:
- WD 1TB Black USB 3.0 My Passport Portable External Hard Drive —
- Seagate Expansion 1TB Portable External Hard Drive USB 3.0 — $55 on Amazon
- Seagate 1TB FireCuda Gaming SSHD (Solid State Hybrid Drive) —
- Samsung T3 Portable SSD – 500GB – USB 3.1 External SSD —
- Samsung 850 EVO 500GB 2.5-Inch SATA III Internal SSD — $170 on Amazon
Installing your Xbox one external hard drive
First, make sure you’ve installed any and all updates to your system. If you have an Xbox-certified hard drive, the system should detect it and it’ll be plug and play for the most part, with the system walking you through the process automatically.
For other hard drives, plug the drive into a USB port and press the Xbox button in the center of your controller to launch the guide. After that, go to Settings > All settings > System > Storage > Manage storage. Under Manage storage, you should see your external hard drive listed. If you don’t see your external drive listed, try the following troubleshooting steps:
Step 1: Remove and reconnect the drive into the same USB port.
Step 2: Remove and reconnect the drive in a different USB port.
Step 3: Reboot your console.
Step 4: Go into Settings > All settings > Power mode and uncheck the box besides “When Xbox is off, turn off storage.”
Step 5: Plug another compatible device into your console’s USB port to see if it functions properly.
Step 6: If your hard drive is working on an AC power adapter, try plugging it into a different outlet.
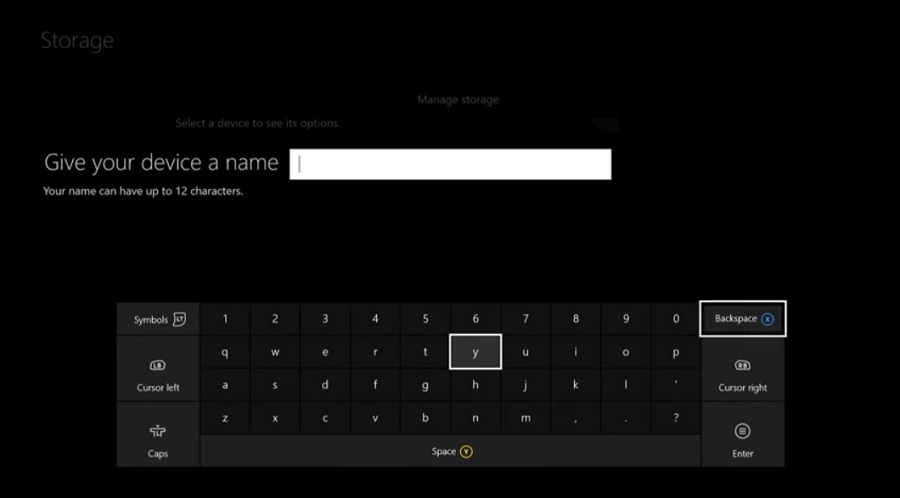
Once you see your external hard drive listed, follow the on-screen prompts. Also, name the drive something unique so you’ll be able to recognize it easily. You can rename your hard drive by selecting it and choosing the “rename” option.

Using your external hard drive
To view the contents of your hard drive, visit the Storage menu, select the name of your drive, and choose the View contents option. While your new games will install onto your hard drive automatically using the default setting, you’ll have to move your old games over manually. To do so, go to your console’s My games and apps menu and find games you’d like to move. Alternatively, you can go to the Storage menu and click on your internal hard drive and find the games there.

To move a game, select Manage game, Move all, and choose Move to your external hard drive. Depending on the size of your game and your drive’s specs, this can take anywhere between a few seconds and several minutes to complete. If you want to house a game on both your internal and external drive — say, if you’re copying your content from an Xbox One to an Xbox One S perhaps — you can select Copy all instead of Move all, and the game will copy to your external drive instead of transferring.
PlayStation 4

Thanks to Sony’s recent firmware update for the PlayStation 4, you no longer have to jump through any hoops to upgrade your storage capacity. Your external hard drive will work with any PS4 model if it’s USB 3.0-compatible, and touts at least 250GB of storage (8TB is the max).
Choosing a hard drive
PlayStation users have similar considerations to Xbox users when picking out an external hard drive — portability, cost, aesthetics, and speed. If you want something faster, with more space, and you don’t want to spend a ton of cash, it’s a good idea to opt for a hybrid model. In PS4 speed tests between SSD and SSHD, the SSHD is typically only a few seconds slower.
If you have an extra internal drive already, it may be a good idea to opt for a USB 3.0 enclosure for around $10 or $20. This will save you a huge chunk of change, and you’ll still get the storage you need.
A few of the best PS4 hard drives you can buy right now for a decent price.
- Toshiba Canvio Connect II 1TB Portable Hard Drive —
- Seagate Expansion 1TB Portable External Hard Drive — $55 on Amazon
- WD 2TB Elements Portable External Hard Drive —
- Seagate 1TB FireCuda Gaming SSHD (Solid State Hybrid Drive) —

Installing and formatting your external hard drive
Plug your device into a USB port on your PlayStation and go to Settings > Devices > USB storage devices. After you select USB storage devices, you should see your external hard drive listed on the screen. If it’s not listed, and you see a message that says “USB storage is not connected” under the USB storage devices menu, check to make sure you’ve installed all of the latest console updates, and that your USB device is plugged in all the way. If you still can’t see the name of your hard drive on the screen, try a different USB port or a different outlet, if you have a hard drive with a separate power plug.
Once you click the external hard drive, your console is going to prompt you to format your hard drive. Go ahead and format your device as extended storage, and follow the on-screen instructions. Please note that once you complete this step, your PS4 is going to wipe your external hard drive so it can prepare it for use.
Once formatted, your disc games and downloads will install onto your external hard drive by default. If you want to change this, you can do so by selecting Storage under the Settings menu, and changing the install location to your System storage instead of your Extended storage.

Using your external hard drive
Moving PS4 games onto your external hard drive is relatively simple. To do so, go to Settings > Storage > System storage > Applications. Here, you can move one or more games at a time to extended storage.
To copy a game to your hard drive, go to Settings > Application saved data management > Saved data in system storage. Afterward, select Copy to USB storage device, choose what you’d like to copy, and wait for the process to complete.
You can also back up your PS4’s internal HDD to an external drive by going to Settings > System > Backup and restore. You’ll need to confirm which data you’d like to back up, and then name your backup so you can easily identify it.


