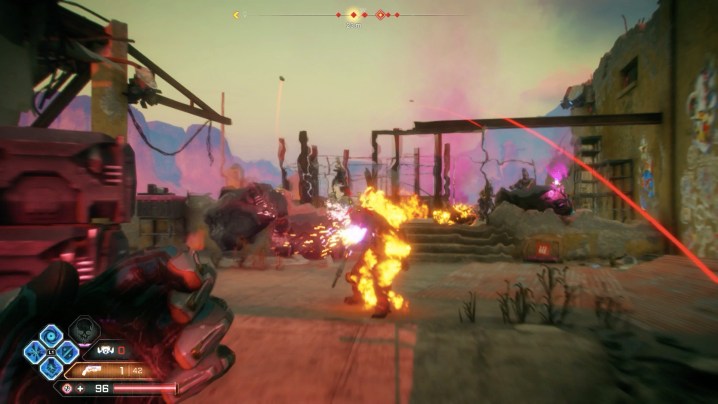
Rage 2 is an oddity in the open-world action genre. The just-released PS4, Xbox One, and PC shooter doesn’t inundate you with quests at every turn. In fact, it has less than ten campaign missions in all. You can work your way through Rage 2 without experiencing a ton of its most exciting moments. Rage 2 partially conceals a bunch of its best features, too. Our Rage 2 beginner’s guide will help you get the most out of your time in the wasteland, from finding hidden quests to managing upgrades to discovering wicked weapons and abilities.
- Finding Arks is your first priority
- Chattiness pays
- Purchase permanent upgrades in Wellspring
- Projects are your Skill Trees
- Dash is your best defense
- Purchase schematics to craft inventory upgrades
- Only upgrade weapons you frequently use
- Don’t miss out on Nanotrite perks
- You can switch vehicles in the menu
- Fast travel and waypoint markers
- Look for Ark Chests and Storage Containers
- Make your own fun
If you’re enjoying Rage 2 and it reminds you of a certain id Software franchise, make sure to check out our interview with id Software Studio Director Tim Willits.
Finding Arks is your first priority

Arks are tucked throughout the various regions in the wasteland. You can find them behind enemy hideouts, in valleys, through dense pockets of forestry. These Arks are really important. What’s inside them will help you in battle, but it also lets you play Rage 2 as it was intended to played: With over-the-top, fast combat.
There are six Arks housing weapons, and seven that have Nanotrite abilities. Only one of these thirteen, the Ark harboring the Combat Shotgun, you’ll encounter throughout the story. The rest you have to find hidden across the wasteland. Drive around a region long enough, and you’re likely to hear Walker remark about a nearby Ark. If you don’t want to personally explore, though, we have guides that detail the locations of the weapons Arks and abilities Arks.
Finding these Arks lets you use awesome weapons like the Smart Rocket Launcher and Firestorm Revolver, and sweet abilities like Vortex and Slam.
Chattiness pays

The wasteland is rather barren, but the towns and settlements you visit have a (somewhat) thriving sense of life. Some of the folks you encounter will reveal open world events in conversation. Complete those events and you might get some rewards. The only problem here is that the game doesn’t tell you to go collect your rewards. So each time you visit a town, talk to as many folks as possible.
Purchase permanent upgrades in Wellspring

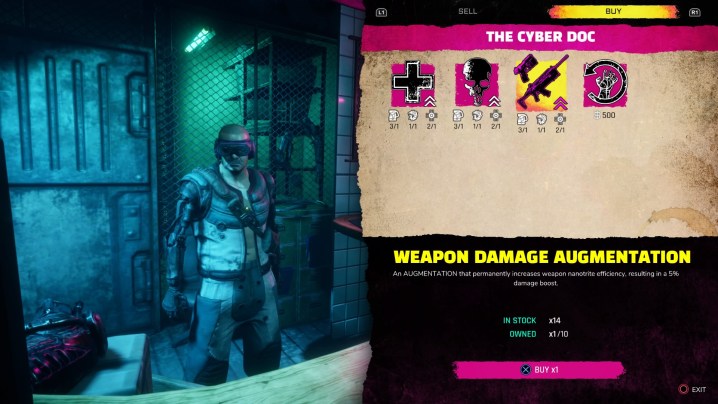
As you make your way through the open world, you’ll acquire various materials such as Ark Tek Cores and Neuronic Interfaces that seemingly have no real purpose. A few of these resources can be exchanged for permanent upgrades at the Cyber Doc in Wellspring. The Cyber Doc sells health, Overdrive, and damage upgrades. Each one increases your stats by five percent. It’s up to you how to allocate these rare materials, but we recommend going for damage first and then health. We never really felt the need to spend materials on Overdrive.
You can buy these rare materials from vendors, but they are quite pricey ($1000 and up). If you have an excess of cash, go wild, but this isn’t the best way to spend your coin.
Projects are your Skill Trees

When you complete the opening sequence, you’ll unlock Lily Prowley’s Project, which is the first skill tree. Access Projects in the menu to spend Project Points (earned all throughout Rage 2) on five different upgrades. That’s a small skill tree compared to the other three, handed out by the three other quest givers in Rage 2: Marshall, Loosum, and Kvasir. After completing each of their first missions, their Project will open up in the menu. There are 64 skill tree upgrades in all, correspond with all sorts of stats. Make sure to check the Projects menu between open world activities to see what you can afford.
Dash is your best defense

Dash is a Nanotrite ability that you unlock in the opening mission. Pressing L1/LB gives you a brief burst of energy to dodge in any direction. Dash winds up as the best defense mechanism you have in your bag of tricks, especially when fighting the giant enemies (can’t miss them). Each of these boss-type foes have moves that are hard to avoid unless you Dash. If you master your Dash timing, you can sail through these towering fights with ease.
Purchase schematics to craft inventory upgrades

Rage 2 doesn’t explain its inventory upgrade system at all. You can upgrade two throwabales (Wingstick, grenade), health/Overdrive/ability infusions, and the turret drone by combining crafting materials. However, you cannot even combine materials until you have the appropriate schematics. These can be purchased at vendors in towns. They cost anywhere from $750 to $1,000, but the upgrades are worthwhile. For instance, once you upgrade your Health Infusion to level two, you’ll be able to craft Health Infusions out in the world. That’s quite helpful, considering you can only carry four Infusions at one time and they aren’t available in excess throughout the world.
Only upgrade weapons you frequently use

Weapons can also be upgraded. Feltrite, the blue pellets that heal you, also deposit into your inventory. Each of the eight guns has five levels. Upgrading increases the four key stats. Most notably: Damage. Additionally, each level tier has one to two mods that can be equipped using Weapon Core mods. Fully upgrading all weapons would require you to spend a ton of time in Rage 2‘s open world. Frankly, we think you’d run out of dedicated objectives before getting there. So, focus your upgrades on the weapons you use most often. The Assault Rifle and Combat Shotgun are obvious choices for upgrades since they are the most practical weapons in the game.
Don’t miss out on Nanotrite perks

The eleven Nanotrite abilities have three to five levels of their own. Like weapons, they require Feltrite to move to the next level. This further puts a strain on your Feltrite budget. Again, focus on upgrading the abilities you use most often.
Upgrading with Feltrite isn’t the only thing you can do here. Pressing X/A on the ability brings up the perks menu. You can purchase tier one perks simply by having the ability, but you’ll need to upgrade to access the higher tiers of perks. It can be really easy to overlook ability perks since they aren’t explained and are buried in a sub-menu. Nanotrite Boosters, which can be found and purchased, unlock these helpful perks that range from reduced cooldowns to significant damage increases.
You can switch vehicles in the menu

If you’re out on the open road and you want to switch rides, you can do so from the menu. As a heads up, you do have to be on a paved road in our experience. Keep in mind that if your vehicle catches flames and stops running, you can repair it by simply stepping in front of the hood and using Focus. So you don’t have to swap rides when things go awry, but you might as well check out more vehicles than your starting Phoenix. You can even unlock flying vehicles.
Fast travel and waypoint markers

Rage 2‘s open world is really big, but it’s also seriously empty. You’ll spend a lot of time driving across long stretches of flat, arid land to get to your next destination. You can fast travel back to the towns and commercial areas you’ve visited, though. Simply go to the map and hover over the town icon. Even if you aren’t needing to go into town, fast traveling and then embarking from there can save you time.
The wasteland can look rather same-y, so it’s smart to drop waypoint markers on the map. Doing so will create arrows on the road, pointing you in the right direction.
Look for Ark Chests and Storage Containers

When clearing out Arks, Bandit Dens, Pit Stops, and other side objectives, make sure to check your map to see how many Ark Chests and Storage Containers are in the area. Storage Containers typically have cash or Feltrite, while Ark Chests have rare materials and other goodies. Most side objectives have at least one Ark Chest and a handful of Storage Containers.
Make your own fun

So here’s the thing: Rage 2 has a big world, but the campaign is extremely short. After completing the opening sequence, you’ll head off to meet three handlers and complete one mission for each of them. After that, we suggest spending a ton of time exploring the open world for Arks, Bandit Dens, and other side objective activities. You’ll need to do some of this anyway to unlock the next set of missions, but we suggest doing more than what is required. Grab all the guns, all the abilities, and enjoy Rage 2‘s excellent combat mechanics.
The second set of missions (one from each quest giver once again) is all that separates you from the final mission. If you only focus on the mainline events, you’ll likely miss out on some of Rage 2‘s best content.


