Undead Labs’ State of Decay 2 might look like every other open-world zombie game at first glance, but where many of its peers focus on fast-paced and enormous battles against the undead, this title for Xbox One and PC is a deep and challenging survival game. Fail to pay attention to the needs of your ever-growing community and you’ll quickly find it in disarray, but if you focus on gathering the right materials and expanding your influence, you can master the apocalypse. Knowing your way around a gun and a baseball bat won’t hurt one bit, either. Here’s what you need to know when you start State of Decay 2.
Surviving against zombies
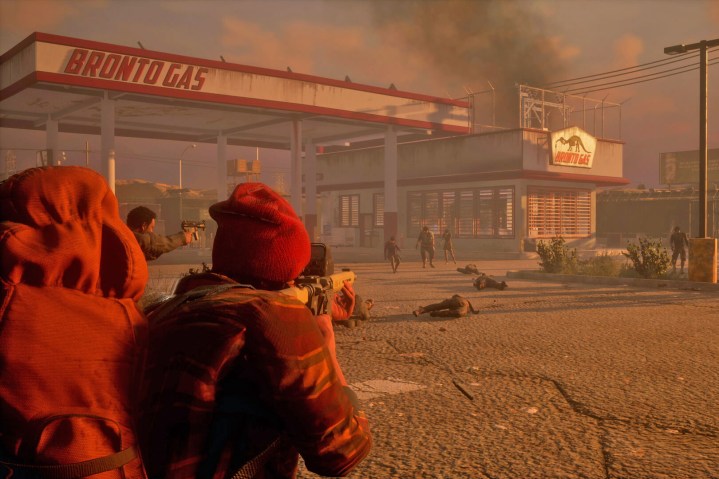
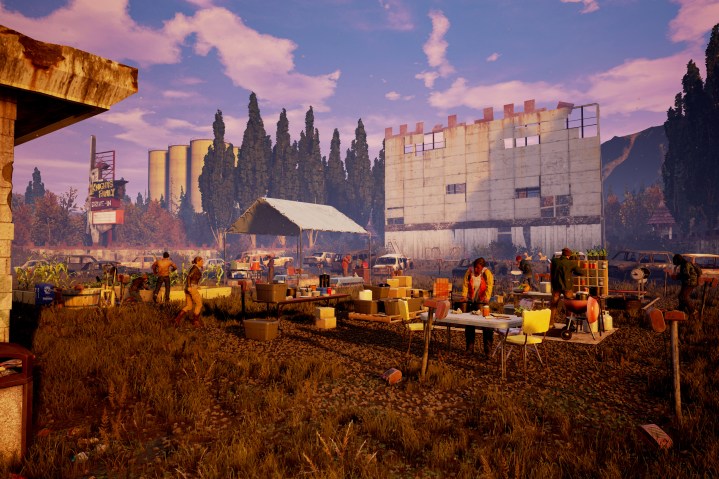
Upon starting up State of Decay 2 for the first time, you’ll be sent into a tutorial mission with a few survivors who must sneak and fight their way out of a zombie-infested compound. This mission will teach you the basics of melee combat, stealth, and firearms. After it’s complete, you’ll have the opportunity to establish a home base and begin recruiting other survivors for your group. Make sure you pay attention during this section and you’ll have a broad idea of what to do – and not do – when you see a zombie. Just in case you need a refresher, though, here is the gist:
If possible, kill with stealth
By holding down the B button on the Xbox One controller, you’ll crouch and move with much less noise. If you manage to sneak up behind a zombie and simultaneously hold down the RT and X buttons, you’ll instantly kill them with a knife to the head. This allows you to thin a group of zombies without alerting them all, and saves your melee weapons from unnecessary wear and tear.
Your gun is a last resort

A well-placed headshot from a pistol can kill most zombies in State of Decay 2 in just one hit, but there are fairly few scenarios where you’re actually going to want to use one. Ammunition for firearms is quite limited, and there are several different types of weapons that each use their own caliber.
Guns are also loud. Killing one zombie with a gun will often result in two or three more discovering your position, resulting in a prolonged battle that could have been avoided if you had just used your melee weapon.
Hold your ground, but be realistic
When you do start swinging your bat, pipe, or sword, mind your character’s position relative to your enemies. You’ll automatically focus on a nearby enemy when you press the X button to start attacking, but won’t snap toward their position. If you aren’t within range, let them take a step or two before you swing. If you miss, you’ll leave them a chance to get in an attack of their own.
Once you’ve attracted some zombies’ attention, always prioritize attacking the undead trying to attack you from behind. If you’ve ever seen a zombie movie, you know they love to leap onto survivors’ backs and chomp on their neck, and this is certainly the case in State of Decay 2. Getting attacked this way can quickly take a large chunk of your health away, and it takes several seconds to shake a biter off.
Should you run low on supplies or find yourself completely overrun, your best course of action might be to run away. Provided that you have some stamina in your tank, you can often make it to a vehicle or safehouse before the zombies can surround you. If you are killed, that character is permanently dead, and your community will have to conduct missions to find a replacement. No weapon or supply cache is ever worth dying over, so don’t hesitate to run from a fight that, for whatever reason, you think you might lose.
Types of zombies

The zombies in State of Decay 2 aren’t limited to the dumb, slow-moving undead you know from George Romero films and The Walking Dead. There are several different types of special creatures you’ll encounter in your first few hours with the game. Here is what to expect, and the strategies you should use for taking them down.
- Screamers: Screamers appear as armless, heavily decayed zombies that will often be surrounded by several standard zombies. If they spot you, they’ll let out a high-pitched noise that will draw several more enemies to your position. Make them your first priority in any encounter, either with stealth or with a bullet if they happen to spot you.
- Bloaters: Bloaters are larger zombies that, as their name suggests, are filled with deadly gas. Shooting one or getting too close will cause a bloater to explode, and the gas is capable of decimating your health, even if you hit them from inside a car. If you see a bloater, either keep your distance or take a shot when you’re several yards away.
- Ferals: Ferals are among the most dangerous threats in the game. Fast-moving and capable of dealing out melee damage in a hurry, you’ll notice their four-legged run right away. While dangerous, you can easily kill one with a well-placed headshot. If a Feral hasn’t seen you yet, kill it right away to avoid wasting your supplies.
- Juggernauts: Juggernauts are insanely powerful zombies that you’ll spot occasionally during your time exploring. Far larger and taller than any other enemy, the Juggernaut can pick you up and deal tremendous damage, but the scariest thing about them is their health: It takes several headshots to bring one down, so your best bet when you see one is usually to run. They’re also deceptively quick, so a car or an elevated structure should be your destination.
Navigating the world

State of Decay 2 is an enormous game, and with your resources constantly being depleted to fuel your base and feed your community, you need to be very efficient at exploring the world and looting resources. Failure to do this properly will not only result in wasted time, but a decline in morale for your survivors. If you’re making the right choices, however, you won’t get overwhelmed.
Get a car, and keep it close
If there is any of our State of Decay 2 advice you absolutely must heed, it’s this: Get a car. Functional vehicles are scattered throughout the map alongside countless junkers, and they offer you a tremendous advantage over on-foot travel. In addition to letting you cover ground faster, a car can quickly mow down waves of zombies that you’d otherwise waste time and resources to carefully take out.
Cars also serve as mobile storage units. You can stash packs of resources you’ll find — such as building materials or food – in your trunk. Without a car, you can only carry one of these at a time per survivor, and the weight can slow you down.
Zooming in on the map will show you the position of your vehicle, and you should always keep it close to the building you want to search. Always be on the lookout for fuel canisters, as you’ll need to refuel your gas tank regularly, and you can keep extra fuel in the trunk alongside the supplies you gather.
Your car will gradually take physical damage, which you can gauge based on the car’s condition – the exterior will look progressively more banged up, and your engine will start to steam, smoke, and eventually catch fire. If you find a toolkit during your exploration, you can repair a vehicle back to its original state, but these aren’t easy to find. If your car is on the brink of death, you’re often better off searching the area for a new one. Save the toolkits for when you need to get away and there are no working vehicles in sight.
Plan ahead

Once you’ve scouted an area for locations – you’ll do this during the tutorial – you can set waypoints for them using the main map. Hover over an icon and you’ll see what type of building is there, as well as the resources you may discover there. If your community is running low on food, for instance, you don’t need to go out and blindly search for it. Instead, find a location that lists food as an available resource and launch a surgical strike. Get what you need, then get out.
If you’re struggling to find the particular resource you’re looking for, you can use your radio for help. Open the quick menu by pressing down on the D-pad and hit RB to access the radio commands. Choose the “resources” option and select the particular type you require. It will then be displayed in orange on the map. You’ll need to spend influence (the game’s currency) in order to use this ability, but it’s almost always worth the cost.
Things very rarely go completely according to plan, so prepare for the worst. Pack more ammunition than you think you’ll need to complete your goal, and always keep a second, undamaged melee weapon in your inventory. Your weapons can break at a moment’s notice, and your small default knife is a poor replacement for the power of an aluminum baseball bat.
Switch characters often to keep your whole crew healthy

As you sprint, climb, jump, and fight in State of Decay 2, your character’s stamina will be depleted. Initially, it will be able to recharge back to its full capacity if you stop moving, but the upper limit will also go down if you exert yourself too much. This is inevitable, particularly if you have to battle large hordes of zombies, but you don’t want to let it drop too low. Once your stamina capacity falls below 60 percent, head back to your home base and choose a different character. Your previous survivor will use the break to rest up, improving both their health and stamina and leaving them available to use again in the near future.
Occasionally, you won’t be able to return to your home base right away, and this is where consumable items come in handy. Bandages and painkillers can refill your health bar during a difficult battle, and the bagged snacks you’ll find during your looting can immediately refill your stamina meter. You don’t want to waste these, particularly if your car is nearby, but always keep a few on each survivor in case of an emergency.
Types of activities
During your time exploring, you’ll be able to do several types of activities in State of Decay 2. Some of these will earn your community new trading partners or supplies, while others will make the area a safer place to live.
Helping survivors
From time to time, you’ll hear a voice call out for help on the radio and a “?” symbol will appear on your main map. This represents a survivor in need, and by traveling to their location and completing their mission, you can usually unlock their group as a trading partner or even recruit them to join your community.
Be warned, however, that survivors aren’t all friendly. Occasionally, you’ll be led to a location, only to find the survivors want you dead, so make sure you bring enough ammunition to deal with both human and zombie threats.
Community member missions

Those already in your group – as well as allied groups — will occasionally have personal missions they need you to help them achieve. These missions are represented by an exclamation point — ! — on your map. These missions often require you to take control of a specific character, and can range from finding someone’s missing brother to assisting another character in need. They aren’t always available, so it’s best to jump on them whenever you get the chance.
Infestations
If you see a yellow house symbol on the map, you’ve spotted an infestation. Infested buildings generally house several zombies in an enclosed space: To clear it out, you have to kill them all. Typically, a screamer is present, and you’ll often find larger, more powerful threats, as well.
You don’t always have to clear out infestations, but they will have an adverse effect on your community’s morale if you leave one nearby. Completing the mission can also raise the social standing of an individual character quickly, eventually giving them “leader” status.
Plague hearts
Plague hearts are marked on your map with large bloody symbols, and their gaudy icon represents their importance. Eliminating all the plague hearts in a region will remove the threat of Blood Plague, which some zombies carry and can turn living characters into zombies with a few attacks. Killing a plague heart is a high-risk mission, though: Each one is surrounded by several plague zombies, who can quickly infect you if you aren’t careful.
Once you attack the plague heart, dozens more zombies will be spawned. Killing the plague heart will destroy the zombies, though, so you have to work fast. To quickly take out a plague heart, bring plenty of explosives with you. If you run out, switch to your most powerful firearms and focus all your effort on the heart itself. Once it’s destroyed, you can breathe more easily.
If one of your characters does get infected, a timer will begin ticking down. When it reaches zero, your character will die and become a zombie. To keep them alive, take a car and get back to your base as soon as possible. You’ll need to use a vial of plague cure to remove the infection, which you make in your infirmary using medical supplies and “plague samples,” which you can scavenge from infected zombies. If you don’t have any on hand or the materials to make them, you can also stabilize the infection at your infirmary, which will halt the disease’s progression without eliminating it, giving you time to find what you need to cure them using another character.
Speaking of which, make sure to loot the area for the plague samples after you kill a plague heart. Until you’ve killed all the plague hearts, infected zombies will continue showing up all over the world.


