

Take methodical shots

The zombies and monsters that populate Union aren’t the smartest creatures in the world, but they will quickly rip you to shreds if you give them the chance. When in combat, make sure to take steady, calculated shots. Headshots are the most efficient way for taking out most of the game’s grotesque monsters, but there are good headshots and bad headshots: A well-placed bullet can take out many zombies with one or two hits, but sometimes, only half a head gets blown off if your aim isn’t perfect. It’s OK to take an extra half second to aim square at their forehead.
Accuracy and ammo conservation are key. Ammo is sparse, but you will likely have enough to get the job done if you aren’t wasteful.
By “calculated,” we mean that you should pause and reassess the situation before firing each round. Most monsters recoil after getting shot and as they recoil, they are often invulnerable to your attacks and/or covering up their weak points. Once they resume their steady march toward you, fire again.
Don’t try to kill everything

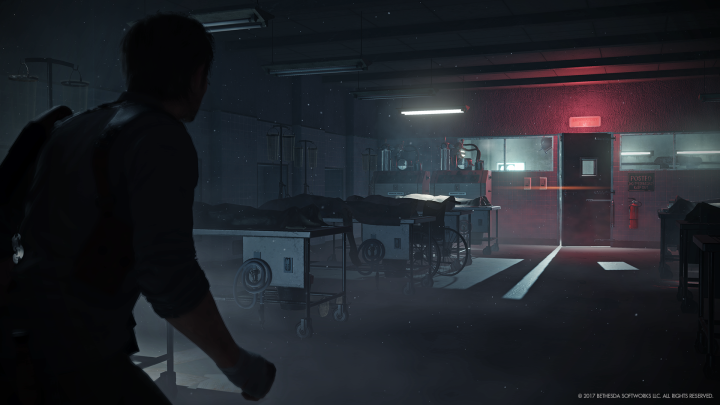
Another way to conserve ammo? Just avoid fights.
You do not have to kill everything you see, don’t even try. The primary reward for killing enemies in Union is green gel, which allows you to purchase upgrades for Sebastian. While useful, that benefit isn’t always worth the risk. If you see a pack of zombies feasting in the center of the street, you might be better off finding a way to avoid them, especially if you have limited ammo and/or have your objective in sight.
If you cannot find an alternate route but still don’t need to engage them, try sneaking around them. As we’ve said, the zombies aren’t terribly smart and their hearing isn’t great. As long as you crouch and remain out of their direct line of sight, chances are they won’t see you. If you need to, you can always throw a bottle in the opposite direction to distract them as you slink away. As you sneak past, an on-screen eye displays your visibility. It shifts left and right based on zombie activity around you, and if the eye opens wide, you have been spotted. If you get caught, sprint away as fast as you can and take cover. You will lose them. You’re better, faster, and stronger (sorry).
There will be plenty of situations that force you to kill creatures to move on, and they will give you more green gel than you would acquire by taking out the fodder in town. There is no sense in jeopardizing your health and wasting ammo that you will certainly need just to take out a few extra monsters. Approaching a group of zombies in attack mode is a recipe for disaster.
Stealth kills are ideal
If you happen upon a lone monster or two zombies with some space between them, you should definitely take a moment, sneak up behind them, and take them with a stealth kill. Stealth kills work best when a zombie is distracted. Quite often they are feasting on a body of Mobius employee and have their hands full. Simply approach them from behind and press ‘X’ on PlayStation 4 or ‘A’ on Xbox One. Stealth kills get the job done with one swift and satisfying animation — no bullets wasted, and now there’s one less monster to worry about.
Scour for resources and ammo
Unlike the first game, Evil Within 2 has a fairly open world. There’s plenty to explore. If you should take advantage of this freedom, you will inevitably run into scores of weapon parts, ammo, gel, health packs, even new weapons.
Along with using the communicator to find resources and ammo, you should be actively looking for precious items in the field with your own two eyes. Enter every building open to you, and check all the drawers, cabinets, tables, and shelves. If you come across wooden crates outside (and you will, often), make sure to break them with your knife: They frequently hold weapon parts that can be used to craft upgrades. Similarly, if you see a vending machine, give it a knock. You will get much more beneficial items than the advertised soda.
At the same time, know when to cut your losses. It isn’t worth it to go into a building covered by zombies if you have little health and/or are low on ammunition. At the very least, return to a nearby safe house, drink the pot of coffee (which replenishes your entire health meter), and combine resources at the workbench to get more ammunition.
Use your map, but don’t forget about your communicator

The Evil Within 2, like many horror games, doesn’t have a mini-map. It makes sense as a way to ratchet up the tension — you can easily stumble into an area crawling with monsters if you aren’t careful. Thankfully, there’s a full-scale map in the menu. From here, you can set an objective point and you will at least know where to go and how far away you are as you’re moving.
You should certainly make use of your map, but also make sure to check your communicator often. It’s easy to forget, but the communicator is technically your means to finding important objectives (you often have to take it out and scan to advance the story), but you it can lead you to side quest, as well as caches of ammo and resources. Take it out and have a listen on your way to your next goal. You’re supposed to be moving with care, remember?
Don’t forget to visit the nurse for your upgrades
Just like the first game, the nurse from Beacon Hospital helps Castellanos expand his brain. You can find her by returning to the police station via any mirror. Sit down in the chair to upgrade physical stats, such as health, resilience, recovery, stealth, and attack.
You upgrade these stats using green gel, which you harvest from enemies in STEM. When it’s time to upgrade, we recommend focusing on health first, as you can expand it almost two-fold early on. But we also strongly advise you to purchase the bottle-break stealth skill.
All those bottles you pick up in the field? Yeah, you’re probably going to have a lot of those at all times. With bottle break, any time a zombie gets in your face and attempts to eat your face, you will automatically break a bottle over its head, and you will escape bite-free.
Complete secondary objectives
As an open-world game, The Evil Within 2 has plenty of side missions. While it may be tempting to skip these missions since they can be tedious at times, you should go out of your way to complete them. Sidequests sometimes reward you with new weapons — the warden crossbow and sawed-off shotgun in the earliest pair. You will also get pouches that increase the amount of ammo you can carry for each weapon.
You won’t always get a game-changing item, but you almost always get a healthy amount of ammo. Since ammo is scarce, doing an extra mission never hurts.
Craft at a workbench, (almost) never in the field
It may be tempting to use the quick crafting option in the menu to make items and weapon upgrades, but you should not do it. Ever. Crafting outside of a workbench costs you hefty premium: Even cheap items like handgun rounds add up quickly.
Obviously, there are exceptions. If you are in the middle of a boss fight, or nowhere near a workbench, you may be forced to craft from the menu to survive, but there are ways to ensure this doesn’t happen.
When crafting at a workbench, use all of your available resources to craft as much as possible. Even if you don’t like using the handgun, craft handgun ammunition instead of saving your resources for the next time you need shotgun rounds. You’ll be happy to have those bullets when you run out of all your other ammo and are forced to pay a ridiculous sum for a single shotgun round in the field.
Weapon wheel and shortcuts
The Evil Within 2 has a friendly inventory system, which allows you to pause and switch weapons at any time without the fear of taking damage. You can also set shortcuts to the D-pad. With four slots available, you should make use of these in whatever way you are most comfortable with.
We strongly recommend setting medical syringes to one of the directional slots for easy access. Beyond that, we almost always have the handgun, shotgun, and crossbow set to the other directions. These are the most common weapons and ammunition you will come across.
Visit the shooting gallery
A few chapters into the game, a new door will appear in the police station. It’s located at the front of the hall leading towards the upgrade chair. Sebastian will make a confused remark about it when it shows up. Inside the room is a shooting gallery with two different games — a moving target practice and a puzzle-shooter that emphasizes accumulating chains of matching blocks.
Beyond being just a fun distraction, these minigames will dole out resources and items for good play. Get better at shooting and earn more ammo? It’s a win-win.
The Evil Within 2 is available now for PlayStation 4, Xbox One, and PC.
Editors' Recommendations
- Resident Evil 4 Shooting Gallery guide: locations, rewards, and tips
- Resident Evil 4: All Yellow Herb locations
- The best weapons in Resident Evil 4
- How to solve the Castle Sword puzzle in Resident Evil 4 remake
- Resident Evil 4 lock codes: how to solve the Village Chief’s Manor combination lock puzzles


