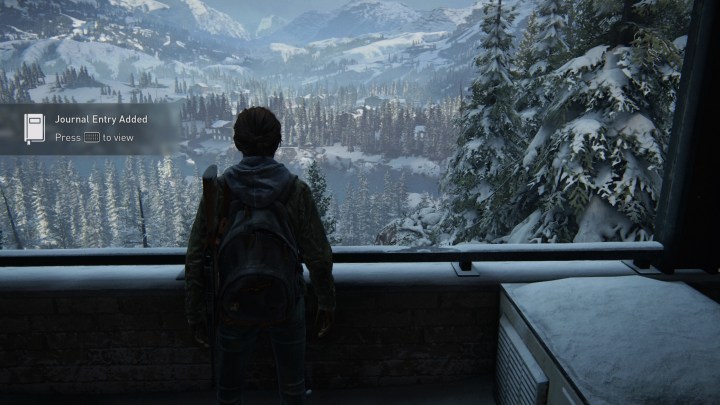
The Last of Us Part II has a lot of collectibles (286, in fact). With more than 100 artifacts, nearly 50 trading cards, and over 30 coins, the easiest collectibles to tackle first, by far, are the journal entries. There are only 20 journal entries in The Last of Us Part II, 18 of which come in the first half of the game. Journal entries contribute to the gold trophy Archivist, where you’ll need to collect every journal entry and artifact in the game. There are far more artifacts, but if you miss a single journal entry, the trophy won’t pop. We’ve done the hard work for you, though, finding all of the journal entry locations in The Last of Us Part II.
Although we won’t talk about any plot details in, well, detail, we will point out landmarks and set pieces for reference throughout this guide. Let this serve as a spoiler warning.
Further reading
- The Last of Us Part II breaks Uncharted 4 sales record
- The Last of Us Part II: All workbench locations
- The Last of Us Part II: Where to find every weapon
Chapter 4: Patrol
Journal #1

Shortly after the chapter begins, Ellie and Dina will dismount their horses inside of an abandoned building. After some dialogue, you’ll go up a set of stairs and out to a balcony. There’s a mini-cutscene here that’s part of the main story path. After it’s over, facing that same balcony, press triangle to jot down the journal entry.
Journal #2

Much later in the chapter, Ellie will pick up a Firefly pendant hanging on the wall next to a door. This artifact is unmissable, and Dina and Ellie will share some dialogue over it. After that, head into the next room and immediately turn right. There, on a shelf, you’ll see a giraffe toy. Inspect it for this journal entry.
Chapter 7: Packing Up
Journal #3

Once you’re inside Joel’s house, head to the kitchen on the bottom floor. Interact with the mug next to the sink for this journal entry.
Journal #4

This entry is part of the story, so it’s unmissable. Still in Joel’s house, go upstairs and into his bedroom. On the bed, inspect the red box for this entry.
Chapter 8: The Gate
Journal #5

From the start of the chapter, continue on the main story path through the woods and down an overgrown highway (there’s a Seattle exit sign at the end of the highway). Once you reach the end, you’ll come to an open area with a security tower and, to your right, a gate with “WLF trespassers killed on sight” spray-painted on the front. Interact with the graffiti for this journal entry.
Chapter 9: Downtown
Journal #6

Chapter 9 is a big open world section where you can explore downtown Seattle. For the first journal entry, head to the corner of 5th Avenue and Madison Street. There, you’ll find a security checkpoint. Head up the ladder to the top of the checkpoint and run across to the second watchtower. In the drawer, you’ll find an artifact, and after picking it up, a journal entry prompt when looking out the front window of the tower.
Journal #7

As part of the main story path, you’ll need to head to the synagogue positioned between Mario Street and Colombia Street (the “dome,” as Ellie and Dina first refer to it). There are a few puzzles for you to solve inside, but eventually, you’ll use a rope to swing to a balcony. On the destination balcony, head to the right into the rabbi’s office. There’s an artifact on his desk, and once you pick it up, Ellie will automatically jot down this journal entry.
Chapter 13: The Tunnels
Journal #8

About halfway through the chapter, you’ll have to take down your first two Shamblers (the Infected with a hunched back). Be careful taking them down, as once they’re defeated, the Shamblers will fall to the ground and explode into a cloud of poisonous gas. Once the gas is clear, interact with a Shambler for this journal entry.
Chapter 15: The Birthday Gift
Journal #9

At the start of the chapter, you’ll see a large T-Rex statue outside of the museum. Interact with the nameplate for this journal entry.
Journal #10

Inside the museum, continue through the exhibit until you reach the space exhibit on the upper floor. Continue straight into the exhibit until you reach two semicircle benches facing each other. Interact with the right bench for this journal entry.
Chapter 16: Hillcrest
Journal #11

From the beginning of the chapter, continue straight into Hillcrest until you have to climb a crashed truck (part of the main story path). On the other side, you’ll see a Ruston Coffee right in front of you. To left, there’s a “rules must be followed” banner with “fuck the WLF” sprayed on the front. Interact with it for this journal entry.
Chapter 17: Finding Strings
Journal #12

At the start of the chapter, you’ll be playing as Ellie in a flashback scene with Tommy. Immediately when you have control, turn right and head to the ledge where you can see a mountain in the distance. As you approach, a prompt will come up. Use it, and Ellie will jot down this journal entry.
Chapter 18: The Seraphites
Journal #13

Near the start of the chapter, you’ll come across the Conference Center. Go inside, and to the left, you’ll see blood smears spelling out “feel her love.” Interact with this display for the journal entry.
Journal #14

This entry is unmissable, but just so you can check it off the list, here’s how you’ll know it happened. Later in the chapter, there’s a mini-cutscene where Ellie will point out the hospital in the distance. After she does, she’ll automatically mark down a new entry.
Journal #15

Later in the chapter, once you emerge from the sewers, you’ll come to a grassy area where Scars will attack you. Once you’ve dealt with them, continue out of the grassy area until you reach a road. Head left to a bus stop and interact with the body there for this journal entry.
Chapter 20: Road to the Aquarium
Journal #16

A little ways into the chapter, Jesse and Ellie will enter an overgrown bookstore. Go to the ground floor, partially submerged in water, and head to the children’s book section. In front of an Alice in Wonderland mural, there are two mushroom trees. Interact with the left one for this journal entry.
Chapter 21: The Flooded City
Journal #17

At the beginning of the chapter, you’ll need to leave your boat to open a chain door. Get out into the water, but before opening the door, head to the left. Go up the stairs there and into the room at the top. Head to the window, and you’ll see the journal entry prompt pop up.
Chapter 22: Infiltration
Journal #18

You’ll reach a point in the chapter when Ellie falls out of an air duct and is attacked by a dog. Once the encounter is over, continue straight through the door in front of you, then turn left and head through the next door. Immediately turn left and go into the next room to find a makeshift kitchen. On the far side of the room, interact with the blue duffel bag for this journal entry.
Chapter 43: Pushing Inland
Journal #19

Late in the chapter, you’ll crawl under a stone wall and reach a road overlooking a town (there’s a police car on the side of the road). Head toward the overlook and an L3 button prompt will come up. Press it, and Ellie will make a new journal entry.
Chapter 44: The Resort
Journal #20

At the start of the chapter, you’ll need to deal with a group of Rattlers. Once you’ve dealt with them, continue straight, parallel to a set of train tracks. Eventually, you’ll spot a green van parked on the train tracks with the Rattlers symbol. Interact with it for the final journal entry in The Last of Us Part II. You won’t unlock the Archivist trophy yet, though; there are still two more artifacts in the game.


