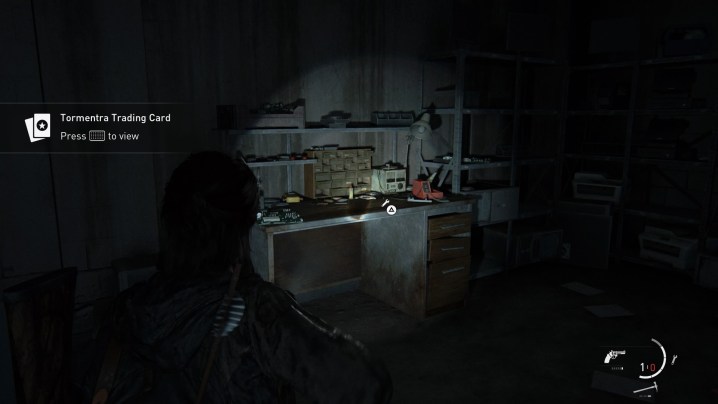
You could classify The Last of Us Part II under multiple genres, but the weapon upgrade system shows the game’s survival horror roots. Like the first game, you can only upgrade your weapons by using a workbench, and there are a limited number of them scattered throughout the campaign. In this guide, we’re going to show you the locations for all the workbenches in The Last of Us Part II, from Chapter 4 to Chapter 44.
- Chapter 4: Patrol
- Chapter 9: Seattle
- Chapter 11: Capitol Hill
- Chapter 13: The Tunnels
- Chapter 16: Hillcrest
- Chapter 18: The Seraphites
- Chapter 20: Road to the Aquarium
- Chapter 21: The Flooded City
- Chapter 25: On Foot
- Chapter 26: The Forward Base
- Chapter 28: Hostile Territory
- Chapter 30: The Forest
- Chapter 31: The Coast
- Chapter 33: The Shortcut
- Chapter 35: Ground Zero
- Chapter 38: The Island
- Chapter 39: The Escape
- Chapter 43: Pushing Inland
- Chapter 44: The Resort
It should go without saying, but let this serve as a spoiler warning. There are 25 workbenches in The Last of Us Part II, and finding all of them will earn you the silver trophy In the Field and the gold trophy Prepared for the Worst. Technically, you don’t need to interact with each workbench to earn these trophies, just stand near them. The distance isn’t clear, though, so it’s a good idea to interact with every workbench you come across, even if you’re not going to upgrade your weapons.
Further reading
- How to avoid killing dogs in The Last of Us Part II
- The Last of Us Part II: All trading card locations
- The best PS4 games
Chapter 4: Patrol
Workbench #1

This workbench comes very late in Chapter 4, after Dina and Ellie have reached Eugene’s stash. After starting a generator, Dina will point out that you can probably mod your weapon with a nearby workbench. You can technically miss the first bench in The Last of Us Part II, but it’d be very difficult to do so.
Chapter 9: Seattle
Workbench #2

This bench is much more hidden than the first. Once you’re in the open-world section of Seattle, head to the interaction between 5th Avenue and Madison Street. You’re in the right place if you see the Valiant Music Shop. To the left of the shop is a security checkpoint with a ladder. Climb the ladder to the top and run across into some tall grass by a military tent. Inside the tent, you’ll find this workbench.
Chapter 11: Capitol Hill
Workbench #3

Early in the chapter, you’ll come to the Capitol Inn motel. Following the story path, go past the motel to lower ground. Once the area opens up, continue left until you see a gas station (it’s hidden by some foliage, so it might be tough for you to see from a distance). The first workbench of the chapter is in the garage of the gas station. Be careful when heading to it, though. There are multiple human enemies patrolling the area.
Workbench #4

Much later in the chapter, Ellie and Dina will find a dead horse, and Dina will puke. After that, you’ll come to a street littered with trip mines. In the first building on your right, you’ll find the second workbench of the chapter, as well as an artifact hanging on a bulletin board.
Chapter 13: The Tunnels
Workbench #5

Early in the chapter, you’ll crawl under a collapsed train car into a long tunnel. At the end of the tunnel, you’ll see a strong red light coming from a room on your right. Continue into the room and up the ladder inside. This is the main story path, and the game wants you to pick up a yellow cable to solve a puzzle. Instead, look for a side room on the upper platform. In there, you’ll find this workbench.
Chapter 16: Hillcrest
Workbench #6

From the beginning of the chapter, look for the Rosemont clothing store. It’s the second building on your right. In the back of the store, behind the counter, there’s a hole in the wall. Drop through the hole to find this workbench, along with an artifact and a bunch of parts.
Workbench #7

This workbench is directly in front of you on the main story path, so it’s tough to miss. After you need to use a dumpster to jump into a building, head inside the building and you’ll see the workbench in front of you.
Chapter 18: The Seraphites
Workbench #8

A little ways into the chapter, you’ll cross under an overpass. Toward the end, you’ll see a black cat dart across the street to the left. Follow the cat’s path to find a truck and a long apartment building. Climb the truck, jump over to the apartment complex roof, and break the window to get inside. Head to the first apartment on your left, and you’ll see this workbench directly in front of you. After you interact with the workbench for the first time, four human enemies will attack you, so be ready for a fight.
Workbench #9

Later on in the chapter, you’ll fight a mini-boss, and afterward, Ellie will point out the hospital for the second time in the chapter. After she does, drop into the water (this is the main story path), but instead of continuing straight, look slightly to the left for a Weston’s Pharmacy sign. Go inside Weston’s Pharmacy and look for a hole behind the counter leading to a dark room. In there, you’ll find this workbench, along with a safe and some supplements.
Chapter 20: Road to the Aquarium
Workbench #10

Once you’re exploring with Jesse, you’ll come upon a WDL building. Head inside and open the door at the back of the building. Turn left and head down the hallway, stopping short of an open door on your right. Crawl under the rubble blocking the entryway to make your way into the room. Inside, you’ll find this workbench, along with a trading card and some supplements.
Workbench #11

Continue on the main story path until you reach a collapsed warehouse after diving through a small pond. Climb the structure, but instead of crawling through the hole on your right, continue up one more pile of rubble stacked on your left. Continue going left through a massive hole in the wall. In the room it leads to, you’ll find this workbench in the corner.
Chapter 21: The Flooded City
Workbench #12

Toward the beginning of the chapter, you’ll need to climb out of your boat to open a chain gate (this is the main story path). Continue past this stop — your boat motor will go out for a moment shortly after — until you see the Seattle Sleep Warehouse building. Don’t head there yet. Instead, take your boat to the left to find a garage with some blue drums outside. In there, you’ll find this workbench. If you’ve been following our guide up to this point, you’ll earn the In the Field trophy here.
Workbench #13

Later in the chapter, you’ll leave your boat inside the W&B Arcade. This is the main story path, so you can’t miss it. Head upstairs and turn left. You’ll find this workbench in the corner. You can also pick up 29 parts on the upper floor, scattered among the games.
Chapter 25: On Foot
Workbench #14

Early in the chapter, you’ll need to lift a cabinet to let Mel through a door. Head through the next door that Manny opens and continue straight. Once you reach a dead end, in a section on your left, you’ll find this workbench.
Chapter 26: The Forward Base
Workbench #15

From the start of the chapter, head up the small set of stairs and through the checkpoint door. After the mini-cutscene, head into the first white tent on your left. The workbench is inside, in plain sight. There are 18 parts inside, as well.
Chapter 28: Hostile Territory
Workbench #16

Late in the chapter, you’ll encounter a group of Scars attacking from a Scar camp inside of a building. Once they’re dealt with, head inside the building and go up one floor. On the upper floor, look around for some rubble you can crawl under. After you emerge, you’ll find this workbench next to an artifact on your left.
Chapter 30: The Forest
Workbench #17

Shortly after beginning the chapter, you’ll have a boss fight against a woman with a pickaxe. Continue on the main story path past this until you reach La Rosa’s Auto Shop. Open the garage door and head inside. In the left corner, you’ll find this workbench.
Chapter 31: The Coast
Workbench #18

This one is very difficult to miss. At the start of the chapter, after splitting up with Yara and Lev, you’ll climb a fence and see a WDL building in front of you. On the left side, there’s a door leading inside the building. Open the door, and the workbench is right there. In the next chapter, you’ll come back to this location again, but it doesn’t count as a new workbench for the purposes of trophies.
Chapter 33: The Shortcut
Workbench #19

About a third of the way into the chapter, after you cross the rapids for the second time, you’ll come to an Interbay store. Inside, in the left corner, is the workbench.
Workbench #20

Much later in the chapter, after a few enemy encounters, you’ll come to a shrine, with a woman painted in blue. To your right, you’ll find this workbench in a room.
Chapter 35: Ground Zero
Workbench #21

This one is a little tricky. After you squeeze through a pair of doors into the surgery area, continue down the hall into the last door on your left. In the back right corner of this room, there’s a hole in the wall near the top. Climb up the desk and through the hole. From the room you land in, head left through the next doorway, and this workbench will be in front of you.
Chapter 38: The Island
Workbench #22

Late in the chapter, you’ll see Isaac’s boat, and shortly after, you’ll be attacked by two Scars. Past this, continue forward until you reach a hut on your left and right. In the hut on your left, you’ll find this workbench, along with some parts, supplements, and an artifact.
Chapter 39: The Escape
Workbench #23

This workbench is on the main story path. Technically, you can’t miss it, even if you don’t interact with it. For reference, though, after Lev drops down a ladder for you, the workbench will be in the room at the top.
Chapter 43: Pushing Inland
Workbench #24

About a third of the way through the chapter, you’ll climb into a house with a Clicker on the roof. Head downstairs, and you’ll find this workbench in the kitchen. There are also some upgrade parts on the kitchen table.
Chapter 44: The Resort
Workbench #25

About halfway through the chapter, you’ll encounter a group of enemies in a complex with a hut in the center. After dealing with them, head into the hut to find this workbench. This is the final workbench, and as long as you’ve gotten near all of them, you’ll unlock the Prepared for the Worst trophy here. Congrats!


