How to get the Fierce Deity set in Zelda: Tears of the Kingdom

Link wearing the fierce Diety set.
Image used with permission by copyright holder

One of the most fun parts of The Legend of Zelda: Tears of the Kingdom is tracking down and wearing the different outfits that are modeled after Link's prior incarnations. There are plenty of new and cool outfits introduced, of course, but sometimes you just want to feel a bit of nostalgia.

For fans of Majora's Mask, you will no doubt want to get the titular mask, but the Fierce Deity set is perhaps even more coveted. This was the most difficult mask to get in the original game, requiring you to trade in every other mask before the final boss fight, and it transformed Link into a fearsome warrior. While it isn't quite as hard to get as before, you will still need some help finding the entire set. Here's where to find every part of the Fierce Deity set in Tears of the Kingdom.

Recommended Videos

Difficulty

Moderate

Duration

30 minutes

What You Need

  • Begin the Misko's Treasure sidequest

How to get the Fierce Deity set

This armor set is tied to a sidequest involving some treasure hunters named Domidak and Prissen. You may have already encountered them in a different sidequest. They can be found by the cliff near Cephla Lake Cave.

Step 1: You'll speak to the pair and learn about all the chests, but you'll find that they can't locate the one with any real treasure.
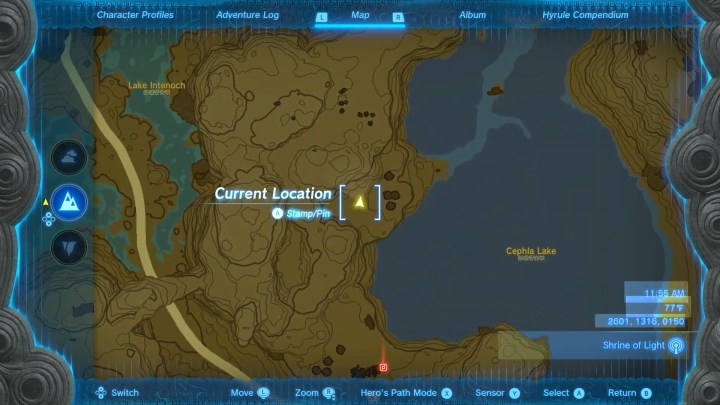
A map of hyrule showing where to get the fierce diety armor.
Image used with permission by copyright holder

Step 2: Feed their nearby dog to have him lead you to the correct chest to open.

Step 3: This will get you the first part of the outfit, the Ember Trousers.

Step 4: This will trigger the "Misko's Treasure: The Fierce Deity" quest.

Step 5: To find the armor piece, go to the Akkala Citadel Ruins Summit Cave.
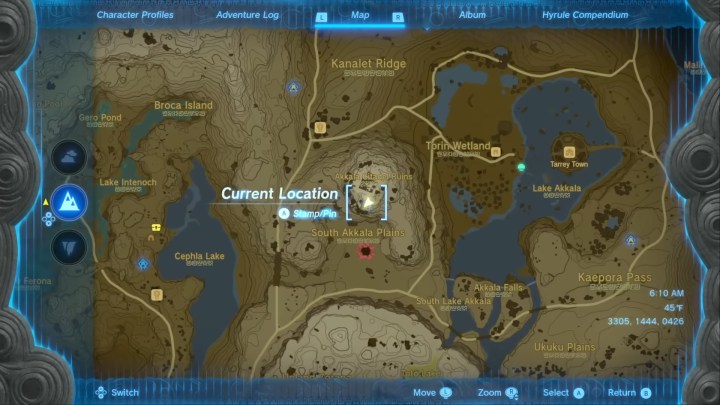
A map of hyrule showing where to get the fierce diety armor.
Image used with permission by copyright holder

Step 6: The room you're looking for is on the southwest side of the central building, which you need to crouch under a hole to reach.

Step 7: Drop into the cave to pick up the armor.

Step 8: For the mask, you'll be going to Skull Lake north of Death Mountain, but warp instead to the Sitsum Shrine.
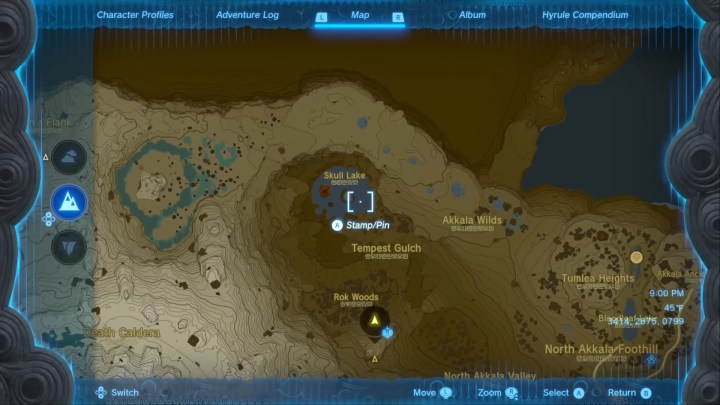
A map of hyrule showing where to get the fierce diety armor.
Image used with permission by copyright holder

Step 9: Leap from this vantage point and glide over the cave so you can fall in.

Step 10: Beware the Stalkoblins and Stalnox inside, and claim your Fierce Deity Mask.

Step 11: Last up are the boots, which are in the Ancient Tree Stump.
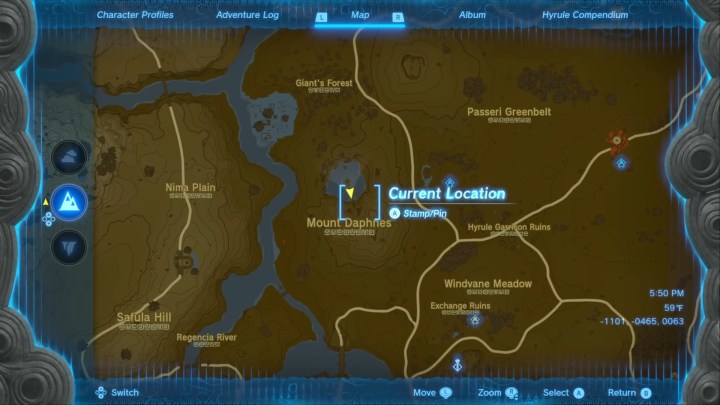
A map of hyrule showing where to get the fierce diety armor.
Image used with permission by copyright holder

Step 12: Follow the root that grows over the water to a wall of vines you can cut through.

Step 13: Follow the path, climb up some walls, and go through one more wall you need to cut through to reach your last chest.

If you return to Domidak and Prissen and go into the cave with all the fake chests again while wearing the full set, a new door will open with one final prize: the Fierce Deity Sword. Equip it to fully complete your set.

Jesse Lennox
Jesse Lennox has been a writer at Digital Trends for over four years and has no plans of stopping. He covers all things…
How to unlock the secret ending in Dragon Age: The Veilguard
A dark and dreary landscape in Dragon Age: The Veilguard.

There are many, many quests and diversions to distract you from the main quest in Dragon Age: The Veilguard. All of them are rewarding in their own way, whether it be story, gear, or a Trophy, but not all will help you get the game's true ending. If you want the complete story, you will need some very specific tips on what to do and when or you will most likely miss out on in completely. Without spoiling anything, we'll make sure you know exactly what to do to get the true ending in Dragon Age: The Veilguard.

Read more
How to play Stardew Valley multiplayer on mobile
Three Stardew Valley players visiting the Night Market.

Farming with friends in Stardew Valley is one of most relaxing ways to spend your day. While the game itself doesn't have cross-platform support, you can at least still play multiplayer with friends on the same platform. Well, any platform except for mobile. Before the 1.6 update, anyone playing the mobile version only had their villagers to keep them company, but now there's a way to invite your real friends to the farm. Using a hidden cheat code, you can now access an experimental mobile version of Stardew Valley. Here's how to test it out.

Read more
How to respec in Dragon Age: The Veilguard
A character draws a bow in Dragon Age: The Veilguard.

You can spend a long time making your character in Dragon Age: The Veilguard. Between their race, appearance, background, and class, there are a lot of ways to customize the game to your liking. Once you do make your choice and get into a few battles, you will earn your first skill point and be prompted to spend it in the skill tree. That's all basic stuff for an RPG, but even seasoned veterans of the genre might get a little overwhelmed by the size of the skill tree here. It's more like a bush, and you will begin at the center and can carve any path you want toward the edges, where the specializations are. However, you will never have enough points to unlock them all. In fact, you will only be able to reach a single specialization at one time. While you could spend an hour reading and mapping the perfect upgrade path, why not just have fun and try things out and respec your points later? Here's how to reset your skill points in Dragon Age: The Veilguard.
How to respec in Dragon Age: The Veilguard

Respecing in Dragon Age: The Veilguard is easy, free, and can be done as many times as you like. When you want to refund your points after you've unlocked the skill tree and spent your first points, you have two options. The first is to simply select the individual skills you want to refund (as long as they aren't connecting two nodes) and refund them one by one. Or, you can start from a clean slate by pressing Y or Triangle on the controller to refund every single point you've spent.

Read more