
How to use Philips Hue lights with geofencing

Smart lights are one of the greatest inventions since … well, since Edison invented the light bulb. With smart lights, you can automate the lights in your home, access vast color spectrums, and create easy holiday lighting displays. One of the easiest ways to automate your lighting and create a safe entryway and a bright, welcoming home, is to use geofencing with smart lights such as Philips Hue.

What is geofencing?

The Philips Hue app.

A “geofence” is the virtual boundary you set for yourself and your devices.

Recommended Videos

Geofencing essentially creates an invisible virtual boundary that can be tripped by a device like a smartphone. Geofencing may use Wi-Fi, cellular data, or GPS to know where you are in relation to another device. For example, geofencing can use your smartphone to determine when you’re very close to your house, and that invisible net (when used with compatible devices) can then trigger any number of actions inside your smart home.

How does geofencing work with smart lights?

You might be wondering how geofencing works with smart lights and what you can do. You can use a geofence with smart lights in your home that will turn on the lights as you approach your home, for example. By setting up a geofence, your smart lights can turn on as you’re pulling into the driveway, or even before you round the corner to your house. Geofencing gives you the ability to draw the boundary yourself so you can have actions occur minutes before you arrive, or as you pull up.

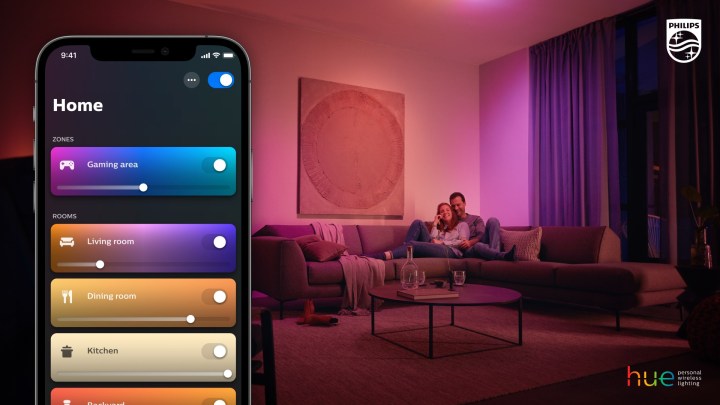
We’ll use the example of Philips Hue smart lights, since they are one of the most available and easiest to use systems out there. Plus, Philips Hue only recently added geofencing abilities. Conversely, if you always forget to turn the lights off when you leave, you can set up your Philips Hue geofence to shut off all the lights after you leave your geofence boundary area. The system is fully customizable and you can choose which lights turn on or off and when.

How to use Philips Hue lights with geofencing

To use your lights with geofencing, you will need to set them up in the Philips Hue app and ensure you have the most current Hue app.

  1. Navigate to the Automations tab in the Hue app.
  2. Select the plus icon (+) to add a new automation.
  3. Select Coming Home or Leaving Home.
  4. Follow the on-screen instructions to add your device to location-based automations.

The app can even detect if anyone else using the Hue app is still at home and knows not to turn off the lights until everyone has left. So you don’t have to worry that you’ll inadvertently turn off the lights when you leave the house. Conversely, if you have geofencing set to turn on lights when you’re close to home and the lights are already on, the geofencing won’t trigger any action.

Erin Lawrence
Erin has over 20 years of experience as a journalist in the media and news industries, with time both on camera and behind…
How to control the Nanoleaf Matter Outdoor String Lights
The Nanoleaf Matter Outdoor String Lights with a smartphone.

Nanoleaf smart lights are always highly customizable, but that's especially true of the Matter Outdoor String Lights. These unique lights can be controlled in a variety of ways – and if you're new to the world of smart lights, you might be missing out on cool functionality by not knowng them all. From using the built-in controller to using the Nanoleaf mobile app and smart home platforms, here's a look at all the ways you can control your Nanoleaf Matter Outdoor String Lights.
Control the Matter Outdoor String Lights with the built-in controller
The most obvious way to control your Nanoleaf Outdoor String Lights is with the included controller. You'll find a variety of buttons here that let you quickly access a variety of features without the need for a mobile app. Here's a look at what all the buttons do:

Minus Sign: Single press to decrease your light's brightness.
Plus Sign: Single press to increase your light's brightness.
Right Arrow: Single press to change to the next preset Scene. Double press to change through colors.
Power Button: Hold for one second to turn the lights on or off. Hold for 10 seconds to reset the device.

Read more
Philips launches its first smart lock with Wi-Fi that can be controlled from anywhere
The Philips Smart Deadbolt with Built-In Wi-Fi being installed on a door.

Philips has officially launched its first smart deadbolt with built-in Wi-Fi (aptly named the Philips Smart Deadbolt with Built-In Wi-Fi), giving users the ability to control their front door regardless of location. There's no need for a secondary bridge or other devices, as the lock itself connects directly to the Philips Home Access App via Wi-Fi, making setup a quick and easy process.

Further streamlining the setup process is the retrofit design of the smart lock. It should easily fit over most existing hardware, so you won't have to change out any deadbolts or worry about passing out new keys. That means the outside portion of your front door will largely look unchanged, though you'll still benefit from "smarts" such as voice command integration, auto-unlock function, door position sensing, and remote access via the mobile app.

Read more
The best smart light switch for Alexa, Google Home, and HomeKit
The Kasa app being used to control the Kasa Smart Dimmer Switch.

One of the most satisfying smart home devices to see in action are smart lights. The thrill of dimming bulbs and changing colors with an app or voice commands has yet to wear off, and it’s one of the easiest products to set up, schedule, and troubleshoot. But what if you want to add smart capabilities to an existing light fixture? If you’re dealing with a ceiling fan, sconce, or some other pre-wired bulbs, you’ll just need to invest in a smart light switch.

These web-connected products come in multiple gang box sizes, and are sold by many different companies. Not all switches are created equal though, and we wanted to round up the best options for those with Alexa, Google Home, and HomeKit ecosystems. So we’ve done just that!

Read more