We can all agree that the iPhone has a great camera — just check out the iPhone 7’s portrait mode, if you’re not convinced. However, the better the camera, the bigger the file size. Newer iPhones allow you to film videos in 4K resolution, which looks great but eats up gigabytes with ease. Eventually, you’re going to want to move the treasure trove of videos stored on your iPhone to your laptop or desktop computer. Luckily, learning how to import videos from an iPhone to a Mac is relatively easy (and quick).
If you’re new to MacOS, don’t forget to take a look at our roundup of the best Mac apps, as well as our suggestions for the best Mac games.
How to import videos with Photos
You may be worried that you have to go through a complicated sync process with iTunes, but for photos and videos, it’s best to open the Photos app that came preinstalled on your Mac. The Photos app is Apple’s replacement for iPhoto. Thankfully, Photos is intuitive and easy to understand, which makes it great for transferring content from your iPhone to your Mac.
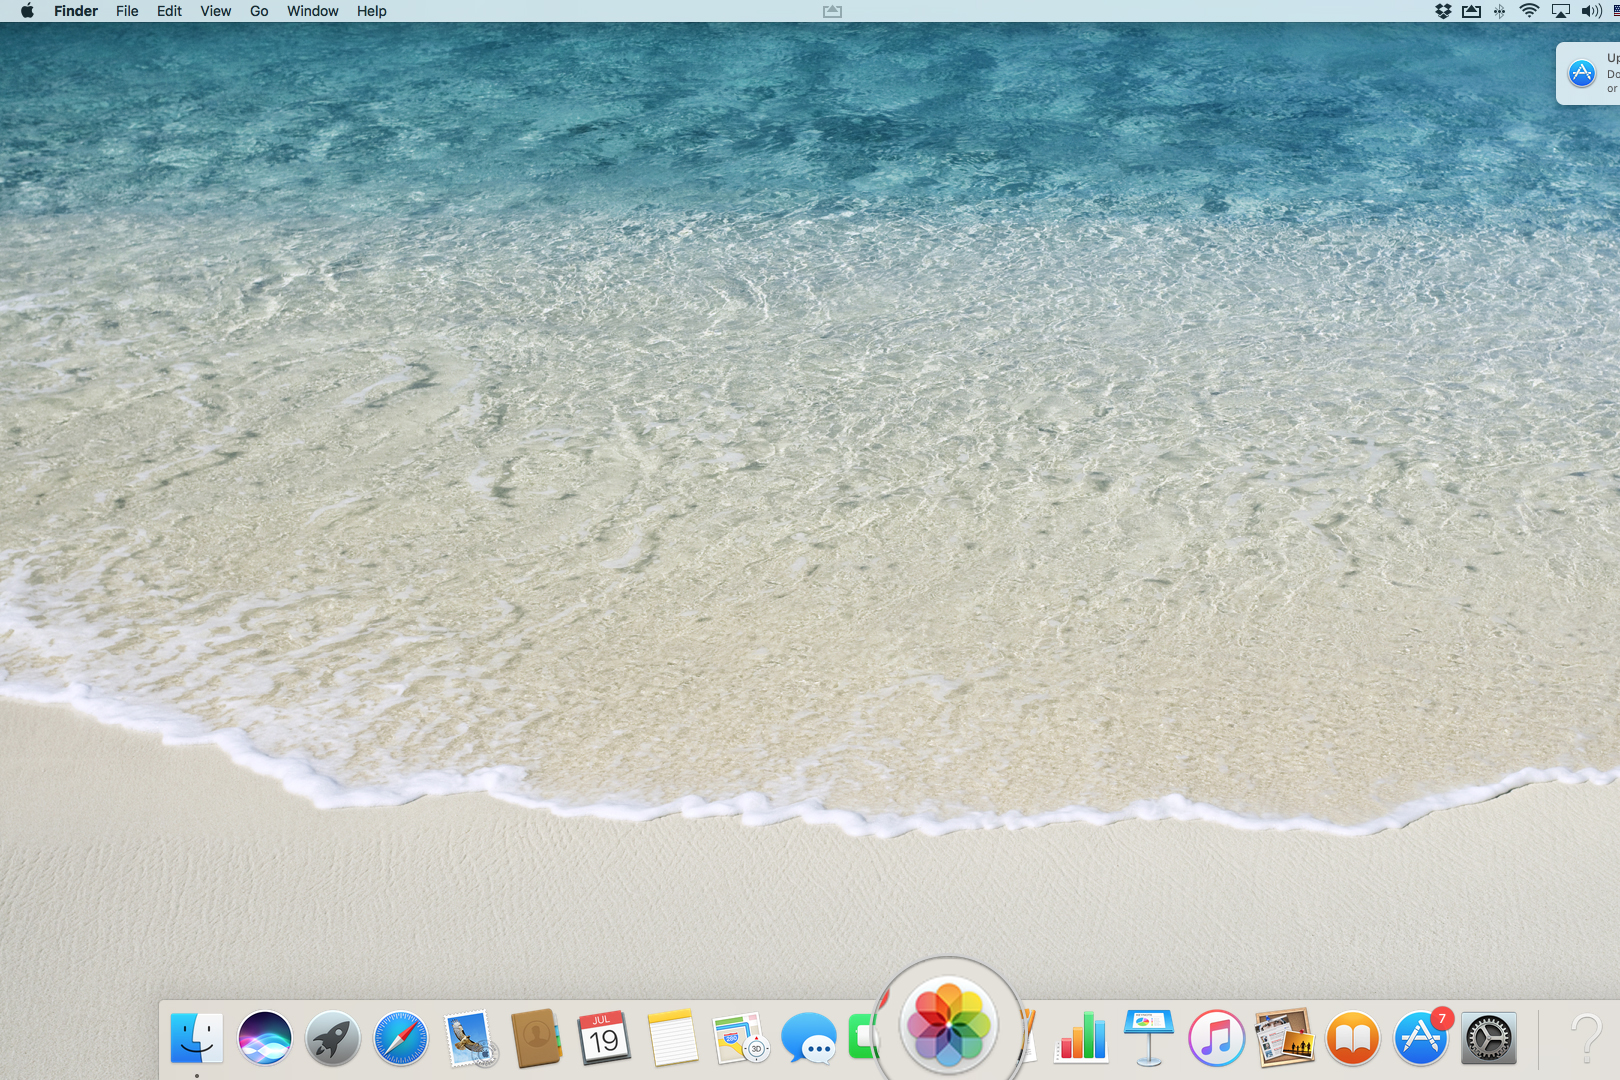
Step 1: Connect your iPhone to your Mac and launch the Photos app as you would normally.
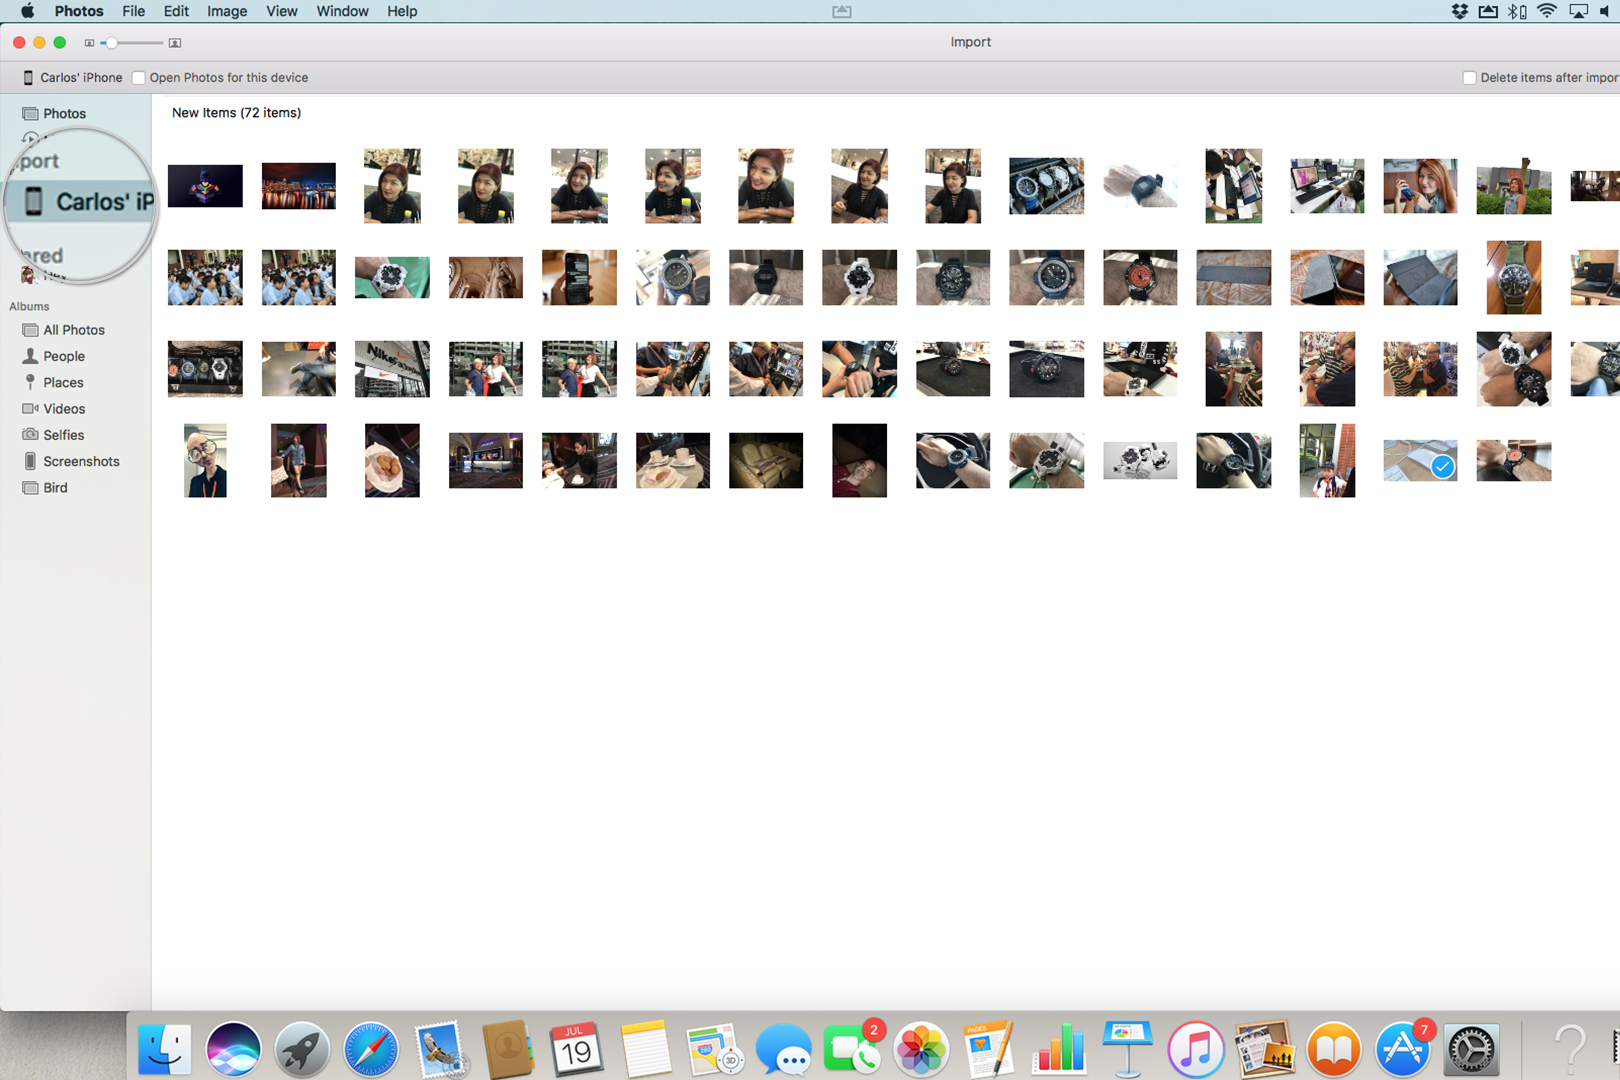
Step 2: Select your iPhone from the left-hand menu.
Step 3: Select the videos you want to import from the resulting list of thumbnails.
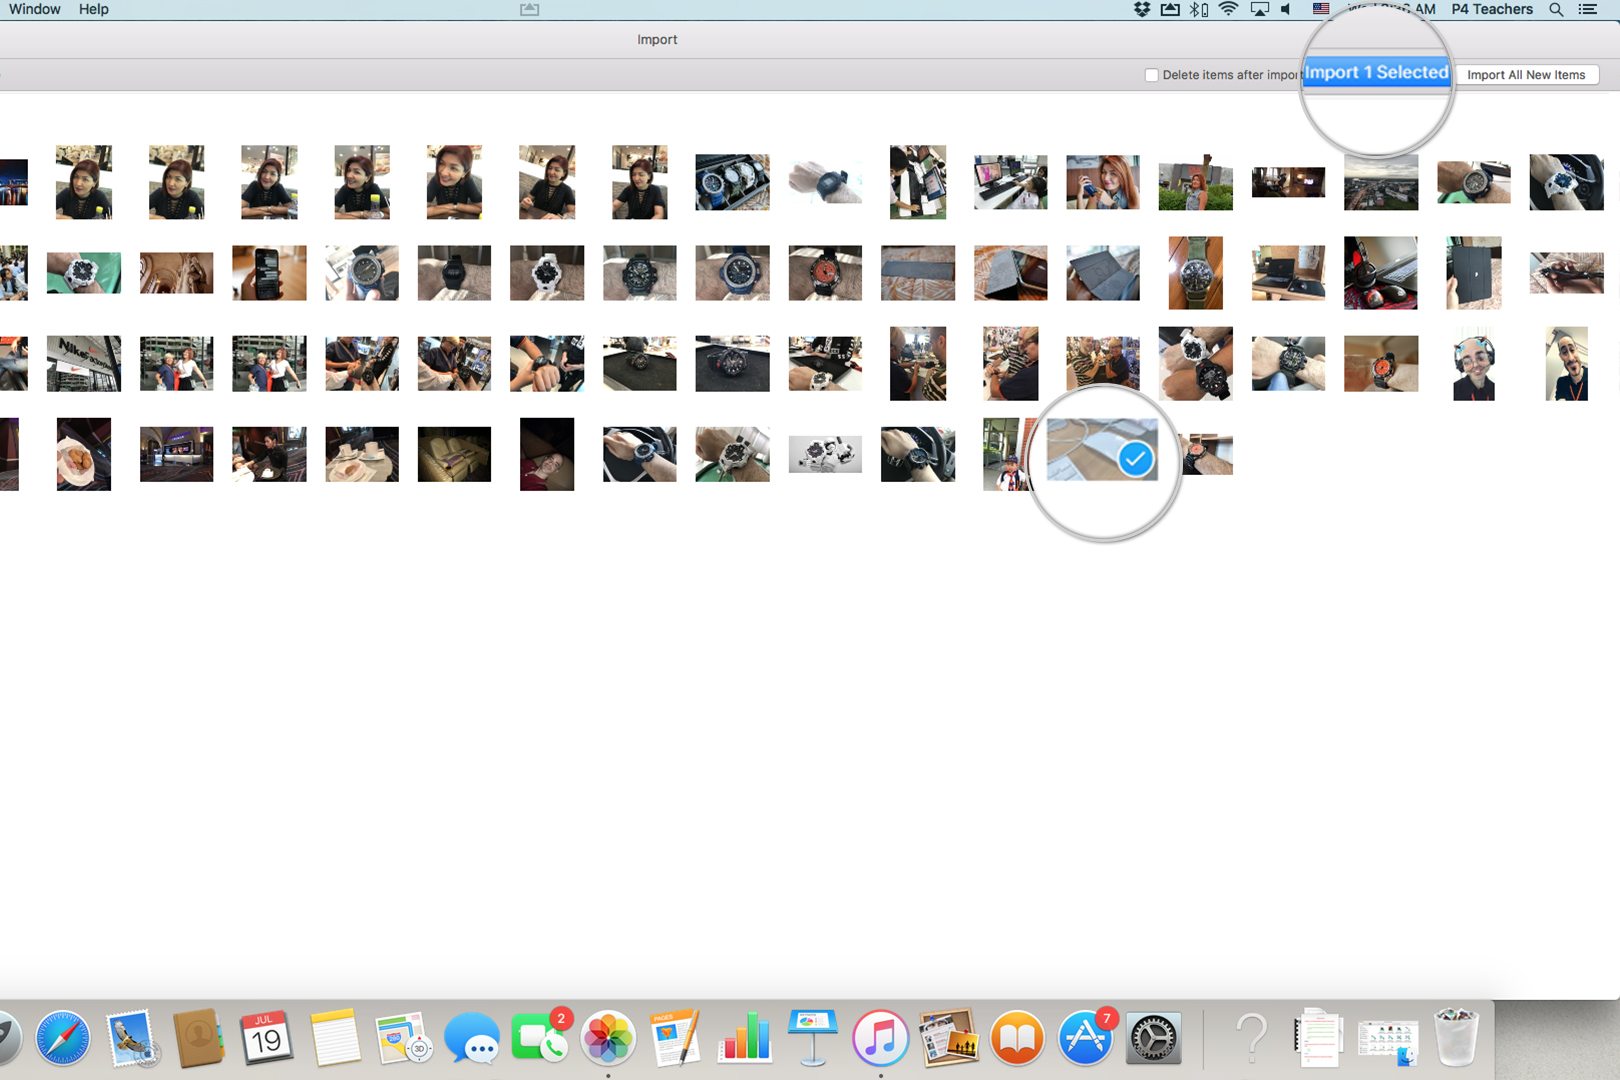
Step 4: If you want to delete the videos from your iPhone after the import, select Delete items after import in the upper-right corner.
Step 5: Click the Import selected button in the upper-right corner. Then, click Videos in the left-hand menu to see your imported videos!
How to import videos with iCloud
If you prefer a wireless solution, you can also import videos to your Mac using iCloud. However, first you need to check if iCloud Photos is turned on in your settings menu.
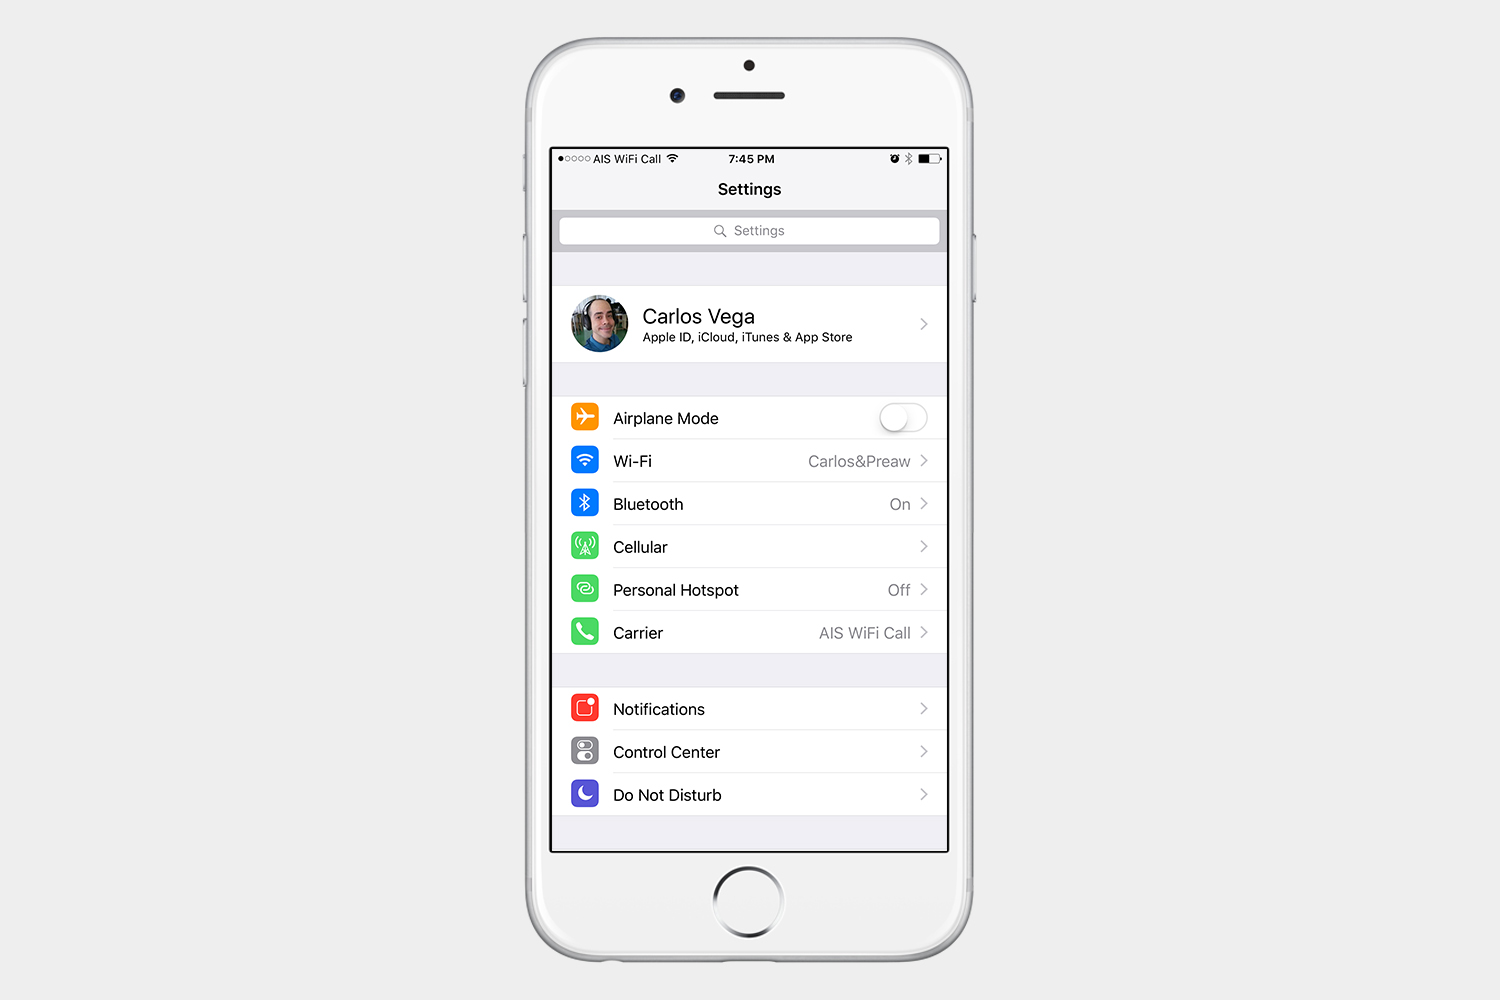
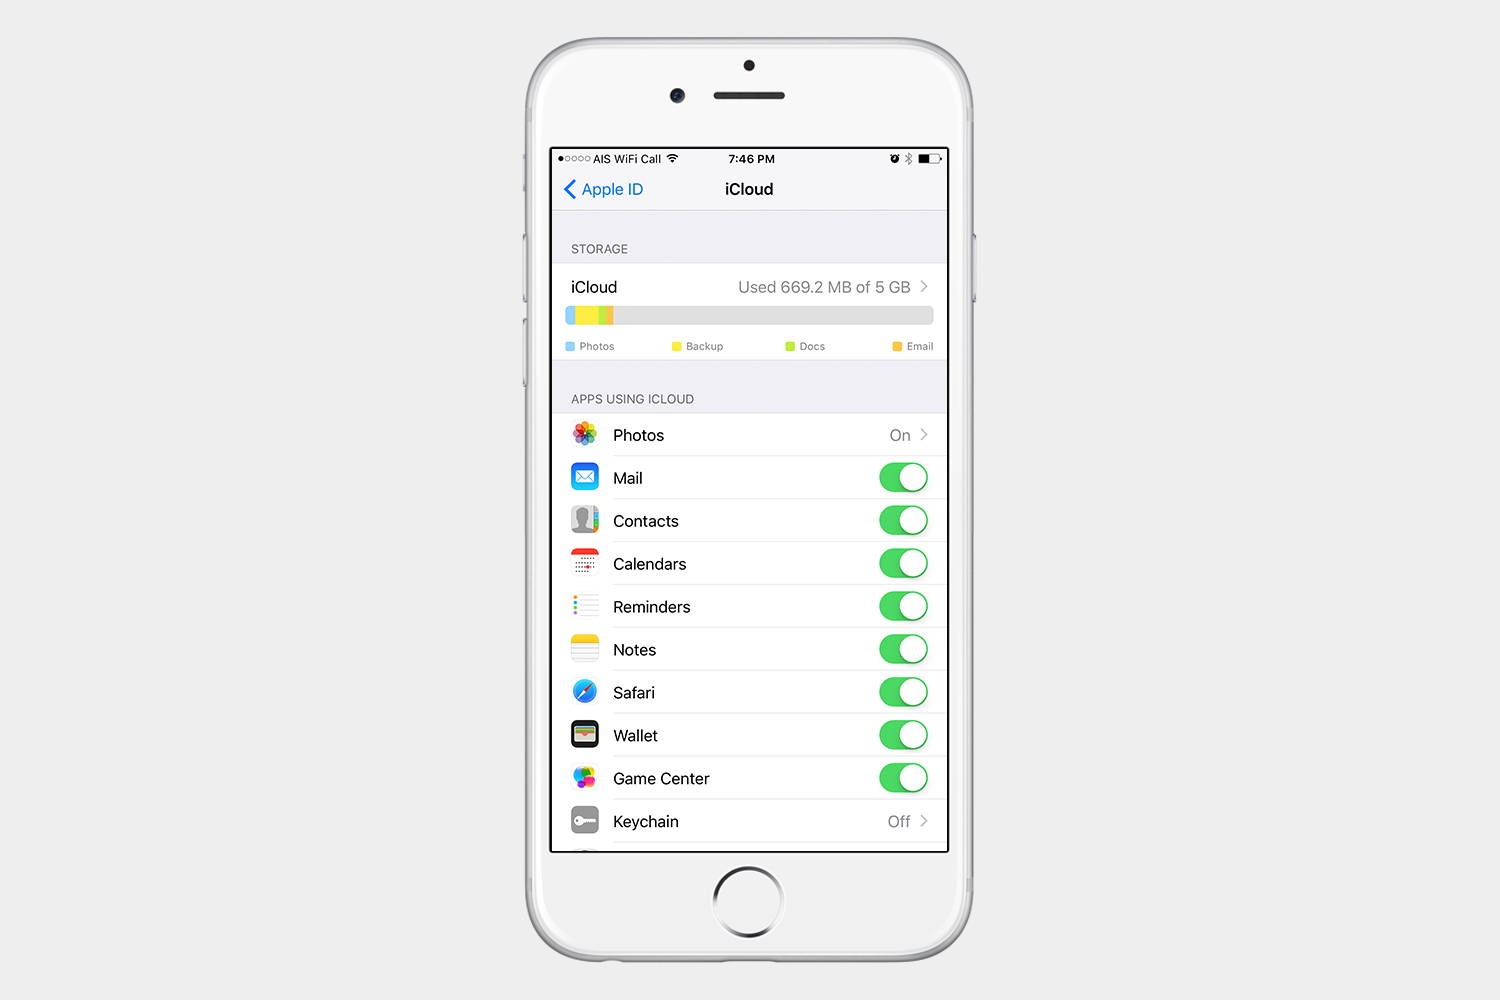
Step 1: Go to Settings > [Your name] > iCloud > Photos.
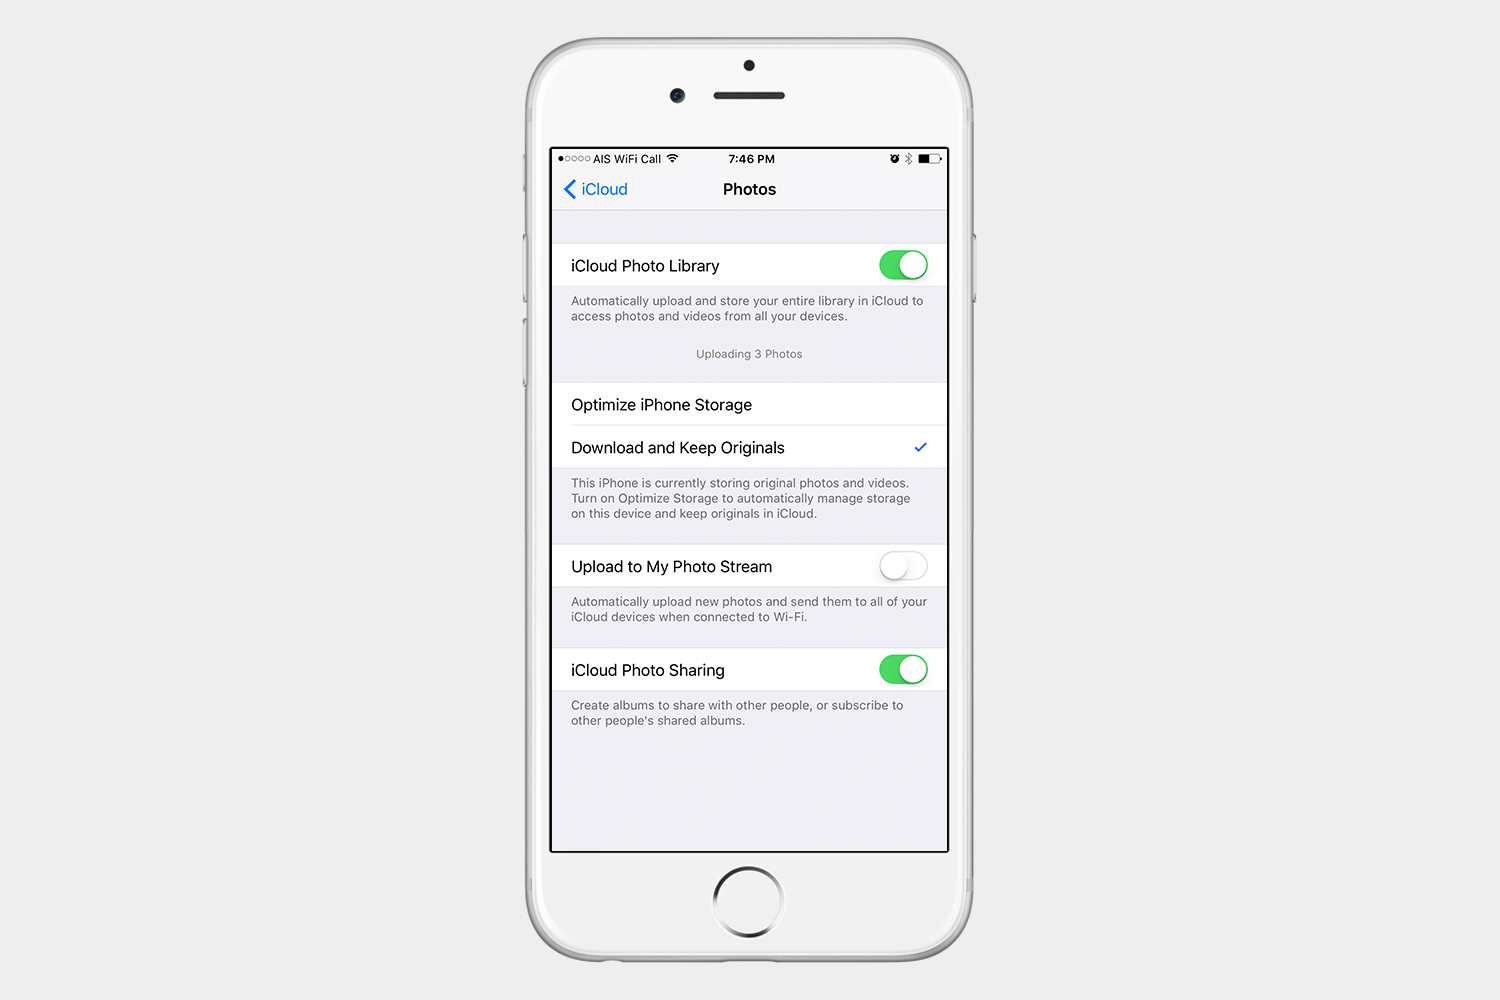
Step 2: Make sure the toggle beside iCloud Photo Library is switched on.
Next, let’s take a look at how to enable iCloud Photos on your Mac.
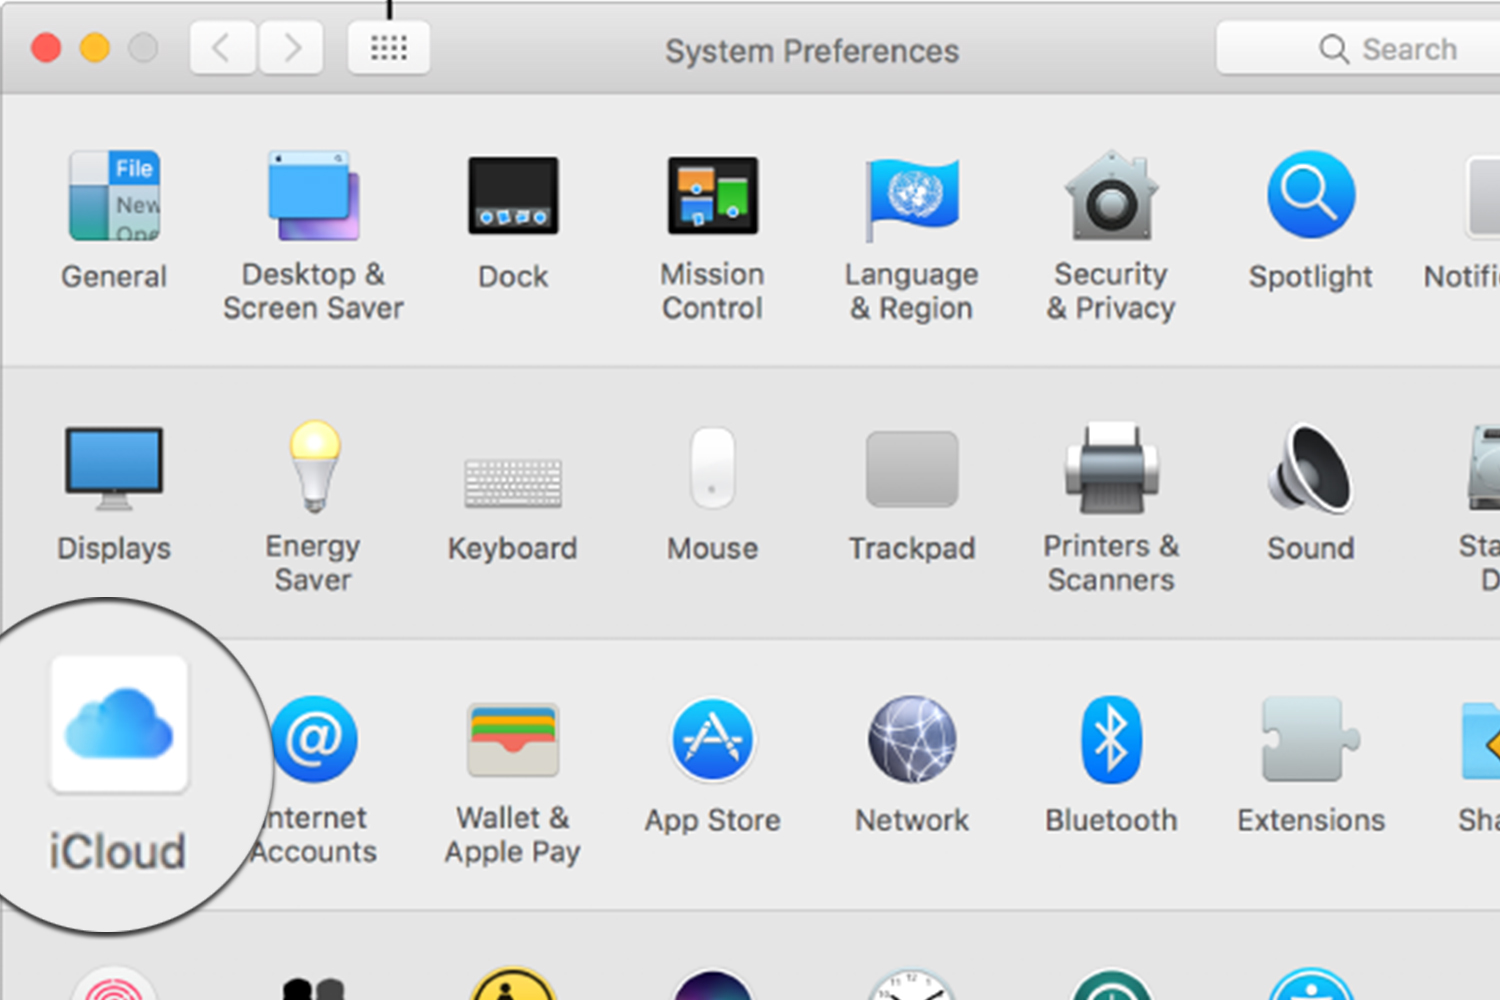
Step 1: Open System Preferences and click the iCloud icon.
Step 2: Log into your iCloud account, if prompted.
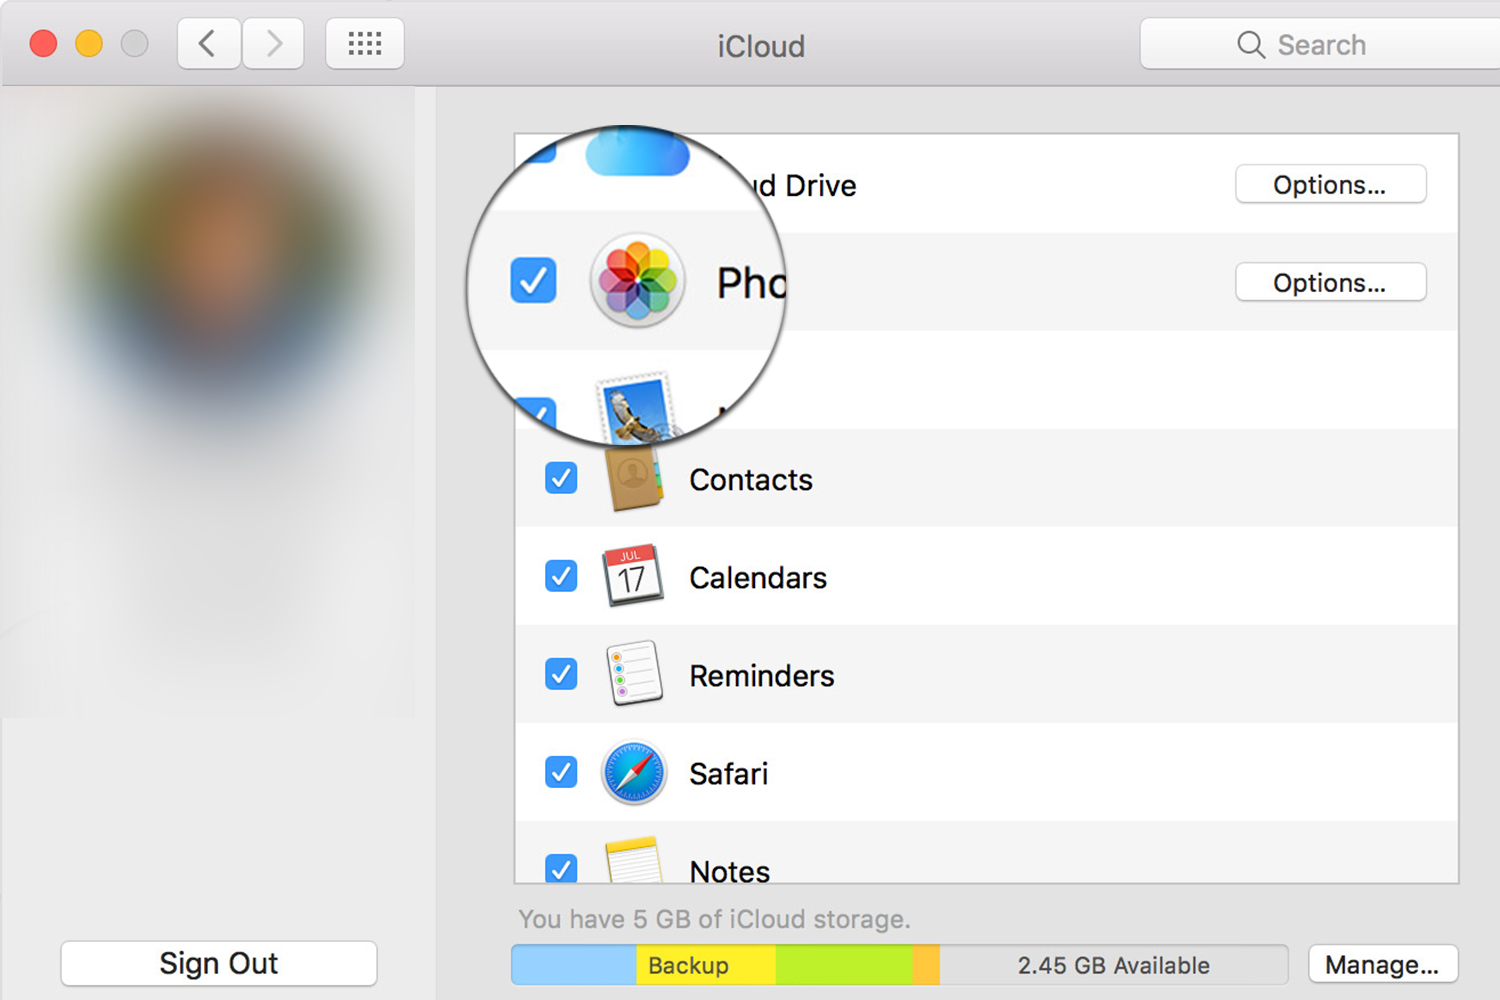
Step 3: Make sure the box directly beside Photos is check.
Once iCloud Photos is enabled, videos will be automatically and wirelessly synced and added to your photo library, which is located within the Photos app.
The new Photos app has many features, so don’t forget to check out Apple’s guide on how to use Photos.
How to import videos with iCloud.com
An even easier method is to go to iCloud.com using any browser and download your videos that way. Since we already turned on iCloud Photos in a previous step, your photos and videos should already be synced with iCloud.com.
Step 1: Navigate to iCloud.com.
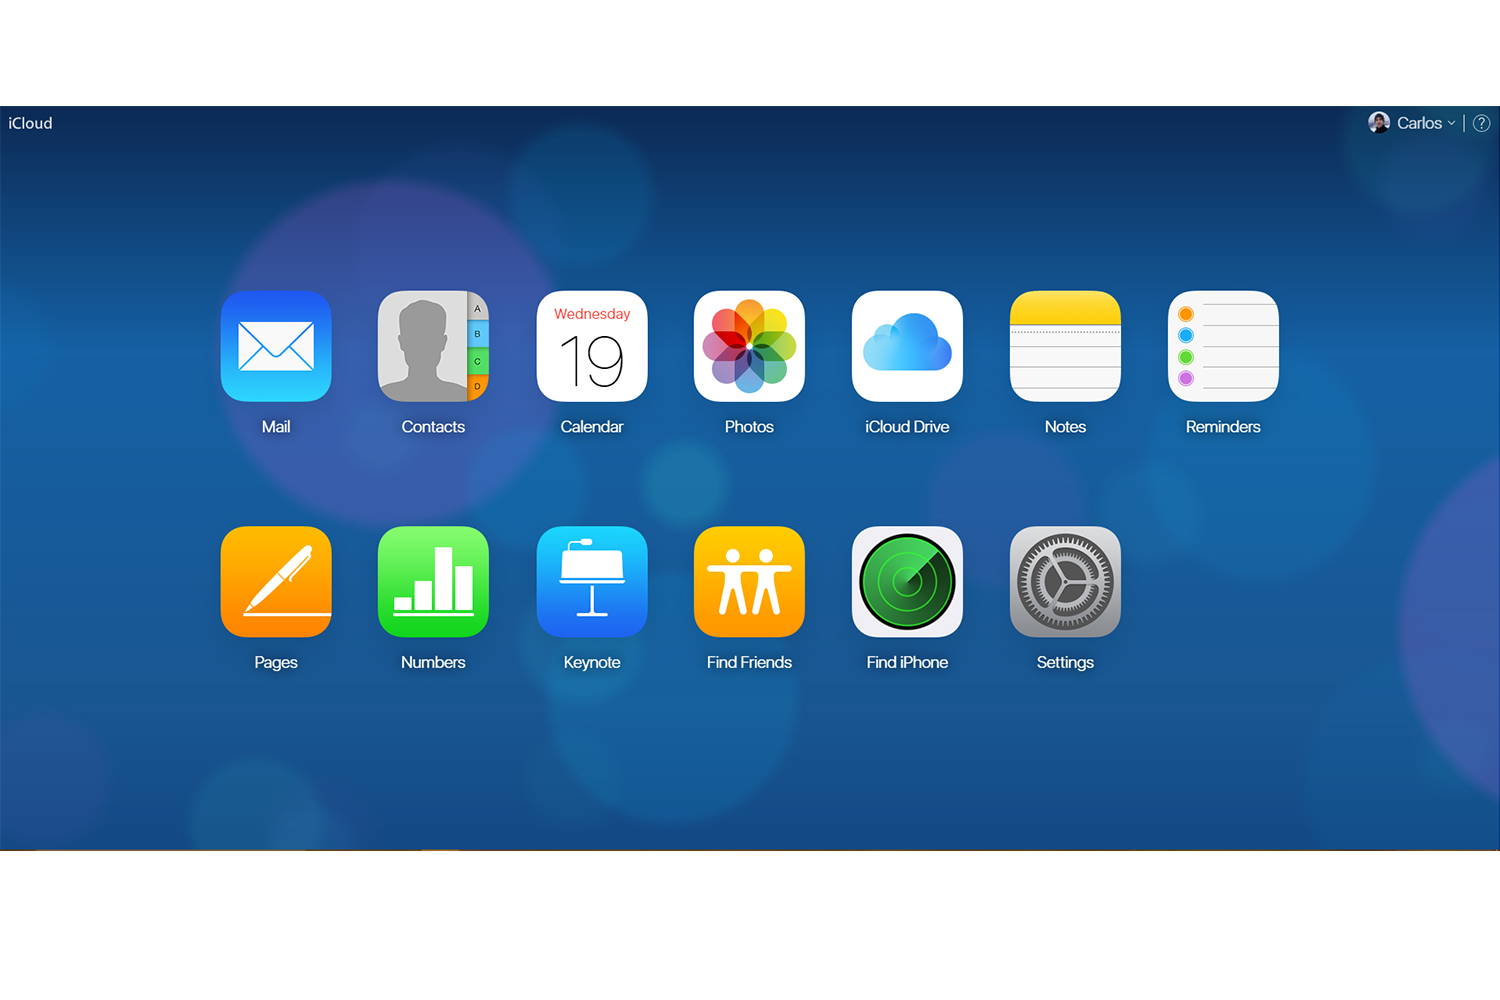
Step 2: Select Photos from the list of available apps.
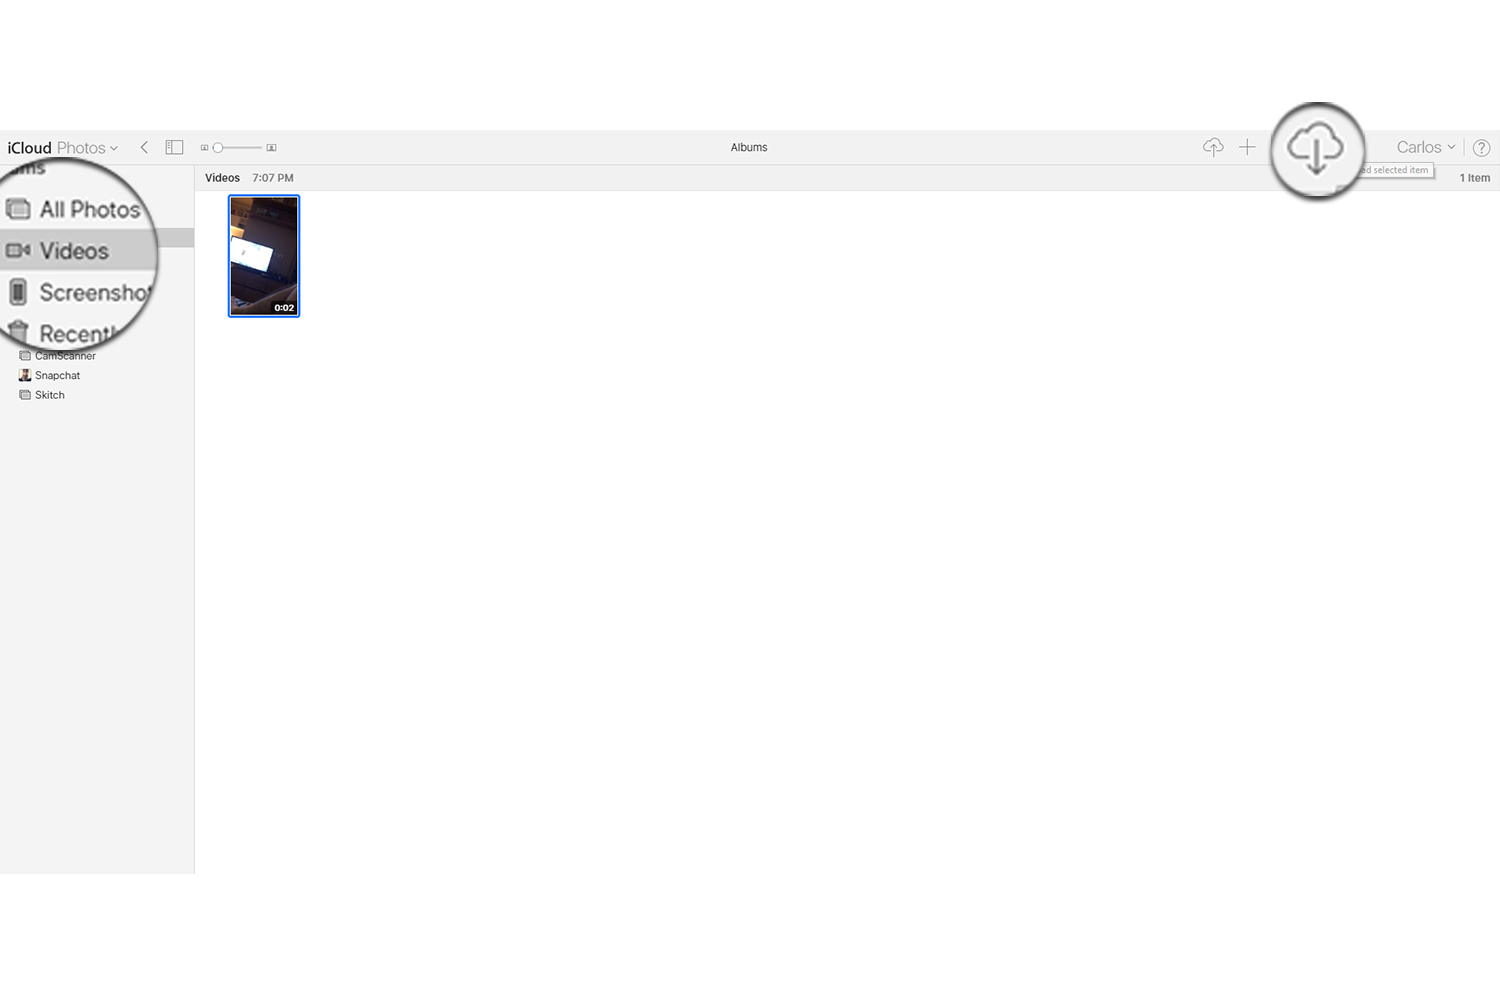
Step 3: Select Videos from the left-hand menu.
Step 4: Select the video(s) that you want to import, and click the download button — the icon depicts a cloud accompanied by a downward arrow — in the upper-right corner.
How to import videos with AirDrop
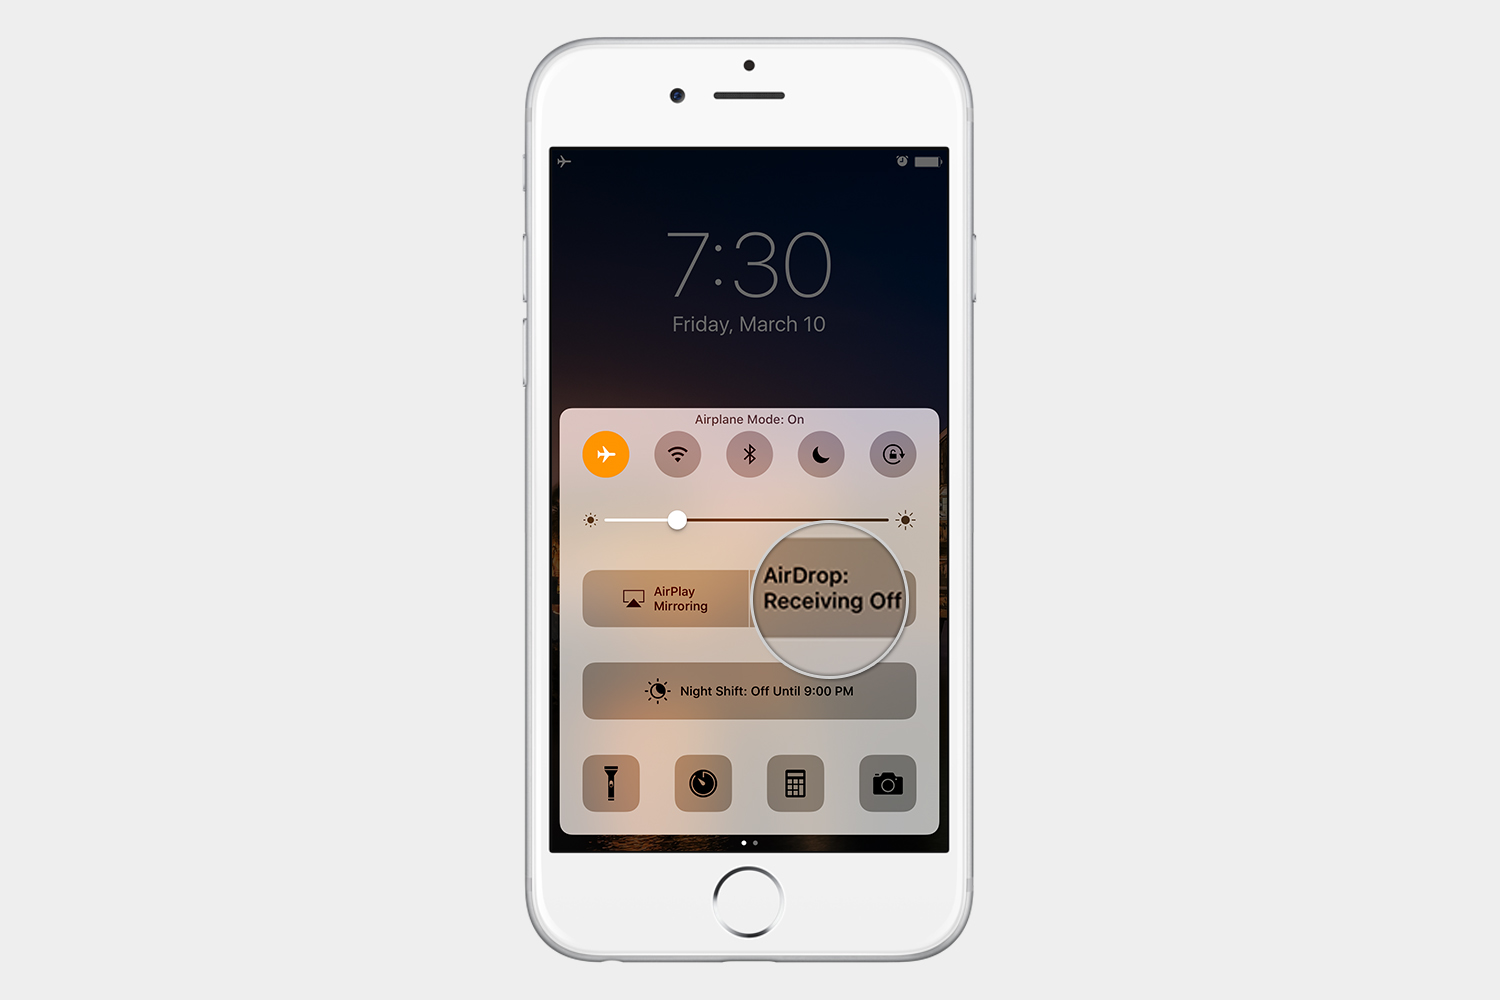
AirDrop is underrated. The handy feature is a recent hallmark of both MacOS and iOS, one that allows you to share content from apps such as Safari, Contacts, and Photos with just a few taps. However, the simple tool utilizes Bluetooth and Wi-Fi to send, meaning you’ll need to activate both connections on your iPhone and Mac before you proceed.
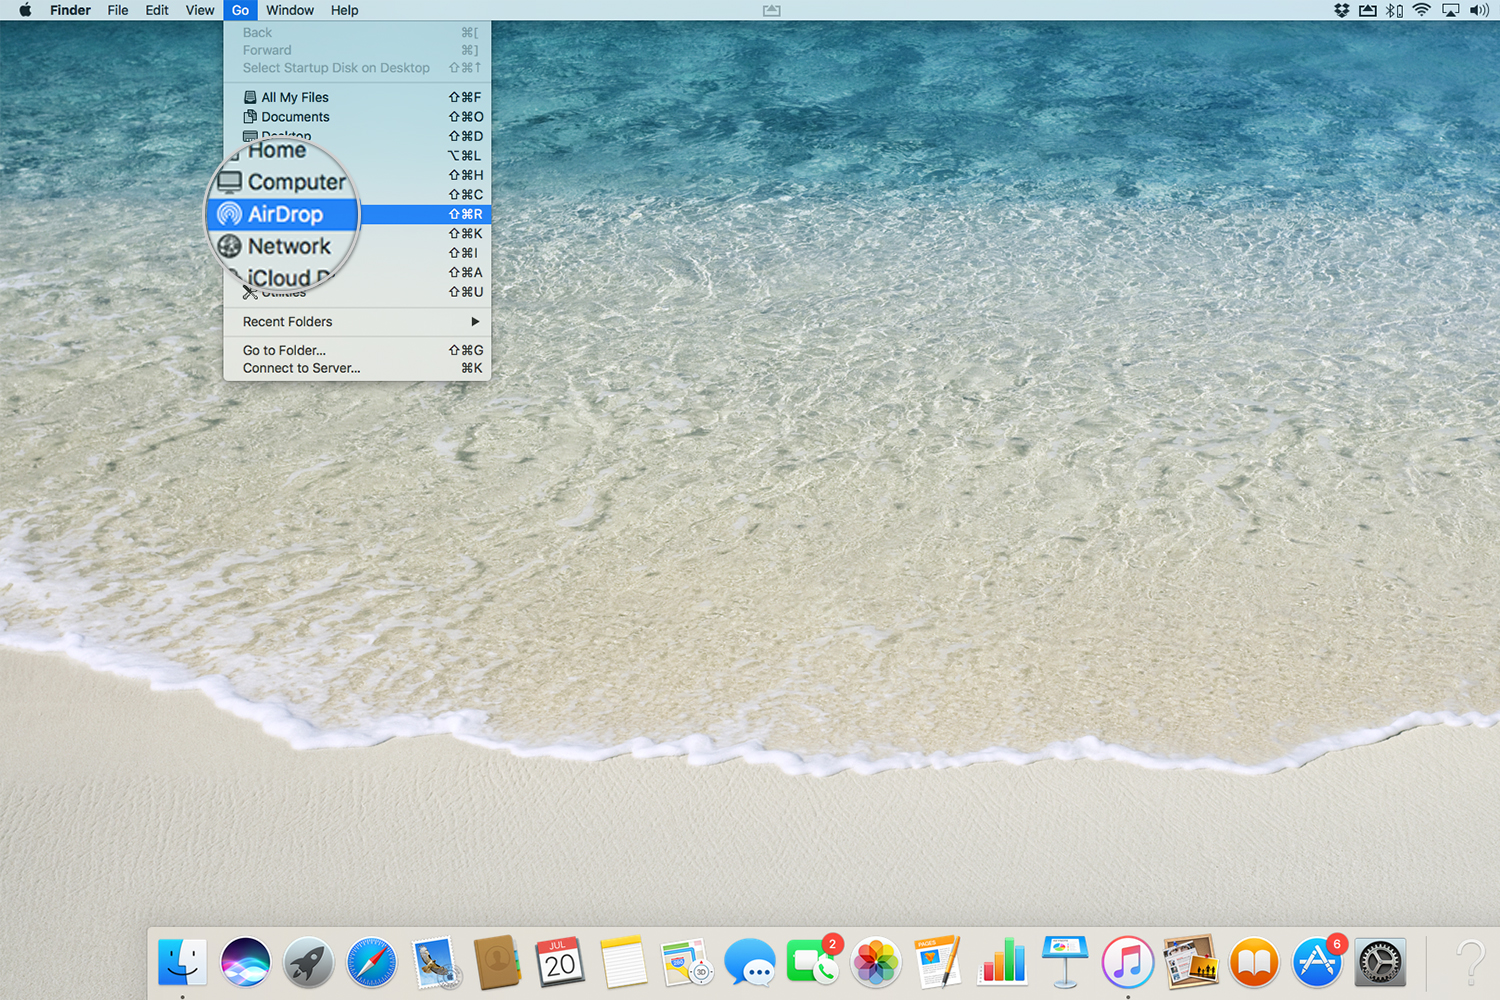
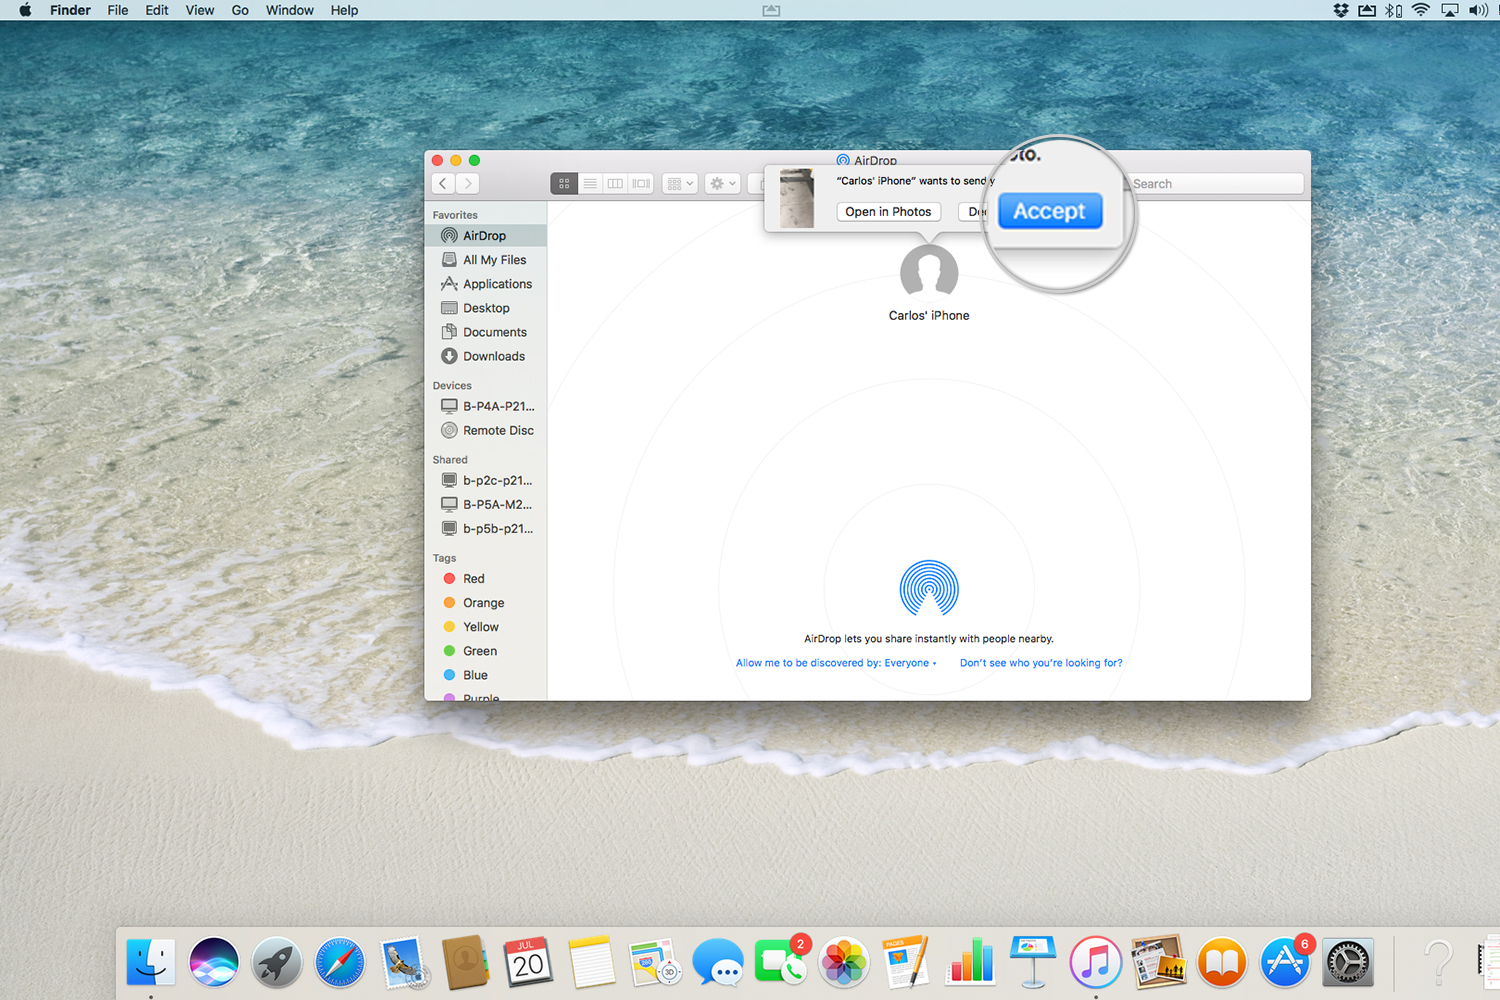
Step 1: Open Finder on your Mac, click Go in the application toolbar at the top, and select AirDrop from the resulting list of options.
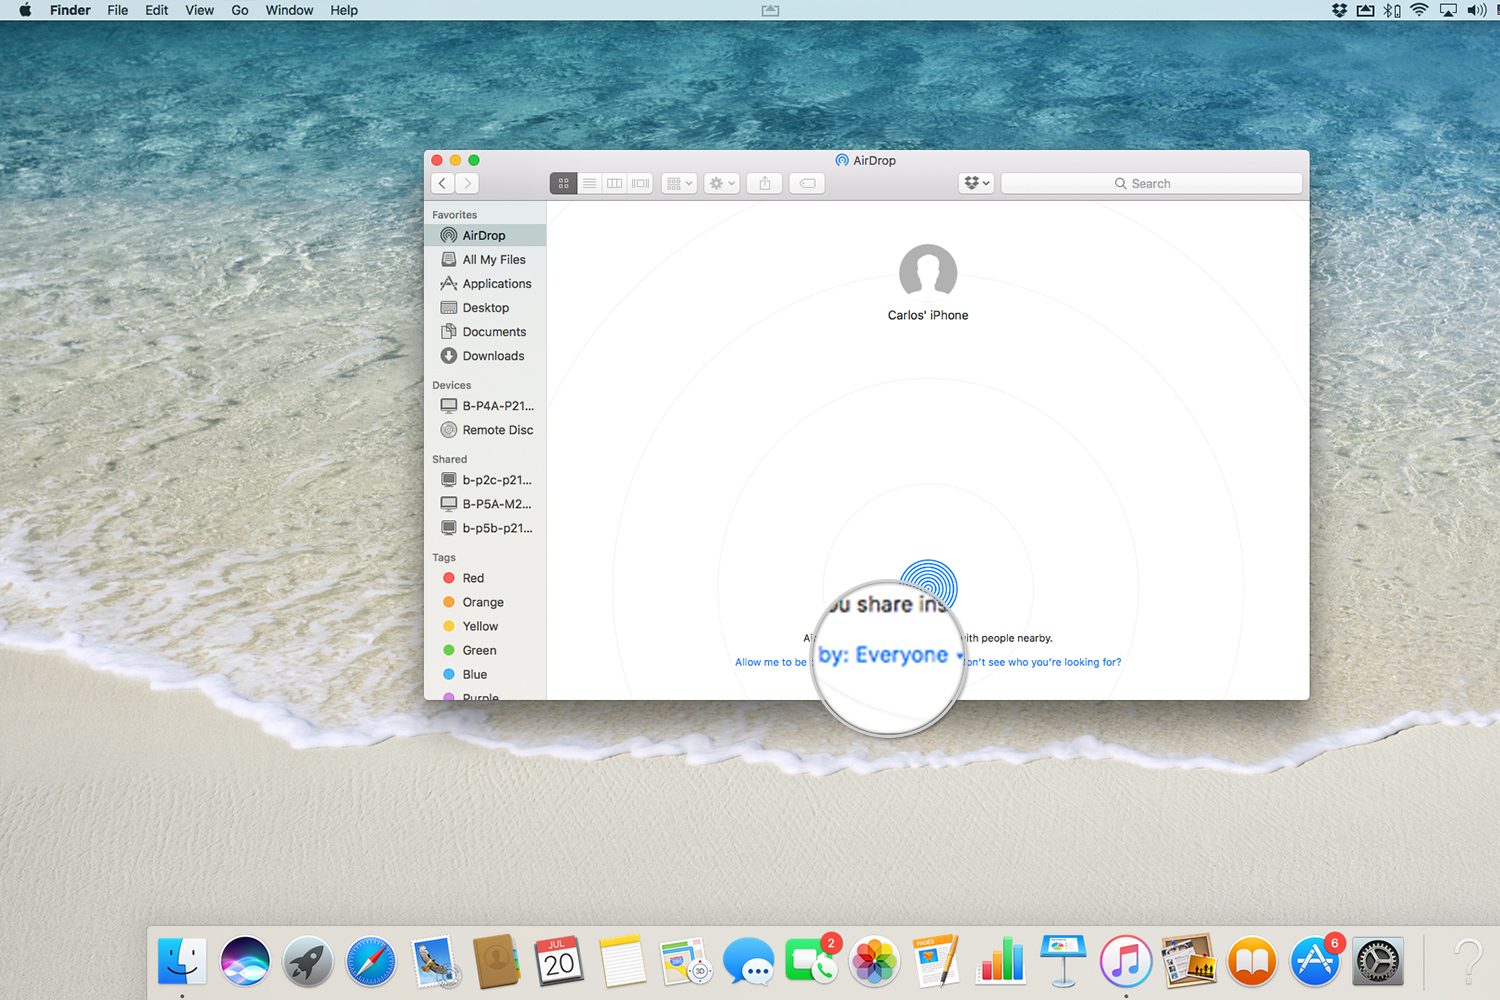
Step 2: At the bottom of the Airdrop window, choose whether you want to receive content from contacts only or everyone. Keep in mind that you can change your decision at any time by clicking the blue link.
Step 3: Swipe up on your iPhone to reveal Action Center, and make sure AirDrop is turned on.
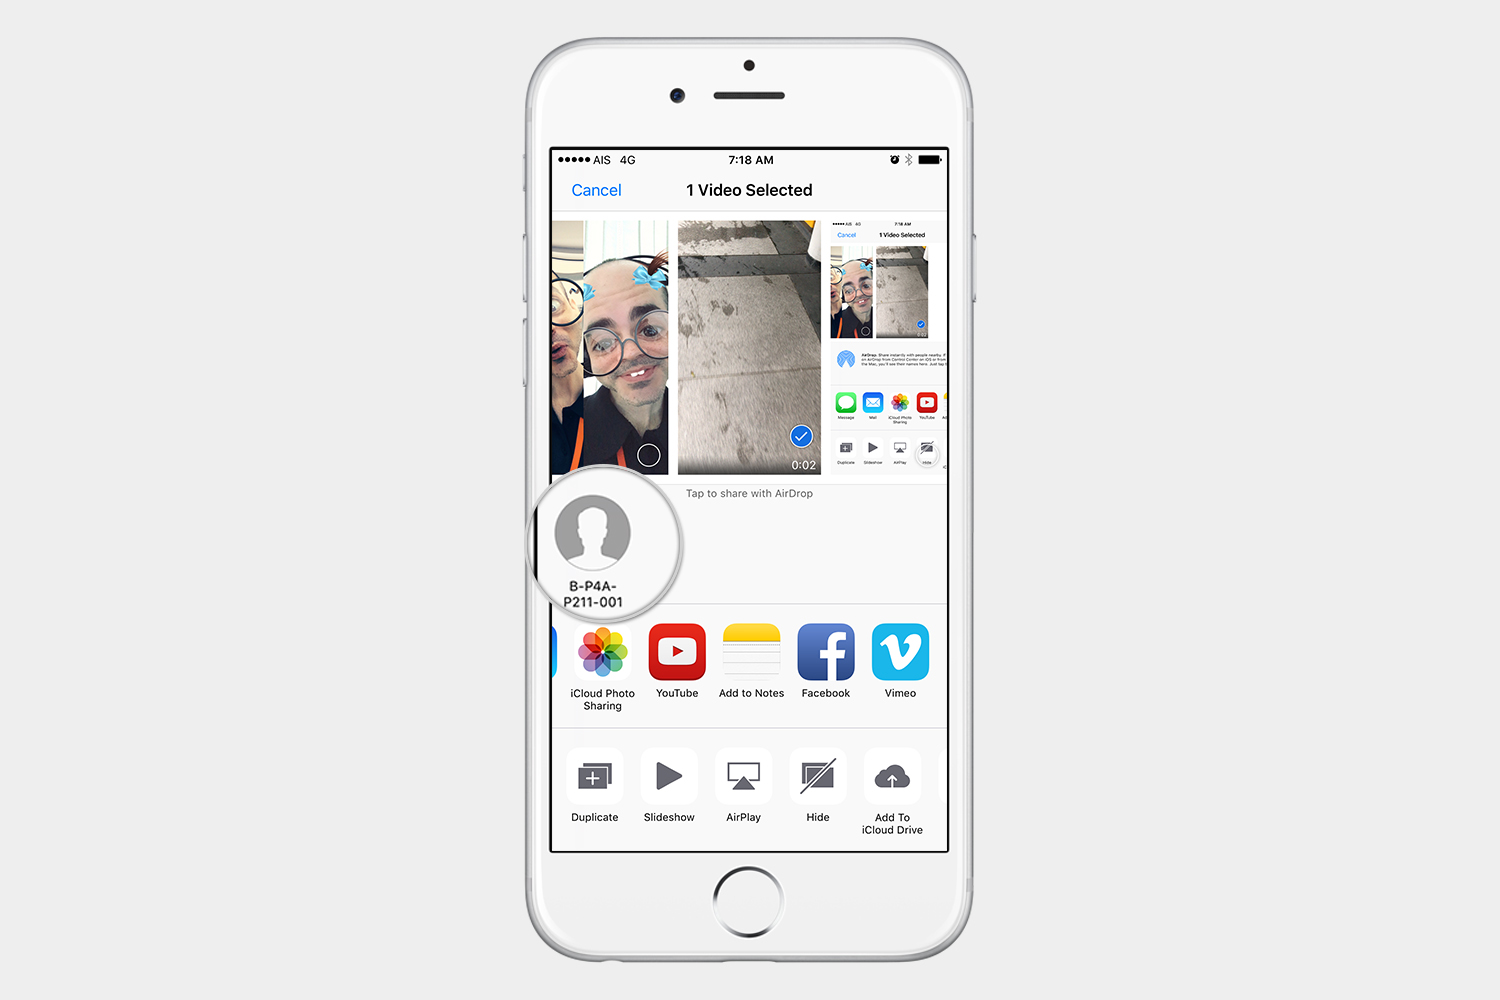
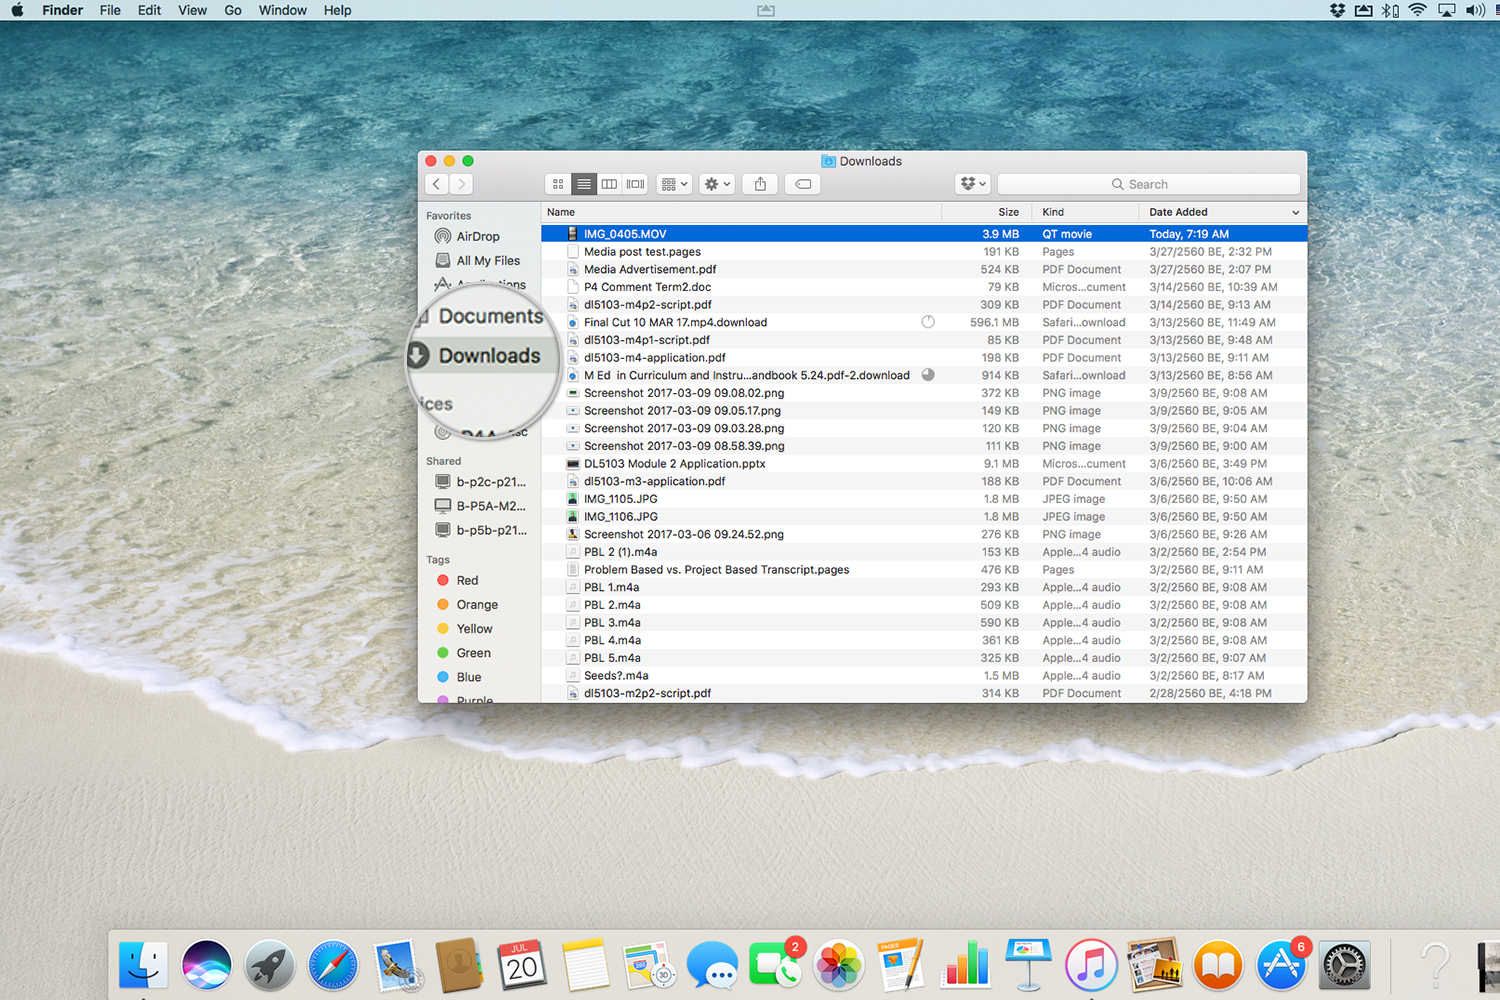
Step 4: Once AirDrop is turned on, select the video you want to share and tap the share icon on your iPhone — the icon features a box with an upward arrow jetting out, and will be located in the bottom-left corner. Then, select your Mac from the list of available devices, and click Accept on your Mac, if prompted. To see your newly-imported video, launch Finder on your Mac and click Downloads in the left-hand menu.
How to import videos with Google Photos
Another option is to upload your videos directly to the cloud. You can use Google Drive, Dropbox, or any other cloud service you prefer — they essentially all do the same thing. Once you’ve uploaded your videos, you can log into your account on your Mac and download your videos. In the example below, we will use Google Photos to import videos from an iPhone to a Mac.
You can proceed in one of two ways.
Step 1: Download Google Photos from the App Store like you would any other app.
Step 2: To back up your entire library, click the Assistant tab in the bottom-left corner. Then, if you haven’t already, tap Turn On beside “Back Up & Sync is off” before toggling the slider on the resulting page.
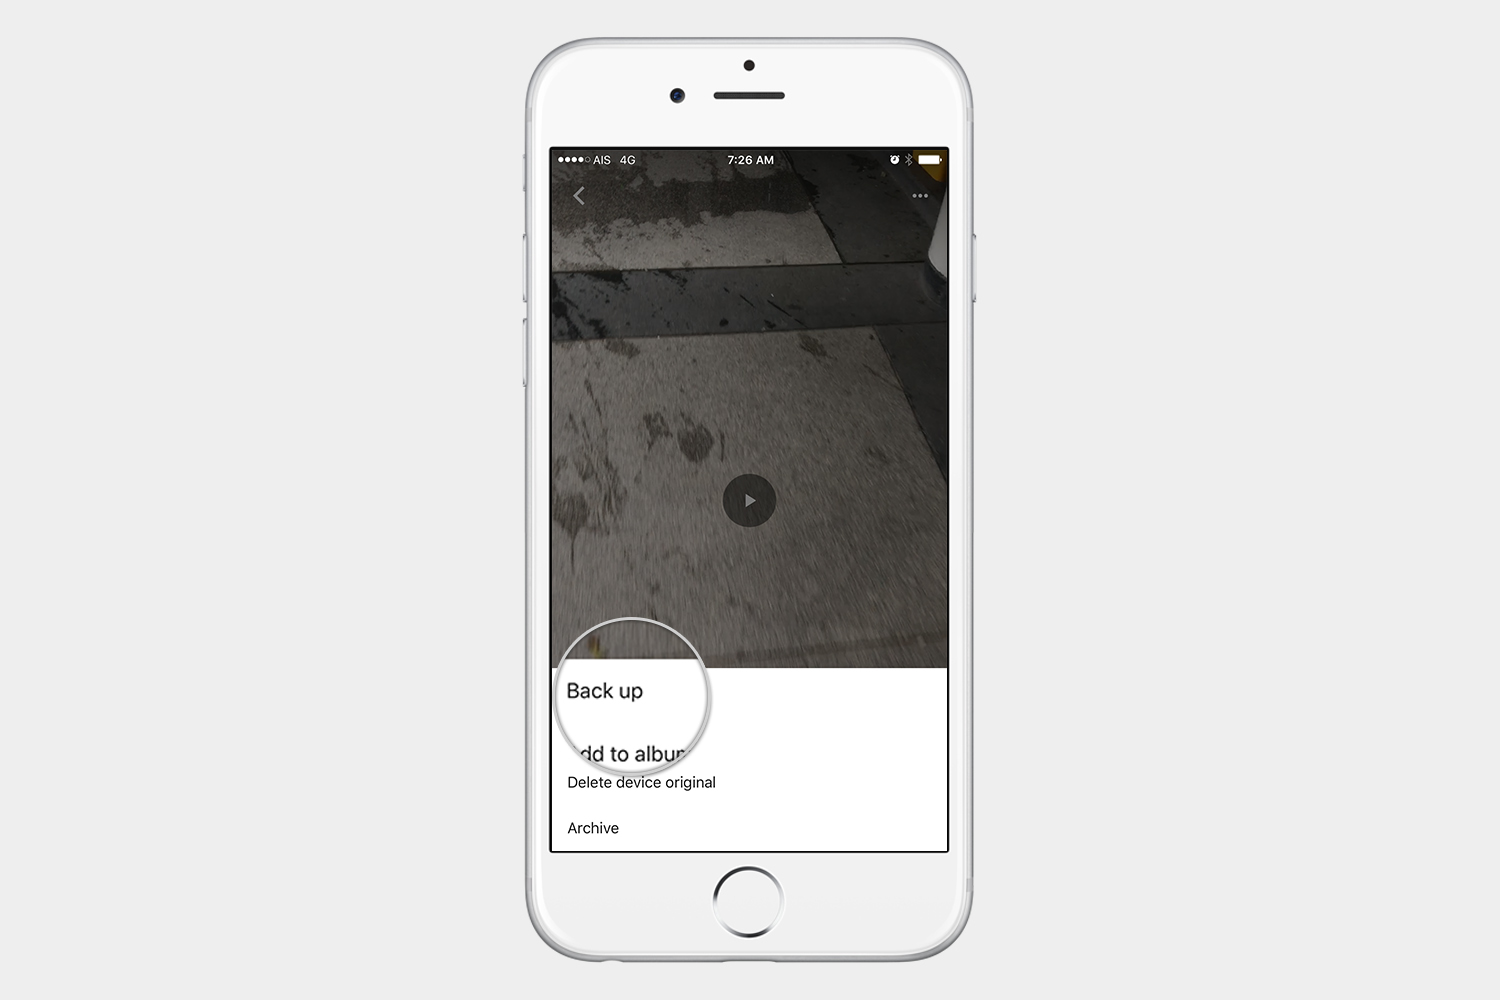
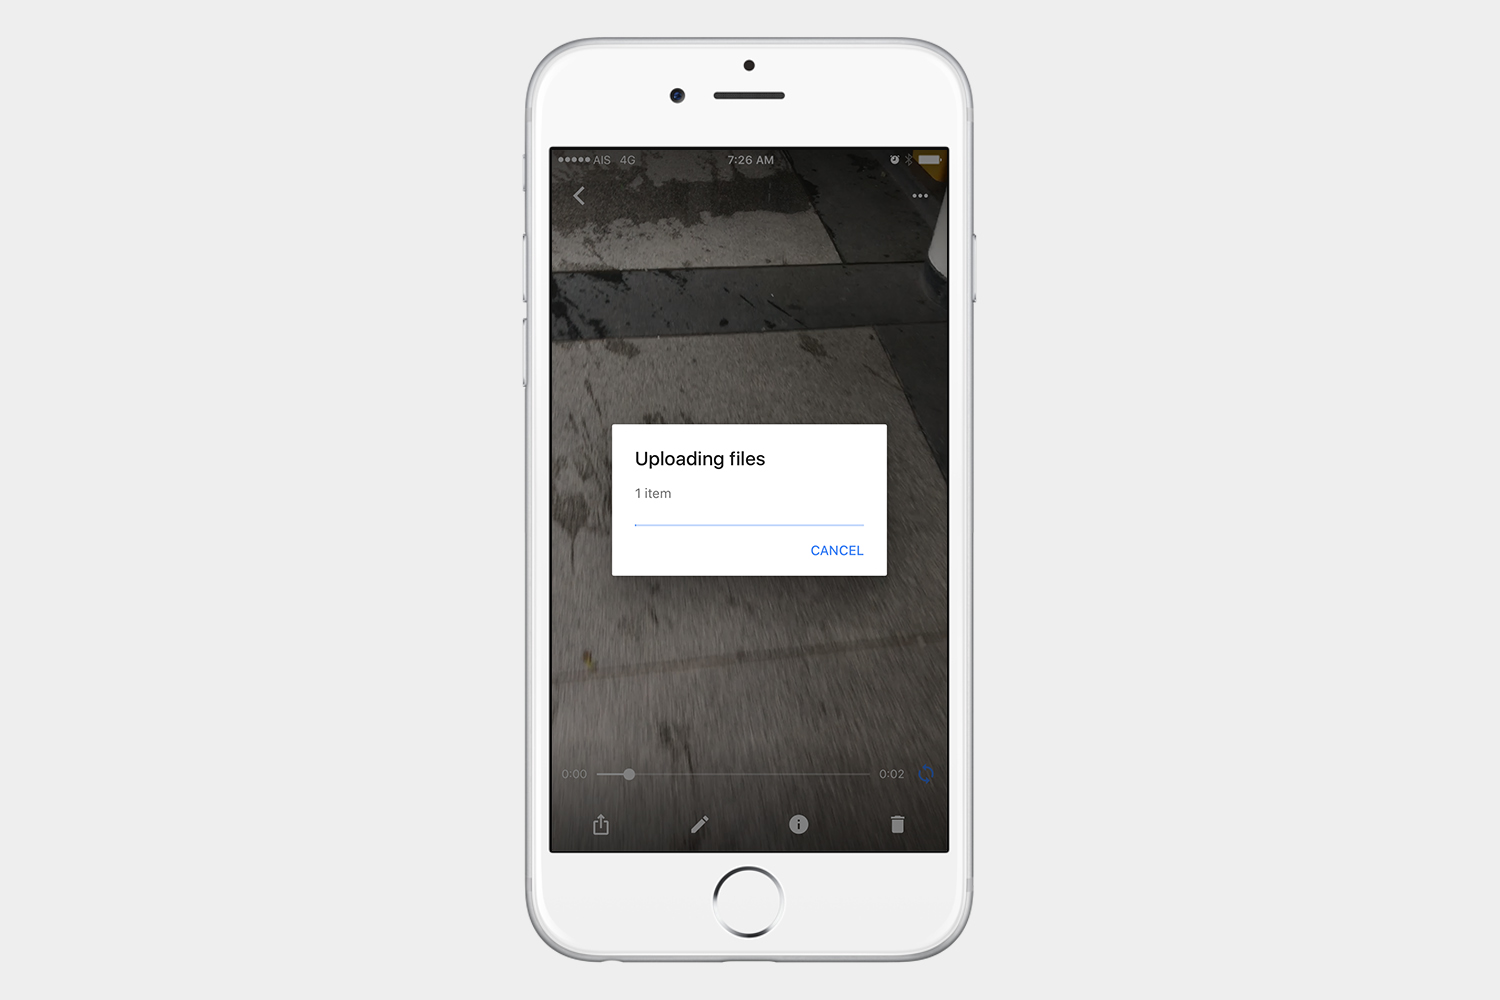
Step 3: If you prefer to upload videos individually, select the video(s) you want to upload from the Photos tab, tap the ellipses in the upper-right corner, and select Back up in the resulting menu.
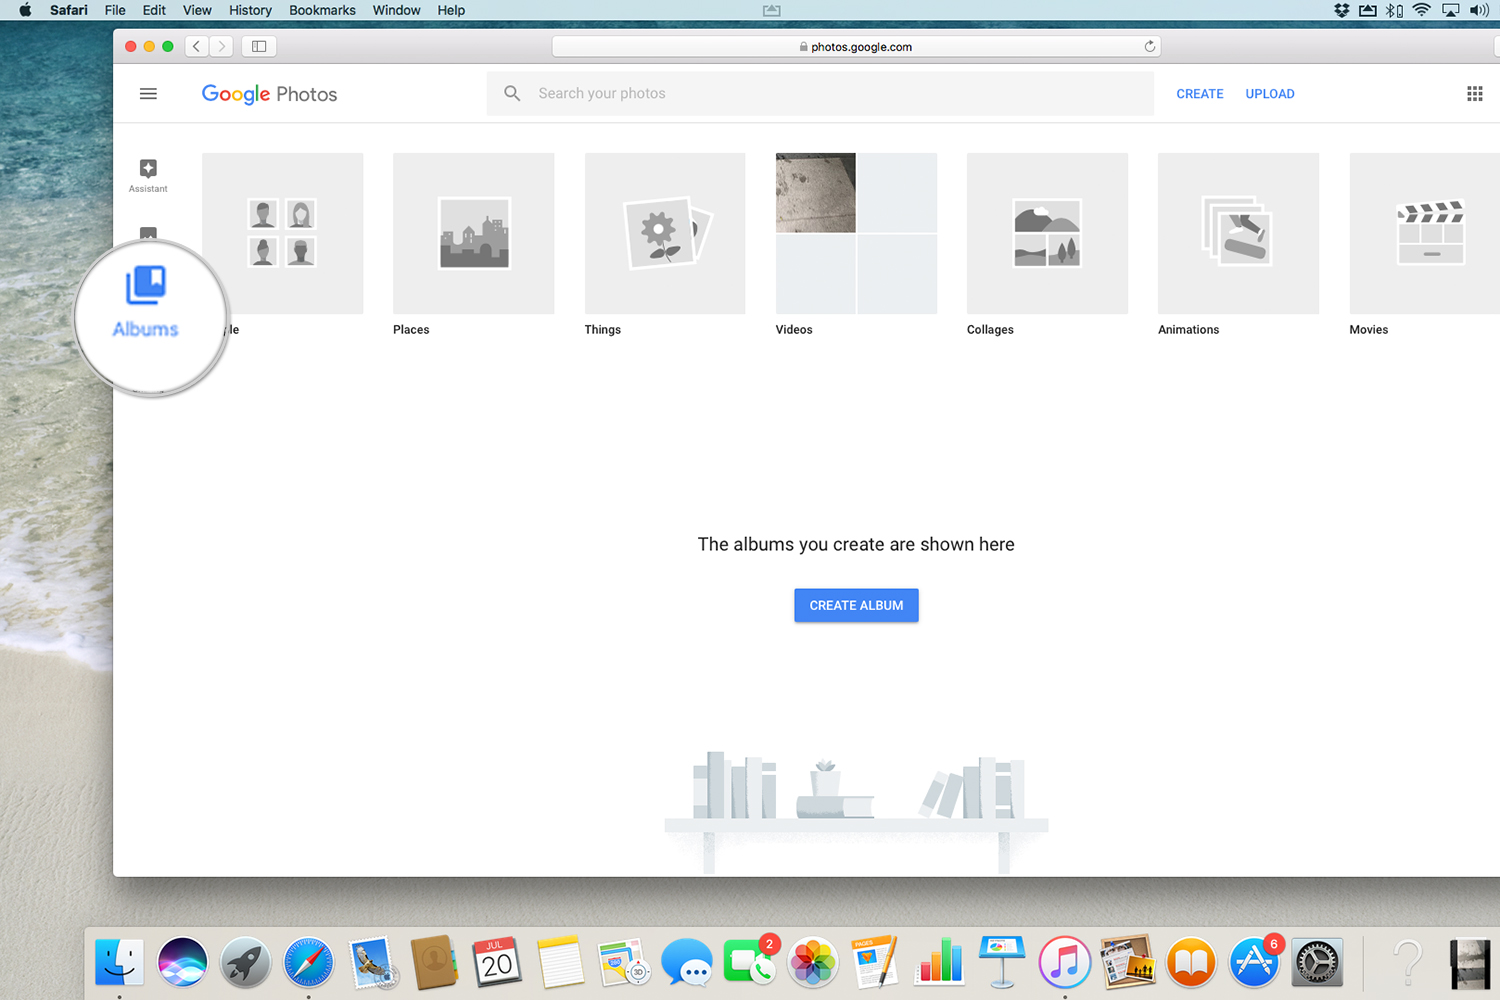
Step 4: Now, log into Google Photos in your web browser and click Photos in the left-hand menu. Here, you’ll find your video backups, as well as any photos you’ve recently uploaded to Google Photos.
