Whether you use one for work or entertainment, the iPad is one of the most revolutionary devices of the 21st century. But, without a dedicated operating system, the iPad felt more like an extension of your phone than a standalone device. Thankfully, Apple’s new iPad OS has been designed from the ground up to provide the best tablet experience possible.
In this guide, you’ll learn how to check your tablet for compatibility, back up your device, and install the new operating system.
Have an iPhone and want to install iOS 13? Check out our guide on how to download and install iOS 13.
Compatible devices

Before installing iPadOS, you’ll need to make sure your iPad is compatible with the new operating system. Apple is known for supporting devices for a long time, but some older models won’t get the update, so it’s worth checking the list below to see if your iPad will get support.
- iPad Air 2 and 3
- iPad Mini 4 and 5
- iPad (6th and 7th generations)
- 9.7-inch iPad Pro
- 10.5-inch iPad Pro
- 11-inch iPad Pro
- 12.9-inch iPad Pro
Downloading and installing iPadOS

Installing iPadOS onto your device is really super simple. Here’s how to get iPadOS on your iPad. Note, if you think you might not like iPadOS and might want to roll back to iOS 12, then it’s worth creating a backup before you start. Check out the instructions below on creating a backup.
- Open the Settings app.
- Head to General > Software Update.
- Your iPad will check for updates and you should get a notification telling you that iPadOS is ready to install. Tap Download and Install.
- It may take a few minutes to download and install the update, and you won’t be able to use your iPad during the update process.
Back up your iPad

Think you might want to roll back to iOS 12 after updating your device? In that case, you should make a backup before upgrading.
There are two ways to back up your iPad — using iCloud, or through iTunes.
Backing up using iCloud
Backing up your iPad using iCloud is the easiest method. Here’s how to do it for yourself.
- Make sure you’re connected to a Wi-Fi network.
- Open the Settings app, press your name, then tap iCloud.
- Scroll down to iCloud Backup, then tap Back Up Now.
If you’re unsure as to whether the backup is complete, you can head to Settings, then tap iCloud > iCloud Storage > Manage Storage, then tap on the device on the list.
Backing up on a Mac running MacOS Catalina
MacOS Catalina no longer has iTunes, so backing up your device on a Mac is a little different than it used to be. If you’re running MacOS Catalina, you’ll instead use the Finder app. Here’s how it’s done.
- Connect your iPad to your Mac.
- Follow the onscreen instructions — you may need to enter a PIN code or tap Trust This Computer.
- Open the Finder app and select your iPad in the sidebar.
- Press the General tab, then tap Back Up Now to manually back up your iPad.
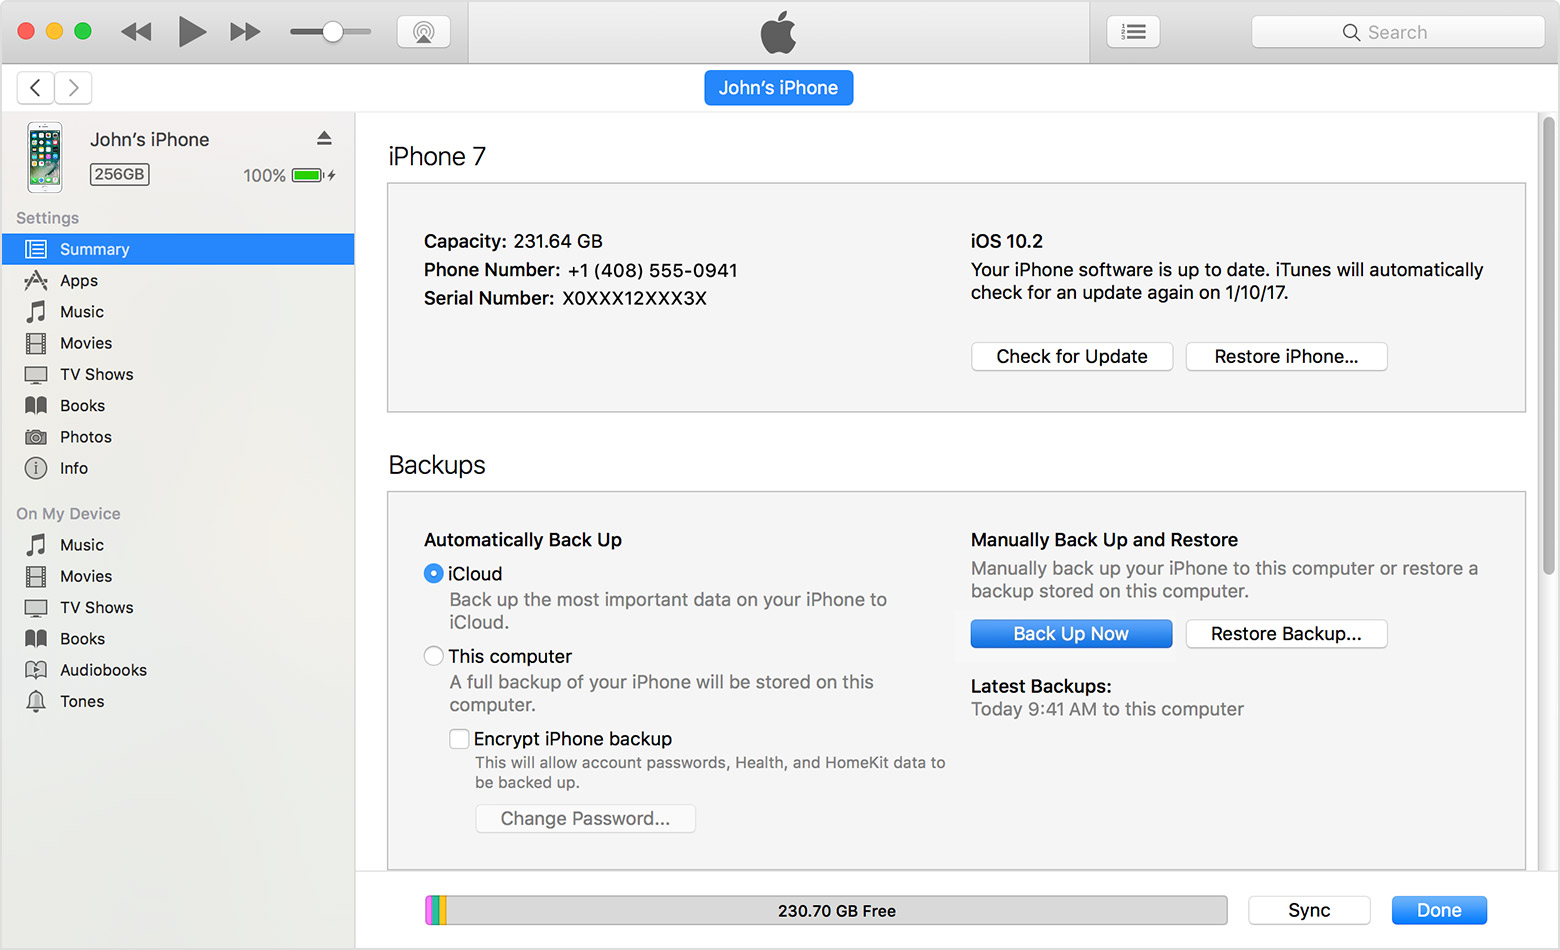
Backing up on a Mac or PC with iTunes
If you have a Mac with Mojave or older, or a PC with iTunes, then you’ll use iTunes to back up your iPad. Here’s how to do it.
- Make sure you have the latest version of iTunes, then connect your iPad.
- Follow the onscreen instructions — you may need to enter a PIN code or tap Trust This Computer.
- Open iTunes and select your iPad.
- Press the Back Up Now button to save your data.
Rolling back from iPadOS to iOS 12
If you created a backup of your device before upgrading to iPadOS, you can downgrade back to iOS 12. Here’s how to roll back from iPadOS to iOS 12.
- To downgrade to iOS 12, you’ll need to put your iPad into recovery mode.
- On an iPad with Face ID, hold the top button and either volume button until you see the Recovery Mode icon. On an iPad with a Home button, hold the side or top button until you see it.
- Plug your iPad into your computer using the cable that came with it.
- On the iTunes popup, click the Restore button.
- Click Restore and Update to confirm.
- An iOS 12 updater should appear. Press Next.
- Click Agree to accept the Terms and Conditions.
- Once the updater is finished, you’ll have a clean install of iOS 12 on your device. You’ll need to restore from your iCloud or iTunes backups to get your data back.
- Follow the instructions below depending on the type of backup you made.
Restore from an iCloud backup
Here’s how to restore your device from an iCloud backup from before you updated to iOS 12.
- On the Apps & Data screen, tap Restore from iCloud Backup and sign in to iCloud.
- Tap Choose Backup and choose the backup you made before installing iPadOS.
- Make sure you select the right backup — if you’ve had your device for more than a day, you may have another backup from when you were already on iPadOS.
Restore from an iTunes backup
Did you make an iTunes backup instead? Here’s how to restore from an iTunes backup.
- Tap Restore from iTunes Backup on the Apps & Data screen.
- Open iTunes on your computer, make sure your device is connected through a cable, then tap Trust This Computer.
- Select your device in iTunes, then press Summary and hit the Restore Backup button.
- Pick the backup from when your device was still running iOS 12.
- Keep your iPad connected to your computer until after it finishes syncing.


