These days, many of us live our entire lives on our smartphones, rarely touching a desktop PC or laptop when we're away from the office. Thankfully, Apple recognized this years ago and has made the iPhone incredibly easy to access and share information from your iPhone without resorting to a computer.
This naturally includes one of the things many folks share with others on a near-daily basis: photos and videos. Thanks to features like AirDrop, beaming your favorite pics over to someone else's iPhone can be done in only a couple of taps. You can also create shared albums in iCloud that don't eat up any storage space, and with iOS 16 and later, you can even create an entire photo library that's shared between close friends and family members.
However, you may not realize that Apple also provides several ways to transfer your personal collection of photos onto a new iPhone with a minimum of fuss. Some of these methods are better done with a Mac or PC, but if you don't have one nearby, there are other ways to go about it just as easily.
So, if you've just received a shiny new iPhone 15 or iPhone 15 Pro under the tree this year, or picked one up during one of the many holiday sales, you needn't fret about losing all of your photos.
Note that if you're transferring all of your data to a new iPhone, your photos should come across as part of that process. However, sometimes you may prefer to start mostly fresh and just bring your photos over. This guide will cover how to do that, and also how to make sure you have a backup of your photos somewhere else — just in case. You can also use these steps to transfer a large collection of photos to an iPad or another family member's iPhone much more cost-effectively than paying for enough iCloud storage to store an entire shared library.

Transfer photos between iPhones via AirDrop
Apple's AirDrop is an elegant and convenient way to send or receive photos from people nearby, and it's super easy to use.
Step 1: First you'll need to ensure AirDrop is enabled on both your iPhone and the recipient's iPhone. On iPhone models with Face ID, you can start by swiping down from the top-right corner of the screen to bring up the Control Center.
Note that if you're using an iPhone SE or an older model with a home button on the front, you'll need to swipe up from the bottom of the screen instead.

Step 2: Select and hold the four-button panel in the top-left corner to expand it.
Step 3: Ensure Wi-Fi and Bluetooth are enabled on both phones by checking the two icons in the middle row. These should typically be on by default and lit up in blue unless you've specifically toggled them off, in which case you can re-enable one or both by selecting the appropriate buttons.

Step 4: On the recipient's iPhone, select the AirDrop button in the bottom-left. If you're certain the recipient has your contact information in their address book, make sure this is set to Contacts Only; otherwise, choose Everyone (or Everyone for 10 minutes in iOS 16.2 or later).
Step 5: Tap in the corner of the screen several times until Control Center closes, or press the Home button on an iPhone SE or older model equipped with a Home button.
Step 6: On the sender's iPhone, launch the Photos app, select the desired photos, and choose the Share button.
You can also choose to share an entire collection of photos from the Days, Months, or Years views by choosing the three-dot menu and selecting Share Photos from the pop-up menu that appears.

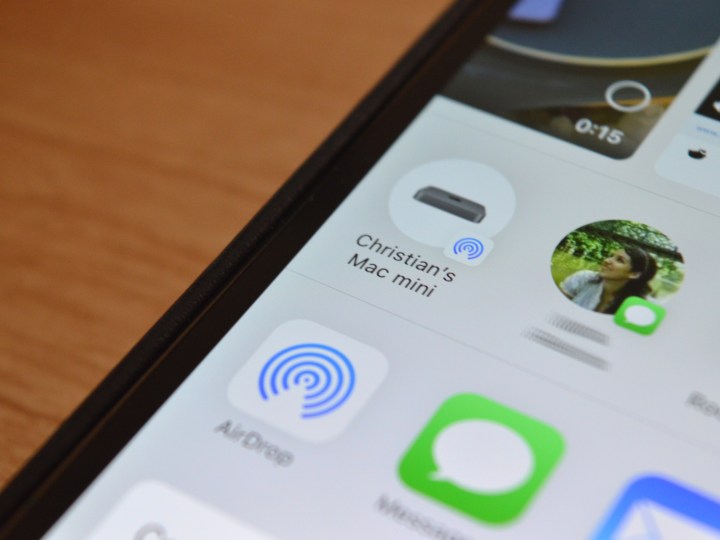
Step 7: On the iOS Share Sheet that appears, select the AirDrop icon.

Step 8: The next screen will show any Apple devices or users nearby that have AirDrop enabled. Find the name of the person or their phone or and choose it.
Step 9: That person will be asked to accept or decline the download. They'll need to tap Accept, after which the photos will be added to their Photos app.
This prompt is skipped when using AirDrop between two devices that are signed in with the same iCloud account.

Step 10: If you're transferring a large number of photos or videos, you'll need to stay within range of each other until the transfer completes unless both devices are running iOS 17.1 or later.
If both iPhones have been updated to at least iOS 17.1, you can walk away once the transfer begins and it should continue in the background over the internet as long as both devices stay online and connected to Wi-Fi. Transfers can also continue over cellular data if that's been enabled on both devices; you can find the option for this in the Settings app under General > AirDrop > Use Cellular Data.

Transfer photos between iPhones using NameDrop
In iOS 17, Apple added a new simplified way to share information via AirDrop by simply holding two iPhones together. Dubbed NameDrop, this feature lets you swap contact info by holding two unlocked iPhones near each other, and in
NameDrop is based on a new proximity sharing feature that lets you share just about anything just by holding your iPhone near someone else's. This saves the trouble of trying to wade through a long list of Apple devices when there may be hundreds of them around in a busy transit station or shopping mall. Here's how to use NameDrop to share photos.
Step 1: Ensure Wi-Fi, Bluetooth, and AirDrop are all enabled on both iPhones as described in the previous section.
Step 2: Ensure proximity sharing is enabled by opening the Settings app, selecting General > AirDrop, and ensuring Bringing Devices Together is toggled on. This should be enabled by default in iOS 17.1 and later.

Step 3: Launch the Photos app, select the desired photos, and choose the Share button.

Step 4: Hold the top of your iPhone near the top of the recipient's iPhone.
You should feel a haptic feedback and hear a notification sound. Continue holding the two iPhones near each other for another second or two and an AirDrop prompt should appear on the receiving iPhone asking them to confirm they want to accept the transfer. Have them select Accept and the selected photos will be transferred.
Since both devices will need to be running iOS 17.1 or later to use AirDrop, you can also walk away at that point and the transfer will continue in the background over the internet as long as both devices remain connected to Wi-Fi or cellular data (if enabled).

Transfer photos from an old iPhone to a new iPhone via iCloud
As we mentioned earlier, if you're transferring your entire digital life over to a new iPhone, your photos will come over with the rest of your data if you restore from an iPhone backup or do a direct device-to-device transfer.
If you're using iCloud Photo Library, your photos won't be part of your backup since they're already stored in iCloud; instead, your library will be resynced to your iPhone once the restore or data transfer completes.
If you're not using iCloud Photo Library, your photos will be contained in every backup you make of your iPhone, whether that's to Using iCloud or to a Mac or Windows PC.
Note that Apple only provides 5GB of free iCloud storage, which won't likely be enough to back up your iPhone. However, the good news is that you don't have to pay for extra storage just to transfer your data over using iCloud; Apple now offers temporary iCloud storage when you buy a new iPhone so you can move your data over without involving a Mac or PC.
See our guide on How to back up an iPhone using Mac, iCloud or PC for more information on how to backup your iPhone and transfer all of your data over to a new one.

Transfer photos to a new iPhone using iCloud Photo Library
If you have enough iCloud storage, you can effectively transfer your entire photo library to a new iPhone using Apple's iCloud Photo Library. For most folks, this will likely require paying for an iCloud Storage plan, since Apple only gives you 5GB for free; however, it's a great way to keep all of your photos stored in the cloud and in sync between all your devices. This includes not only transferring them to a new iPhone, but also being able to view them on your iPad, Mac, Windows PC, and even on an Apple TV.
Chances are you may already being using iCloud Photo Library without even realizing it, in which case, transferring your photos onto another iPhone with the same iCloud account is simply a matter of enabling it on the new iPhone. Here's how to check if it's enabled, and turn it on if not.
Step 1: Open the Settings app on your iPhone.
Step 2: Select your name at the top of the Settings screen.
Step 3: Select iCloud.

Step 4: Under "Apps Using iCloud" select Photos.
Step 5: If Sync this iPhone is toggled on, then you're already using iCloud Photo Library and all of your photos should be in iCloud. You can confirm this by looking at the "In iCloud" numbers and "Status" below.

Step 6: If Sync this iPhone is not enabled, you can toggle it on. Note that you will need to have enough storage in iCloud to contain all of your photos and videos; your iPhone will warn you if this isn't the case and provide an option to purchase additional storage.
Unlike a one-time transfer to a new iPhone, there's no temporary storage available here. If you don't have enough, you'll need to either delete some photos or videos or pay for a storage upgrade. However, if you're only planning to use this to transfer your photos, you can sign up for a month and cancel the storage plan once everything has been moved over.
Step 7: Once your iCloud Photo Library is in sync from your first iPhone, repeat the above steps on the second iPhone to switch on Sync this iPhone to download your images from iCloud.

Step 8: If you want to continue using iCloud Photos and are willing to pay for whatever storage is needed to keep your photos in the cloud, this is all you'll need to do. The default setting of Optimize iPhone Storage will keep the most recent photos on your iPhone while leaving the rest in iCloud to save local storage space.
However, if you don't want to keep paying for iCloud Photo library, you'll need to select Download and Keep Originals to ensure all of your photos are downloaded to your new iPhone. This may take some time, but should occur in the background whenever your iPhone is connected to Wi-Fi and charging. You can check the status by returning to the iCloud Photos settings.

Transfer photos via a Mac
If you'd rather not using iCloud or AirDrop, it's also possible to transfer your photos from one iPhone to another using a Mac or Windows PC. This is a more involved process that requires downloading all of your photos from one iPhone to your local computer and then uploading them onto the new iPhone; however, it gets the job done and lets you avoid the cloud entirely.
The steps to do this will vary depending on whether you're using a Mac or a Windows PC, but in both cases you'll download the images using the operating system's built-in photo import tool and then transfer them to the new iPhone using either Finder macOS Catalina or newer or iTunes on older macOS versions or Windows.
Note that you can only transfer photos onto an iPhone using Finder or iTunes if you are not using iCloud Photos.
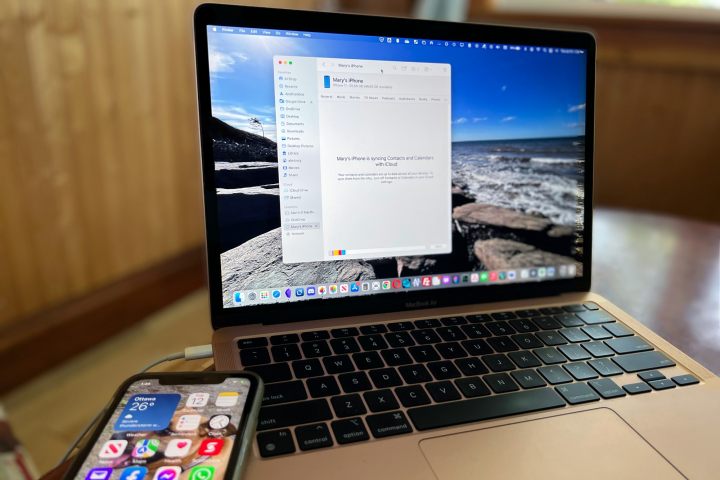
Step 1: Plug your old iPhone into your Mac using an appropriate USB to Lightning or USB-C cable.
Step 2: If this is the first time you've connected your iPhone to this computer, you'll be prompted to trust the connection on both your iPhone and computer. Select the Trust option on both ends.
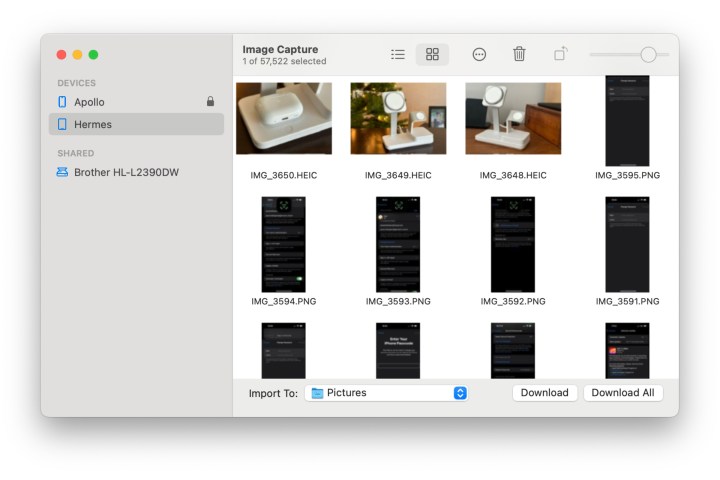
Step 3: On macOS, open the Image Capture from the Finder Applications folder or Launchpad.

Step 4: In Image Capture, select your iPhone from the Devices section in the left sidebar.

Step 5: At the bottom of the Image Capture window, choose a folder where you'd like to copy all of your photos and videos from the Import To drop down menu.

Step 6: Select Download All to begin downloading all of your photos to the selected folder.
Step 7: Once all of your photos and videos have been successfully downloaded, close Image Capture by selecting Image Capture > Quit Image Capture from the menu bar.
Step 8: Open Finder (macOS Catalina or later) or iTunes (macOS Mojave or earlier).
Step 9: Select your iPhone from the left sidebar.
Step 10: Choose Photos from the navigation bar below the name of your iPhone.

Step 11: Check the box beside Sync photos to your device from and choose the folder where you saved your photos.
Step 12: Select Include Videos to ensure any videos in that folder will also be synced to your iPhone.
Step 13: Select Apply to save the settings and begin syncing your photos.
Note that this sync process will run automatically each time you reconnect your iPhone to your Mac, not only adding any new photos from your selected folder, but also removing any that you've deleted from that folder. If you'd like this to be a one-time transfer, be sure to uncheck the Sync photos option in iTunes or Finder.
If you're using a Windows PC, you'll need to use the Windows Photos app to import your photos from your iPhone; however, once you've done this, you'll be able to transfer them to your new iPhone using iTunes by following the appropriate steps above.


