One of the most important reasons you have your iPhone with you at all times is so you can stay up-to-date with the things and people that are most important to you. This need to be connected is an important consideration when it comes to choosing our data plans, carriers, smartphones, and many other things.
But one of the downsides of being connected 24/7 is that you may be overwhelmed with the number of notifications coming in. They can be helpful, but sometimes notifications can get in the way of whatever you’re doing, or they can disturb you when you don’t want them to.
Managing notifications is an essential part of dealing with your iPhone on a daily basis and also a way to keep that long list of notifications in your Notification Center somewhat manageable. Here’s an easy walk-through on how to turn off notifications on an iPhone.
If you haven’t updated to Apple’s latest yet, here’s our iOS 11 review, all of its new features, and also its most common problems and how to fix them.
Turn off all notifications
If you want to turn off all notifications at once, the easiest way to do it is to turn on Do Not Disturb. To do this, swipe up from the bottom and tap the moon icon next to the screen rotation lock.

Do Not Disturb allows notifications to arrive, but it prevents them from making sounds or waking up the display.
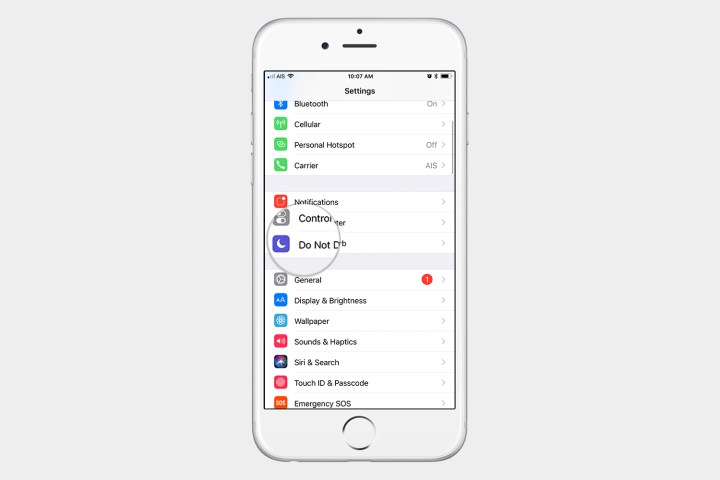
You can go to Settings > Do Not Disturb and access all the settings for Do Not Disturb. For instance, you could schedule it to turn on and off at specific times.

Maybe you turn on Do Not Disturb manually late at night because you don’t want to disturb someone else, and a text notification makes a sound anyway. In the settings, you have an option to silence always or only while iPhone is locked. You can also allow calls from your favorites and even have it turn on by itself while you’re driving.
We suggest going into the Do Not Disturb settings to set it up the way that works best for you.
Turn off notifications for specific apps
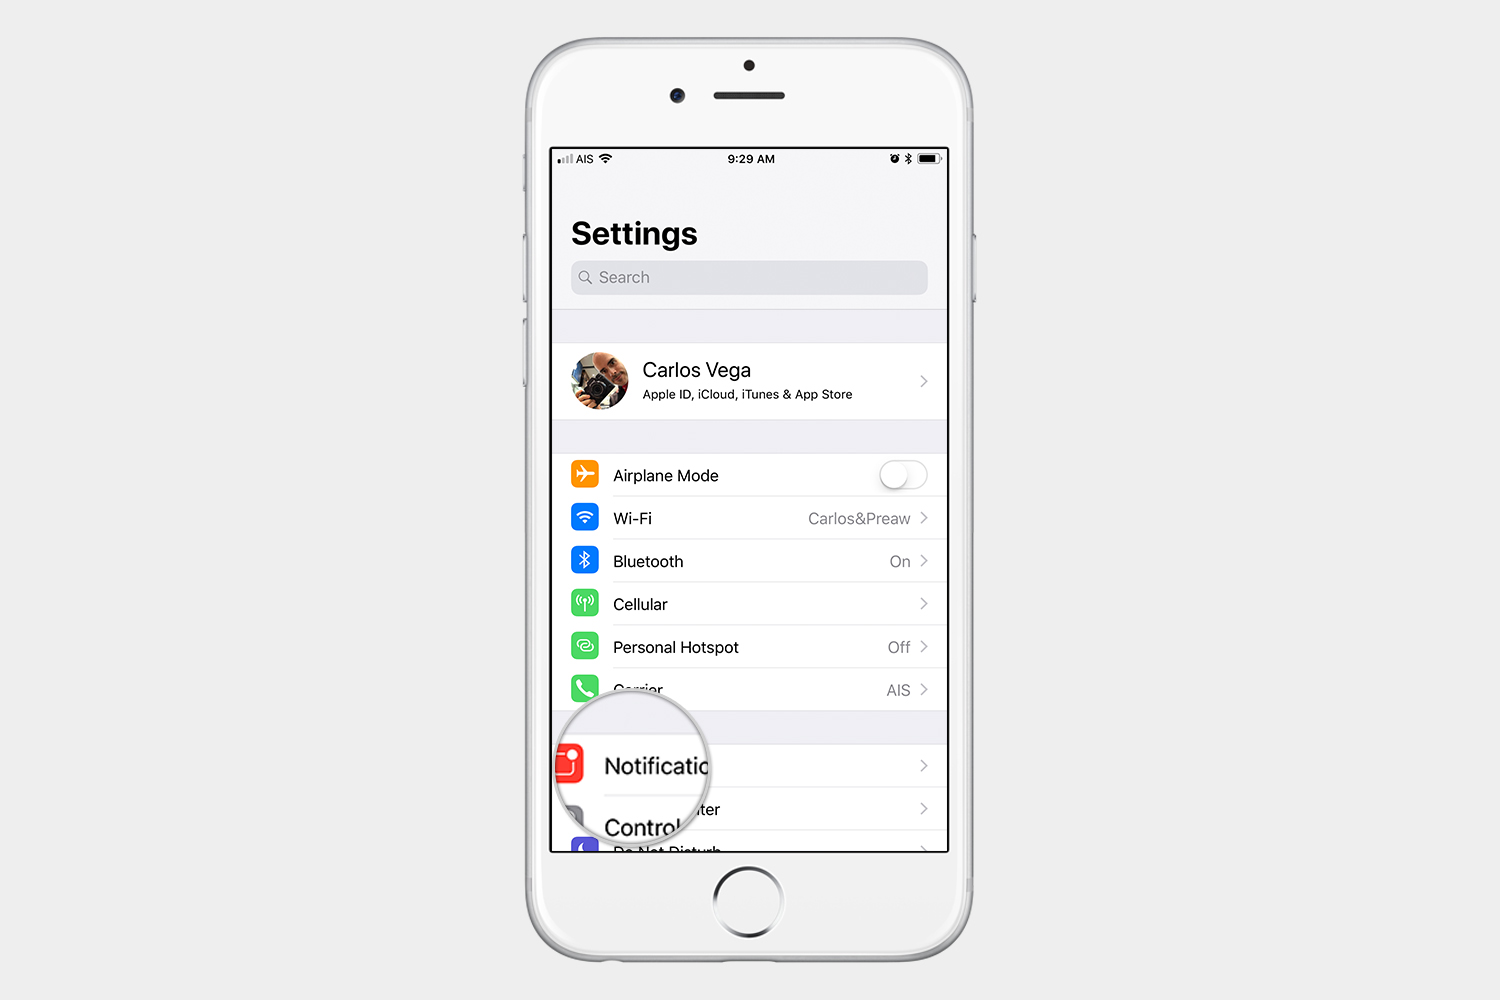
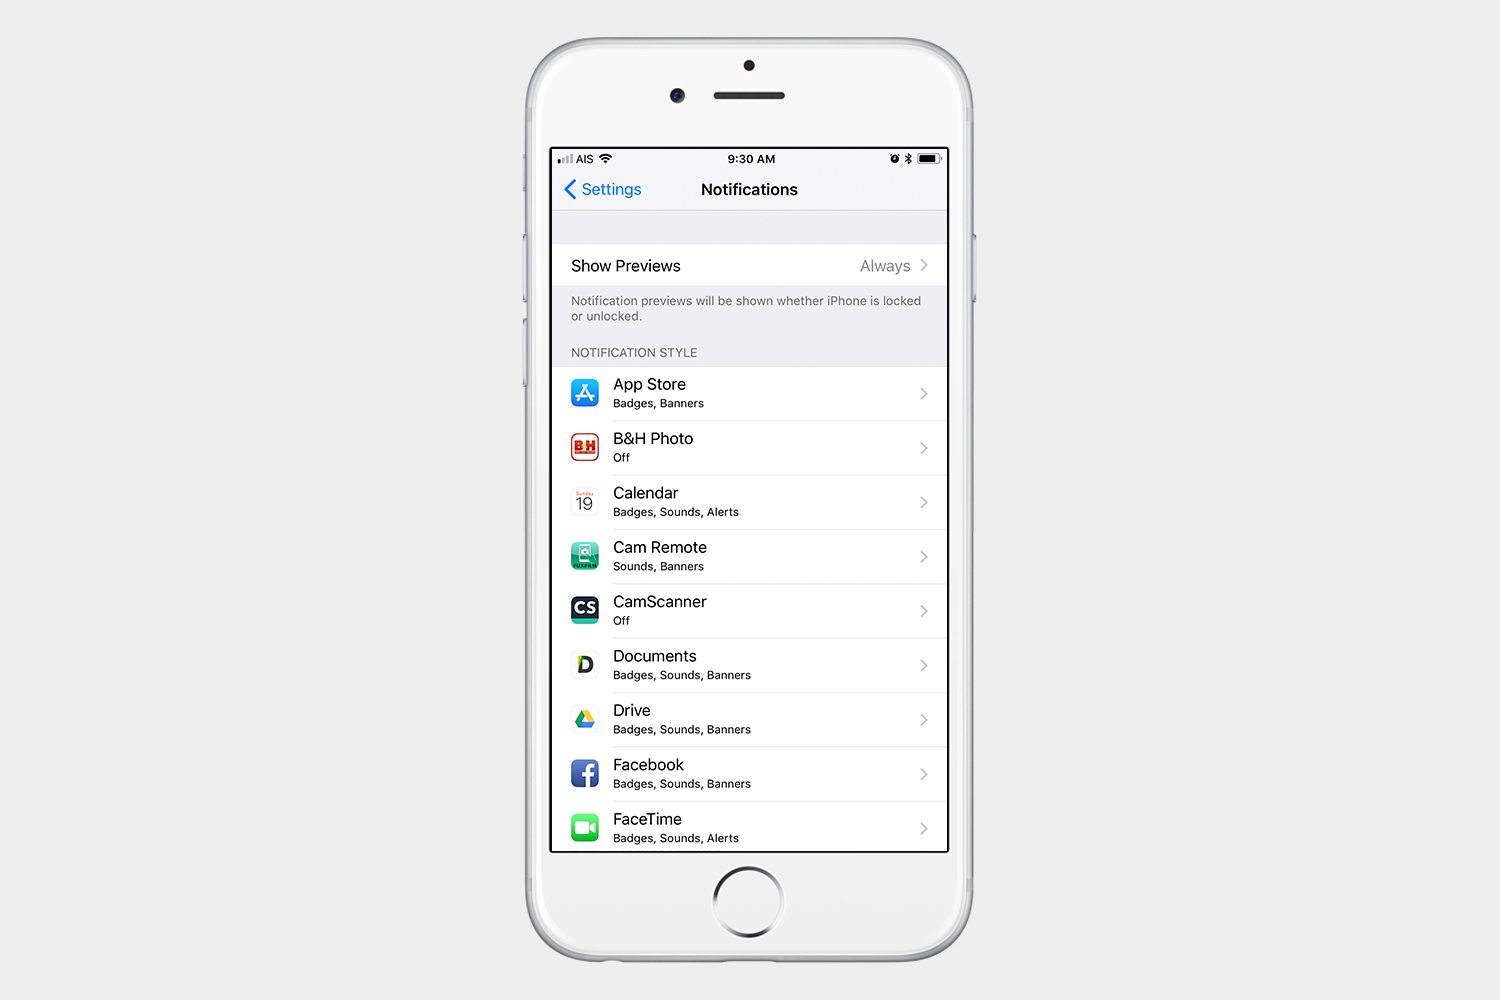
If you’re looking to turn off notifications for an app, go to Settings > Notifications. You will see a list of all your apps here, and you can turn off the notifications, or make the notifications behave in a way that you find less annoying, in case you want to see the notification but the way it’s currently coming in is getting on your nerves somehow.

This screen may seem self-explanatory at first, but let’s dig into it a little deeper. Firstly, at the very top, you will see an option that says Show Previews. The Show Previews option is there for each app, but iOS 11 introduced this toggle where you can manage it for all apps at once. Show Previews is important for your privacy.
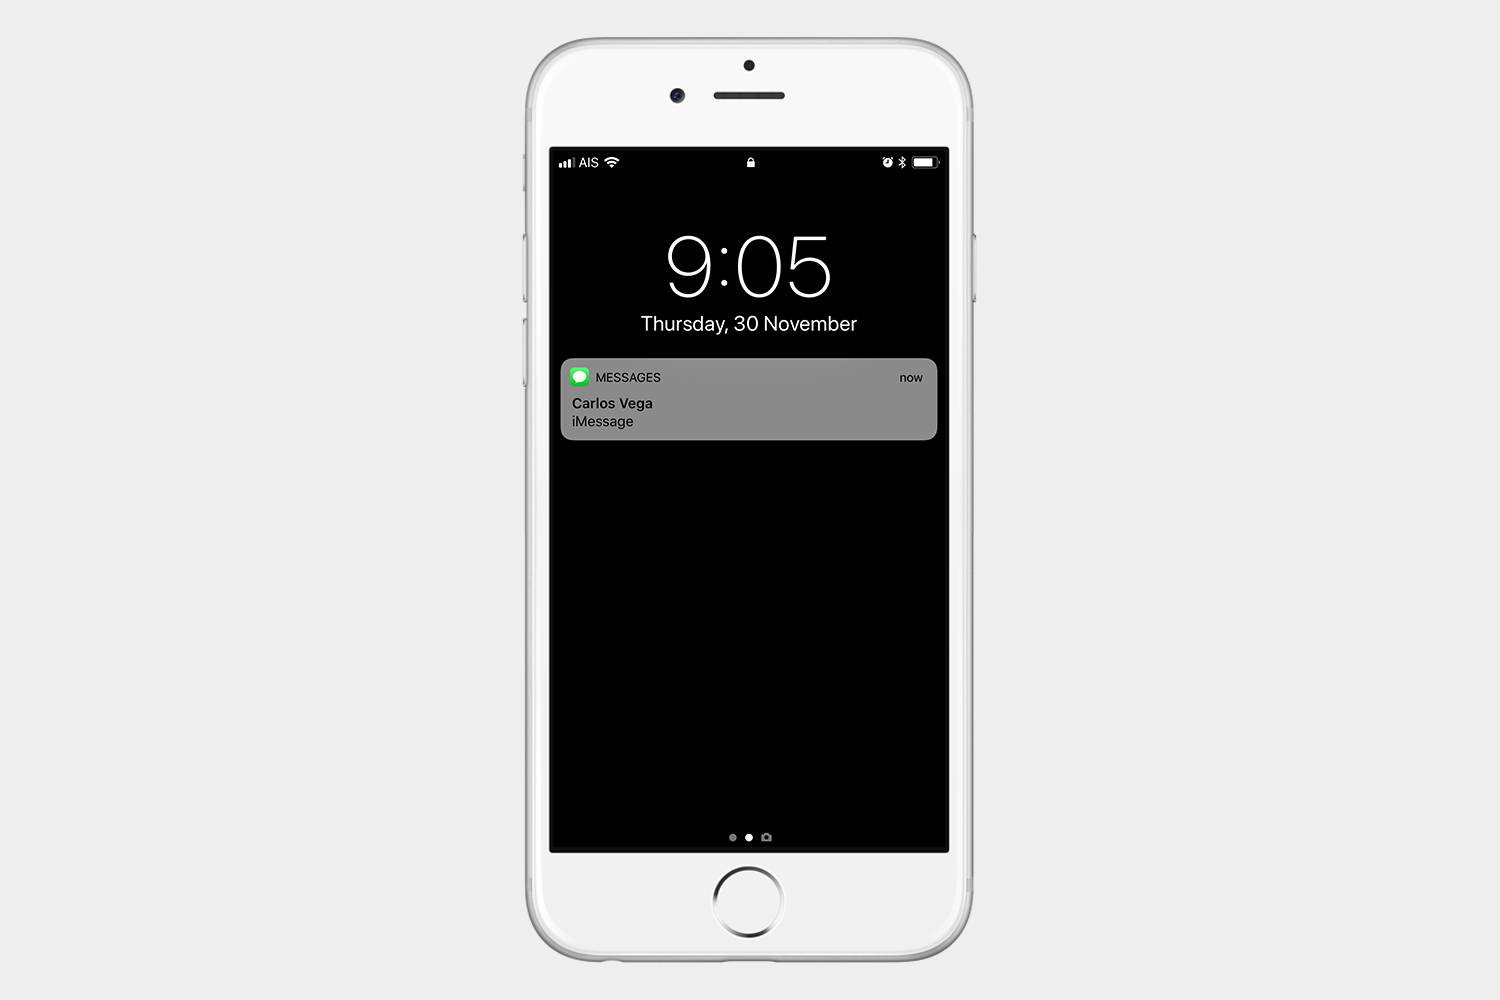
Below is an example of the way a notification will show up with Show Previews enabled.

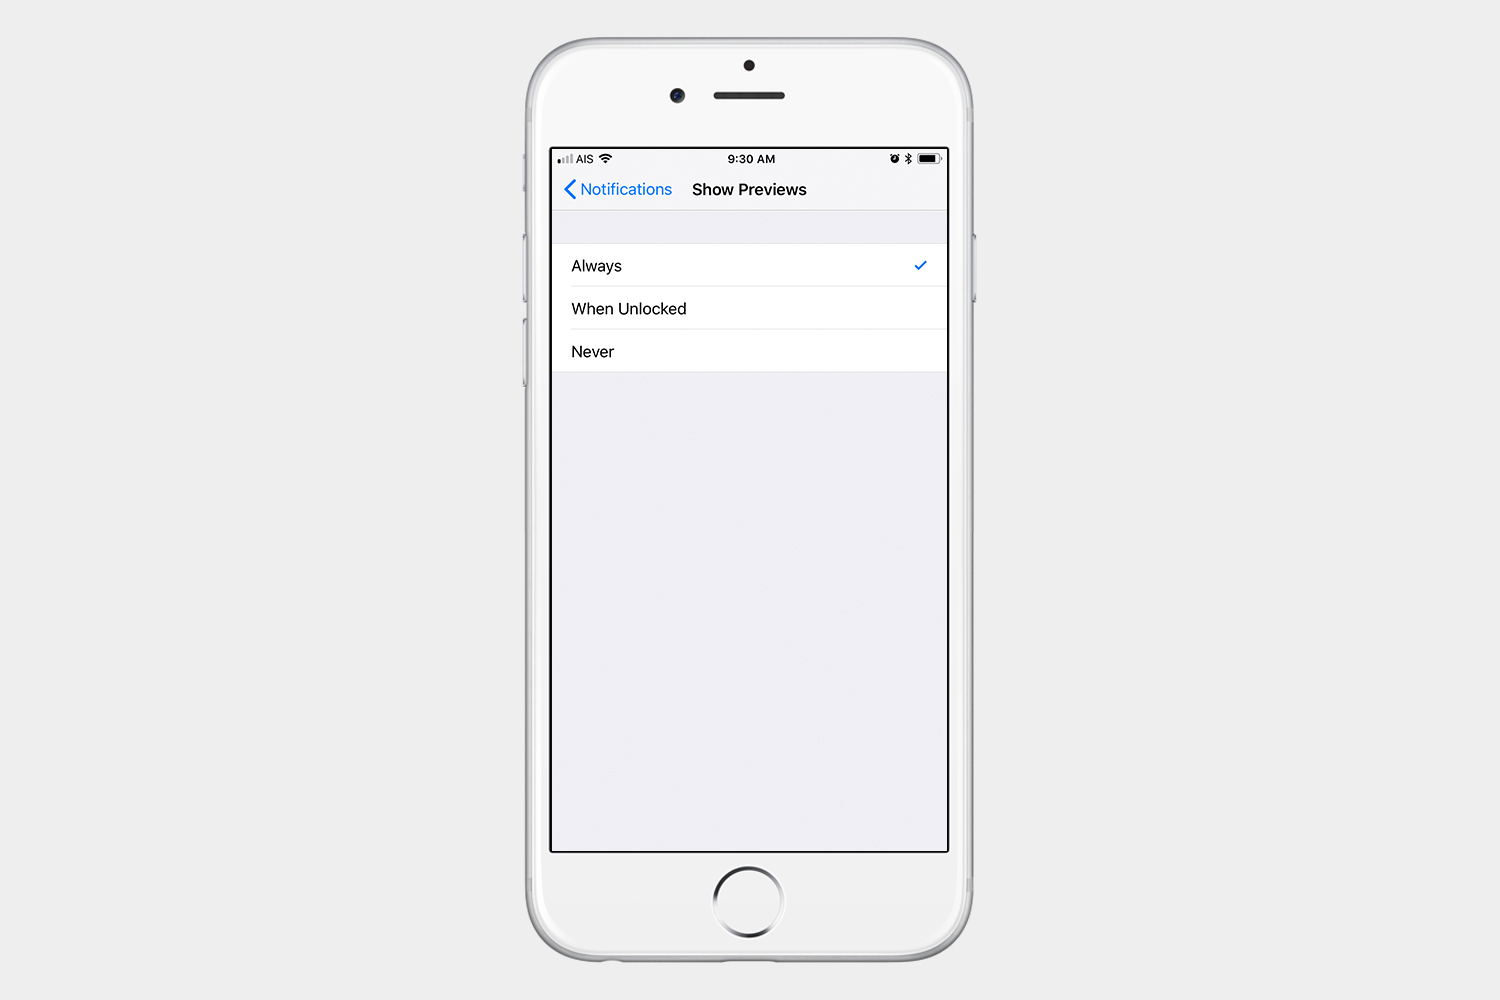
And here is an example of the way a notification will show up with Show Previews disabled. You can set Show Previews to show always, when unlocked, or never.
Sometimes hiding the preview is the best way to go for your privacy. You can also do this on an individual app, so let’s take a look at the options you will find within the notification settings for each app.

- Allow Notifications: Toggle this to turn the notifications on or off.
- Sounds: Toggle this on or off if you want notification sounds for this app.
- Badge App Icon: This option controls whether or not you want to display the small red circle on the top-right corner of the icon showing the notification counter.
- (Alerts) Show on Lock Screen: This will let you control whether or not you want to show the notifications on the lock screen for this app.
- (Alerts) Show in History: Controls whether or not you want to see the notifications for this app when you swipe down from the top to reveal notification center.
- (Alerts) Show as Banners: Do you like notification banners? Use this to turn them off if you don’t. You can also set them to show temporarily or persist on the screen until you tap on them.

If you scroll down a little more, you will see Show Previews at the bottom. You can set it here for that particular app if you want the previews to show always, when unlocked, or never.
