Apple’s iOS 11 mobile operating system introduces a ton of new features, with far more custom options to tailor the experience to your needs. But updating to a new version can be anxiety-inducing. We’re here to make the adjustment far easier with some useful iOS 11 tips and tricks. If you want to check it out for yourself, here’s how to download iOS 11.
Battery and performance management features
To check on your battery and throttling, iOS 11.3 allows you to access battery health information in your settings. All you need to do is go to Settings > Battery > Battery Health. From there, you’ll see your maximum battery capacity in comparison to when the battery was new.
When your battery starts to degrade, you’ll an option that will allow you to toggle the Peak Performance Capability on or off. But it’s important to note that when you first upgrade to iOS 11.3, the performance manager feature is automatically disabled. If you do have the option to enable it, the feature will throttle CPU if the battery is incapable of handling peak power input.
Save storage with new camera formats
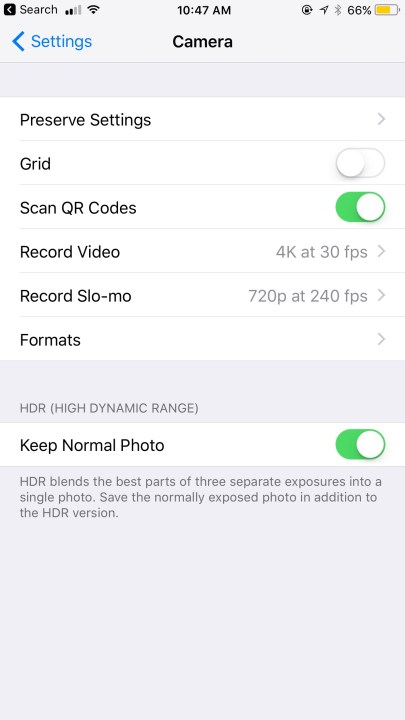
To help save storage, you can save your photos under HEIF (High Efficiency Image Format) and HEVC (High Efficiency Video Coding) by going to Settings > Camera > Formats and check off High Efficiency. For photos, HEIF offers twice the compression effectiveness of JPEG and can still be shared. For video, your footage will use HEVC for the high-resolution 4K video the iPhone shoots in. Under both formats, you’ll be able to free up storage without sacrificing the quality of your photos and videos. Your images automatically save as HEIC and movies as an HEVC .mov file. But if you choose to stay on the Most Compatible camera format option, your images will save as JPGs and movies as h.264 .mov file. To learn more about both formats, read our HEIF and HEVC guide.
Using the Apple Pay Cash Card

With the Apple Pay Cash Card, you can send transactions between you and family or friends through iMessage. The feature can be opened within the iMessage window manually via the App drawer, but it also comes up through QuickType suggestions based on the context of the conversation. By tapping on the Apple Pay icon, you can set the dollar amount you’re requesting or paying. After approving it with Touch ID, or Face ID when you get the iPhone X, the money arrives on your cash card instantly in the Wallet app.
How to use the Files app
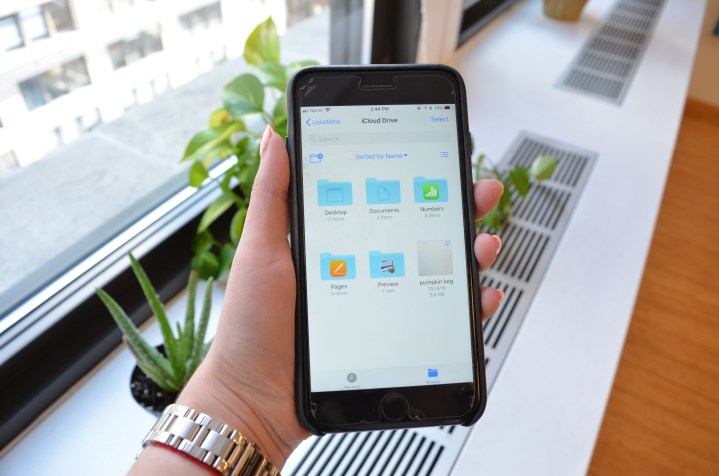
With the Files app, you have one location to browse, organize, and search files stored in iCloud Drive, your iPad, Mac, and third-party cloud services such as Google Drive. The interface resembles Finder on the Mac, and lets you arrange your files in different folders and subfolders for easy access across your Apple devices. On the app, you’ll have the option to create a folder, name it, and then add anything you’d like from documents to photos. You can also sort them by name, date, size, and tags for extra organization. Other features include marking up and sharing PDFs or images stored within the folders. Check out our deep dive of the new Files app for more.
How to access your notifications
In iOS 11, the notification center and the lock screen have fused. Instead of having to swipe down to another notification screen after unlocking your phone, simply swipe down to reveal your lock screen, and all your notifications will appear separated by day. You can clear or view them by swiping the notification to the left, and you can also open each one by swiping fully to the right. Tapping and holding via 3D Touch will let you interact with the notification, such as sending a reply to an iMessage. In this new notification center, you can access your camera by swiping to the left, and the Today view by swiping to the right (just like the lock screen).
How to type to Siri
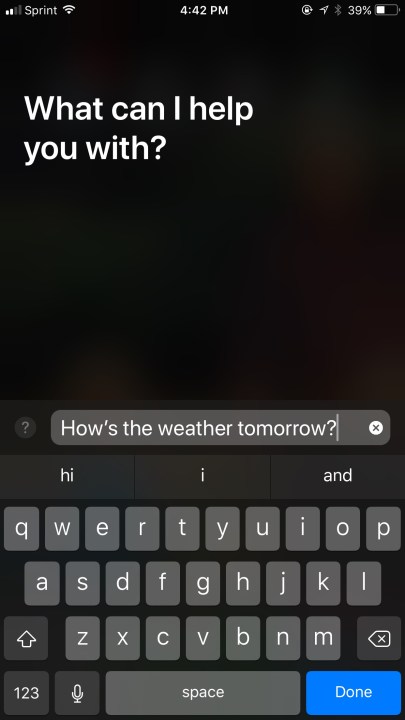
With iOS 11, you can now type out your questions or commands to Siri. Go to Settings > General > Accessibility > Siri and toggle on Type to Siri. After tapping Done, Siri will pull up the results for you automatically. You can also adjust voice settings to “Control with Ring Switch” which will signal for Siri to show text but not speak responses when your ringer is off — however, it will still beep when called on.
How to customize your Control Center
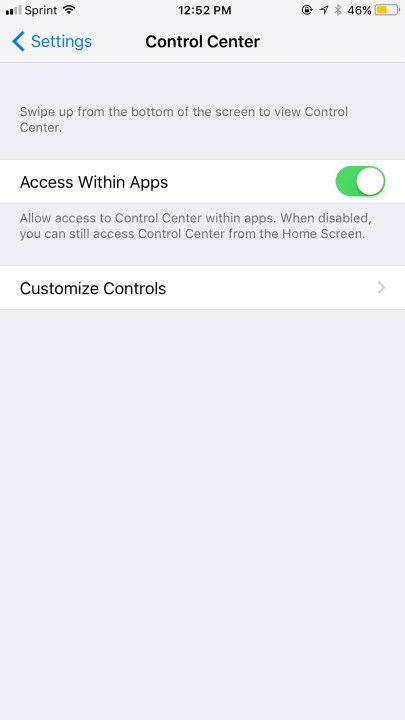
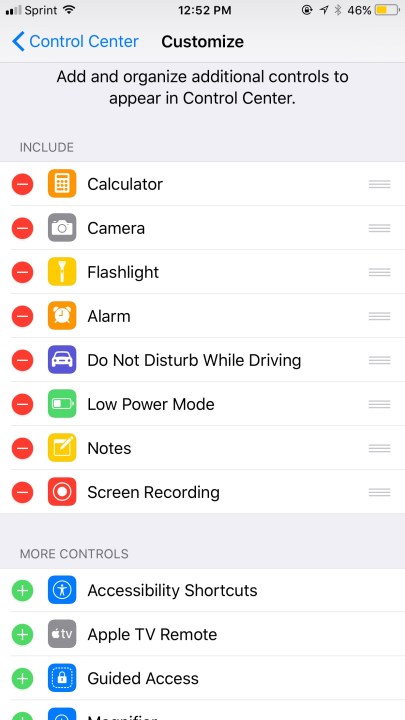
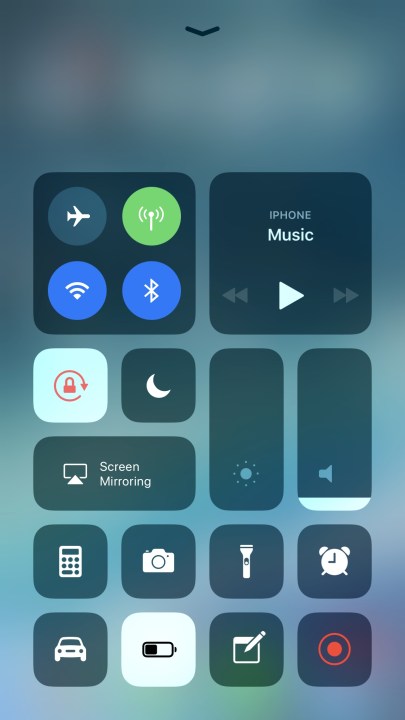
The Control Center in iOS 11 has been completely redesigned and is now more customizable. To customize the Control Center, go to Settings > Control Center > Customize Controls. Tap the plus signs in the “More Controls” section to add the items you’d like to include. You can also reorganize the order they appear by holding down the symbol on the right and dragging the controls to your preferred spot. You can use 3D touch to adjust controls like sound, brightness, and the flashlight.
How to easily turn on Low Power Mode
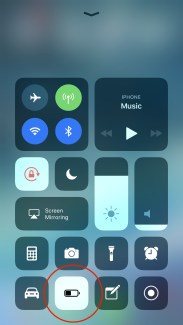
Low power mode is nothing new to iOS 11 — neither is having low battery — but in the past, turning it on it required you to go to your Settings and tap on the Low Power Mode tab. Now, you can add it to the customized Control Center and easily turn it on or off by tapping on the low battery icon. If you’re always running out of power, check out our iPhone battery saving tips.
How to screen record
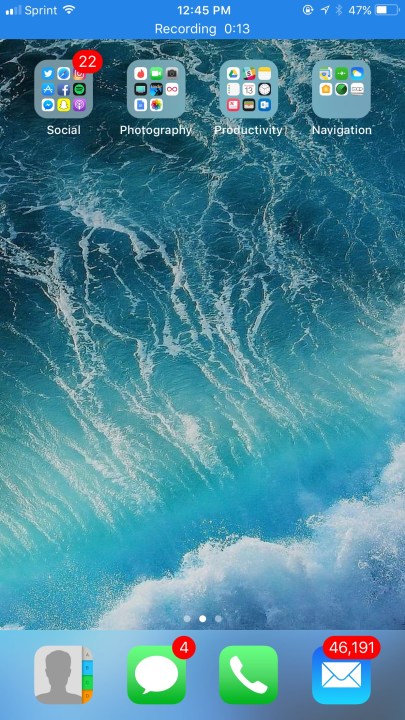
In the past, recording screen activity on your iPhone required a third party app. Now, you can screen record straight through the built-in feature. You’ll have to add it to your Control Center by going to Settings > Control Center > Customize Controls. Once it’s added, pull up the Control Center and tap on the screen record icon which will turn red to indicate it’s on — you’ll also see a blue banner when you exit the Control Center and start using your phone to signal that it’s recording. To record audio as well, the record icon will give you the option via 3D touch to turn the microphone on. Once you’re finished, you can either tap on the banner or the icon in the Control Center to stop recording. The videos will automatically save to your Camera Roll.
How to scan documents
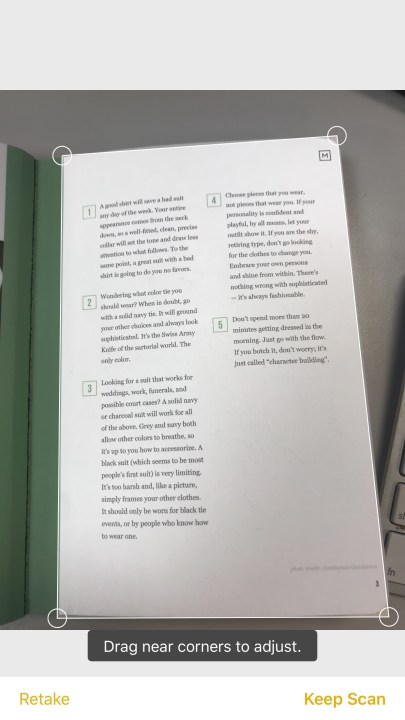
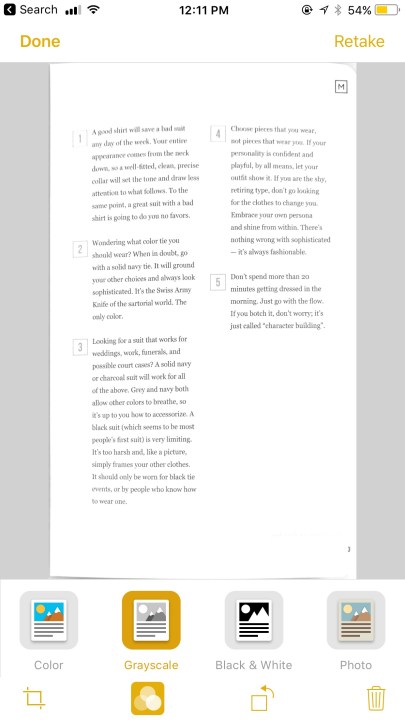
The Notes app in iOS 11 now has a feature to scan your documents. To scan a document, click the plus sign on the bottom of the screen and tap “Scan Documents.” The camera will snap a photo of the document and add it to your notes. You can also edit the color scheme with options like black and white, color, and grayscale.
How to turn on “Do Not Disturb While Driving”
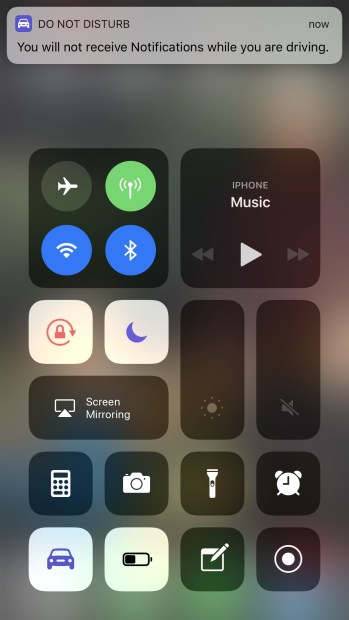
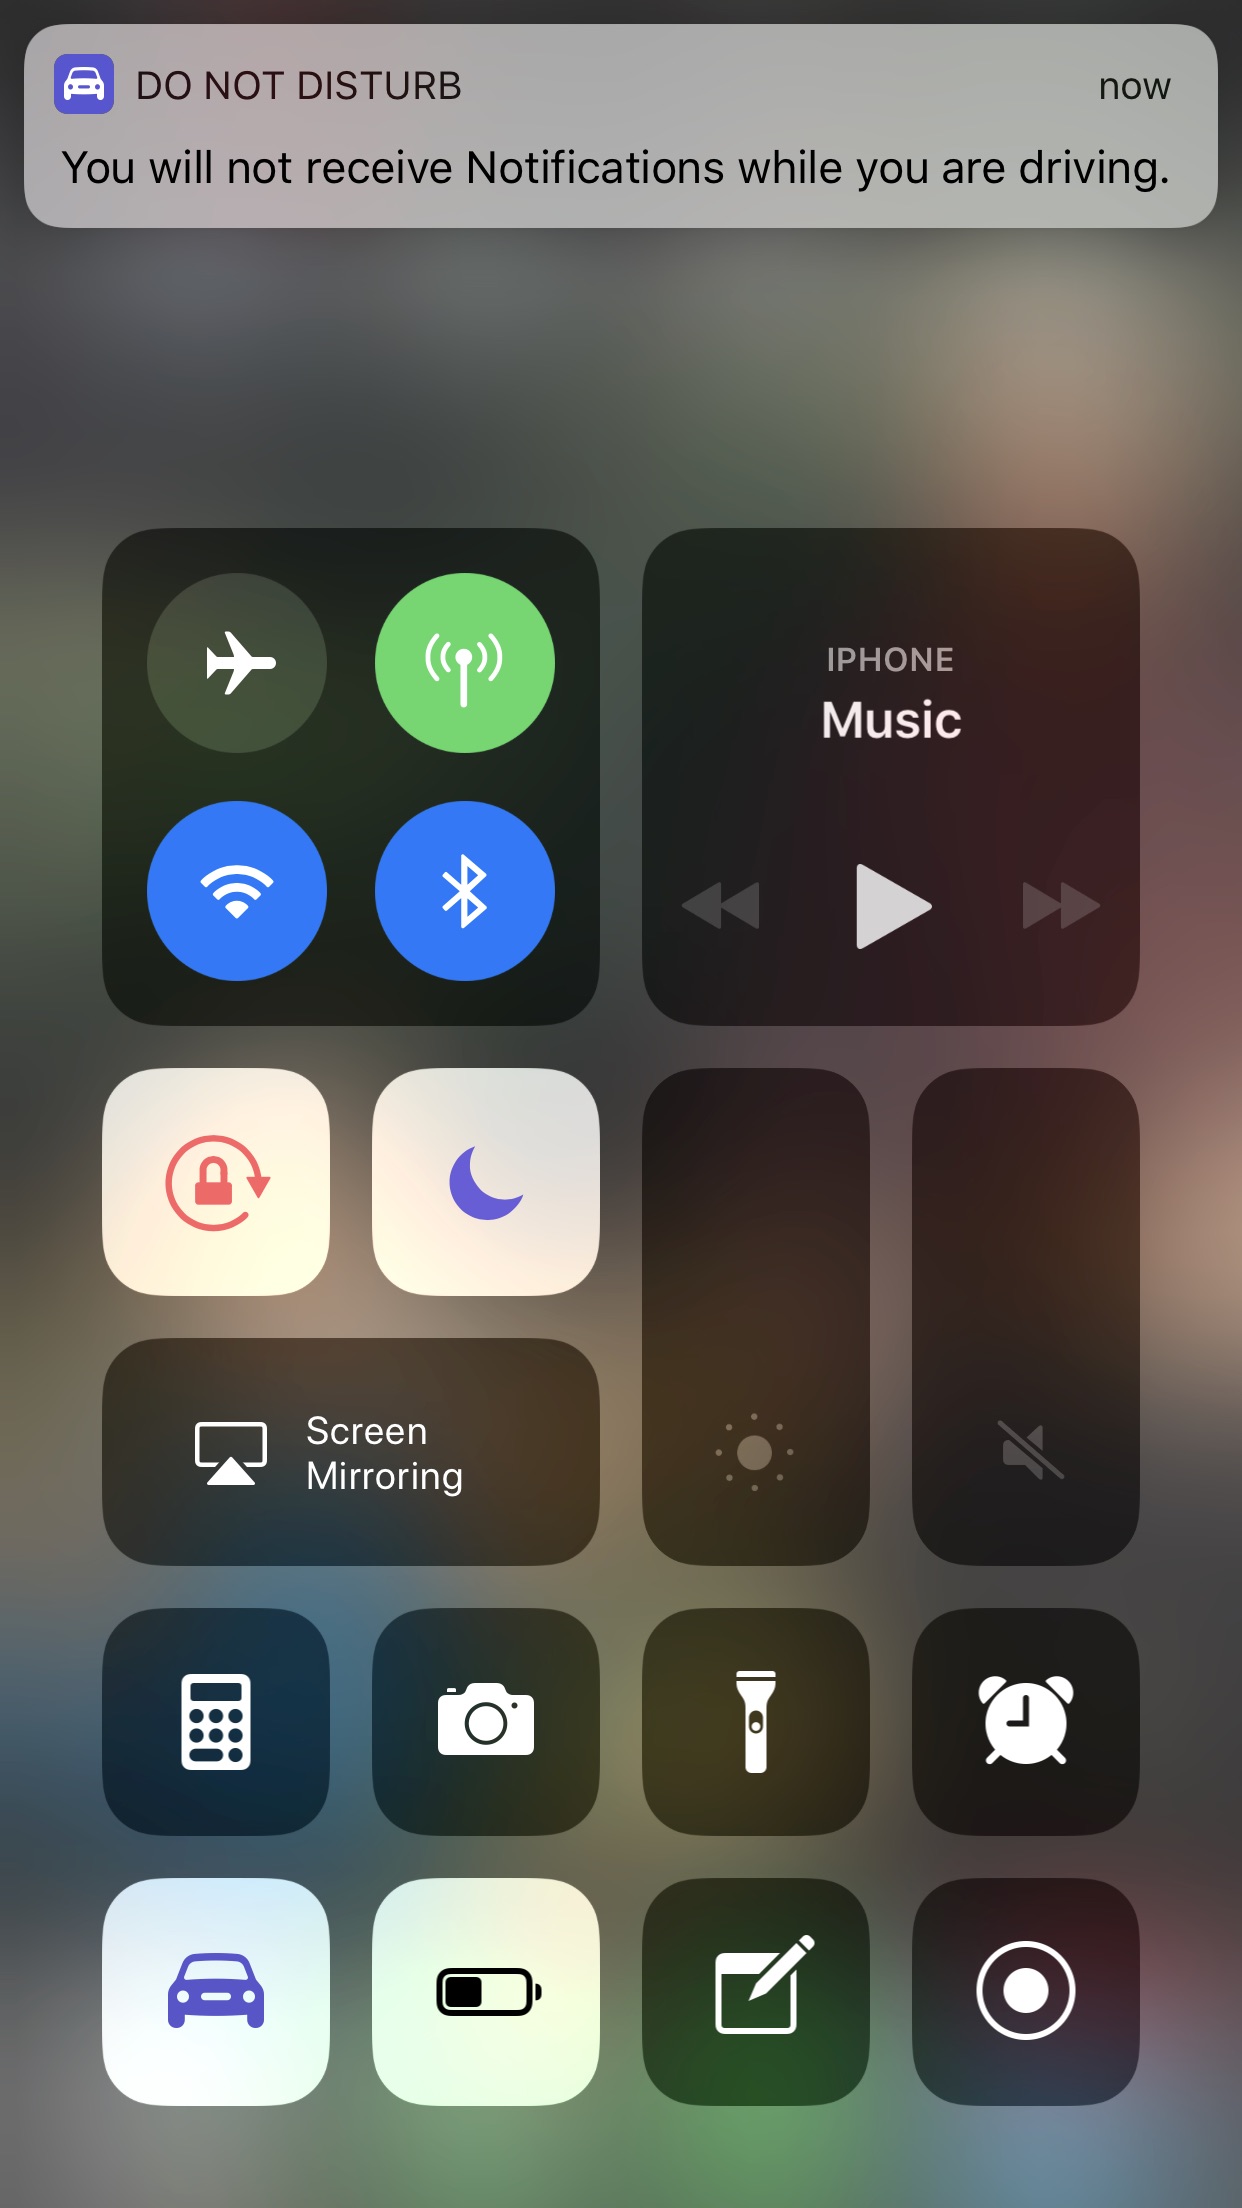
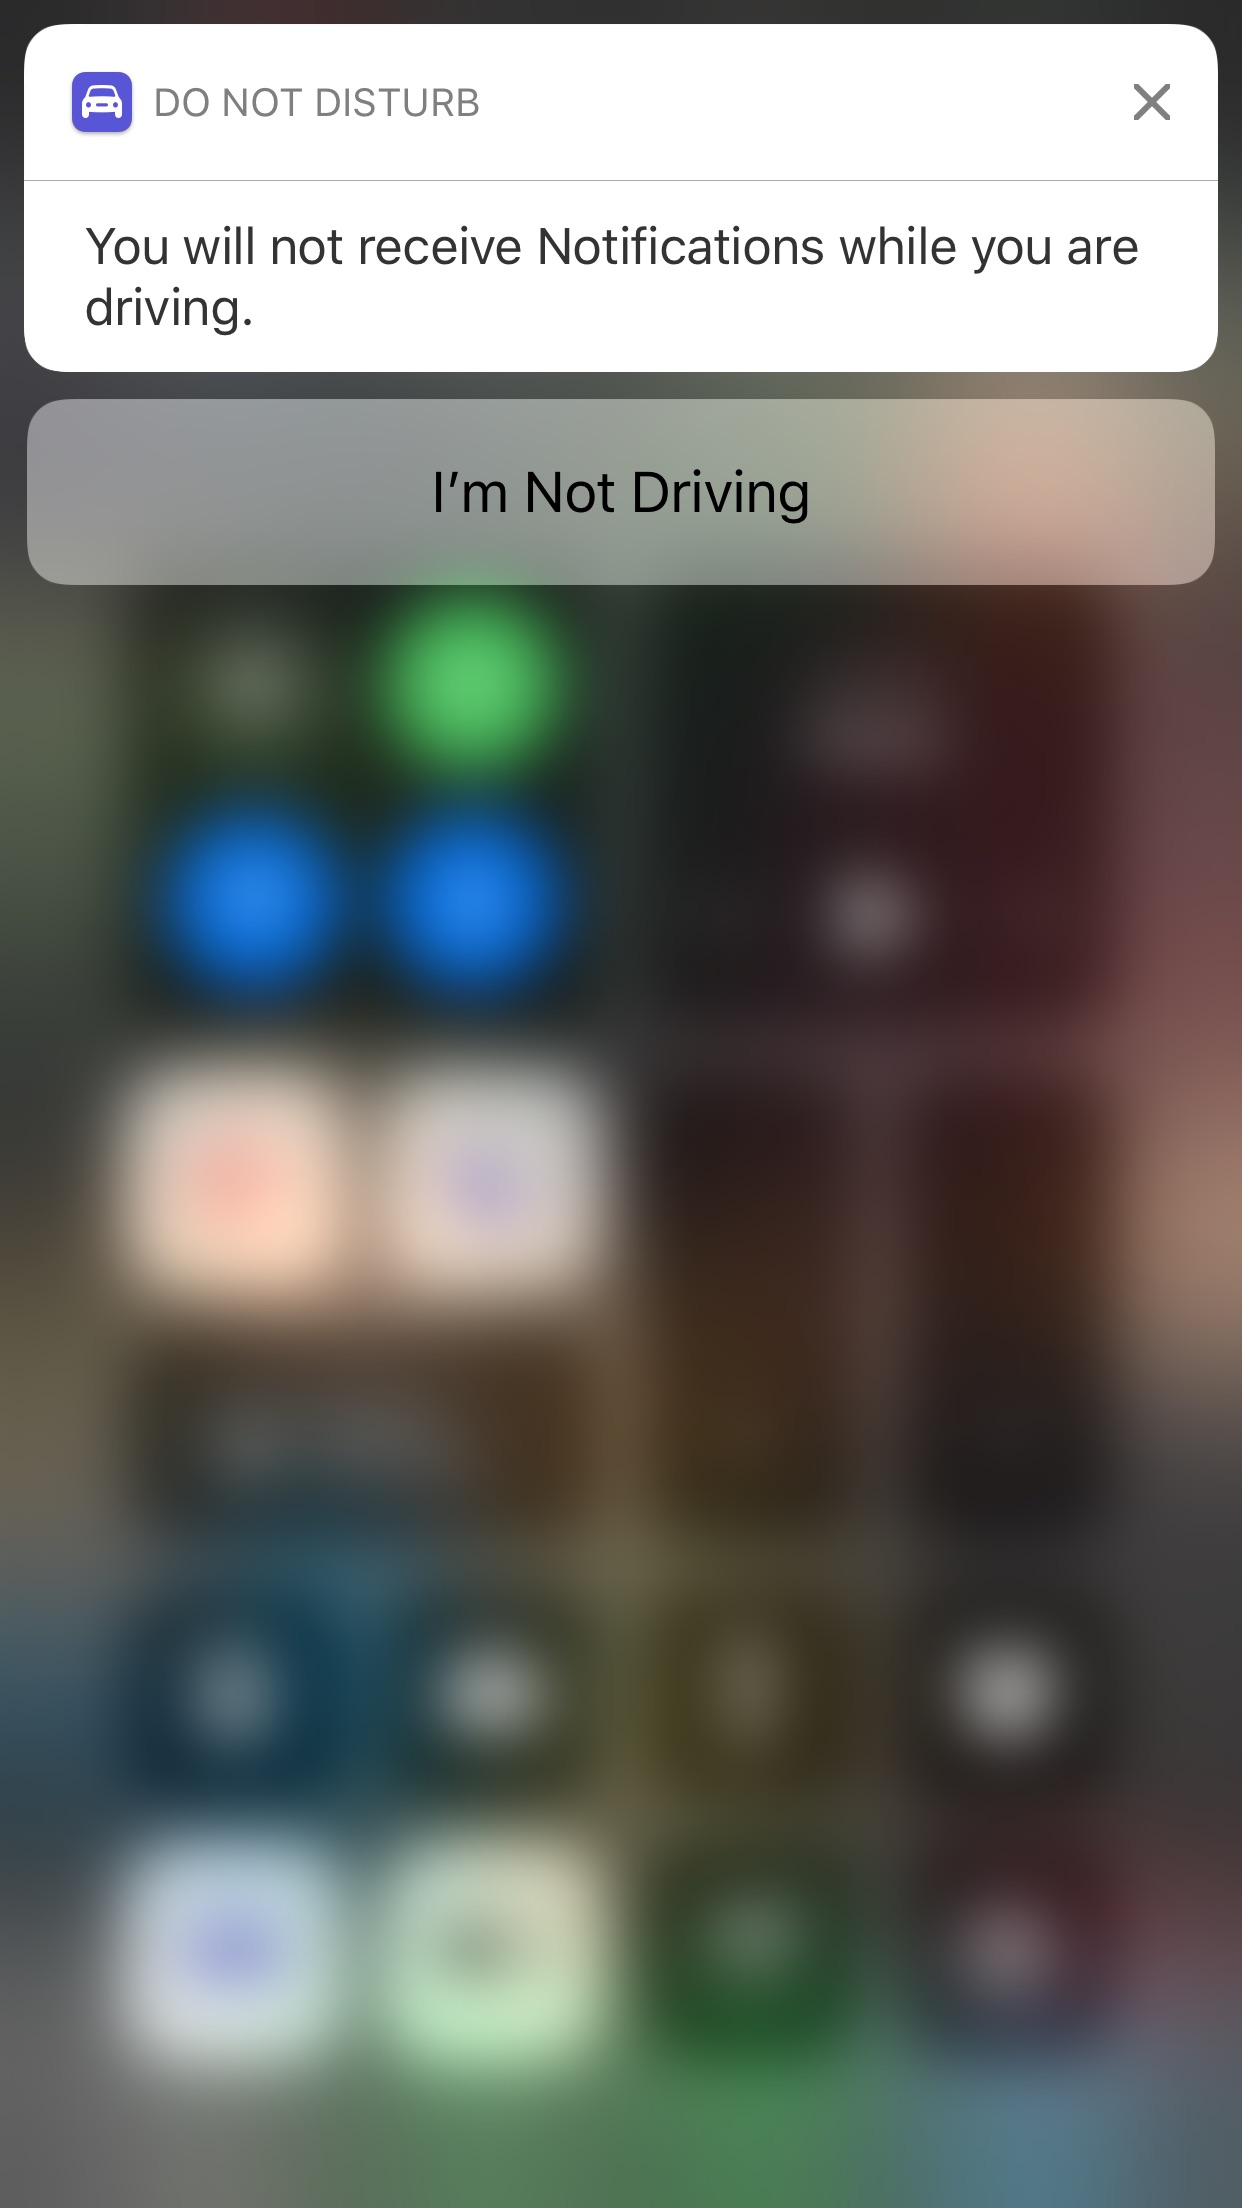
In an effort to reduce car accidents caused by distracted driving and improve safety on the road, “Do Not Disturb While Driving” kicks in once your iPhone senses the acceleration of a vehicle. It will mute all text messages, phone calls, and notifications, and there’s an option to respond to text messages with an automatic reply notifying friends and family that you’re currently behind the wheel. You can switch between turning it on manually — which can also be added to the Control Center for easy access — or automatically when connected to the Bluetooth in your car. If you want to unlock your device while driving, you have to tap on the option that says “I’m Not Driving” to gain access to your phone.
How to auto-answer calls
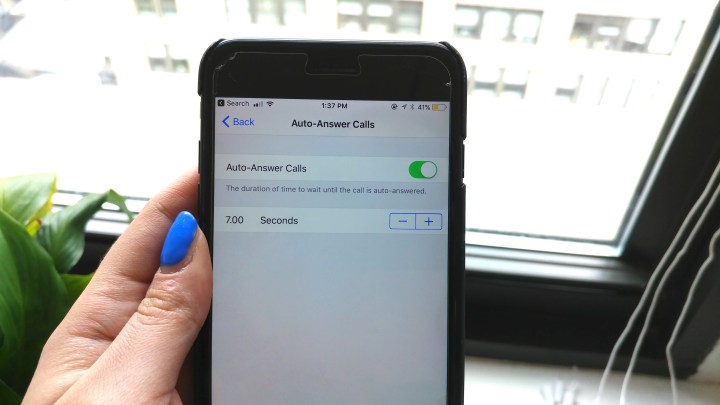
Under Accessibility > Call Audio Routing, you can choose “Auto-Answer Calls” to answer phone calls automatically after a specific amount of time. After turning on the feature, you’ll be asked to enter the amount of time you’d like to pass before the call is answered.
How to turn on persistent banners
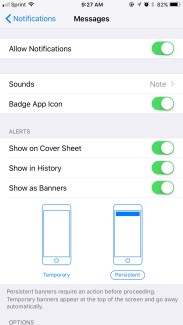
Unlike temporary banner notifications that disappear automatically, you now have the option of setting persistent banners instead. The notification will stay at the top of the screen until you’re ready to get to it, or you can swipe up to dismiss it. However, it will disappear if you exit an app, press the home button, or enable Siri. To change your banner settings, go to Settings > Notifications > Messages, toggle on Show as Banners and tap Persistent.
How to edit and save screenshots
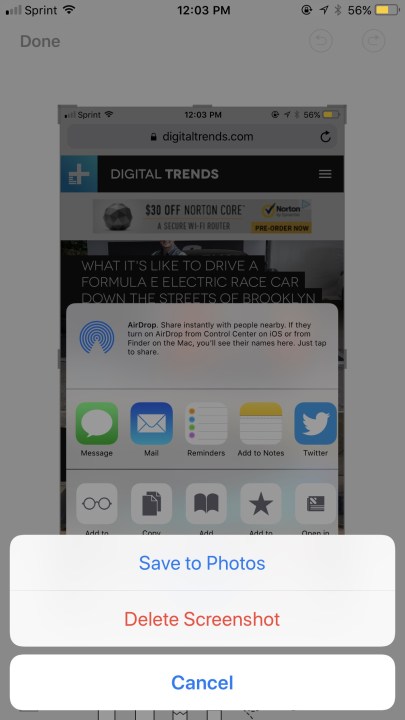
After taking a screenshot, you’ll see it appear as a thumbnail in the bottom left-hand corner of your screen. Holding down on the photo brings you to a menu of options to share it, via text message, email, or social media. You can also markup the screenshots with a variety of different coloring tools. They’ll no longer save automatically to your camera roll, but clicking on the thumbnail gives you the option to save the screenshot or delete it. If you don’t tap on the thumbnail, the photo will automatically save to your photo album.
How to delete or turn on offload apps
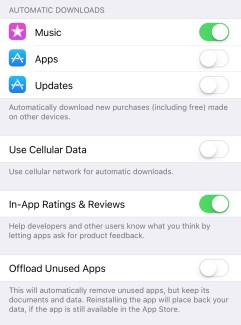
The Offload feature removes apps you barely use when storage is low, but still keeps all the data and documents on your device. You’ll see the deleted apps as gray icons on the home screen, and you can reinstall them by simply tapping on the icon. You can activate the feature so that it works automatically in the background by going to Settings > General > iTunes & App Store and turning on Offload Unused Apps, or choose to use it on individual apps.
How to zoom out using one hand on Maps

Instead of having to use two fingers, you can now zoom out by double-tapping and holding down on the Apple Maps app. If you’re holding your device with one hand, you can use your thumb to slide up or down across the screen which will zoom out your view on the map. The app also includes indoor maps for places such as shopping centers or airports, and for the outdoors you’ll now have lane guidance to show you which lane you should be in while driving — which helps you to avoid missing your exit.
How to clear out storage
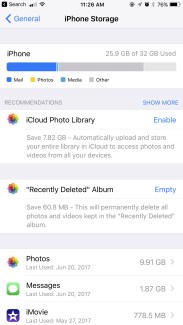
If you want to clean out your storage to make room for more data, iPhone Storage — reached via Settings > General > iPhone Storage — gives you recommendations to get rid of things like your recently deleted photos or old text message conversations. For texts, you can also enable auto delete to remove messages and attachments sent and received over one year ago.
How to activate Emergency SOS
Even though Emergency SOS is already activated on your iPhone, you can also enable the “Auto Call” feature. This will call emergency services when you press the power button rapidly five times. It will also disable Touch ID temporarily until you enter the passcode. It won’t start dialing right away, but gives you the option to call. You can find it under your settings when tapping on the Emergency SOS tab.
How to turn off your device without using the power button
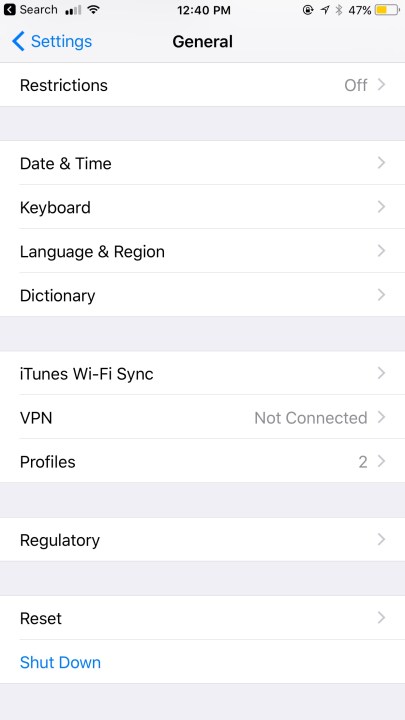
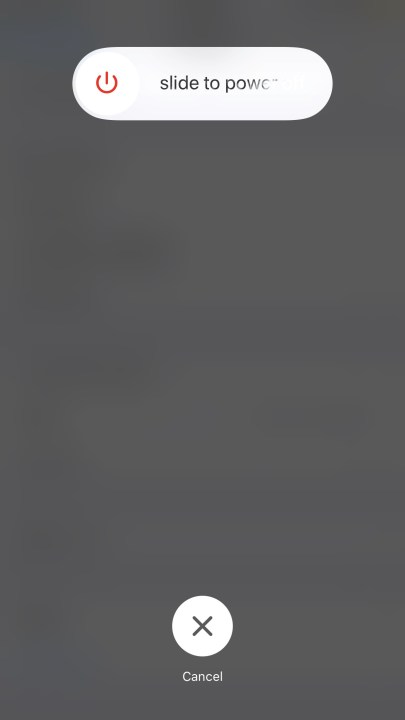
Instead of holding down the power button to turn off your device, go to Settings > General > Shut Down. You’ll be prompted to “slide to power off;” do so and your device will shut down. If your power button is broken, you can turn the device back on by connecting it to your computer or a charger using a Lightning cable.
How to create PDFs in Safari
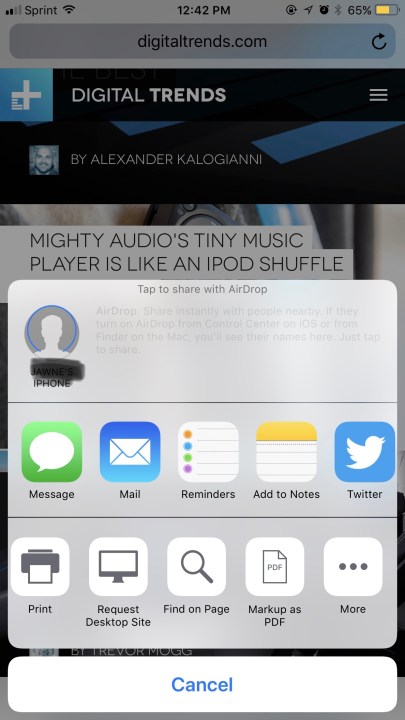
While using the Safari web browser, tap on the share icon at the bottom of your screen and select the “Markup as PDF” option. You can add annotations to the PDF and send it out via email and text, or save it to your iCloud Drive.
How to change tracks using AirPods
With iOS 11, you can skip to the next track by double tapping on the AirPod earpiece and double tap on the other one to go back to the previous track. You can even customize which earpiece applies to the next or previous tracks. Go to Settings > Bluetooth, tap on your AirPods from the list of devices, and toggle on “Automatic Ear Detection.”
How to activate the one-handed keyboard
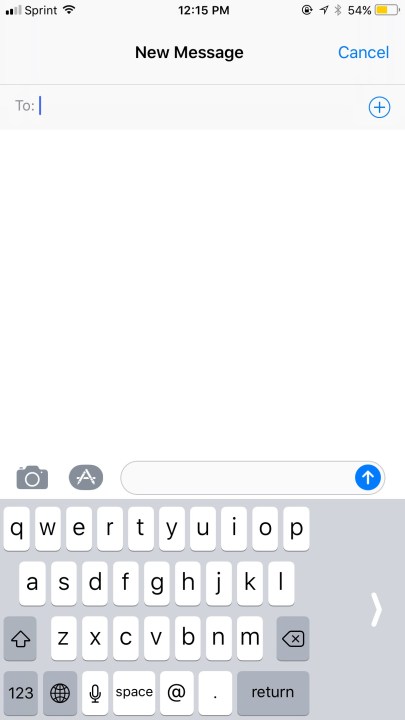
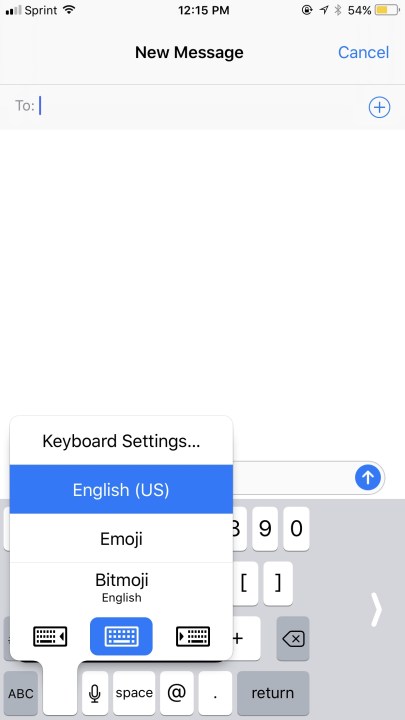
This is one of the most important iOS 11 tips and tricks if you struggle to type one-handed. If you want to type using one hand, iOS 11 lets you switch between keyboard modes. Switch to the one-handed keyboard by holding down the globe or emoji icon and select the right-handed or left-handed keyboards from the menu. It will scrunch the keyboard to one side of the screen, making it easier to reach all the keys while typing.
How to tap and drag apps on the home screen

With the newly re-designed App Store in iOS 11, you might find yourself downloading way more apps than your home screen can keep track of. You can move multiple apps at once by holding down one app and tapping the additional apps you’d like to move to create a stack. You can move them freely around the home screen or add them to a folder.
How to use new Live Photo features
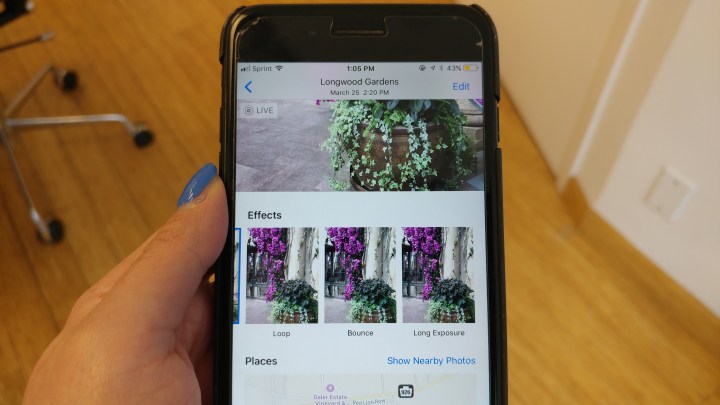
The new features for Live Photos include Loop, which repeatedly plays the Live Photo; Bounce, which picks the best start and end points to play the Live Photo forward and in reverse; and Long Exposure, which blends all the frames of the Live Photo together. All three of these features can be accessed by swiping up on a Live Photo, and finding the camera effects in a carousel gallery. You can also change the default photo of the Live Photo when in edit mode by scrolling through the frames. After selecting the exact frame you want to use as the preview photo, click Make Key Photo.
How to switch between camera filters
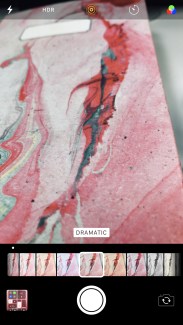
Instead of a grid layout covering the entire screen, the camera filters are in a slider view format now, allowing you to switch between them while still in regular camera mode.
How to scan QR codes
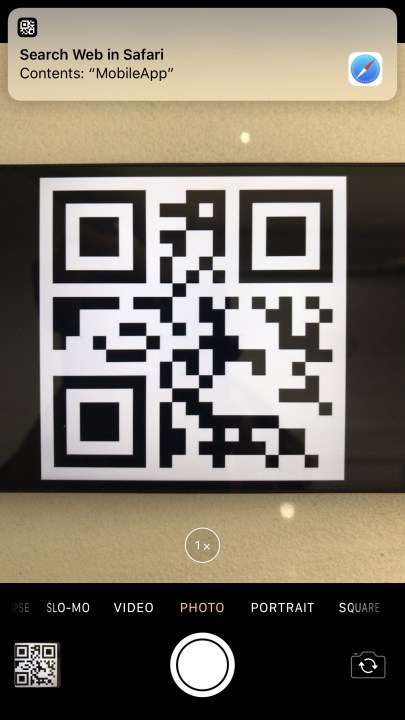
This feature will already be turned on after downloading iOS 11, but you can toggle it on or off by going to Settings > Camera. You can connect to Wi-Fi by scanning QR codes on routers, use them to add contacts, expand adverts, and more.
How to hide photos
If you’re wondering how to hide photos on your iPhone or iPad, you’ll be glad to know that the option is still there in iOS 11. If there’s a photo you don’t want anyone to see on your device, you can select the “Hide” option to move it from the camera roll to a new album titled “Hidden.” Once it’s in this album, you’ll no longer see it in your regular camera roll.
How to turn on Smart Invert
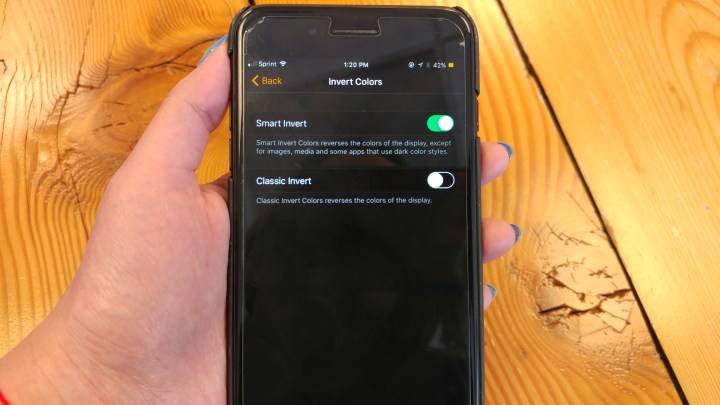
There’s no actual “Dark Mode” feature, but iOS 11 does have a “Smart Invert” option. You can access it by going to Settings > General > Accessibility > Display Accommodations > Invert Colors and toggling on “Smart Invert.” This will reverse the colors except on images, media, and some apps that already use dark colors.
For iPad users, iOS 11 packs new features like multitasking along with drag and drop. For a more in-depth look, check out our iPad Pro tips and tricks.
Updated on March 28: Added new battery and performance management feature available with iOS 11.3


