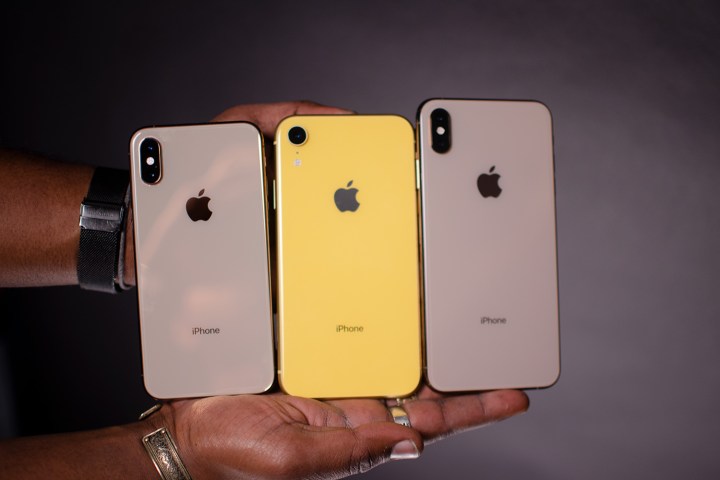
The iPhone XS, iPhone XS Max, and iPhone XR refine the mobile experience Apple created with last year’s iPhone X. From Face ID to the all-new Memoji, this year’s iPhones are among the best phones on the market.
If you’re upgrading from an older iPhone or switching from Android, things are a little different on the new iPhones. Here are a few of our favorite iPhone XS tips and tricks to get you started.
How to set up Face ID
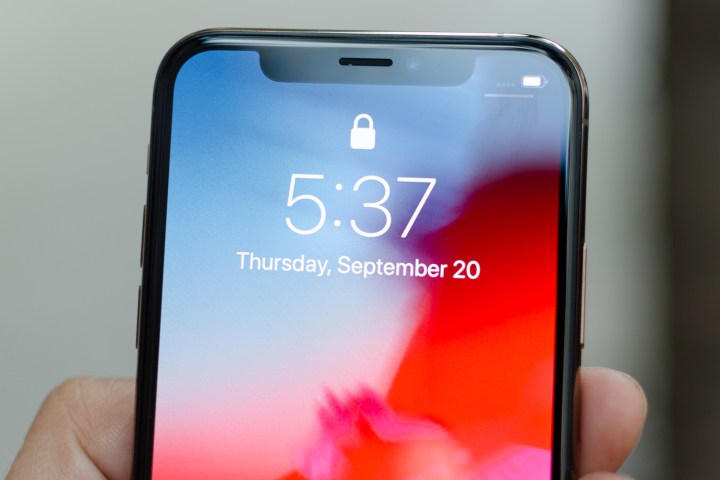
Mark 2018 as the year Apple finally killed the Home button on all its new iPhones. On the iPhone XS, XS Max, and iPhone XR the easiest way to unlock your phone is by using Face ID.
To set up Face ID, you’ll want to be in a room with good light. Go to Settings > Face ID & Passcode. If you already have a passcode you’ll be prompted to enter it. Otherwise, you’ll need to set one up to continue. Tap Setup Face ID.
You’ll need to scan your face twice to complete the process. Once complete, you’ll simply need to swipe up on the lock screen with your eyes open to unlock your phone. If the phone doesn’t unlock you can swipe up to try again. You may need to move the phone further from your face, especially if you’re checking your phone from bed or in a dark room.
You can also add an alternate appearance for Face ID. Just go to Settings > Face ID and Passcode > Set Up An Alternate Appearance.
How to take a screenshot

If you’re used to tapping the power and home buttons to take a screenshot, you may be a little confused when trying to do so on the iPhone XS, iPhone XS Max, or iPhone XR.
If you want to take a screenshot, simply tap the Power and Volume up buttons simultaneously. A small image of the screenshot will appear on the lower left side of the screen. Tap the image if you wish to make any edits; otherwise, the image will save to your Photos app within a few seconds.
How to set up and use Apple Pay
Ready to leave your wallet at home? With Apple Pay, you can easily pay for items with your phone.
To use Apple Pay, you’ll need to add a card to your wallet. To do so, go to Settings > Wallet & Apple Pay > Add Card. You may need to contact your bank to verify the card before you can use it.
Once Apple Pay is set up, it’s easy to use. Just double tap the lock button on the right side of your phone. If Face ID is set up the phone will scan your face to approve the purchase. Otherwise, you’ll need to enter your passcode.
How to use Portrait Mode and Depth Control

Both the iPhone XS and iPhone XS Max have Portrait Mode on the front and rear cameras. To use Portrait Mode, open the camera and swipe the menu slider left until you see Portrait. You’ll see a carousel appear with different lighting options such as Natural Light, Contour Light, Stage Light, Natural Light, and more. Select your desired option and press the shutter button. If you want to use the front-facing camera, just tap the camera rotate icon to the right of the shutter button.
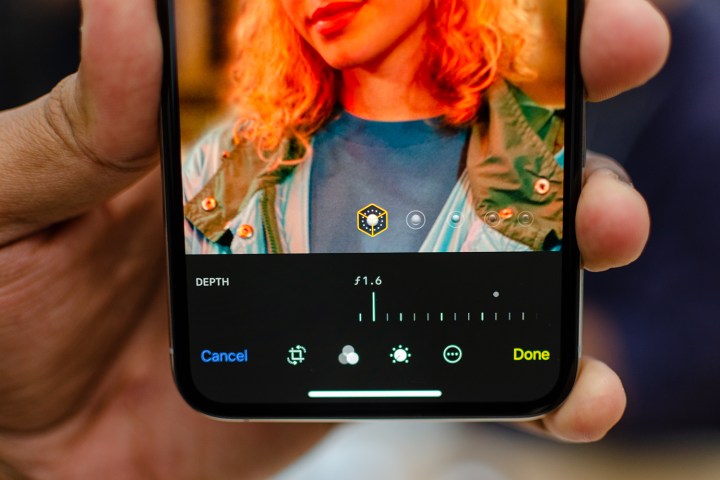
Depth Control is a new feature that’s exclusive to the 2018 iPhone lineup. With Depth Control you can control the amount of blur in the background after you’ve taken the photo. To use Depth Control, simply select the photo and tap edit; the Depth Control slider will appear automatically in the edit screen.
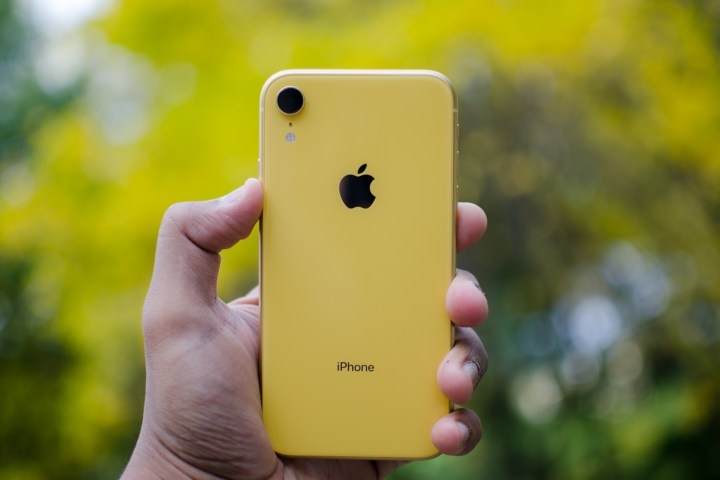
The iPhone XR has a singular camera instead of the dual-lens found on the iPhone XS and XS Max. Thanks to Smart HDR, the iPhone XR doesn’t need the addition of a secondary lens — it uses artificial intelligence and neural nets to optimize the camera’s functionality. Whether you have too little light or too much, Smart HDR helps to produce great looking photos in extreme lighting conditions.
But unlike the iPhone XS and XS Max, Portrait Mode photos with the iPhone XR can only be taken of people rather than food, objects, pets, etc. When you open up to Portrait Mode on the device, you also only have three different lighting options to choose from — Contour, Natural, and Studio. With its TrueDepth camera, you’ll be able to take Portrait Mode selfies as well.
How to turn off your iPhone

Sometimes looks can be deceiving. In the past, the button on the right side of your iPhone was likely the power button. However, that button is actually the lock button on phones that have TrueDepth cameras. So how do you turn your phone off?
If you want to turn your phone off, simply tap and hold either volume button along with the lock button simultaneously. After a few seconds, you’ll see a slider appear to turn off your iPhone.
How to create a Memoji
Last year Apple released Animoji for the iPhone X, and this year it’s one-upping itself with Memoji in iOS 12. Memoji are animated avatars that you can control with your facial movements.
Creating a Memoji is simple. Just open the Message app and tap on the app drawer. Select the Animoji (monkey) icon and swipe right until you see the New Memoji icon (+). Here you can customize your Memoji to your heart’s content. When you’re satisfied, simply tap the Done button at the top of the screen to save your Memoji.
How to use gestures to complete common tasks

For many people, the iPhone XS, XS Max, or XR may be the first iPhone they purchase that doesn’t have a home button. The lack of a home button means you’ll need to learn some new gestures in order to use your phone.
The most commonly used gesture is the swipe up from the bottom of the phone. This allows you to easily switch between open apps. When you swipe up you also have the opportunity to close apps by simply swiping up in the particular app you no longer need.
In addition to swiping up, you can also swipe down from the top of the screen. If you swipe down from the center you’ll open the notifications window. Swipe down from the right side and the Control Panel appears.
There are also two gestures that allow you to quickly wake the phone. First up simply tapping on the screen will wake the phone. This gesture is enabled by default, but if you’ve turned it off by accident just go to Settings > General > Accessibility and enable the Tap to Wake slider.
You can also wake your iPhone simply by lifting it up. Again, this is on by default on the iPhone XS and XS Max, but can be enabled or disabled in the settings by going to Settings > Display & Brightness and tapping the Raise to Wake slider.
How to use Do Not Disturb
Looking for a little quiet time? Do Not Disturb mode allows you to easily turn off notifications and calls on your phone.
You’ll probably want to customize Do Not Disturb mode before using it. Just go to Settings > Do Not Disturb to make the desired changes. Once you’ve set up Do Not Disturb you can activate it by either toggling on the Do Not Disturb slider or tapping the Do Not Disturb (moon) icon in the Control Center.
Bedtime is an additional function in Do Not Disturb that allows you to automatically turn on custom features each evening at bedtime. Bedtime specially dims the screen, silences calls, and sends notifications directly to the Notification Center. To set it up, just go to Settings > Do Not Disturb > Scheduled > Bedtime. You’ll see an option to schedule Bedtime to your preferred sleeping hours.
How to use Split View on the XS Max and iPhone XR

What good is all the extra screen real estate on the iPhone XS Max or iPhone XR if you can’t put it to good use? Split View for both models allows you to get an expanded view of certain iOS apps and websites. For example, if you use the Mail app in Split View you’ll see both your current messages along with a preview screen. You’ll also see Split View in action on certain websites such as The New York Times.
Using Split View is easy. Simply open a compatible app or website and turn your iPhone to landscape mode and make sure rotation lock is not turned on. If the phone does not switch to landscape, swipe down from the top right side of the screen and make sure the rotation lock icon (padlock) is not enabled.
How to use Siri
Siri is Apple’s digital assistant and can help you with basic tasks like sending messages, adding appointments to your calendar, and even using Apple Pay to send cash to friends. Siri will also learn your personal preferences and offer suggestions and shortcuts that may be of interest.
There are two ways you can access Siri. The first is by simply long tapping the lock button. The second and easiest method is by saying, “Hey Siri”.
If you haven’t set up “Hey Siri, you’ll need to do so in the settings by going to Settings > Siri & Search > Listen for “Hey Siri” and follow the prompts.
How to use Notifications and the Control Center
Apple made some huge changes to notifications in iOS 12. For starters, you’ll see grouped notifications that can be deleted in bulk simply by tapping the X icon. Of course, if you want to get the most out of the Notification Center, you’ll probably want to customize it to your liking.
In addition to adding group notifications in iOS 12, Apple also made it easier to customize the notifications you receive in Notification Center. Simply long tap on any notification and you’ll see two options: Deliver Quietly and Turn Off. Deliver Quietly simply means that the notification will go directly to the Notification Center instead of alerting you when it arrives. Turn off, of course, means you’ll no longer receive notifications from the app in question. You can further customize the way you see and receive notifications by going to Settings > Notifications and tapping on each individual app listed.
Control Center allows you to quickly access commonly used utilities on your phone. It’s opened by swiping down on the top right corner of your phone. Many of the icons use 3D Touch to provide additional use options: Simply press hard on the icon and you’ll see a menu appear for the app.
While the Control Center has many of the most commonly used features easily accessible from a single location, you may want to customize it to your liking. You can do so by going to Settings > Control Center > Customize Controls. From here you can add and move controls to suit your needs.
How to use Group FaceTime
With iOS 12, you can participate in group FaceTime calls with up to 32 people using your iPhone XS, XS Max, or iPhone XR. You can set up the group session via the FaceTime app by choosing the contacts you’d like to add — open the app and manually input contact each contact you’d like to add. You can also start a group FaceTime call within a group chat on iMessage — once in the chat window, tap on the initials at the top of the window and tap again on the camera icon. During group FaceTime calls, you also have the ability to add text, stickers, and Animojis to your own window.
We have in-depth instructions on how to set up a Group FaceTime call.
How to enable trackpad mode with Haptic Touch
Since the iPhone XR doesn’t have 3D Touch features, you can use Haptic Touch to easily change the position of your cursor without having to tap on text. You can turn your keyboard into a virtual trackpad by holding down the spacebar and then dragging your finger around to select specific text. Once you let go, you can then tap on the text to copy, cut, paste, share, and more.
How to use the one-handed keyboard
Since the iPhone XS Max and iPhone XR are larger, using them one-handed can be a little difficult. To make it easier, you can use the one-handed keyboard which moves the keyboard to either the left or right depending on your preference. To turn the setting on, go to Settings > General > Keyboards > One Handed Keyboard. You can then choose whether you want it to the right or to the left of the iPhone’s display.
If you don’t want the setting turned on all the time, you can also turn it on and off through iMessage. While you’re typing, long-press on the globe icon in the lower left-hand corner of the display and tap on whether you’d like to use the right or left keyboard. To turn it off, long-press on the icon again and tap on the middle keyboard option.


